Battle School Germs With Homemade Hand Sanitizer With Essential Oils

natural hand sanitizer for school germs with essential oils

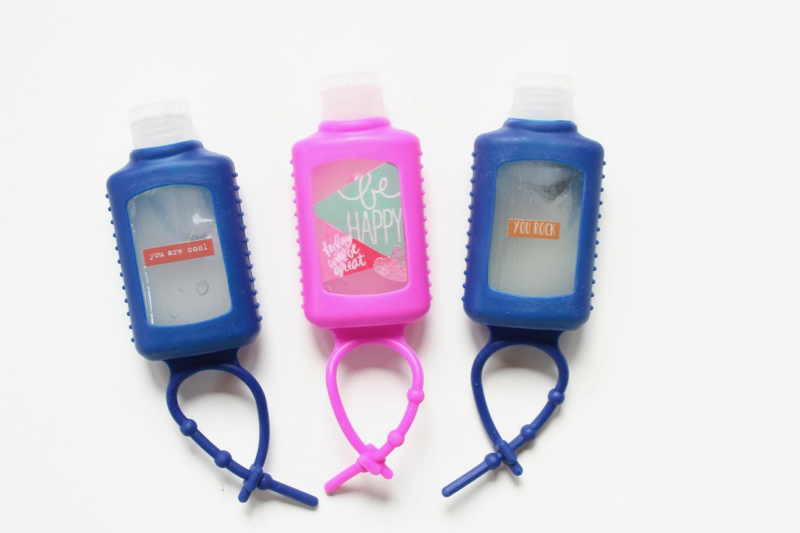
Let’s face it, back to school means it’s back to our kids being in a petri dish of germs. New germs every day in the classroom, on the playground, in the lunchroom, etc. We have a simple and convenient way (it’s a portable keychain) to help all you parents fight the germs – a homemade hand sanitizer with essential oils. If you want to skip the homemade part of this project, just buy the portable hand sanitizer bottles (with the sanitizer already in it) and customize the bottle with fun stickers! Kids would love to do this for themselves, and make others for friends! Friends don’t let friends spread germs.

Step 1: Make the sanitizer. Mix all the ingredients below together in a bowl.

Ingredients:

  • Aloe Vera  (the clear, non-scented kind, organic and 99% aloe vera is best), 1 cup
  • OnGuard, doTERRA essential oil, 25 drops
  • Water, 1/4 cup (witch hazel works here, too)
  • Vitamin e oil, organic, 1-2 tsp

Step 2: Fill the portable containers with the sanitizer. We did it teaspoonful by teaspoonful. We saved and filled containers that were previously filled with hand sanitizer, but if you buy new bottles, you can use it, or put in another container (and use in the office, or at home), and then fill it.

Step 3: Remove any label from the bottle.

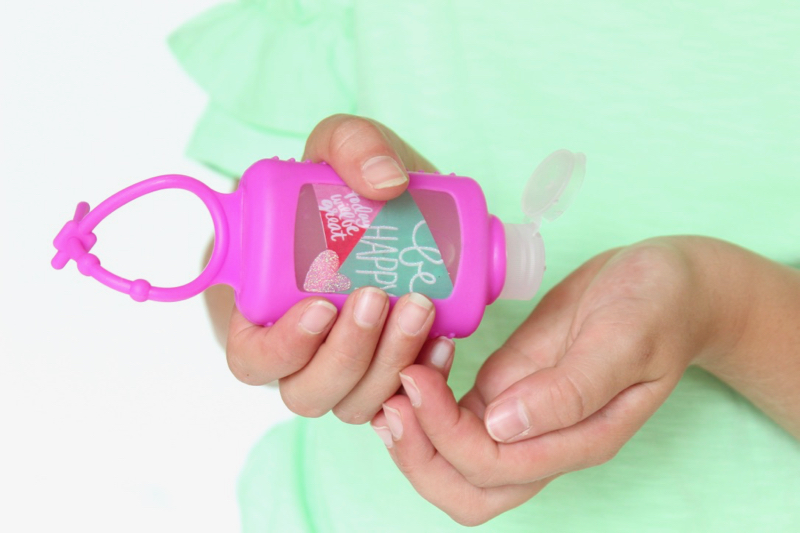
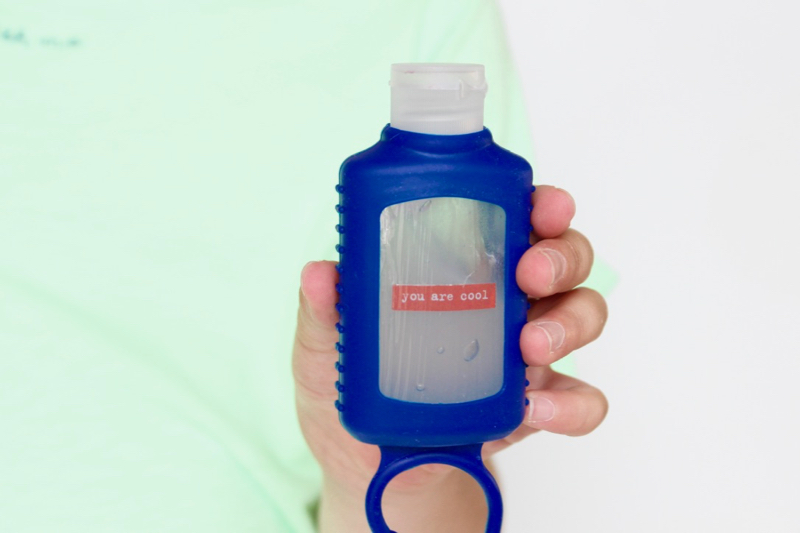
Step 4: Remove the rubber keychain, and add paint and/or fun stickers to the bottle. Happy Planner at Michaels had amazing stickers! It would be fun to use monogram stickers, too.

Step 5: Apply Mod Podge over the sticker design. Repeat once the first layer is dry.

Step 6: Put the rubber keychain back around the bottle, and then attach to your childs backpack, and tell them to use it at school. Obviously it’s not for ingesting, and remind them of that!

natural hand sanitizer for school germs

IMG_5342natural hand sanitizer for school germs with essential oils

natural hand sanitizer for school germs

On Guard is a doTERRA proprietary blend of oils including Wild Orange, Clove, Cinnamon, Eucalyptus, and Rosemary that contains protective immune benefits, cleanses hands when soap and water are not available, and kills germs on surfaces in the home. They have an awesome cleaning concentrate that we love, too!


The information we share is based on our research and personal use with doTERRA Essential Oils. We are not physicians, and this recipe has not been approved by anyone but us. These statements have not been evaluated by the Food and Drug Administration. This product is not intended to diagnose, treat, cure, or prevent any disease.

This post contains an affiliate link.

Back To School DIY Squeeze Coin Purse

retro-vinyl-coin-purse-treat-yourself

This post gave us that nostalgic, warm and fuzzy feeling, because we were reminded of our childhood. We crafted with the retro oval squeeze coin purses our grandparents, aunts and uncles (and even us) used to carry loose change in. It’s a throwback to our past, because we always love a good retro find. Plus, school is (almost) back in session, and these coin purses fit easily in or on backpacks for our kids to bring loose change for yummy bake sales. We also made one funny adult version (visit our Instagram to see what it says here), because we wanted in on the coin purse fun, too.

This project will take less than 30 minutes, and you can customize it any way you like, such as adding a monogram, funny phrases, emojis, etc. It makes great classroom gifts, or cute gifts for friends. We used our Silhouette CAMEO electronic cutting machine for $-related phrases. If you don’t have one, you can always buy permanent vinyl stickers. It’s a one-step project – design and cut vinyl lettering, and then add it to the squeeze coin purse.

Materials:

ka-ching-retro-squeeze-coin-purse

retro-vinyl-coin-purse-treat-yourself

retro-vinyl-coin-purse-treat-yourself

retro-vinyl-coin-purse-treat-yourself

Affiliate Disclosure: This post contains affiliate links, which means j. sorelle receives a small commission from the sale of certain items; however, the price is the same for you, whether it’s an affiliate link or not. 

How To Throw A Backyard Movie Night Under The Stars

DIY outdoor movie night-the-sandlot

There’s something so nostalgic about watching a movie outside under the stars. It just feels like summer, and we don’t know about you, but it gives us all the feels – happiness, comfort, excitement, relaxation and childhood. We grew up going to Drive-In Movies. Those kinds of theaters seem to be few and far between, but honestly, these days we’re opting for a snuggle in our own backyard to watch a movie under the stars.

Recently we had the neighbor kids over for a DIY backyard movie night. Jessica would have preferred to spend week crafting fun DIY decor, a sign, cute favors – the perfect set up. But, honestly time (and energy) didn’t allow for that this summer, so with a quick text invite, and bring your own blankets (so we had more than enough), the kids had a blast watching a movie under the stars. The weather was perfect, the company was amazing, the popcorn was plentiful and the movie was a classic. Oh summer, please stay forever!! We can’t wait to get another movie night on the calendar. Here’s some tips to throw a fantastic DIY movie night this summer. Again, nothing fancy with our photos – we need an iphone upgrade but until that happens, our 6S will have to “give you an idea” of our memorable movie night.

1. Set Up A Screen
You can go so many different ways to set up a screen. You can build one with PVC pipe, buy a huge screen or a smaller screen, hang or tie screen material, or use sheets. We had a large piece of pegboard (the sheets they sell at Home Depot) for a separate project, so we literally set it up on a large bench, leaned against (in between) 2 trees, spread out two white sheets over it, and used chip bag clips to keep it in place. It worked like a charm! BTW, two sheets worked better than one, but if you have a black sheet, that would work behind one white sheet, too. If you buy the sheet of pegboard or white board from Home Depot, it runs about $20.

the-sandlot-outdoor-movie-night-diy-movie-screen

2. Be Wise With Your Movie Pick
Pick your movie carefully. We wouldn’t want to go to an outdoor movie night showing a scary movie, or something out of our league. We had a wide array of kids, from ages 5-12, and both boys and girls. Our movie was a classic most kids love, even the girls, and it fit our PG age range. We know it’s one of our faves – The Sandlot. We hosted the movie night around the 4th of July, and baseball is so American to us, it’s all about childhood and summer, and there’s a great firework scene in the movie. It was a hit!

the sandlot-diy-outdoor-movie-night

the sandlot

3. Buy or Borrow A Projector
We have an awesome neighbor who let us borrow her projector. If you are lucky like us, ask nicely, and you won’t have to spend any money on the projector. If you want to invest in one (we are considering it after we realized how much fun movie nights are), there are some options here and here. We played the movie from Amazon Prime via our ipad. You will need a cord to connect to an apple device. Also, don’t forget a bluetooth speaker for great movie sound.

4. Serve popcorn and candy
A night at the movies isn’t a night at the movies without popcorn and candy boxes. We filled popcorn bags with popcorn, and more popcorn, and more popcorn. Everyone had their choice of candy, $1 each from Wal-Mart.

lightbox-now-showing-sandlot-popcorn-box-diy-outdoor-movie-night

5. Blankets, Blankets and More Blankets
We live in the Colorado Rocky Mountains, so it gets chilly at night. Everyone dressed in warm sweatshirts and sweatpants, and brought along a blanket or sleeping bag. We laid down picnic blankets, and the kids snuggled on top. You will need extra blankets for those who may forget, and for those who get extra cold like us! We rearranged some patio furniture in the back of the yard, so some kids got a seat off the ground. Make sure to have lots of extra pillows on hand. The kids wanted more and more pillows as the night went on.

diy outdoor movie night

6.  Have Bug Repellant On-Hand
Whenever outside camping or hiking (or in this case an outdoor move night), it’s good idea to have bug repellant on-hand. We love doTERRA’s TerraShield. Check for possible sensitivities, and share the bug repellant love.

7. Have A Dance Party Before Showtime
It doesn’t get dark until around 8:40 p.m., and the kids showed up early to the movie showing. To kill time, we had a dance party in the backyard. It was so fun! Kids showed off their amazing moves, and it got everyone laughing and moving before the movie. We used a bluetooth speaker, cell phone and our Spotify account to play some sweet jams.

8. Create An Experience
Like we mentioned, Jessica would have wanted to build a popcorn bar from scratch, create a theatre sign, etc. But since simple was the theme of the night, we used items we had on-hand to add that extra special touch. We set up our lightbox with The Sandlot words on it. We hung outdoor lights on the patio and outside dining table. Not only did it make it not so dark outside, but it also created a special ambiance. If you want to keep it easy and affordable, you can print fake money and have kids “buy” candy and popcorn, and fake tickets would be a nice touch, too. Be resourceful, and decorate with that you have. Keep it easy so you will want to host a movie night again!

now showing-the-sandlot-american-flag-lightbox

the sandlot-diy-outdoor-movie-night-american-flag

Happy summering, y’all. We hope you get outside to watch a movie under the stars.

Note: This post contains affiliate links.

SHOP THE POST:
[show_shopthepost_widget id=”3210771″]

Celebrate Toy Story at Walt Disney World With A Fun DIY T-Shirt

toy-story-t-shirts-woody-and-buzz-disneybounding

Jessica’s family went to Walt Disney World this past spring. We went as children with our parents, and when she went back, although there are new, awesome additions, it felt like that world had remain untouched. Yes, there were notable differences – everyone is on smart phones now (their app is amazing), security was more intense than she remembers (a good thing nowadays), FastPass is wonderful (makes lines more bearable), and it was more painful being the one actually paying for it all. But, precious memories came flooding back. The matching neon Mickey shirts our mom made us wear, the famous Mickey flower garden (and photo opp), a pretty Main Street, U.S.A., animated characters brought to life, Splash Mountain, happy vibes, and yes, It’s A Small World looked and sounded exactly the same.

Disney has certainly made it a magical world for generations, and Jessica was happy to share that magic with her kids. Despite having blown out his back earlier in the week, Jessica’s husband was a total trooper, and rode every ride (and stood in every line). The kids loved every minute of it. We felt the pure exhaustion after all the excitement and crowds at the end of the day! So happy we stayed for the fireworks show – worth it (near the back with a quick beeline to the Monorail). She can share tips of the day if y’all are interested – it’s a compilation of tips from great friends, and first-hand experience. Let us know at hello@jsorelle.com.

Jessica and her family missed the opening of Toy Story Land on June 30th, and her kids say it’s another reason to go back! It’s a story all our children adore, and it was even an animated film we grew up with, too. Before she left, Jessica made DIY t-shirts to celebrate the opening of Toy Story Land at Walt Disney World. She went with classic phrases by the lovable characters, Woody and Buzz. The boys took it to the next level by Disneybounding, which is dressing up as the character without wearing a costume (basically wearing everyday clothes inspired by favorite Disney characters). They love their shirts, and it was a great DIY project anyone can do. Tulip ColorShot Instant Fabric Color paint was amazing to work with – we can’t wait to work with it again! See the full tutorial on Momtastic.

toy-story-t-shirts-woody-and-buzz-disneybounding

toy-story-t-shirts-woody-and-buzz-disneybounding


DIY Rocket Popsicle Piñata

rocket-popsicle-red-white-blue-pinata

Jessica’s kids birthdays are close to July 4th, plus we love to celebrate America, so it’s always a really busy time of year and we are in the party mode. This year, we’re celebrating with all things red, white and blue. A party just isn’t a party with young kids without the joy of hitting a piñata. We couldn’t find the perfect (and affordable) red, white and blue piñata, so we made one with the iconic patriotic popsicle in mind. It’s DIY rocket popsicle piñata! It only took a couple hours from start to finish, so you still have time!

Materials:

  • Red, white and blue tissue paper
  • Scissors
  • Pinata, frappuccino shaped
  • Glue stick, or
  • Strips of cardboard
  • Packaging tape

Directions:

Step 1: Remove all existing tissue paper from the pinata. We found a frappuccino shaped piñata at Walmart for less than $15, left the cardboard shape and stripped it of all pink and white tissue paper. Remember to fill the piñata with goodies before you cover it with new fringe.

frappuccino pinata

Step 2: Cut strips of red, white and blue tissue paper.

Step 3: Cut fringe on each strip of tissue paper.

Step 4: With 12 inch strips of cardboard scraps (about 3-4 inches thick), position them from the lid of the piñata frappuccino shape, and angle them up. This is hard to explain, and sorry for our poor photos, but the 4 cardboard scraps will be used to made a little square (or for lack of better words, nipple) on top of the popsicle, to look like the real thing. We used packaging tape to keep it in place. We added the white cardboard tube on the bottom of dry cleaner hangers to create that indention affect along the side of the piñata, but it didn’t really work, so don’t worry about that!

craft with cardboard

Step 5: Starting from the bottom, glue the fringe onto the cardboard. We found it’s best to do two layers of fringe on each layer. You can glue the strips of fringe on top of each other before gluing onto the pinata.

Step 6: Continue layer by layer, blue on the bottom, then white and finally red. Cut a piece of cardboard the shape of a popsicle stick, and with an X-acto knife, cut a slit on the bottom of the popsicle. Insert the cardboard popsicle stick. Hang and have fun!

Enjoy…and then grab a real Rocket popsicle from the freezer to ring in this 4th of July!

IMG_4847