Try This Anthropologie XO Vase Hack

XO vase-anthropologie hack- valentines day decor-DIY flower vase

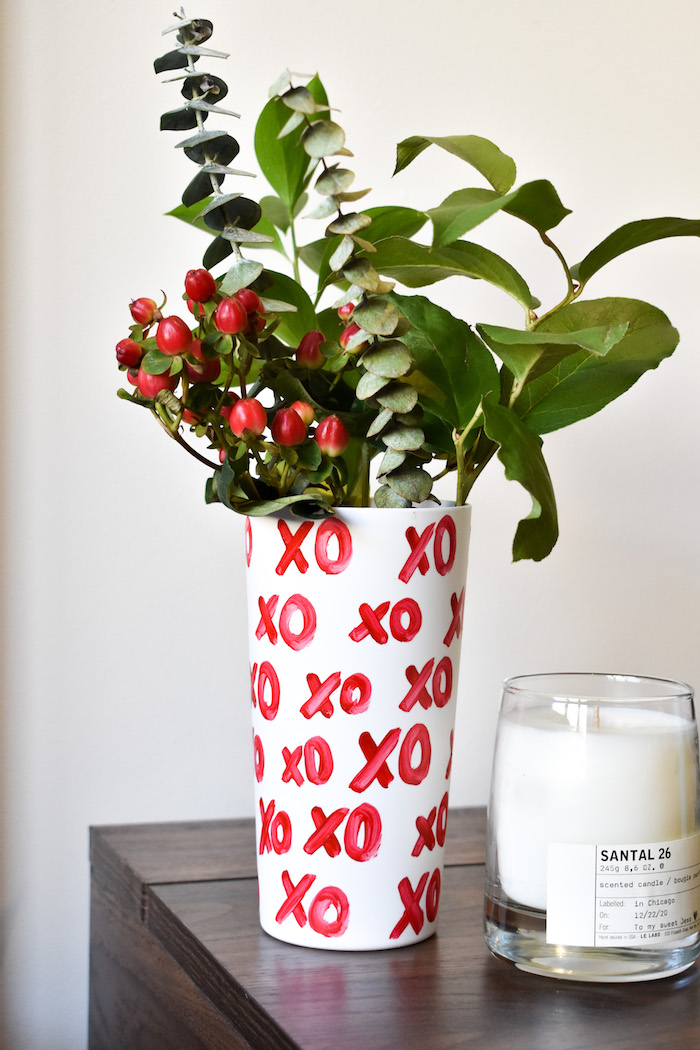
I was perusing the Anthropologie site last week. They were having a great sale, and I love to stock up on gifts. I ran across these XO vases. They are darling, and the price is not ridiculous at all, but after a quick trip to Walmart, I saw white cups for .50 cents, and my mind went straight to the cute red X’s and O’s on Anthropologie’s vase. No calligraphy or crazy artistic expertise needed for this DIY XO vase. If you learned how to draw X’s and O’s in kindergarten, YOU GOT THIS!

The DIY vase is not made of glass or pottery, but if you’re looking for a thoughtful, low-budget buy for a girlfriend, friend or loved one this Valentine’s Day, this is a good one. Actually, I’d argue that an XO vase is relevant all year long – we give hugs and kisses all year, right?!

Let’s get this LOVEly vase party started.

XO vase-anthropologie hack- valentines day decor-DIY flower vase

DIY XO Vase, Anthropologie Hack

Materials:

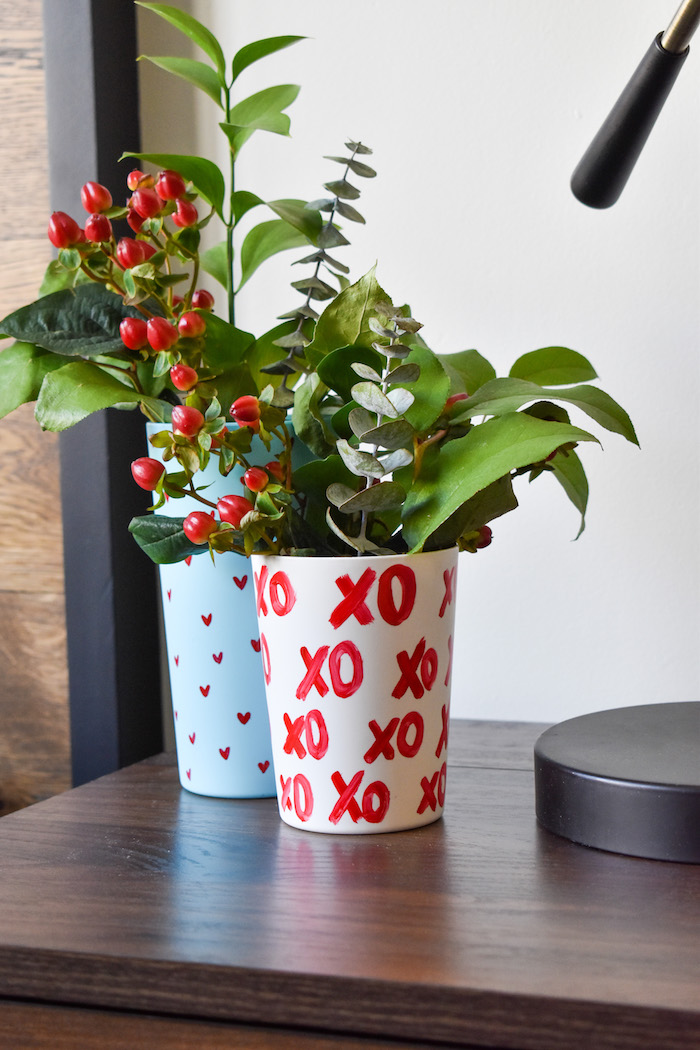
  • White tumblers – here and here (pink and teal also available at Target for .50 cents)
  • Enamel paint, red (Michaels, Joann’s or Walmart)
  • paint brush (thin, slanted tip worked best for us)
  • waterproof sealant (optional, if you want them to last longer)

Directions:

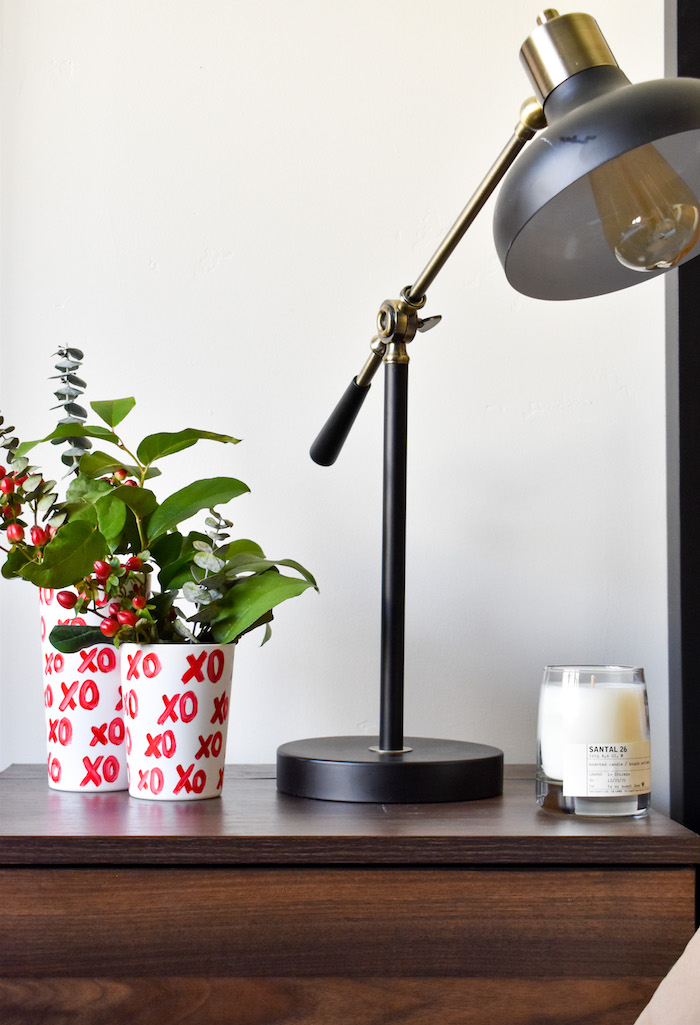
Step 1: With a paintbrush, draw X’s and O’s all over the vase with enamel paint. Enamel paint is best because it’s dishwasher safe. NOTE: Since the cups are plastic, the XO can scratch off, even with dishwasher safe paint. So, spraying or painting the cups with a dishwasher safe sealant is a good idea if you want them to last. Leave a small space between each set of XO’s. Start at the top of the cup and make your way down. If you want to add weight to the bottom, add a rock. Wait to the paint to dry, and then fill with water and pretty flowers. That’s it!

BTW…if DIYing is not your thing, the real version at Anthropologie version is really pretty and a great gift!

XO vase-anthropologie hack- valentines day decor-DIY flower vase

XO vase-anthropologie hack- valentines day decor-DIY flower vase


XO vase-anthropologie hack- valentines day decor-DIY flower vase

Happy (early) Valentine’s Day!

Halloween Decor: DIY Googly Eye Wax Candles

DIY eyeball candles

We’ve got major heart eyes for these DIY eyeball candles. It’s subtle, but an amazing DIY candle upgrade for Halloween. The candle is store-bought, but the DIY eyeballs take less then 30 minutes to add, and the supplies needed are minimal. These are not traditional plastic eyeballs, because that would be a fire hazard…instead, these googly eyes are made from wax.

Once Halloween is over, you can store the candles as-is, or scrape off the eyes, and you have your standard black candles back!

DIY Eyeball Candles for Halloween 

Materials:

  • Soy candle wax, white
  • Crayon, black
  • Black taper candles
  • Heat-safe glass with spout (glass measuring cup works great)
  • Pot with about 2 cups water on the stove
  • Bamboo skewer, 2 for each color wax

Directions:

Step 1: Pour about 2 tablespoons candle wax flakes in the glass measuring cup. Set the cup in a pot with water on the stove. Set heat to high and watch it melt. You will not even use it all the wax for these DIY eyeballs, but you can add more if needed. We didn’t use a white crayon with this project because we couldn’t find one. We have 5 of every other crayon, but not white. You can try to use a crayon instead of the soy wax. The black crayon we used for the eyeball was easy to melt and use; however it was somewhat fickle attaching to the white eyeball. By fickle, we mean, the wax had to be very hot and sometimes it would take a second try to stick to the white eyeball (so not THAT fickle). So, we are not sure if this was due to the fact that they are two different kinds of wax, or if the crayons are slightly different to work with.

halloween candles

Step 2: Use the end of the bamboo skewer (the round, flat end, NOT the pointy end) to dab into the hot white wax, and then dab onto the candlestick. You can let the wax cool a bit, so it hardens faster on the candle. As you know a candlestick is round, so if you tilt, the eyeball will be a little deformed. We dabbed a couple drops of wax along one “side” of the candle, and once they turned white and hardened, we would rotate the candle and dab along another edge. The wax takes about 30 seconds to harden, so this is not too time consuming.

diy googly eye halloween candles-halloween crafts

diy googly eye halloween candles-halloween crafts

Step 3: Once you have all the white eyeballs, now it’s time to melt the black crayon. It’s easier to melt the black crayon if you use a knife to cut it into little shavings. When it’s melted, time to dip the skewer (you can try either end of the skewer, depending on the size of the white eye) and dab gently on each eye. If the black doesn’t attach right away, like we mentioned above, dip it into the melted crayon wax again (make sure it’s hot) and try again. It should work, even if it takes a try or two.

diy googly eye halloween candles-halloween crafts

diy googly eye halloween candles-halloween crafts


Step 4: Step them in a safe taper candle holder, and watch them glow as Halloween nears. As always, with any kind of candle or candle-related project, please be careful. Don’t ever leave candles unattended, or within close reach of children. Keep flammables away from open flames. Be smart.

diy googly eye halloween candles-halloween crafts

diy googly eye halloween candles-halloween crafts

diy googly eye halloween candles-halloween crafts

Note: This post contains affiliate links. We may make a small commission if you purchase any of the items, at NO extra cost to you. Thanks for supporting our family blog. 


DIY LaCroix Baby Shower Favors That Sparkle

lacroix cans make the cutest diy baby shower planter

We know you aren’t actually hosting a baby shower in the next month or so during stay-at-home orders, but we do know baby showers are going to happen again when we make it through this historic, difficult time. When COVID-19 does pass, and a baby shower is on the calendar, you will be ready with the cutest baby shower favors ever!! With this DIY favor, the colors pop (so it’s a decor piece as well) , you can drink ALL THE cans of LaCroix to make these DIY planters, and everyone loves a little “baby” succulent they can grow at home, too! It’s a win/win for the host and guest, and also for the mom-to-be because they can be gender-specific or neutral.

All the details are here at Momtastic.


Sip Sip Hooray: DIY Pumpkin Wine Dispenser

diy wine dispenser pumpkins for fall bar

The photo speaks for itself: wine + pumpkins = the best fall bar ever!

This DIY wine dispenser is not only easy to make, it’s also cute, makes for an amazing hostess gift, and you can use it all season long! Heck, store it and use it again next year, and the year after that. Boxed wine has never looked so good!

Tutorial is on Momtastic.

diy wine pumpkin dispenser for boxed wine

$250 Oriental Trading Gift Card Giveaway

IMG_5027 (1)

Oh my goodness, we have an amazing giveaway with one of our favorite companies, Oriental Trading. When we think about parties, decorations, DIY’s, and crafts, Oriental Trading is top of mind.

Recently, we’ve been playing around with DIY Balloon garlands. It’s been a party of balloons in our house for several weeks now with all the lingering balloons. We get the kids in on the blowing and tying action, so it’s fun for the whole family. Oriental Trading has everything we need for our balloon garlands (tutorial coming soon). It’s a wow-factor for any party, and an affordable one. Get balloon happy like us and check out the awesome selection at Oriental Trading.

If you have a party coming up, want to stock up on school or craft supplies, or you’re hosting an upcoming holiday, enter the giveaway today to win $250.  The giveaway starts July 11 at midnight and ends July 25 at 11:59 pm (Pacific Time). Enter below.

$250 Oriental Trading Gift Card Giveaway

After you enter the giveaway, check out some of the other amazing blogs included in the giveaway:
Happy Family Blog
Teacups and Fairytales
Suburban Wife City Life
Little Bits of Everything
Living La Vida Holoka