fall’s favorite flavor

This is a very exciting time in my husband’s life. I’d like to think this is true because we are newlyweds {which it absolutely IS the reason he is so happy :-)}, but it’s the time of year that he likes to call “pumpkin season”, which is the most delicious time of year.

Some of his favorites are the Pumpkin Spice lattes at Starbucks and Pumpkin Pie in the Sky ice cream at Cold Stone {yumm!}. Pumpkin is in the crisp air, and we are definitely loving it!

For the next few months, my husband will be requesting any kind of food with pumpkin in it. Lucky for me, I came across these delicious pumpkin recipes. Happy baking!

{Pumpkin Pie Bites, Bakerella}

2 refrigerated ready-to roll pie crusts

8 oz. cream cheese, room temperature
1/2 cup sugar
1 cup canned pumpkin
3 eggs
1 teaspoon vanilla
1 teaspoon pumpkin pie spice
Pumpkin-shaped cookie cutter

Optional
1/2 cup chocolate morsels
vegetable oil
re-sealable plastic bags

Preheat oven to 350 degrees.
Use cookie cutter to cut 12 pumpkin shapes from each pie crust. Roll the dough thinner than it comes out of the box.
Press dough shapes into a 24 cup mini muffin tray. (Make 12 at a time, alternating cups to make sure pie crusts don’t overlap each other.)
Apply egg whites from one egg to the top edges of each pie.
Mix cream cheese, sugar, canned pumpkin, remaining 2 eggs, vanilla and pumpkin pie spice together until thoroughly combined.
Spoon mixture into each pumpkin-shaped pie crust.
Bake for 12-15 minutes.
Remove pies to cool and repeat with second pie crust. Place the muffin tray in the freezer to cool it quickly for re-use.

Makes 24 pies. Keep refrigerated.

To decorate, melt chocolate in a heat-proof bowl in the microwave on medium. Heat in 30 second intervals, stirring in between until melted. Add a little vegetable oil to make the chocolate more fluid. Transfer to a re-sealable plastic bag and cut the corner off. Drizzle or draw faces on pies.

For more adorable pumpkin inspiration from Bakerella, click here

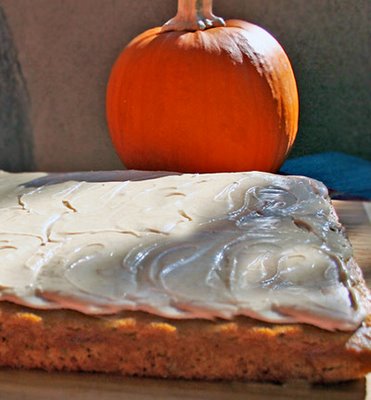
{Gluten-Free Pumpkin Spice Bars, recipe via Gluten-Free Goddess}

{just for all you gluten-free gals out there}

2 large free-range organic eggs

1/3 cup extra light olive oil or vegetable oil

1 cup light brown sugar, packed

1 cup organic pumpkin puree (canned is fine)

2 teaspoons bourbon vanilla extract

1 and 3/4 cups Pamela’s Ultimate Baking Mix or a dairy-free gluten-free flour mix with 1 teaspoon baking powder, 1/2 teaspoon baking soda, 3/4 teaspoon salt, and 3/4 teaspoon xanthan or guar gum added

1 teaspoon cinnamon

1/2 teaspoon Pumpkin Pie Spice- or a blend of nutmeg, cloves, allspice, ginger

1/3 cup finely chopped walnuts or pecans

Preheat the oven to 350 degrees F.

Grease a 9×13-inch baking pan or line the pan with greased parchment.

Beat the eggs till blended; add the oil and beat to combine. Add the brown sugar and beat until smooth. Add the pumpkin, beat till smooth; add the vanilla, beat to combine. Add the baking mix and spices; and beat just until the batter is smooth. Add in the nuts and stir by hand to combine.

Dump the batter into the baking pan and spread the evenly. Bake in the center of a preheated oven for about 20 to 25 minutes, until the bars are firm, and a wooden pick inserted into the center emerges clean.

Cool on a wire rack. Frost when cool.

{For the yummy gluten-free frosting finishing touch recipe, click here}

a little something halloween for everyone

Halloween is just a few weeks away. Here are some fun ideas to entertain for both adults and kids on Halloween. Whether the party is the same night, or a different night, we found an adult-friendly version and a kid-friendly version for everything. Gotta love that!

DRINKS

For the Adults
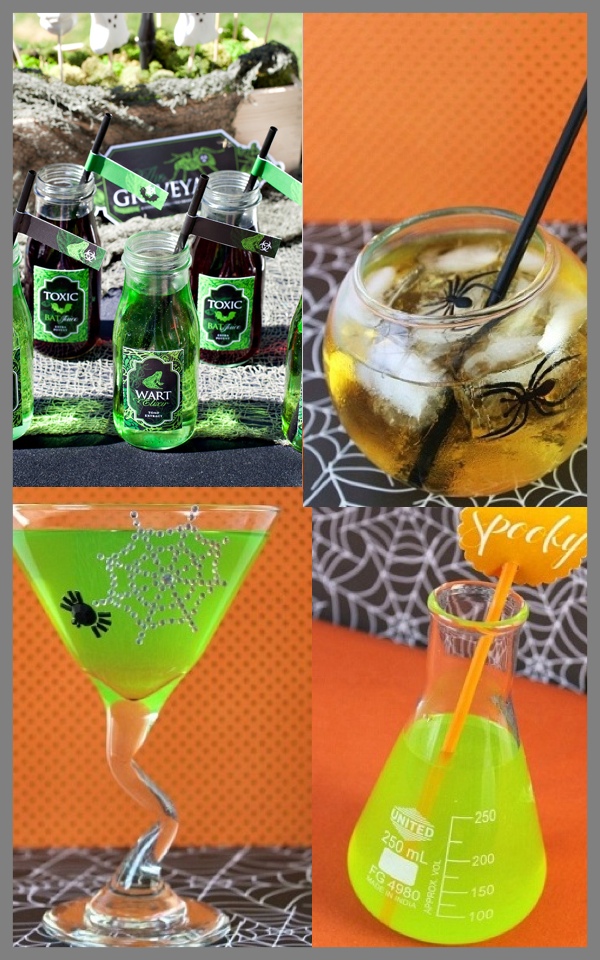
For the adults, Celebrations at Home had a brilliant idea for those martini drinkers or highballers. Add some bling to the martini glass and fill it with Chris’ yummy Green Goblin Punch recipe. Or, add different colored shimmery spiders to help guests identify their goblets. Simply spray crafts store arachnids with adhesive, sprinkle each spider with a different shade of glitter, and hot-glue to black pipe cleaners {piped around the base and stem of glass}.

For the highball cocktail, try freezing plastic spiders in ice cubes for a creepy surprise.  And to make it a bit different, Chris recommends using a mini “fish bowl” vases from the craft store as a tumbler instead!

For the Kids
For your mad scientist tikes, Celebrations at Home had a great idea to use science beakers and fill with green punch and a straw with a decorative straw flag. Or, create other potions for the kids with free printables from Hostess with the Mostess.  

FOOD
{warning, all foods can be served to adults and children}

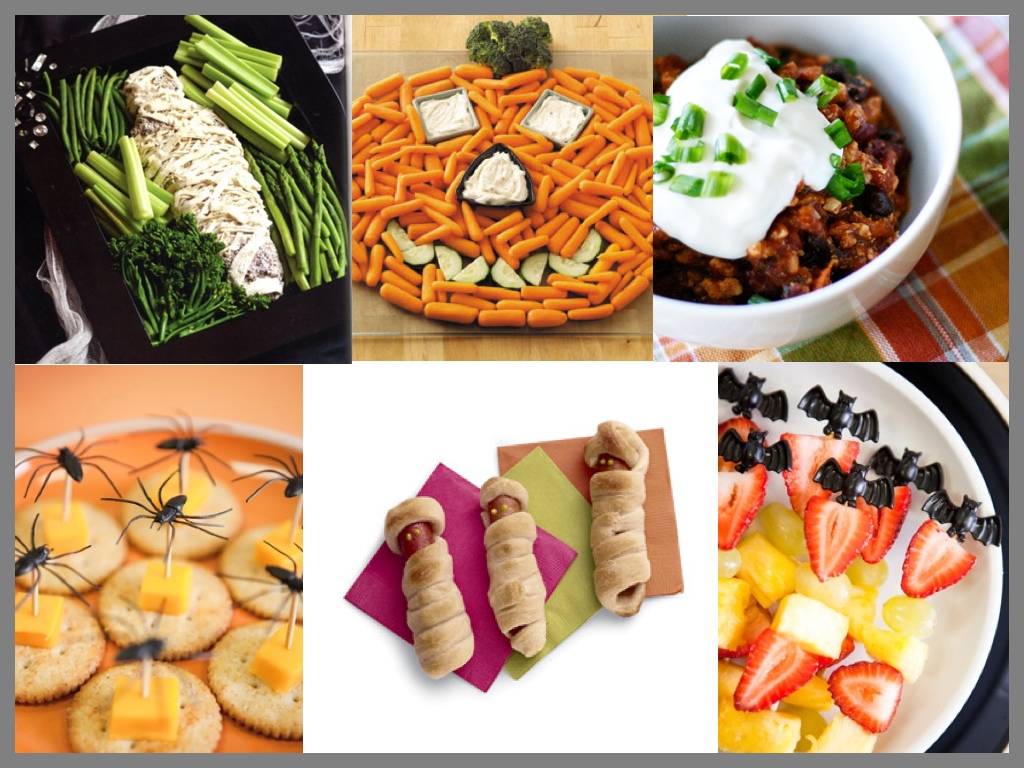
It’s tradition in my family to have chili and hotdogs on Halloween. Turkey Chili. Beef Chili. Chicken Chili and Veggie Chili. We have it all. Lisa, With Style and Grace, shares some of her favorite chili recipes here. Or, use your favorite chili recipe.

Disney Family Fun shares Hot Dog Mummy snacks for the kiddos.

Hostess with the Mostess shared an adorable Mummy’s Night Out Veggie Dip recipe that will be sure to spook your guests and delight their tummies.

One Charming Party created festive Fruit Skewers topped off with a bat ring.

DESSERTS

For the Adults
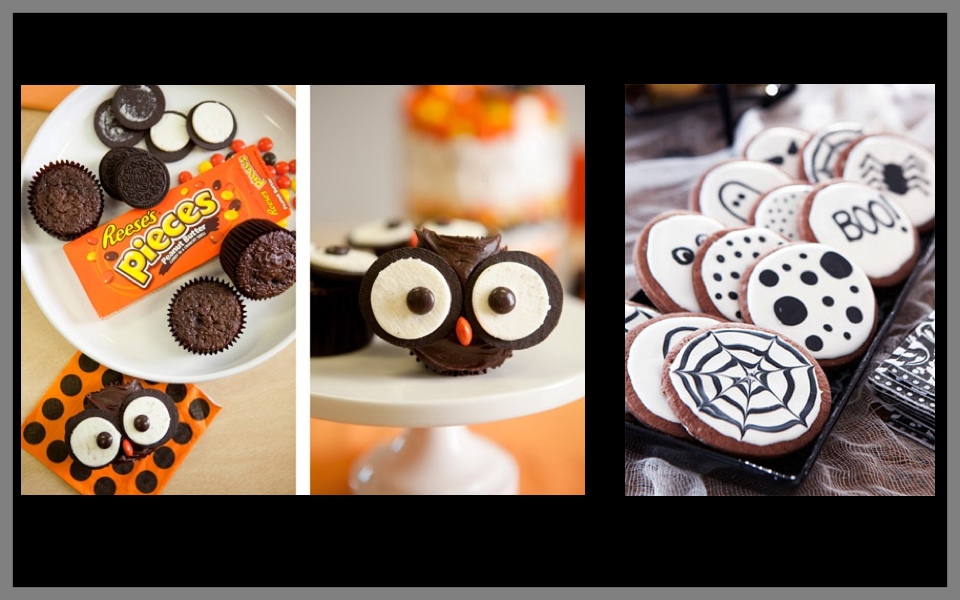
Black and white spider web cookies. Bake your favorite sugar cookies recipe.  This tutorial from Martha Stewart’s Firework Cookies will work perfect for a web-like effect.
Ingredients
4 cups all-purpose flour, plus more for surface
1 teaspoon baking powder
Coarse salt
2 sticks unsalted butter, room temperature
2 cups sugar
2 large eggs
2 teaspoons pure vanilla extract
Icing: white and black {store bought or homemade}

Directions
Make the cookies: Sift flour, baking powder, and 1/2 teaspoon salt into a large bowl.
Beat butter and sugar with a mixer on medium-high speed until pale and fluffy, about 3 minutes. Beat in eggs, 1 at a time. Reduce speed to low. Add flour mixture, then vanilla. Refrigerate dough, wrapped in plastic wrap, for at least 1 hour.
Preheat oven to 325 degrees. Roll out dough to a scant 1/4-inch thickness on a floured surface. Cut out cookies using a 1 3/4-, 2 1/4-, 2 3/4-, or 3 1/2-inch round cookie cutter, rerolling scraps once. Transfer to a baking sheet. Refrigerate until firm, about 30 minutes.
Bake until edges just start to brown, 17 to 19 minutes. Transfer cookies to a wire rack, and let cool completely.

To Decorate the Cookies
Pipe an outline of white icing around edge of 1 cookie, leaving a 1/4-inch border, then “flood” with more white icing to cover.
Immediately pipe a black dot in the center of cookie. Then pipe concentric rings of black around the center dot (using the same color as the dot, or alternating colors).
Immediately drag a toothpick through the black to create a web-like effect, starting from the center dot and working toward the edge, then alternate dragging inward and outward as you work around the cookie.
Let dry. Repeat with remaining cookies and icings.

For the Kids
One Charming Party had a great idea to let the kids make their own Owl Cupcakes.  

ACTIVITIES

For the Adults
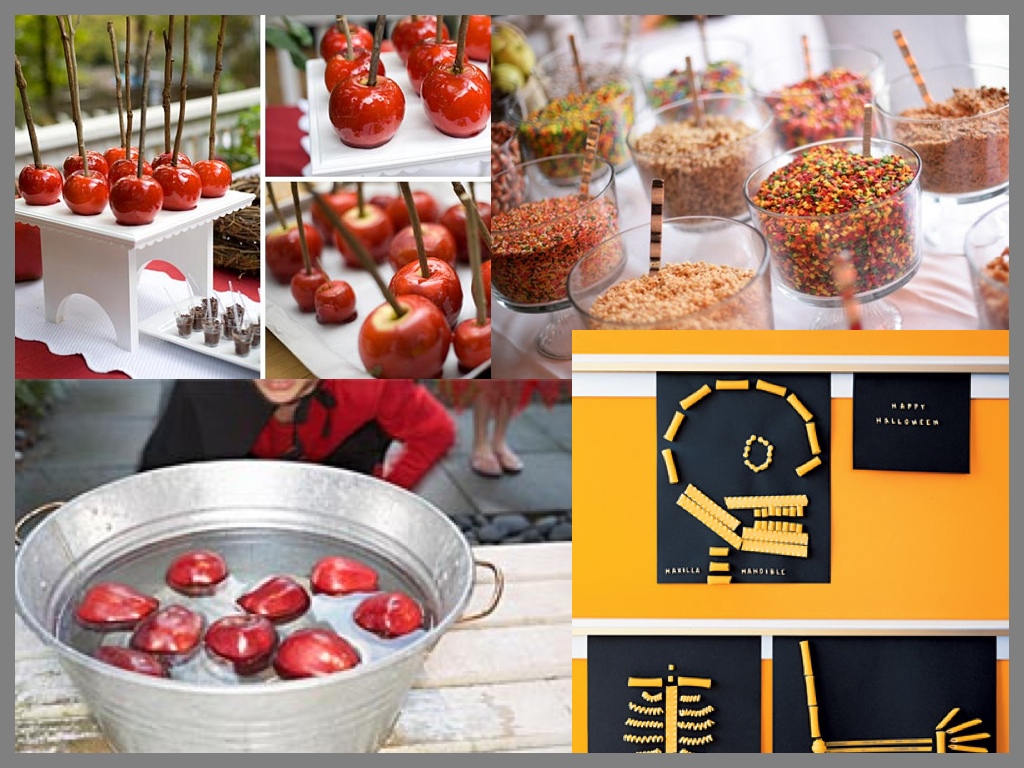
Caramel Apple Bar for adults. Oh, this looks so yummy and fun! I love the rustic impact the twig sticks give the apples. I have a soft spot for anything rustic.

For the Kids
Bobbing for Apples for kids and Skeleton Art made with noodles, via Martha Stewart.

DECOR
{warning this category has a little overlap for kid/adults decor}

For the Adults
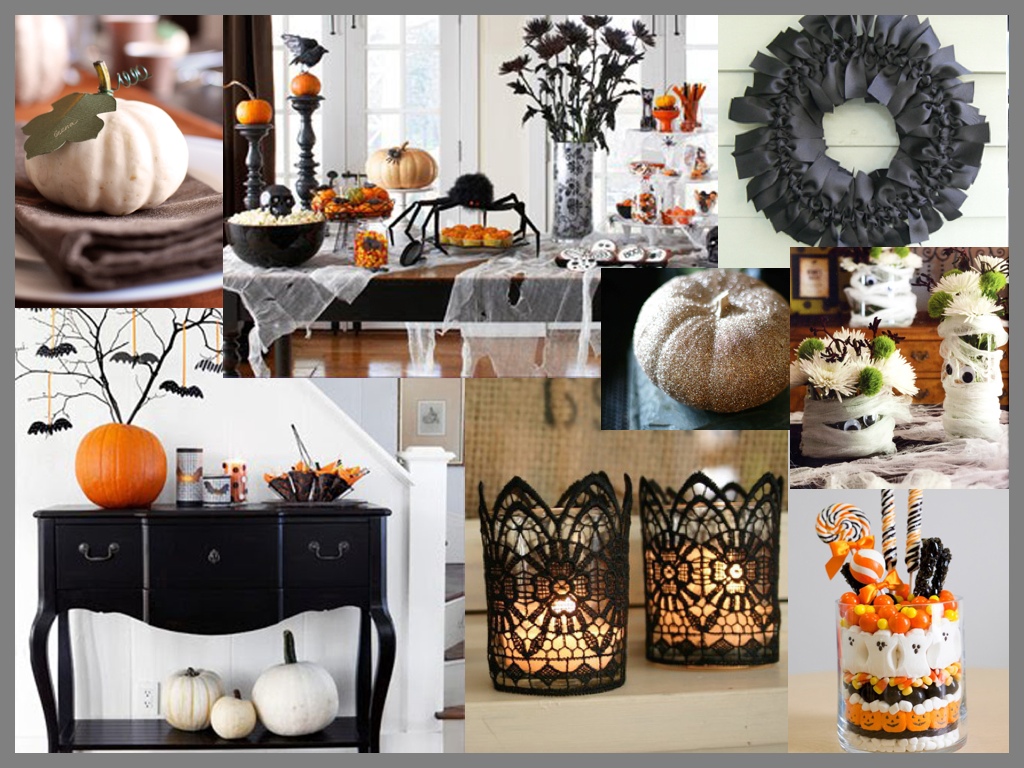
This ribbon wreath will greet your guests with style {and can be used for a handful of other parties with its basic black construction}.

Family Chic black lace candles are an easy project and add a big glam impact to your Halloween table and mantle decor.

Twig and Thistle offers an easy DIY tutorial for individual pumpkin place cards. The pumpkin can be whatever color you like. I have to say, I’m digging the white.

Set up a Table of Treats with these tips from Good Housekeeping. Rip cheesecloth for a moth-munched look and drape over the table. Arrange snacks in servingware and on cake stands, then tuck in crafts store creepies and crawlies (spiders, skulls, mice, and crows). For a fun floral display by purchasing spider mums at the local florist. Lay down newspaper in a well-ventilated area. Spray-paint the flowers with black Krylon spray paint and put them in a slim vase. Nestle the smaller vase inside a larger vase lined with black-and-white damask patterned wrapping paper. Lastly, top off large, black candlestick holders with small white or gold glitter pumpkins. {P.S. I have these glitter pumpkins in my home and I love it…thanks for the DIY tips, Lisa, With Style and Grace} 

For the Kids
One Charming Party created an adorable kid-friendly vase decorated with candy. Or, make these mummy vases with helpful tips by Hostess with the Hostess.

Good Housekeeping shares how-to’s for fun batty branches and candy-filled cones. I like the black and white color palette this year, so I recommend spray painting the pumpkin for the batty branches white. 

Wait, don’t forget to find and print your free Halloween printables here.

{images via Celebrations at Home, Disney Family Fun, Family Chic, CasaSugar, Hostess with the Mostess, Good Housekeeping, One Charming Party, Twig and Thistle, With Style and Grace and Martha Stewart}

apple of my eye

I have a love/hate relationship with fall right now. With fall comes all the warm and gorgeous colors, yummy crock pot recipes, pumpkin patch events with the kids, beautiful fall foliage, toasty drinks and fall boots and sweaters…but it also means winter and SNOW is quickly approaching {which also means it will not end for 8 months}. I’m going to stay positive and focus on at all the things I love about this time of year…and appreciate it before it’s too late. Besides, in the mountains it’s too gorgeous not to enjoy it, however quick it may be.

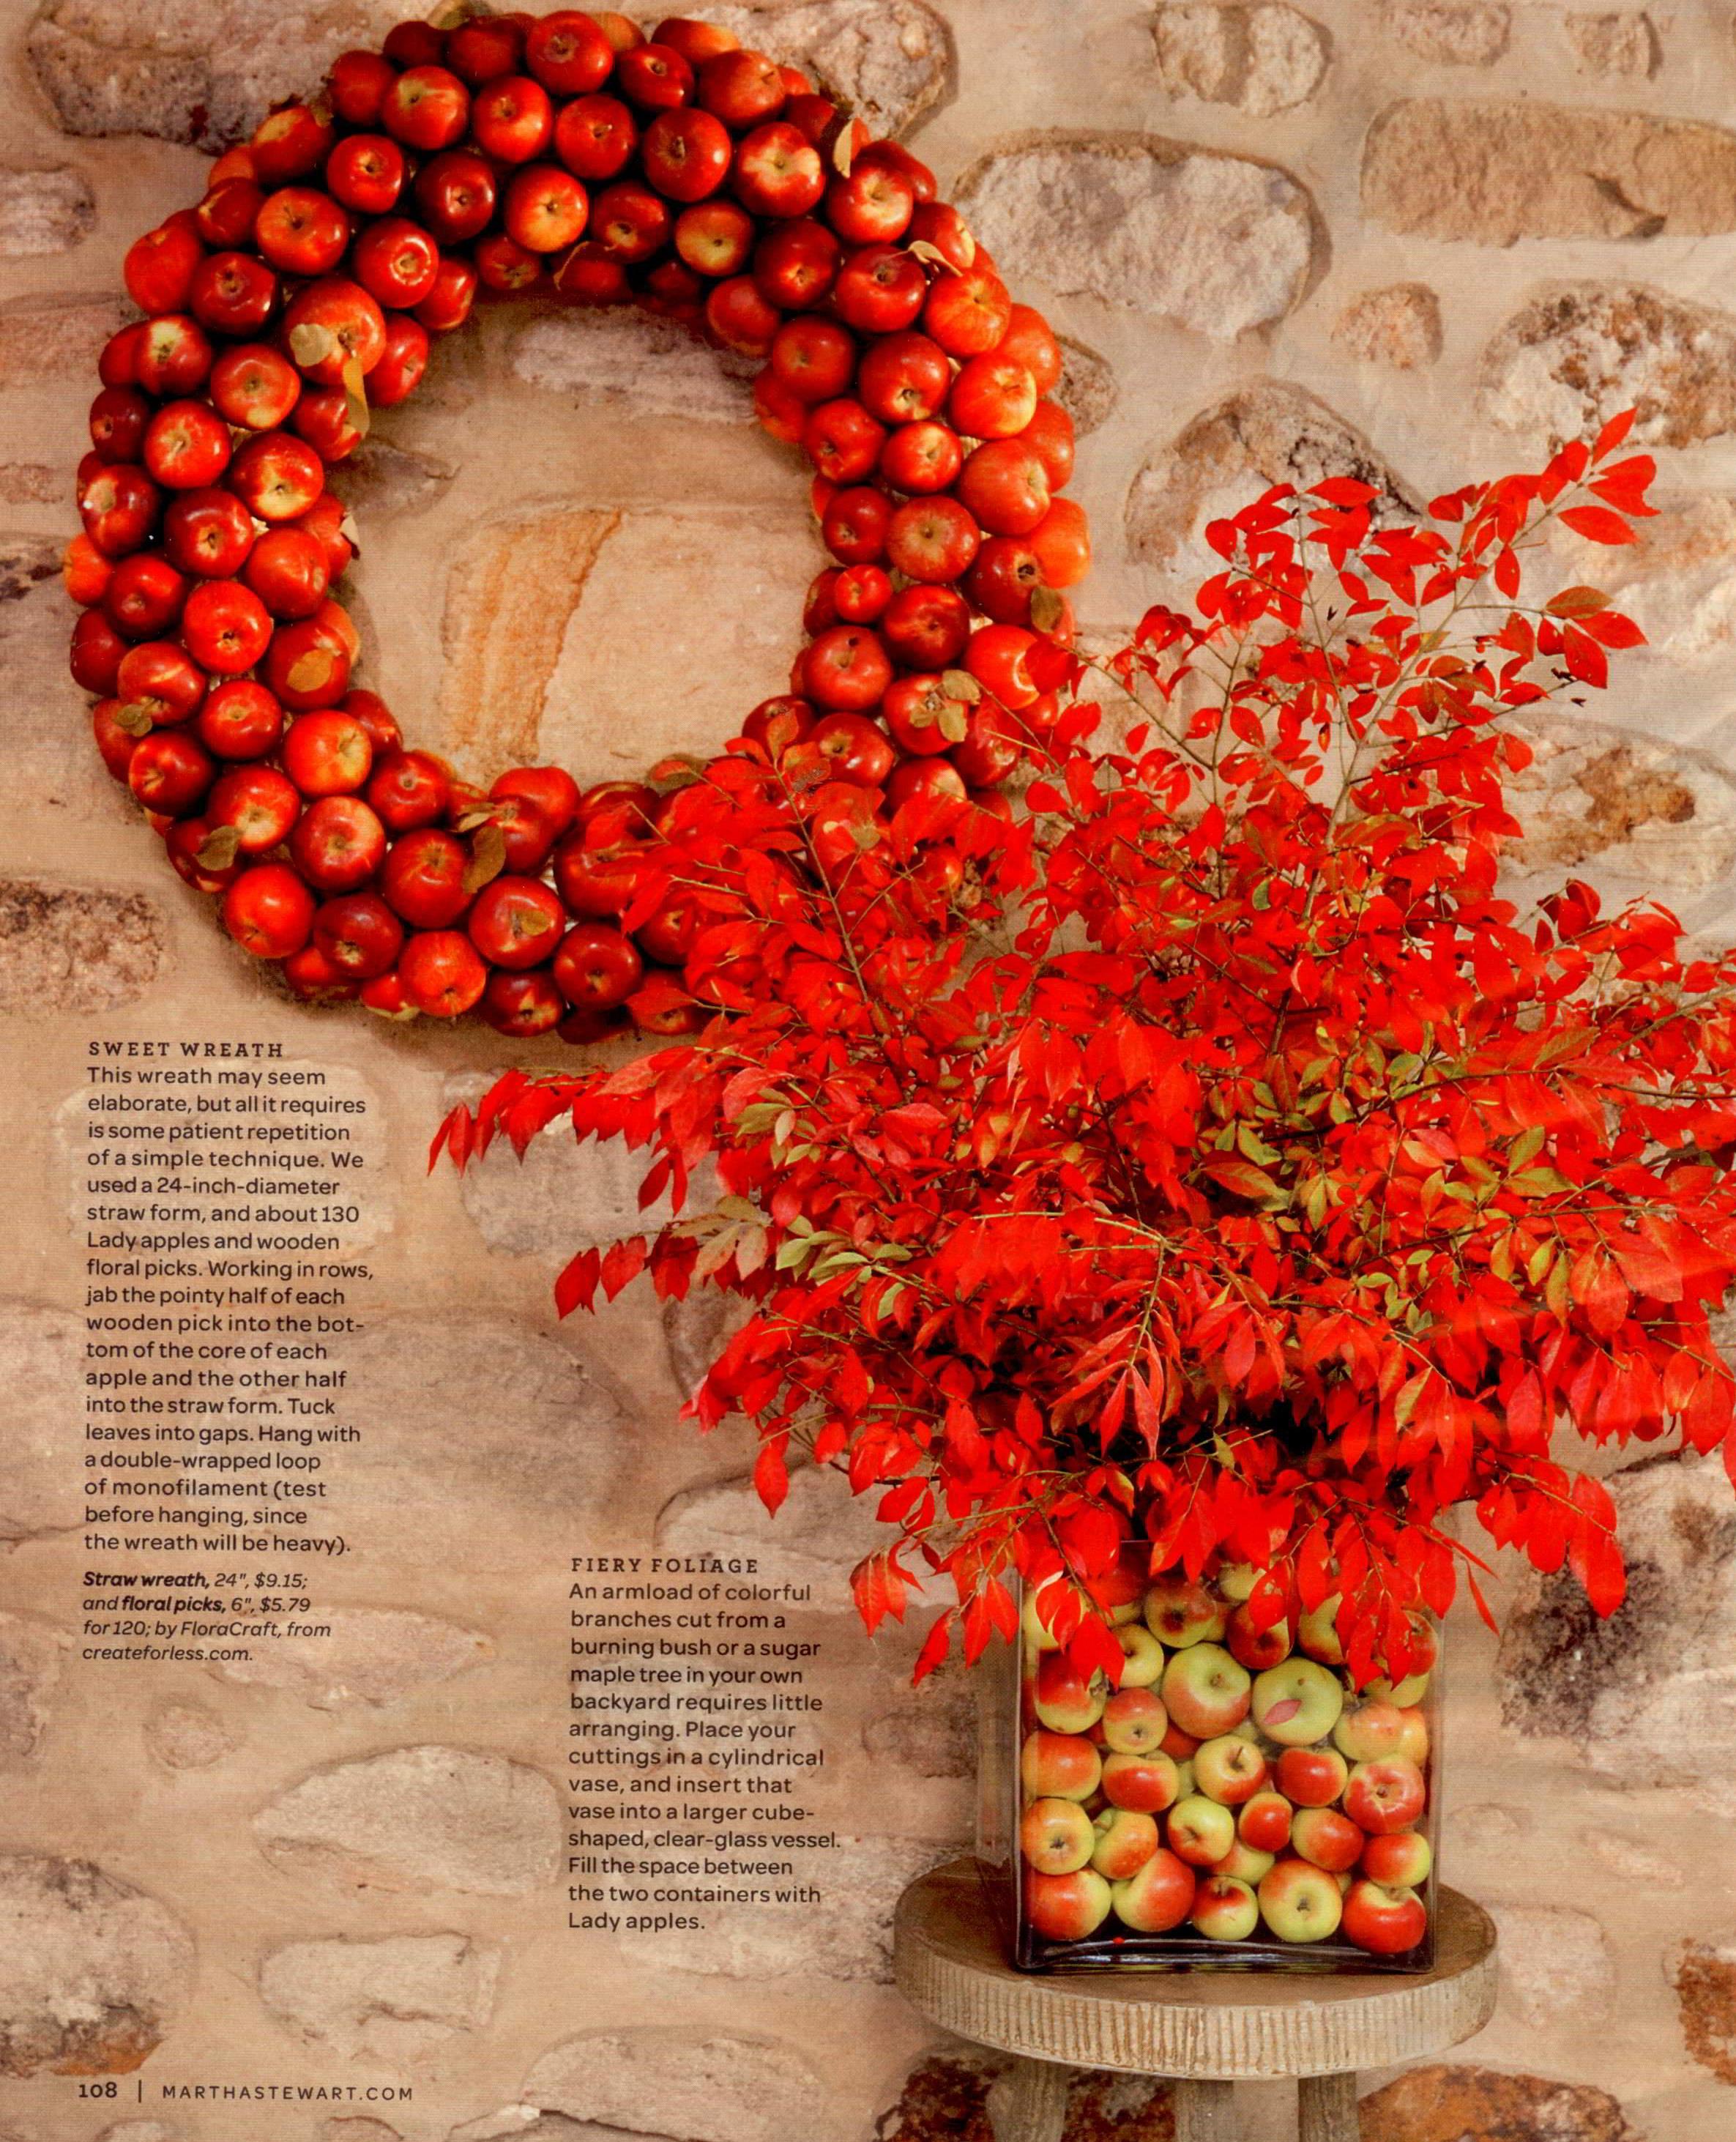
This apple-inspiration from Martha Stewart Living, October 2011 caught my eye.

The talented people at Martha Stewart used a 24-inch-diameter straw form and about 130 apples and wooden floral picks for the sweet apple wreath. Working in rows, they jabbed the pointy half of the wooden pick into the bottom of the core of each apple and the other half into the straw form. You can tuck leaves into the gaps. Another good tip: Hang with a double-wrapped loop of monofilament.

For the beautiful foliage in the apple-filled vase, cut a large amount of branches from a burning bush or a sugar maple tree. Place your foliage in a cylindrical vase and insert that vase into a larger cube-shaped, clear glass vase and fill the space in between with lady apples.

Who could resist these adorable and delicious apple bowls filled with ice cream and caramel? Not me. Caramel Apple Sundaes
{recipe via Martha Stewart Living, October 2011}
Ingredients
1 cup sugar
1 tablespoon water
1 cup heavy cream
12 apples, such as Gala
1 lemon, halved
3 pints vanilla ice cream
1/2 cup chopped toasted walnuts

How To
Combine sugar and water in a medium saucepan over high heat, and cook, stirring occasionally, until mixture is dark {about 6 minutes}.
Remove from heat, and carefully pour in cream {mixture will spatter}, whisk until smooth. Let cool.
Slice the top 3/4 inch from each apple, discard.
Using a spoon or melon baller, scoop out enough flesh to fit a scoop of ice cream.
Drizzle with some lemon juice to prevent flesh from browning.
Fill each apple with a scoop of ice cream. Spoon caramel on top, and sprinkle with walnuts.

{images via Martha Stewart Living, October 2011}

eat {and celebrate} what you sow

OK, I know…fall is almost here. But, before summer is officially over, why not throw a garden party. I’m inspired to do so this year because it was my first year growing a garden {along with my lovely neighbor, Regina}. I came to the conclusion that I am great at growing Kale and Carrots. But first to admit that my areas for much-needed improvement include Spinach and something that I just can’t do in the mountains {unless I start as a plant inside} – Zucchini. There’s always next year!

Invite your mom, girlfriends or neighbors…and with the ideas below, your party will be fabulous…and healthy!

What’s on the Menu?
Caprese Skewers

{recipe via With Style and Grace}
Ingredients
Cherry [or grape] tomatoes – any color, halved
Mozzarella balls, cut into slices
Fresh basil
Balsamic vinegar
Extra Virgin Olive Oil
Sea salt, to taste
Toothpicks
Ceramic ramekins

Directions
Skewer one tomato half, cut side up. Stack the thin slice of mozzarella, followed by a sprig of fresh basil and then topped with the other tomato half, cut side down – forming a tomatoes mozzarella & basil “sandwich”.
If you have individual dishes, add about 1 tablespoon of balsamic vinegar and 2 tablespoons of olive oil – more or less depending on the size of dish. Rest the tomato skewers on top.
NOTE: You can also serve these on a plate and drizzle the olive oil and balsamic directly over the tomato skewers.

Veggie Pizza
{adapted from Colorado Cache}
Ingredients
8 oz cream cheese
1/3 cup mayonnaise
1 teaspoon dry dill weed
1 teaspoon minced onion {dried onion}
2 cup finely cut veggies {cut in small pieces…I like to use broccoli, red pepper, carrots and sometimes cauliflower}
1/2 cup green onions, thinly diced
1 package Pillsbury crescent rolls

Directions
Blend cream cheese, mayonnaise, dill, dried onion in a medium bowl.
Roll out crescent roll onto baking tray and connect ‘seams’ to make one large square with dough.
Bake for 400 degrees for 10 minutes, then cool. Sometimes its less time, so just keep and eye on the dough to make sure it doesn’t get too brown.
Once cooled, add cream cheese mixture and top with veggies, then with green onions.
Store in refrigerator before serving.
Cut in squares and place on pretty serving tray.
Yes, it’s that easy and it’s so yummy!

Corn and Avocado Salad

{adapted from Martha Stewart}
Ingredients
4 shucked ears of corn
1 sliced Hass avocado
1 tablespoon fresh lime juice
1 tablespoon extra-virgin olive oil
1/2 teaspoon coarse salt

Directions
Heat grill to medium-high. Grill corn, rotating often, until lightly charred, about 15 minutes. Let cool slightly. Carefully cut kernels from cob. Gently toss with avocado, lime juice, olive oil, and salt.

Veggies in a Cup, Individual Servings
This is so simple, but it’s a garden party, so there has to be plenty of veggies, right?
Place sticks of veggies in a cup, arranged to look pretty, and serve with a side of ranch or hummus.

Drinks
Serve lavender lemonade in mason jars, like Oprah did for her garden party. Coffee and tea {and champagne or white wine} would hit the spot too.

Dessert
Pie in a Jar


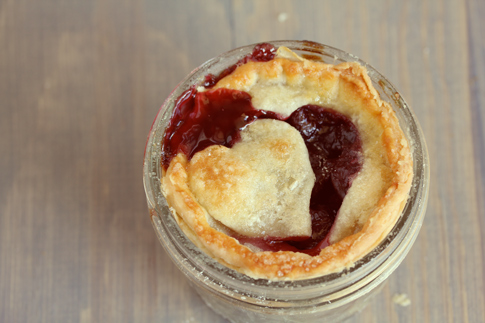
Read the Pie in a Jar tutorial here. Apple Pie or Cherry Pie – you decide.

Zucchini Bread
{adapted from , found at WebMD}
Ingredients
1 rounded cup of fresh, grated zucchini
1 cup sorghum flour
1/2 cup tapioca starch (sometimes called tapioca flour)
2 teaspoons baking powder
1/2 teaspoon baking soda
3/4 teaspoon xanthan gum
1/2 teaspoon fine sea salt 
1 teaspoon cinnamon
1 cup brown sugar
1/3 cup light olive oil or coconut oil
1 teaspoon fresh lemon or lime juice
2 free-range organic egg whites, beaten or egg replacer (1/4 cup liquid)
1/4 cup coconut milk {we used So Delicious}
Optional: 1/3 cup chopped walnuts or pecans

Instructions
Pre-heat your oven to 350 degrees F. Line the bottom of a 9-inch loaf pan with a piece of parchment paper. Lightly oil the parchment paper.
Press the grated zucchini with a paper towel to remove as much moisture as you can. After pressing, fluff with a fork. Set aside.
In a large mixing bowl, whisk together the sorghum flour, tapioca starch, baking powder, baking soda, xanthan gum, sea salt, and cinnamon. Add in the brown sugar. Add the oil, lemon juice, egg whites or egg replacer, and the coconut milk. Beat to combine and continue to beat on medium high until the batter is smooth – about two minutes. Add in almost all of the shredded zucchini and stir by hand to combine. If you are adding nuts, stir them in to distribute. Scoop the batter into the prepared loaf pan and using a silicone spatula, even out the top.
Bake in the center of a preheated oven until the top is golden and firm, yet gives a bit when lightly touched. It should feel slightly springy. This may take anywhere from 50 to 60 minutes. Test with a wooden tooth pick –  it should emerge with no crumbs or batter.

Decor
Stick with white/ivory colors with an accent of green.

Create a herb wreath to greet your guests with fresh sage, oregano, rosemary, and bay leaves from Swith and Hawkin or make one yourself.

Place a large vase, or three small vases with a hydrangea arrangement from your yard in the center of the table.

Use mini terra-cotta pots filled with herbs such as rosemary, basil, cilantro, etc as place cards. Use popsicle sticks to write your guests names and stick in dirt. You can give as favors, or save for your own herb garden.


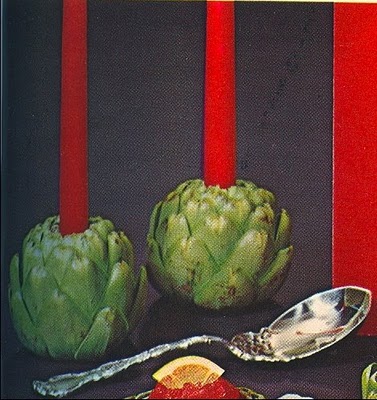
Use artichokes as candle holders. Cheap and adorable.

Favors
Give guests seeds packets for next year’s garden, or bulbs to plant this fall.

{images via You are my Fave, Martha Stewart, With Style and Grace, Country Living, Intimate Weddings, Elizabeth Anne Designs, Lowes and Thrift Shop Romantic}

going clean

My fabulous cousin and aunt have been doing this cleanse called “Clean” since April. They can’t say enough things about it – they look great, they feel wonderful and they’ve each lost 30 pounds! Since my wedding is coming up in a few months, I wanted to hop on-board, too! Now, I’m not one who goes on diets to lose weight (the gluten-free diet is difficult enough!), but I thought that doing a cleanse might help be lost that difficult ten pounds just before my wedding. Plus, my cousin and aunt were continuing the Clean lifestyle and my mom was going to start with me. I had my own personal support team to help me 🙂

About a month ago, I picked up Clean by Alejandro Junger, MD from Barnes & Noble and immediately stuck my nose in. I was absolutely fascinated by this book! It is truly disturbing when you stop and think about how many toxins are inside our body from the air we breathe, the place we live, the cosmetics we use and the food we eat. There are a lot of unnecessary toxins that we feed into our body that harm us. When it comes to food, we can certainly control those toxins.

In the book, Alejandro describes exactly how Clean works. Although there is a lot to it, the #1 rule is to follow this simple formula: Eat two liquid meals and one solid meal per day (the solid meal to be eaten at lunchtime). Snacks in between are allowed, but you must keep a 12-hour window from your last meal until your breakfast the next morning in order for your body to cleanse.

After completing Clean, I feel healthier, my skin is brighter and I’ve lost weight! No more stomach aches, bloating, fatigue or headaches. Clean is a cleanse that makes perfect sense and is easy to do. Only 21 days and you’re clean!

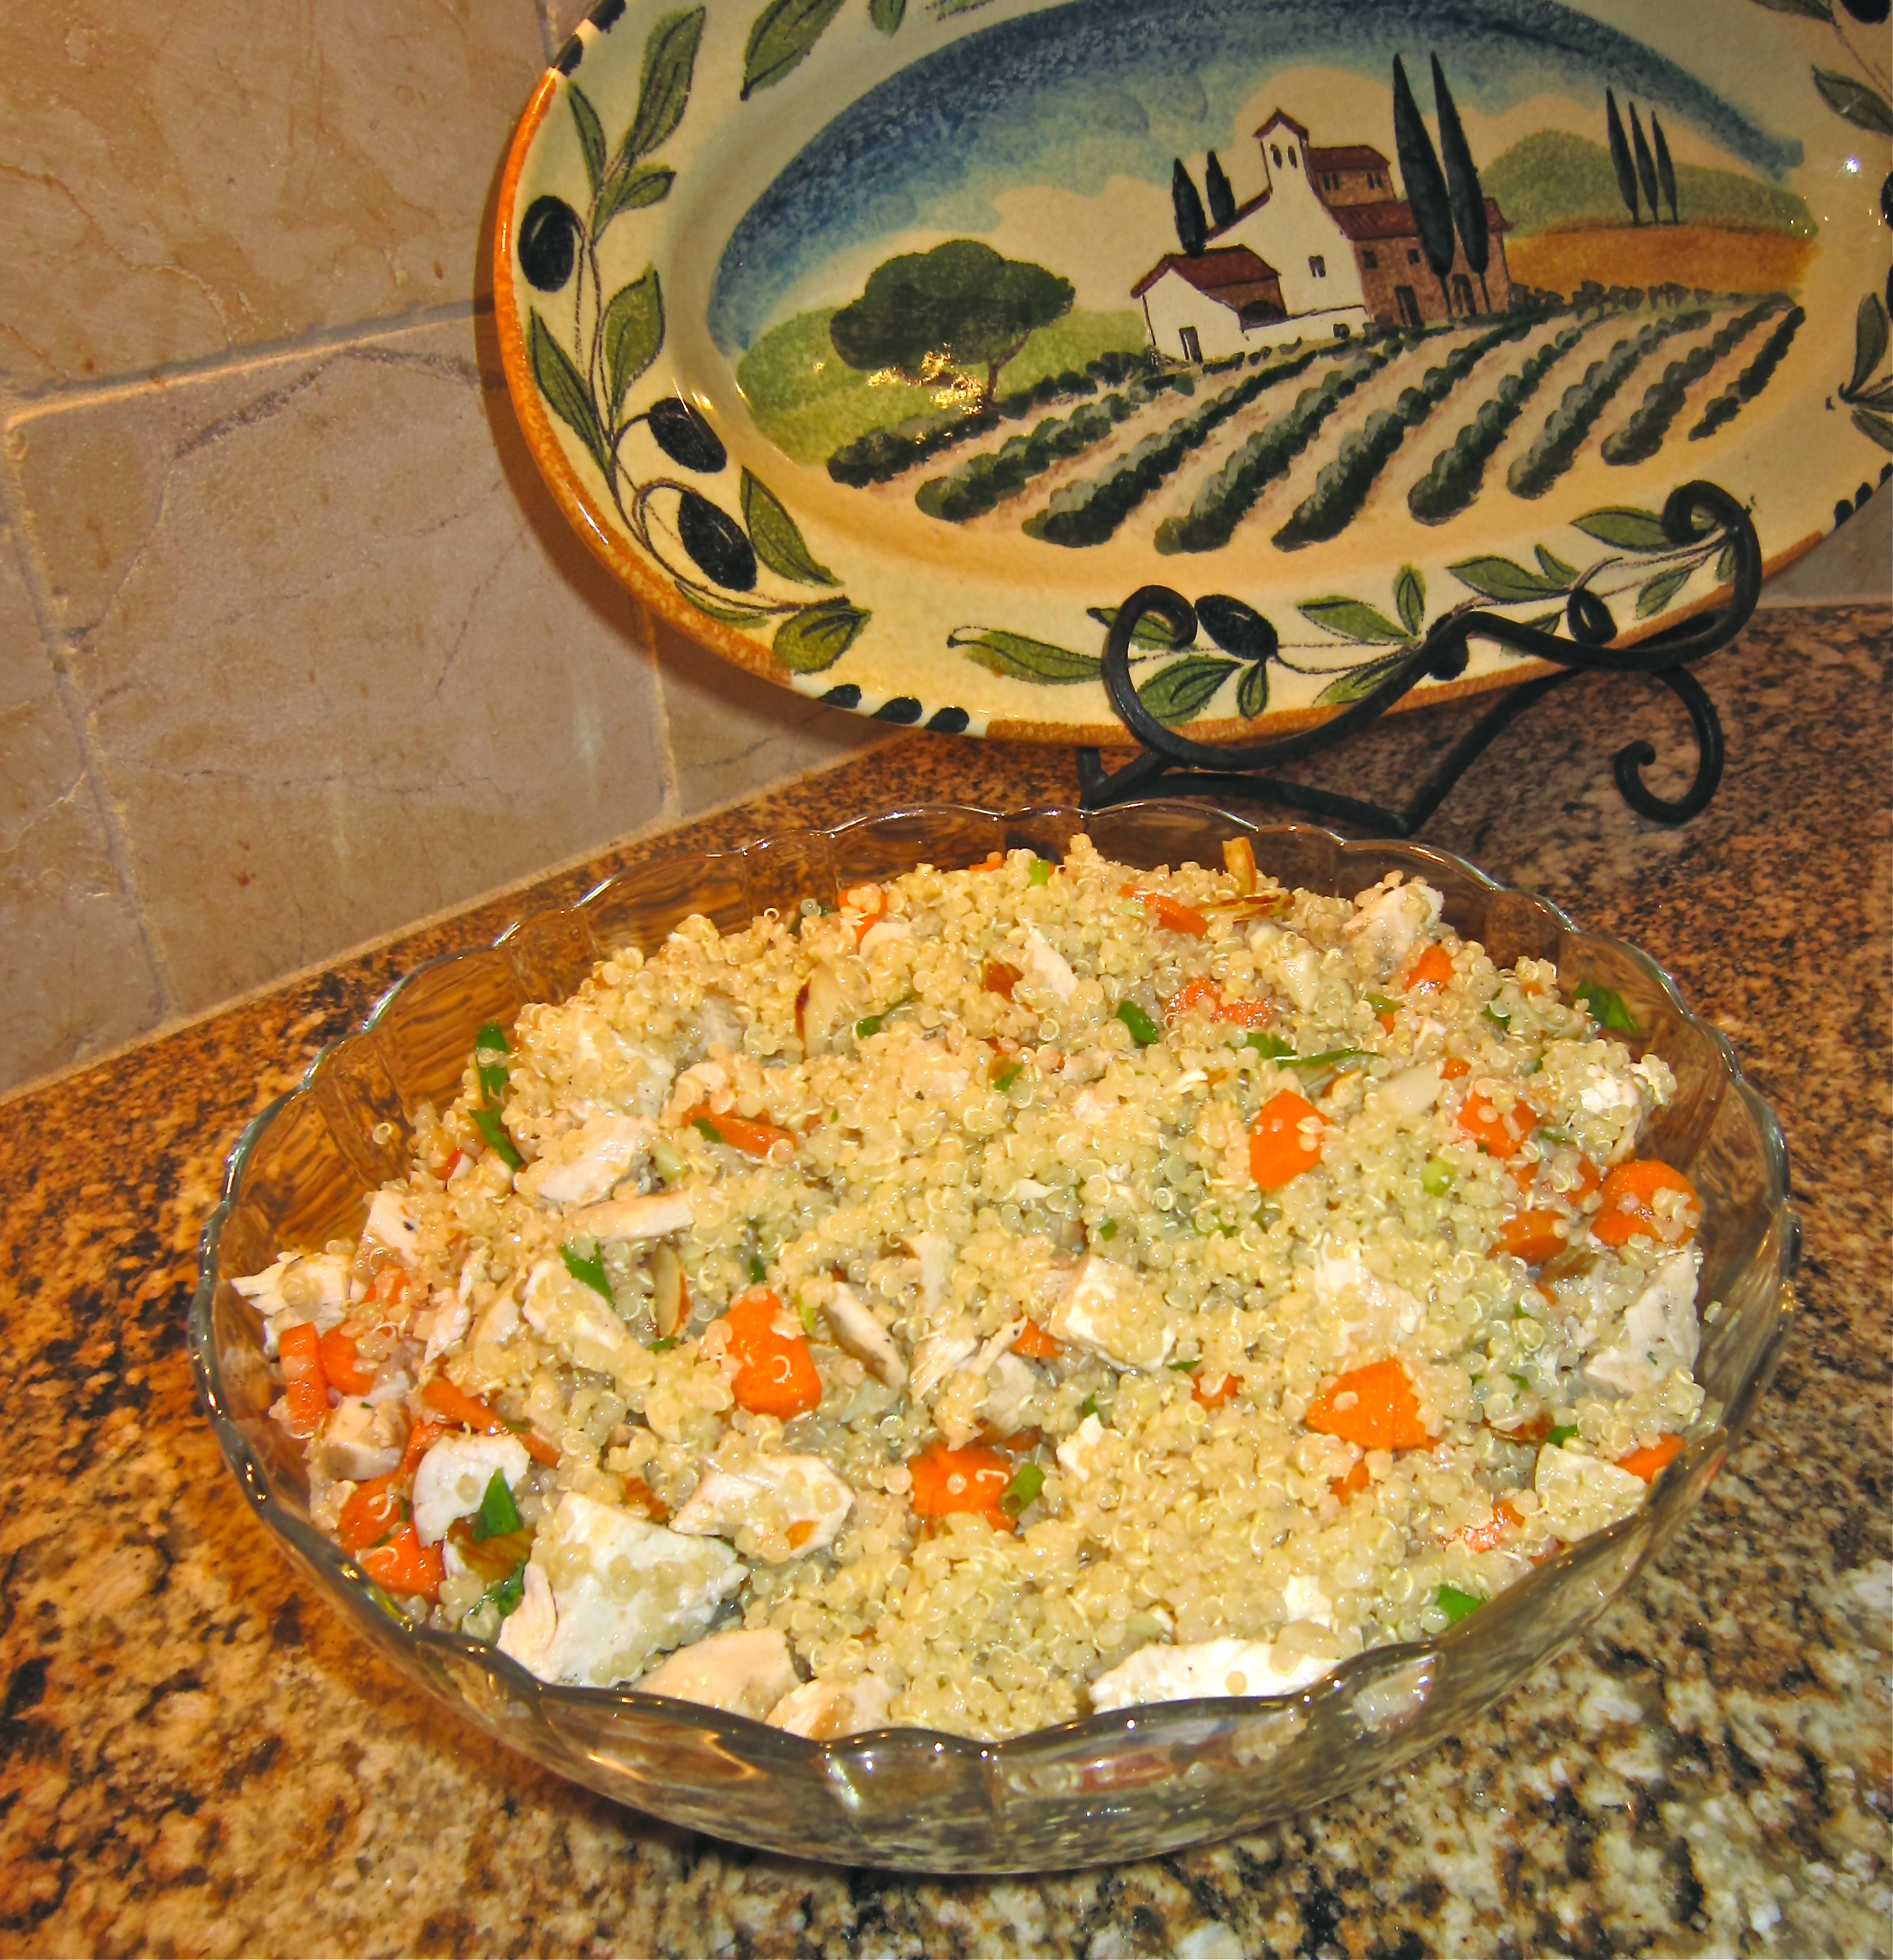
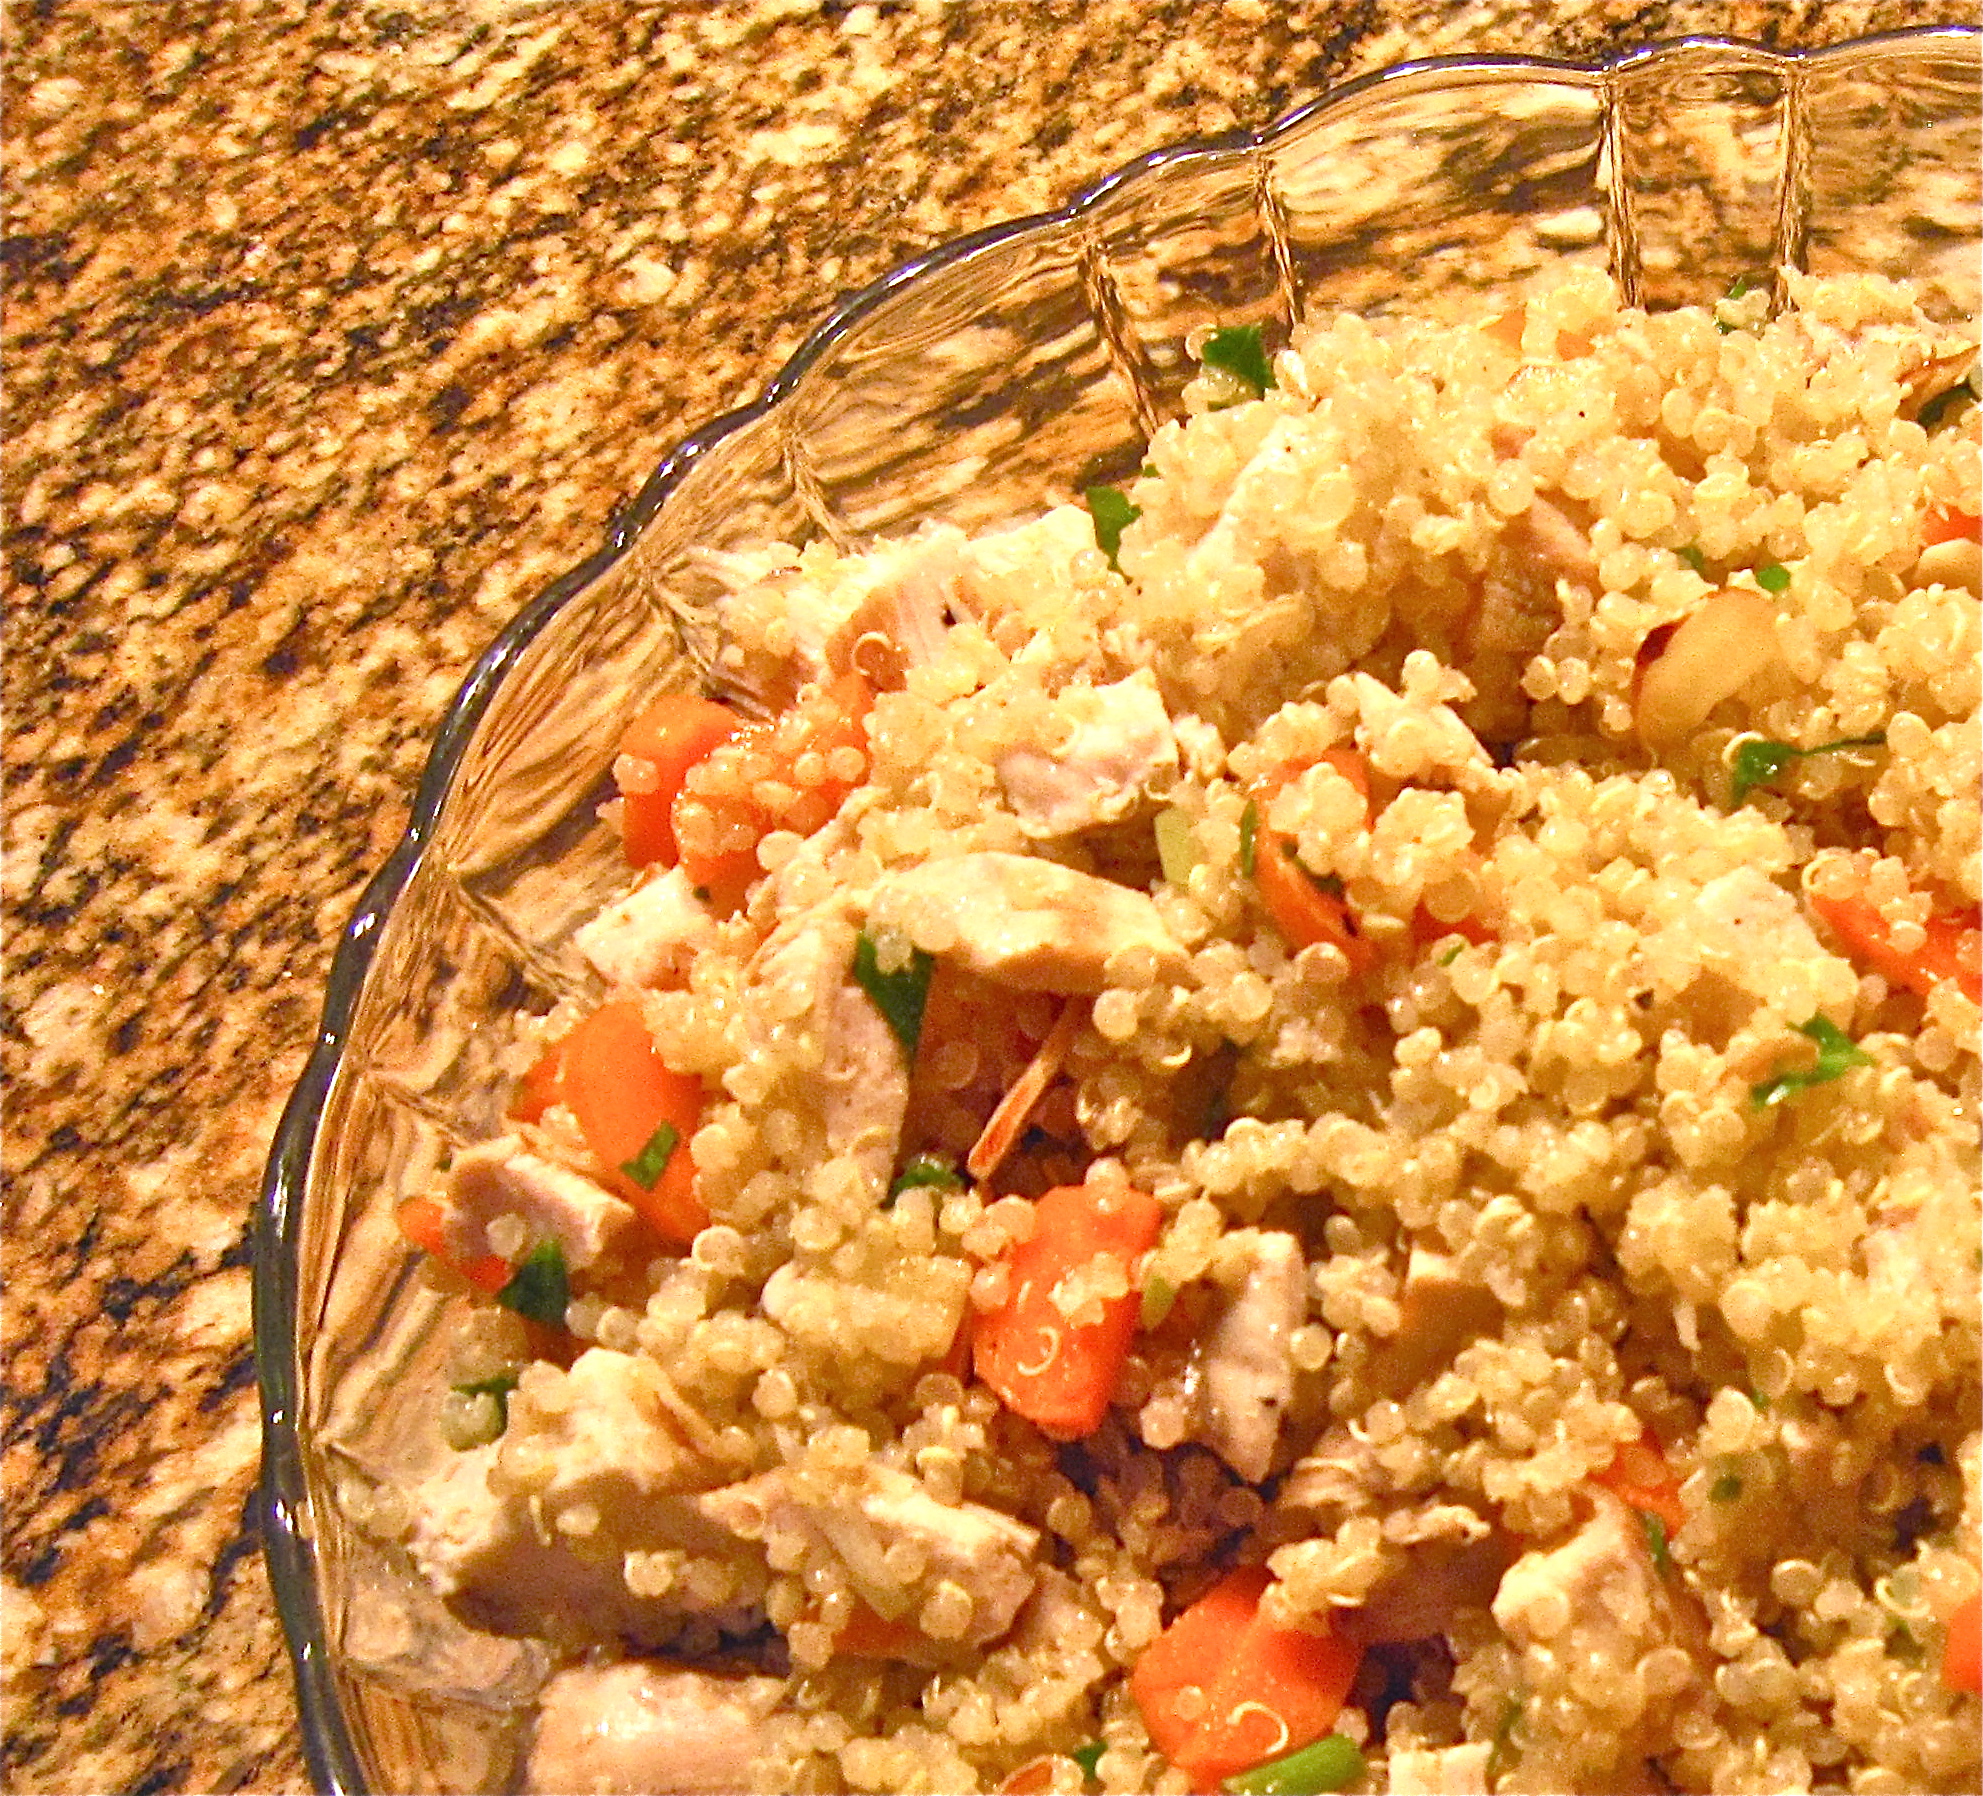
I wanted to share my all-time favorite recipe from Clean: Quinoa Salad with chicken and Mixed Greens (p.254 in Clean). It’s refreshing, delicious, healthy, and super easy to make. Double the recipe and eat it for your lunch all week! You’re going to love it 🙂

Ingredients:

2 cups cooked and cooled quinoa

4 (4-ounce chicken breasts, grilled or steamed and thinly sliced)

1 tablespoon chopped parsley

1/4 cup currants

1/4 chopped raw almonds

1/2 cup diced carrots

1/4 cup chopped mint

1/4 cup scallions, cut thinly diagonally

1/4 cup chopped parsley

1/4 cup lime

1 teaspoon agave nectar

1/4 teaspoon ground cumin

1 teaspoon sea salt

1/2 cup olive oil

4 cups salad greens tossed with 2 tablespoons olive oil

Instructions:

1. Steam chicken breast.

2. Put all ingredients except chicken and salad greens in a bowl. Toss together with quinoa. Adjust seasoning to taste.

3. Mound half quinoa salad on each plate

4. Make a bed of salad greens next to quinoa and place the sliced chicken on top.

mmmm… delicious!

{currants not photographed}

Recommendations:

Make it your own. I love currants, so I use about 3/4 cup currants in the mix (even though I was in the middle of making it last night and realized that I was out of currants!) Add a few more almonds if you enjoy a ‘crunch’. I suggest using less than 1/2 cup olive oil – I don’t think 1/2 cup is necessary because the mix will get soggy. Personally, I enjoy Quioa Salad without the chicken or salad greens because I love the taste of quinoa so much. Be creative!

If you’re looking to cleanse your body from toxins, lose a few pounds and feel healthy and energized, try going Clean! Visit their site and check out all of the resources that they provide (grocery list, elimination diet foods, daily routines, ect). Happy cooking and Cleaning!

I think this Alejandro guy is a genius 🙂

{imges via tutto bella}