DIY Marbled Snowmen

DIY-black-and-white-marbled-snowmen-with-mini-santa-hats

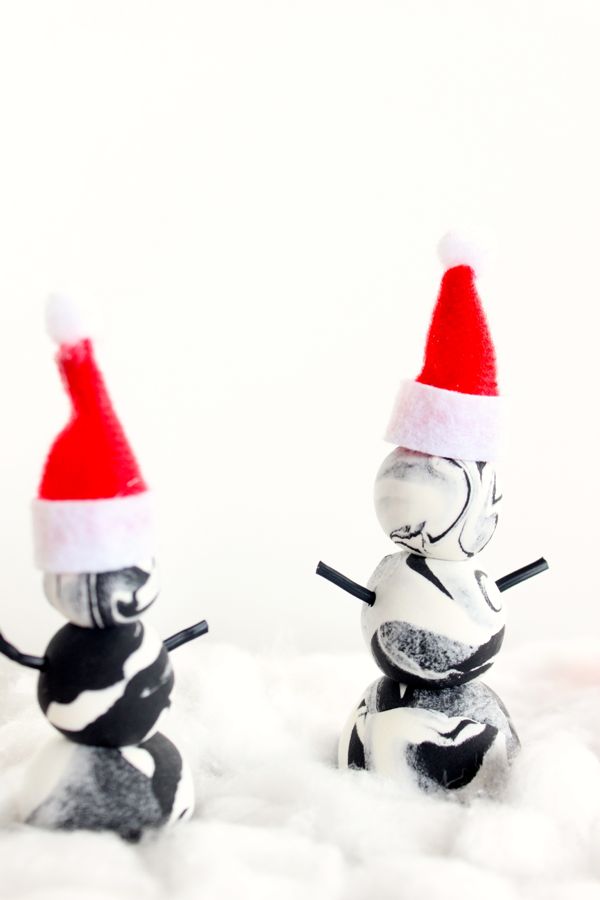
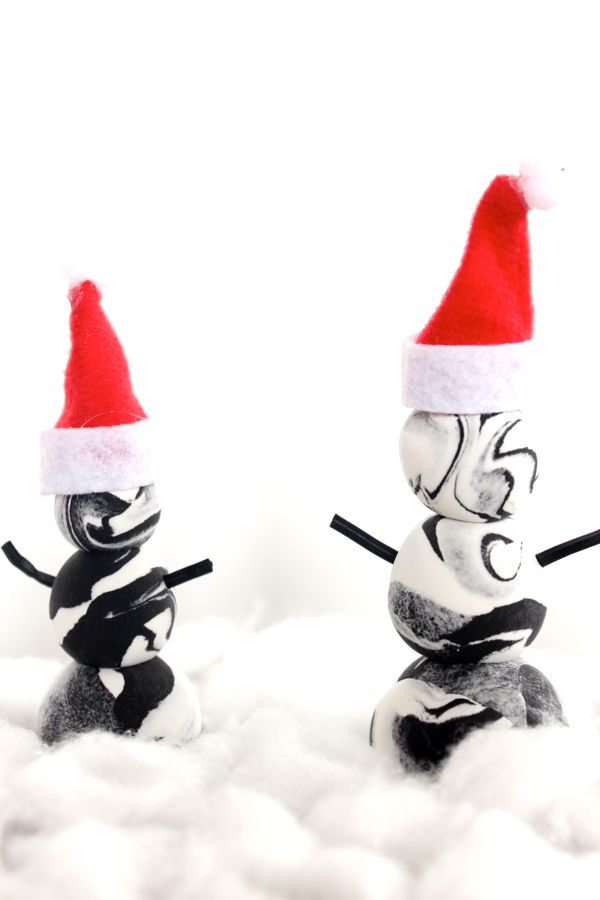
This may be one of the easiest DIY Christmas projects ever. Do it with the kids. Do it last-minute. Just do it. You need these marbled snowmen in your life.

These DIY, black and white marbled snowmen can easily be made into ornaments, gift toppers, place cards and the list goes on and on.

How-to: Simply twist, twirl, fold, smash and then roll two colors of Crayola Model Magic foam into balls. Make three different sizes – small, medium and large – and stack them on top of each other. Add tiny sticks for arms and don’t forget mini santa hats from Oriental Trading.

Merry marbling to you.

black-and-white-diy-marbled-snowmen-christmas-crafts

img_8566

DIY Pencil + Crayon Cupid Arrow

pencil-arrow-cupid-crayola-crayon-heart-valentines.jpg

Valentine’s Day is still a month away, but we’re in the mood for love. And we’ve been struck by the cutest bow and arrow ever!

If you’re opting for a non-candy Valentine, or want to play cupid on February 14, this is the arrow for you.

crayon-cupid-arrow-crayon-heart-valentine.jpg

Materials Needed

How To Create Our Crayola Love Struck Arrow:

  1. Fill the silicone tray with old or new bits of crayons to the top.
  2. Bake at 250 degrees for 13 minutes. Once the tray cools a bit, place in freezer for 5-10 minutes. The hearts should pop right out.
  3. Use a drill to drill a small hole in the top-middle part of the heart, so the tip of the pencil fits into the heart similar to a pencil sharpener. Don’t drill the hole too big, but if it’s not fitting just right, add some glue to the tip of the pencil and insert.
  4. For the end of the arrow, cut felt and either glue the two pieces together or if you use sticker felt like us, just press the two pieces together, sandwiching the pencil.

If you want to package for classmates or a friend, place the arrow in a thin cellophane bag and seal with washi tape.

crayon-pencil-cupid-arrow-dig-valentine

diy-cupid-arrow-valentines-crayon-pencil-valentine.jpg

{images via j. sorelle}