This week my children’s school held bake sales and homemade ornament sales to raise money for a school in Houston whose families have suffered tremendous loss from the hurricane. My kids were thrilled to participate, and wanted to make as many ornaments as they could to raise as they said, “a ton of money.” While they made DIY marbled clay snowflake ornaments of their own, I made a couple, too. It’s a super simple craft for kids and adults of all ages, which is why I’m sharing it with you today. Plus, this is a wonderful gift to encourage the kids to give their family and friends.
Materials:
- Oven-dry clay, Sculpey colors red, green, teal, white, blue
- Parchment paper
- Snowflake cookie cutter, large and small to make the inner snowflake opening
- Rolling pin
- Baking pan
- Wallet size photos
- Glue dots
Directions:
Step 1: Lay down parchment paper, and roll balls of clay with the various colors.
Step 2: Combine colors, and then twist and turn to blend the colors together for that marbled effect. With a rolling-pin, roll it out so it’s about 1/4 inch thick.

Step 3: Press the cookie cutters into the clay, both the large snowflake and the small one. Remove excess clay around the cutter.

Step 5: With a small straw (like the ones used in coffee shops), punch a small hole through the top of the ornament.

Step 6: Bake on parchment paper according to clay package directions.
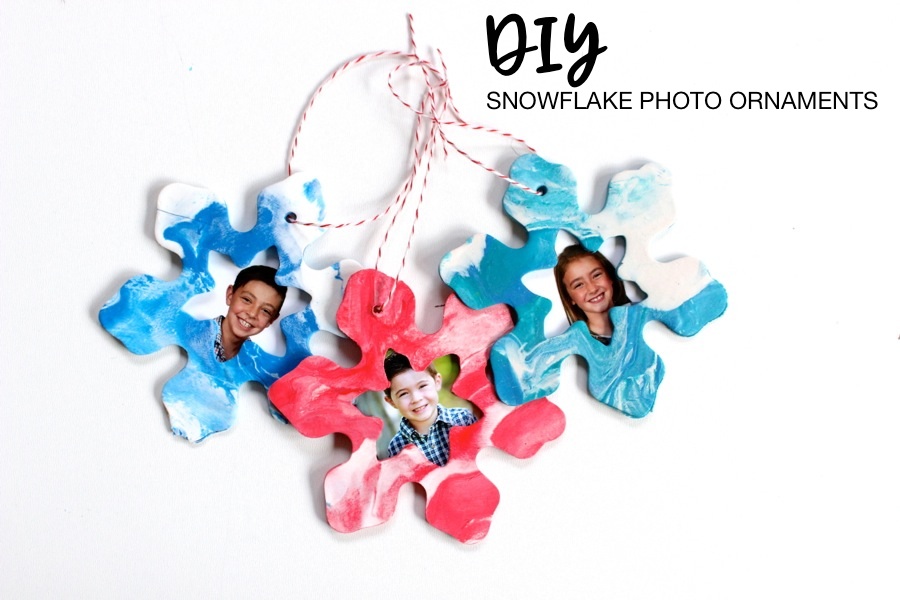
Step 7: Add a wallet size photo with glue dots on the back of the ornament, string and hang it.


Speak Your Mind