Moments you are grateful for in your everyday life should be noted. Whether you write it down, type in into your phone, or record it in a gratitude journal, take the time to do it. With this continued practice, your mind and energy vibrations will shift. Your perspective will change. Negativity will find it’s way to the door, and a lighter, happier heart will be full of joy.
The list does not need to be profound, and there’s no wrong answer. It will challenge you on the worst of days. And, on the best days, it will come easy. My {Jessica’s} list this past week included gratitude for two weeks in a row of bright and warm sunshine, no snow on the ground in early November, a good glass of wine shared with friends, a moment of great hope for our country, a phone conversation with my elderly and sick grandpa, kisses from my children in the morning and a husband that loves to cuddle, even when I don’t.
Oprah, a firm believer in a gratitude journal, is quoted as saying, “Be thankful for what you have; you’ll end up having more. If you concentrate on what you don’t have, you will never, never have enough.” We couldn’t agree more.
Yes, it’s true that circumstances are a reality, life can be really, unbearably hard, and our hearts can actually break. But, the one thing we can control is our attitude and the way we look at all the moments in our life. With a grateful mind and heart, life is more likely to have a beautiful view.
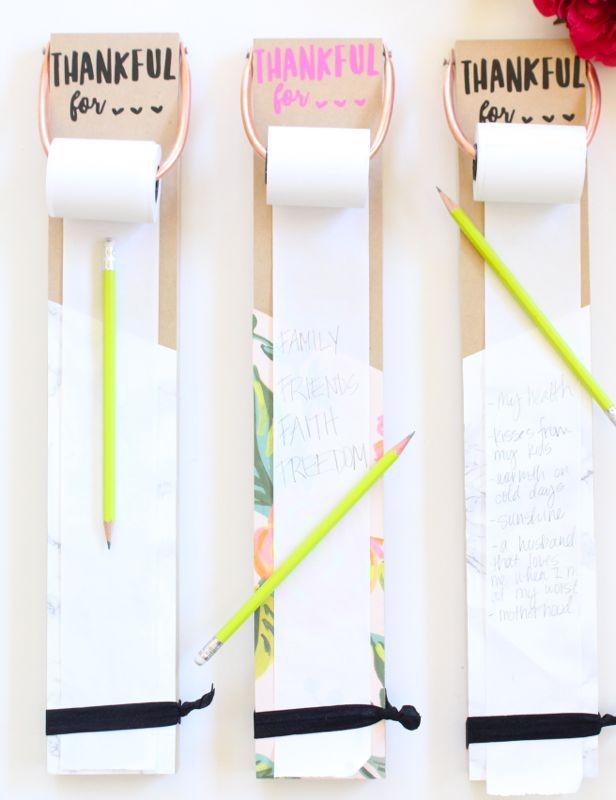
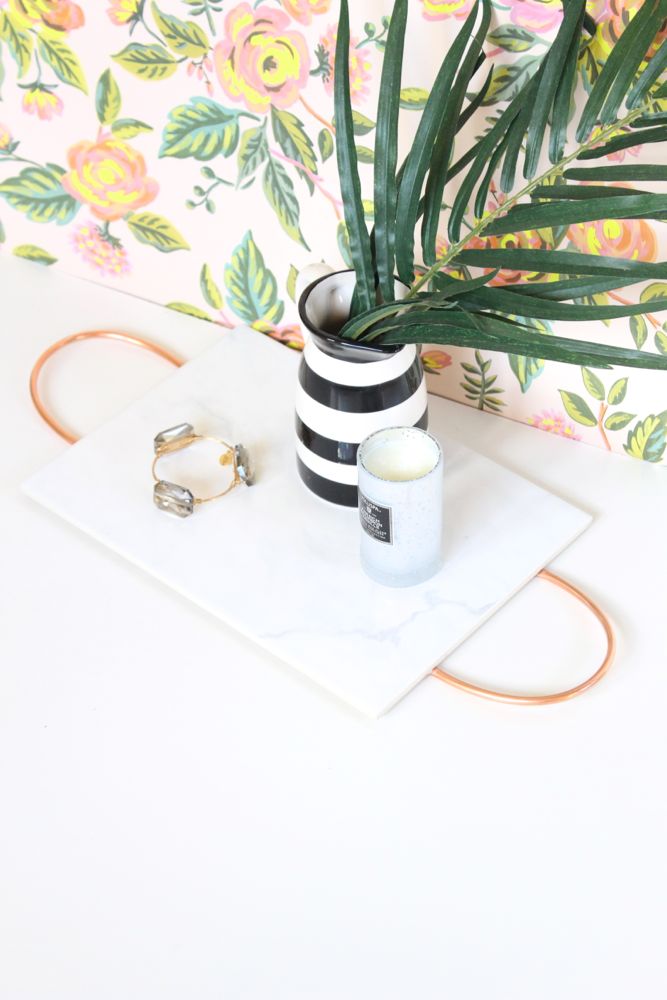
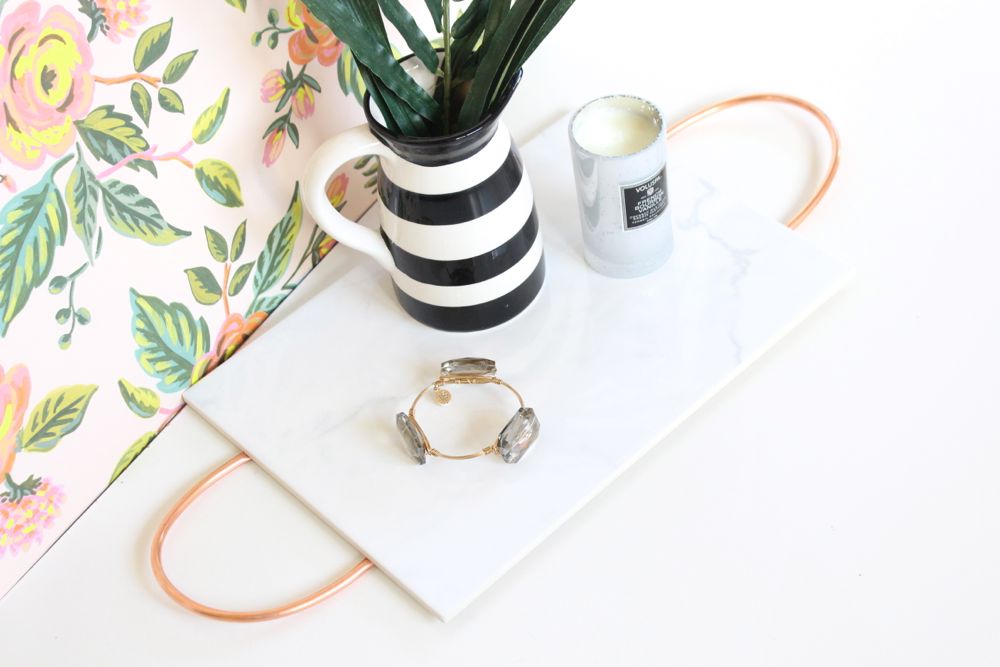
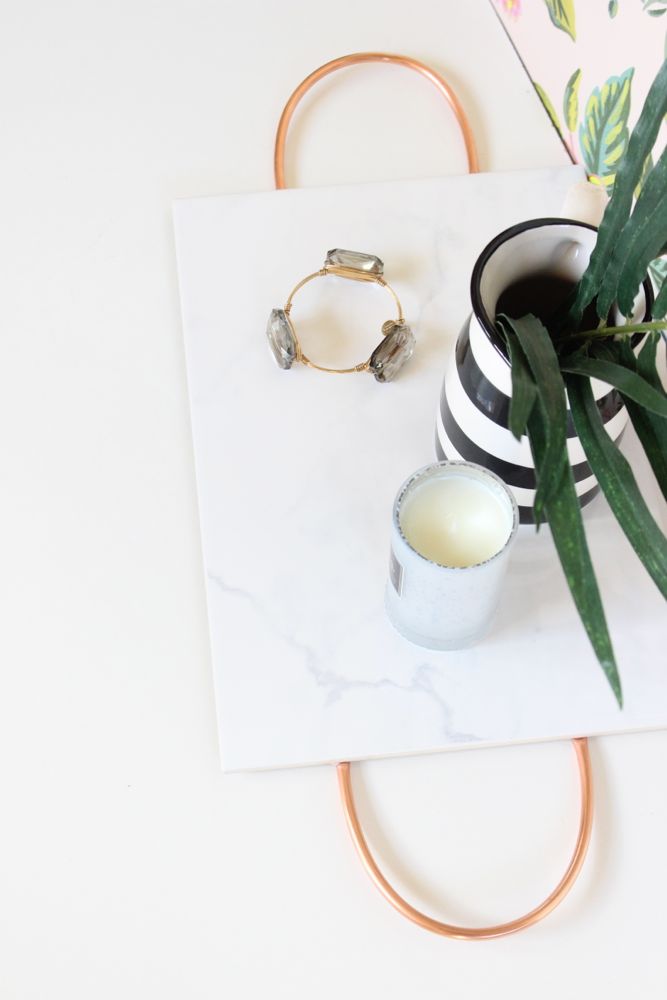
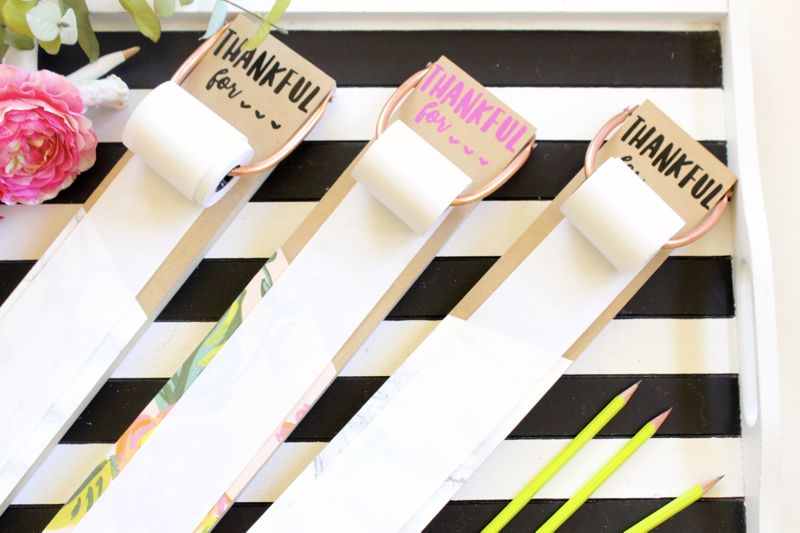
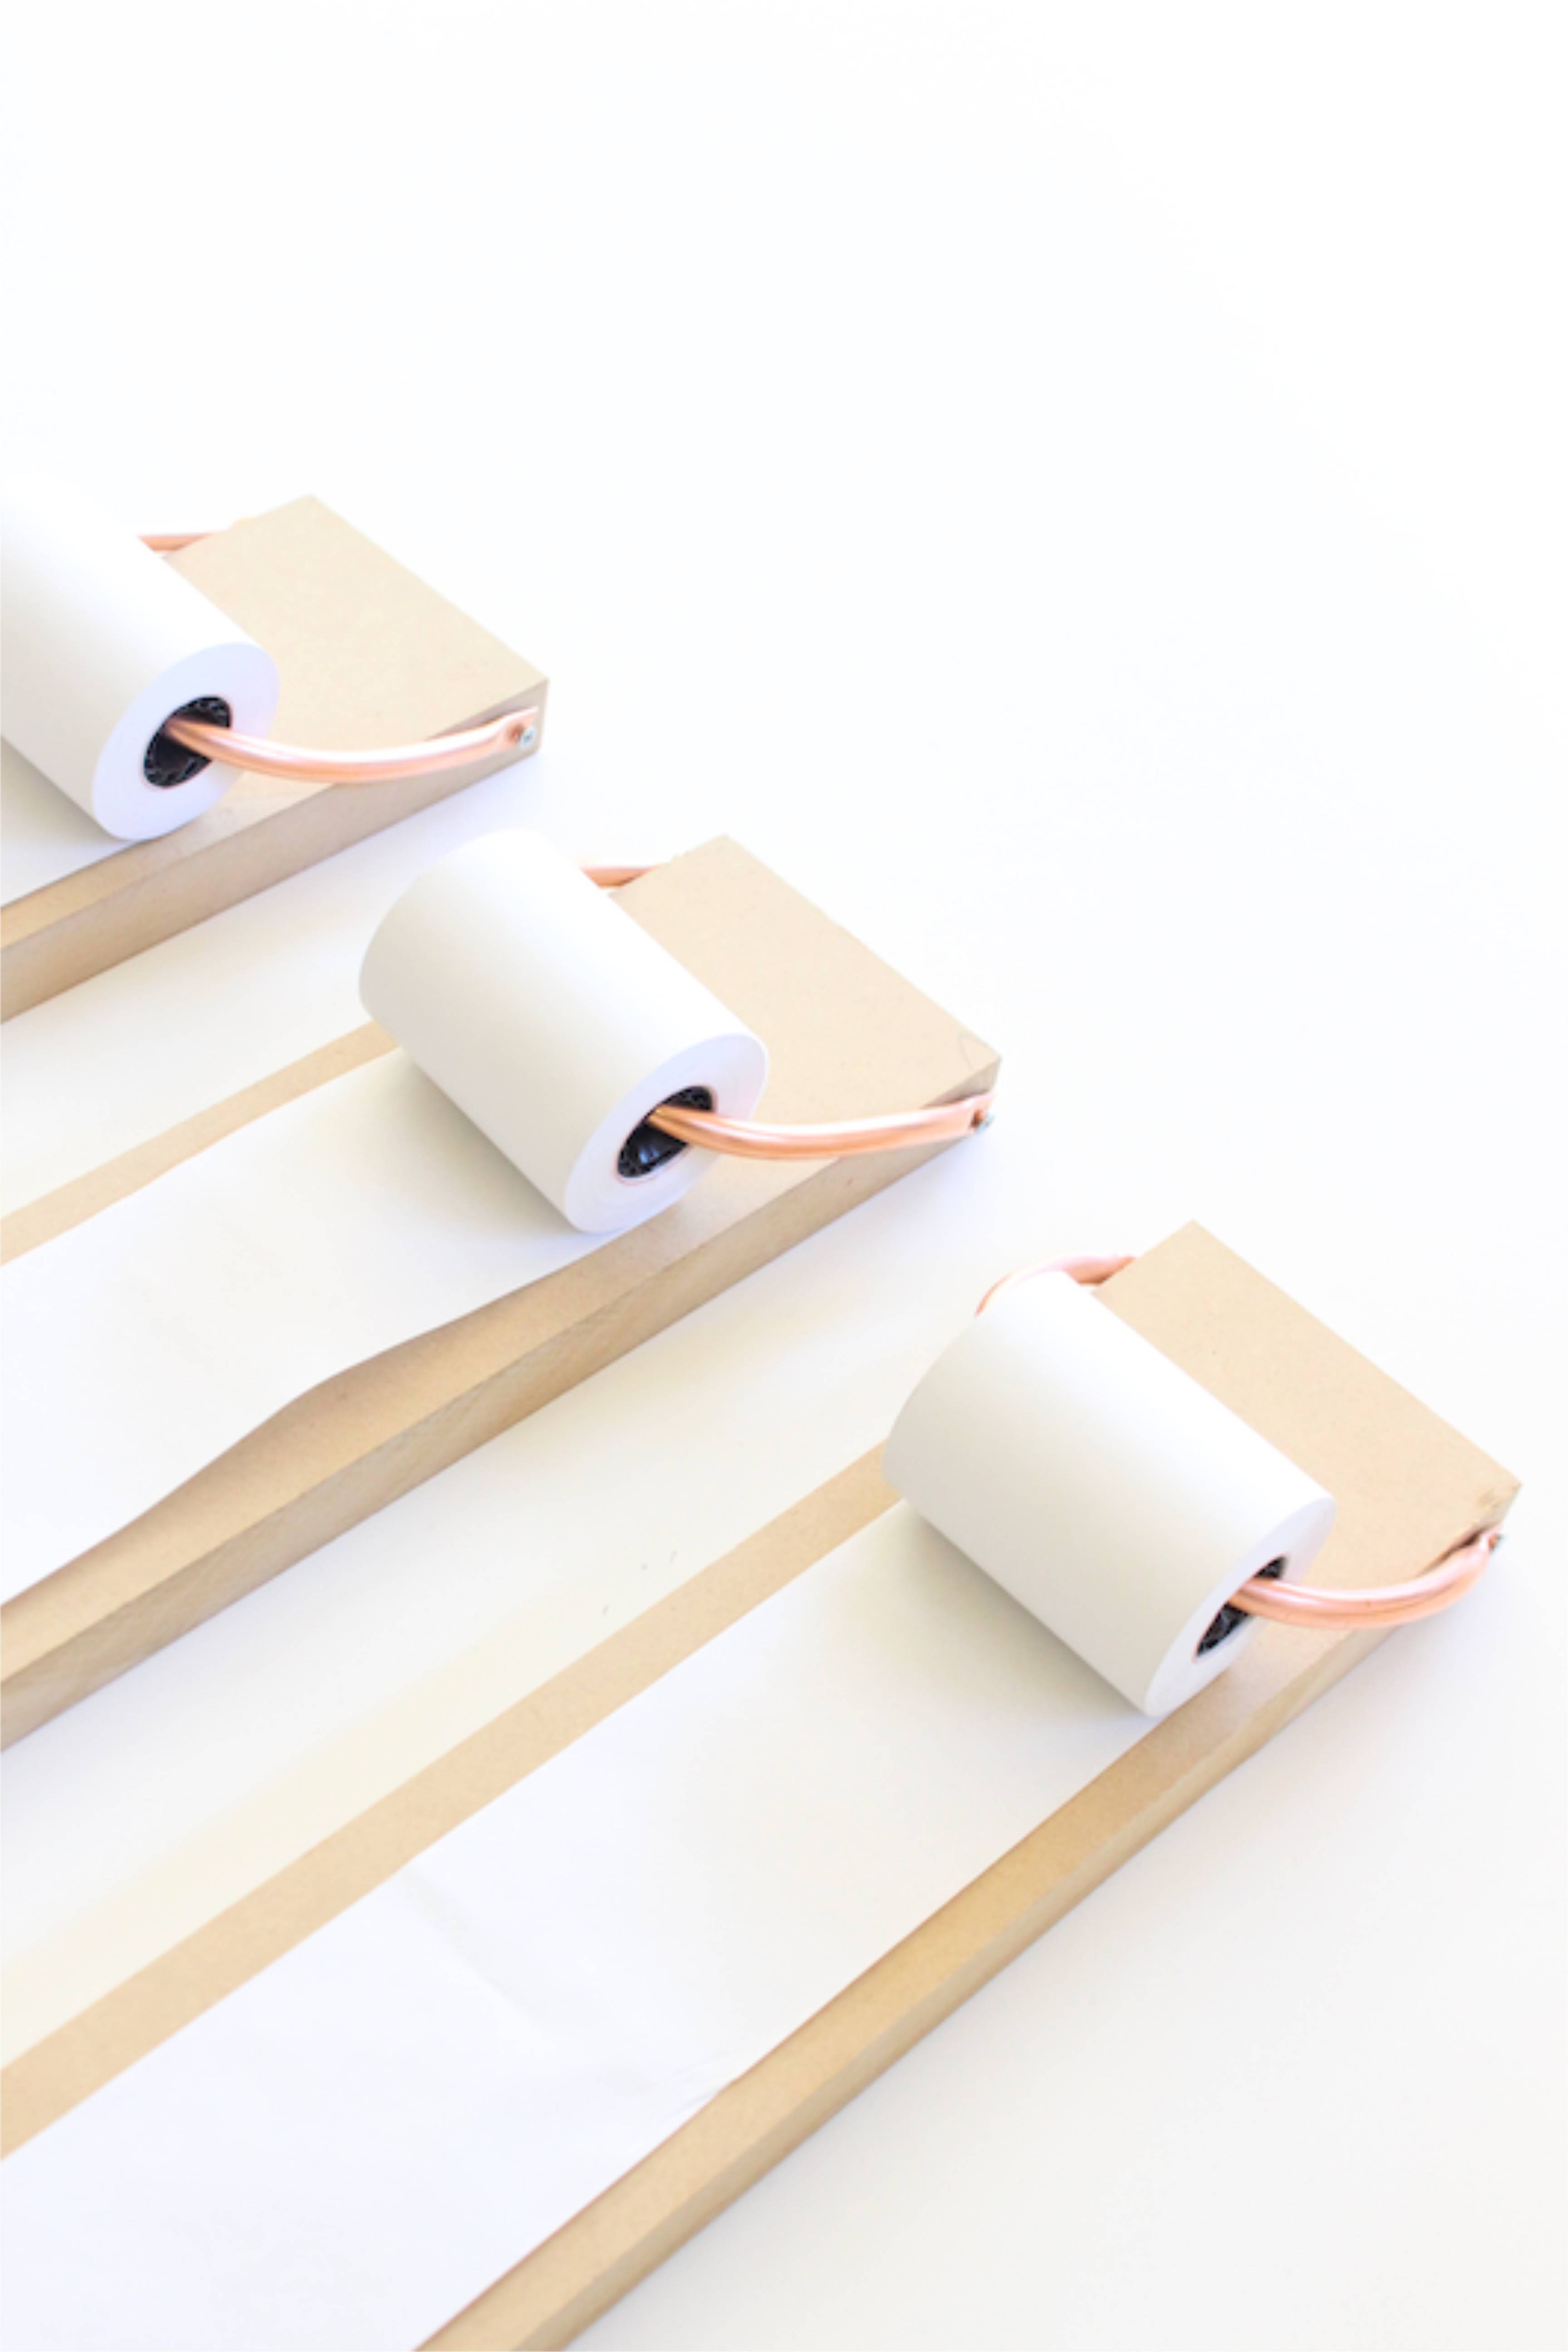
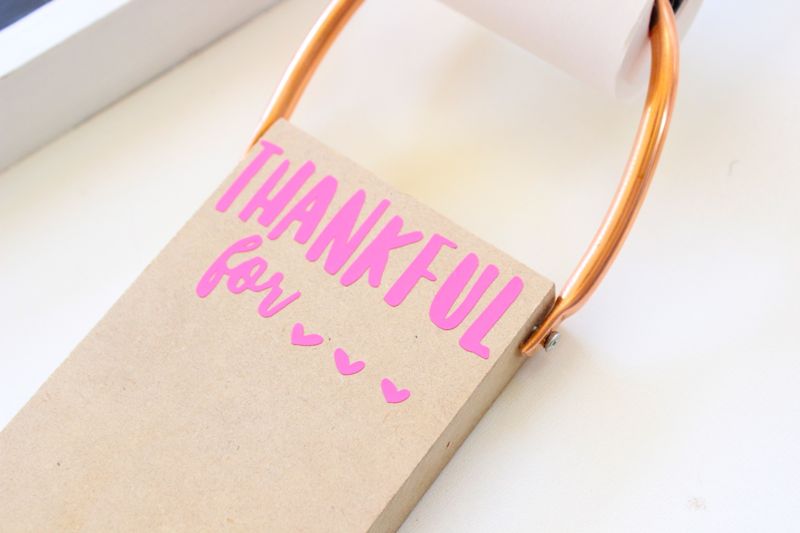
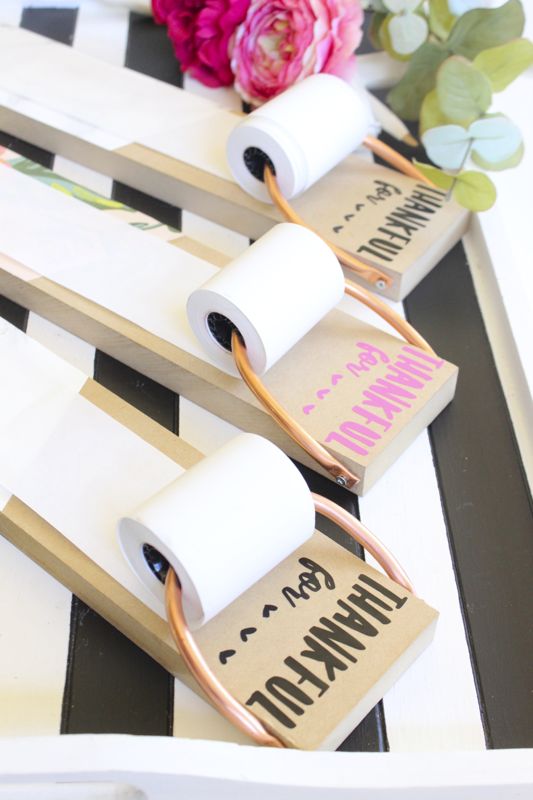
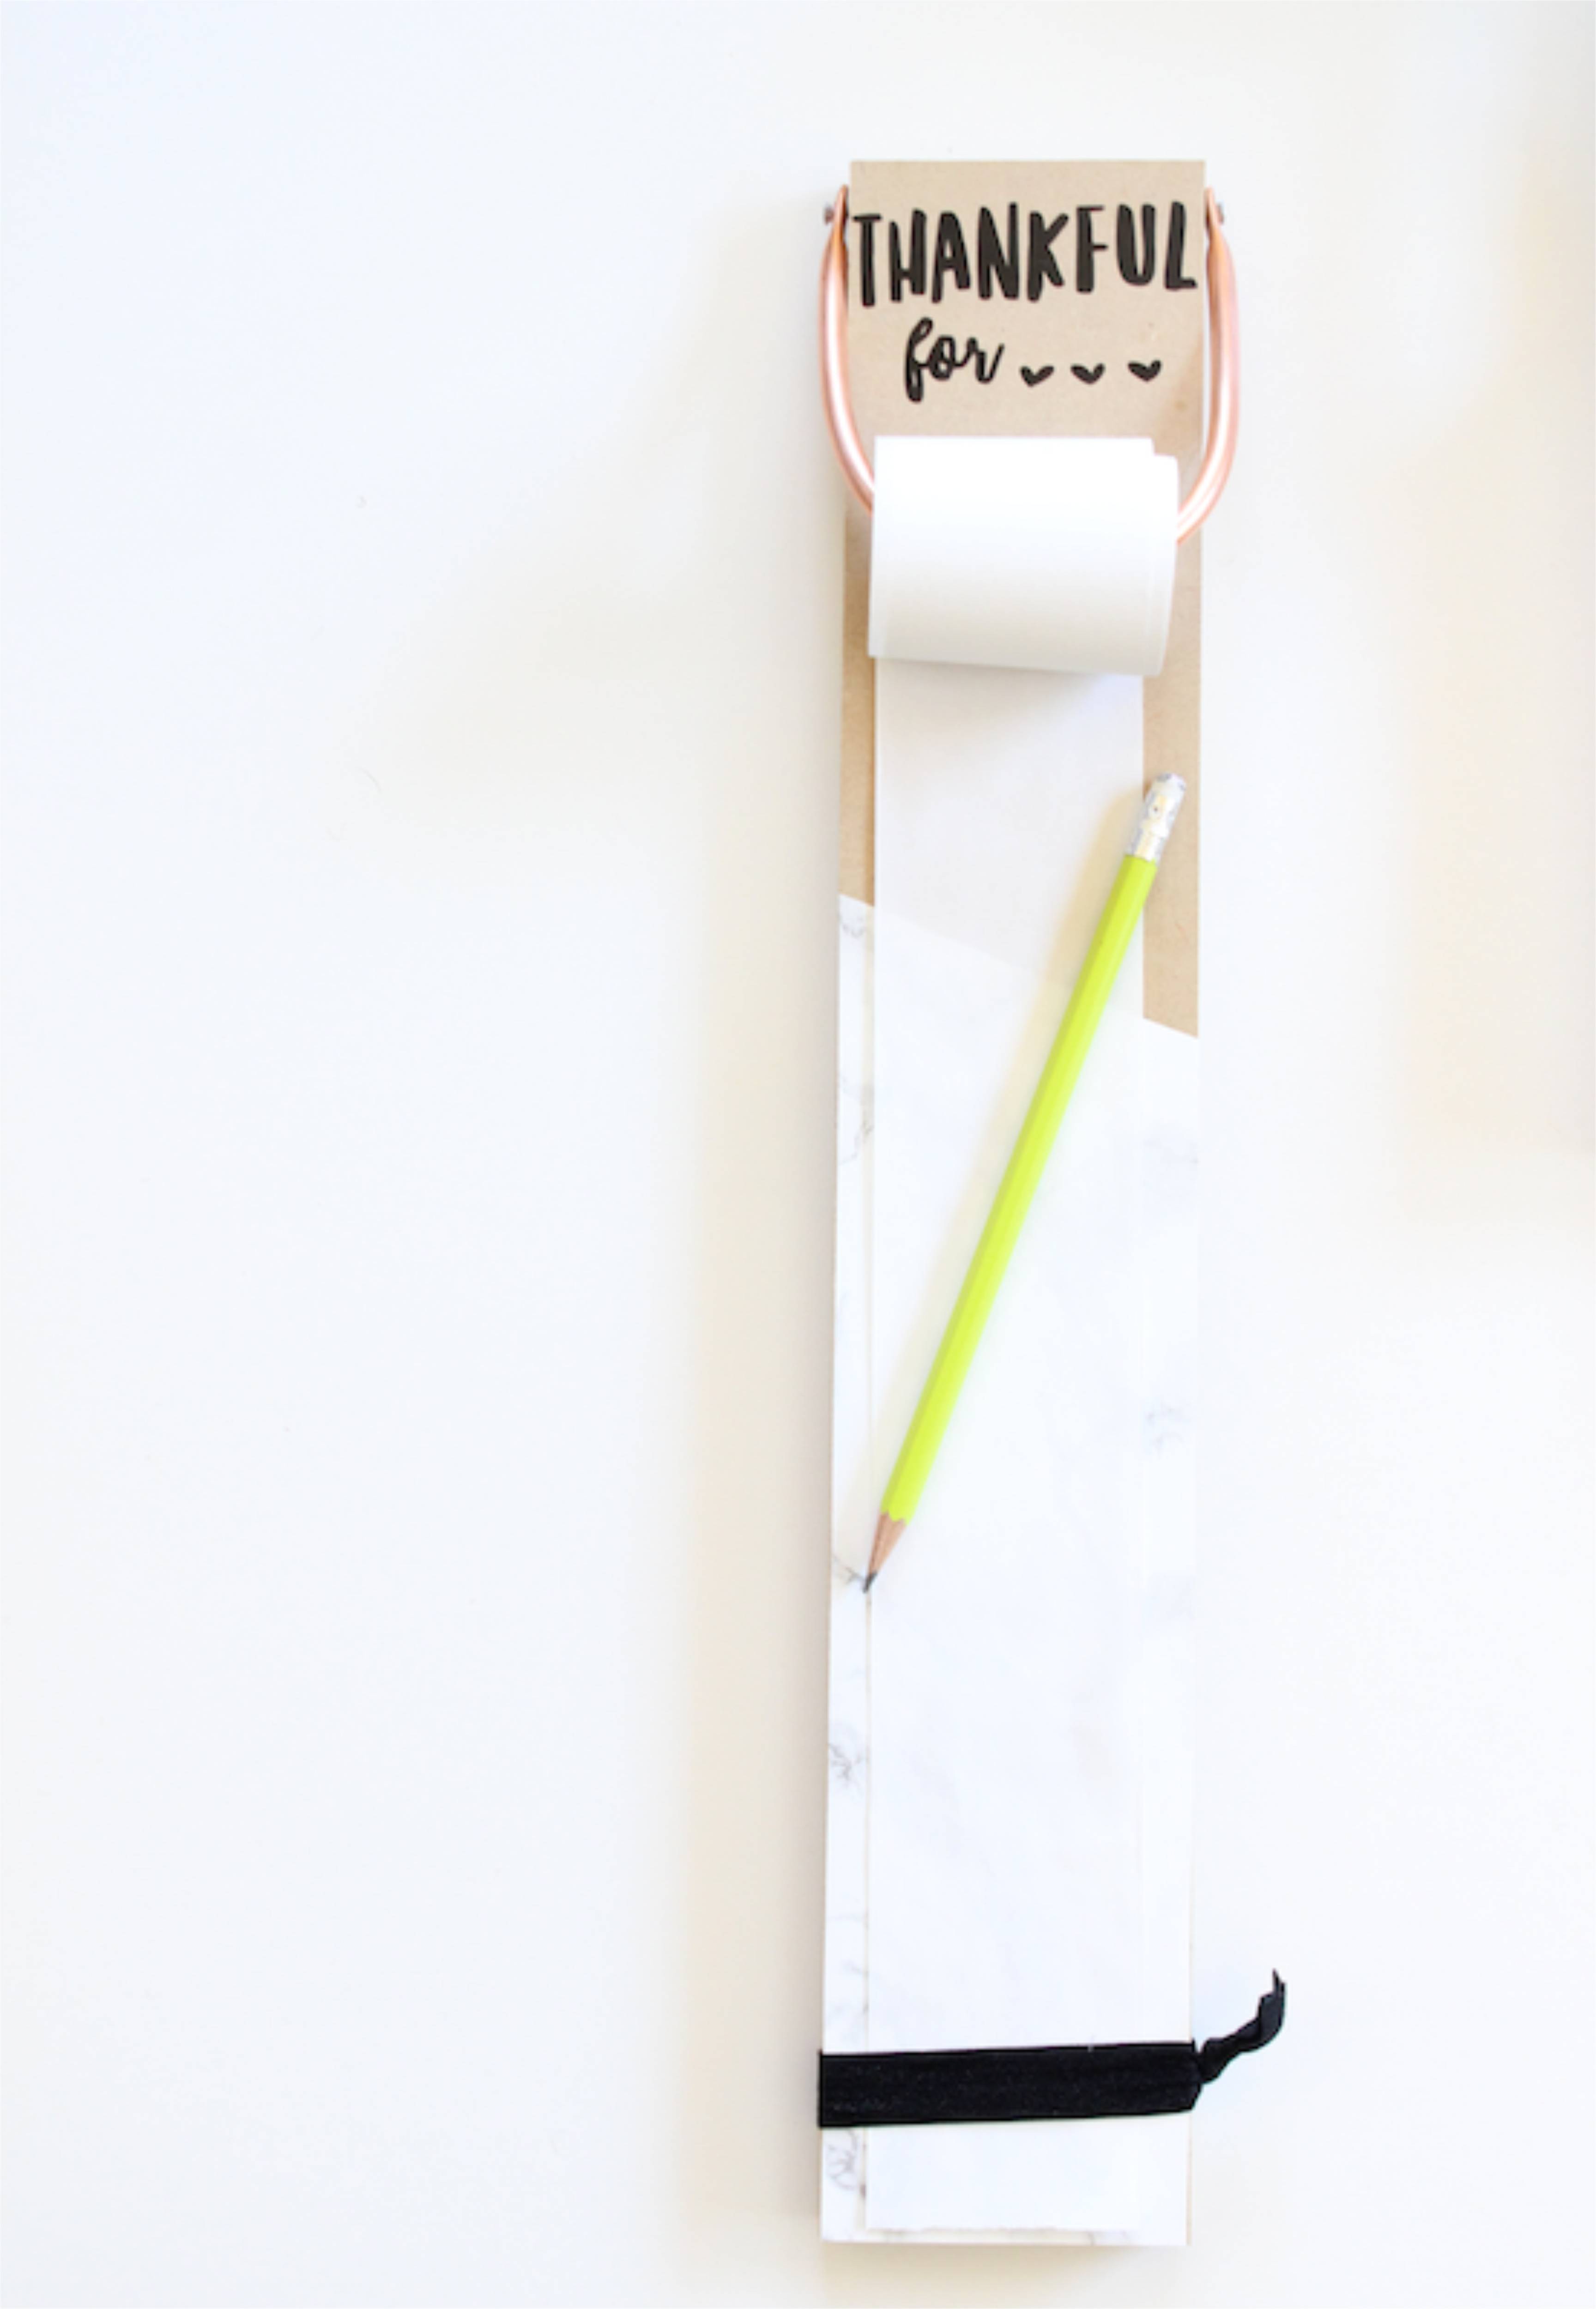
We have an easy and cute DIY for you to note all the things you’re thankful for in your life on a daily basis. It’s a DIY list pad; a I’m Grateful for List Pad, to be exact. The scroll means the list can go on and on, and it’s decorated with faux marble and Rifle Paper Co. paper, so it’s pretty to look at…which means it can be carried around with you, or left in a public area of your house.

Here’s how we did it!
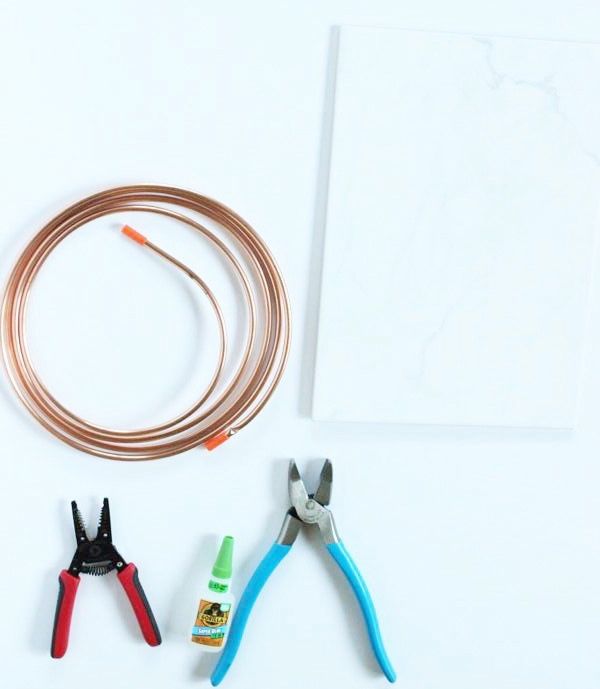
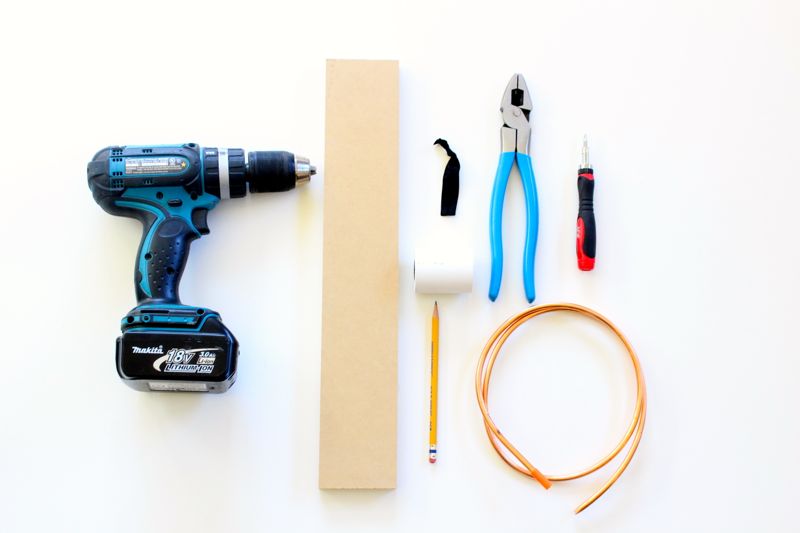
Materials:
- wood, semi-thin and smooth
- Pliers
- Thermal paper roll, 2 1/4″ x 85′
- Tiny screws
- Drill
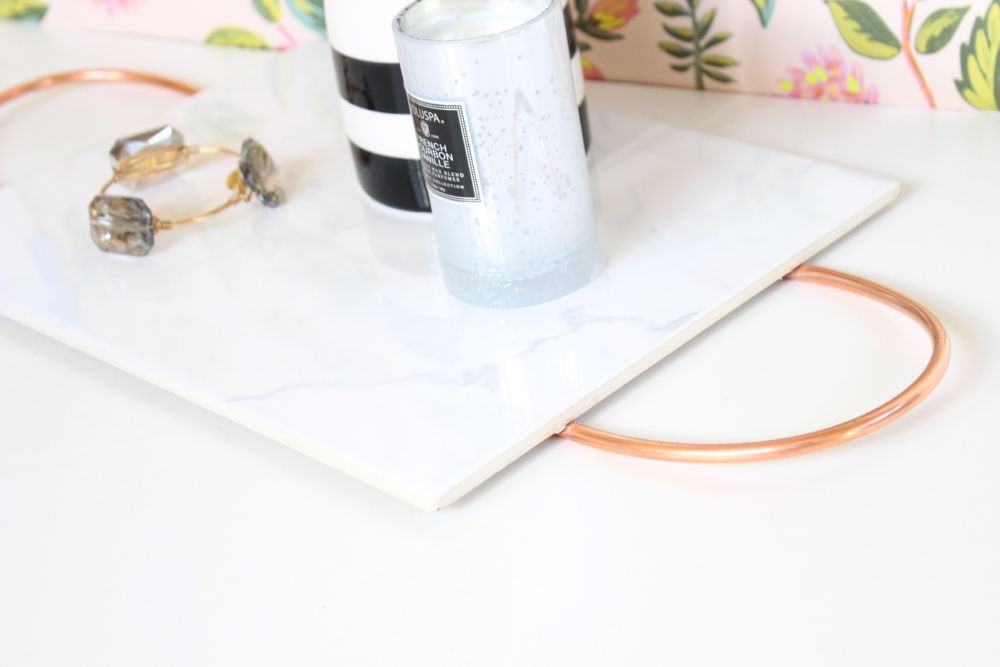
- Copper Coil, 1/4 inch, Home Depot
- Silhouette America CAMEO 3 cutting machine and vinyl
- Rifle Paper Co. Wrapping Paper
- Goody Ouchless Ribbon hair ties
- Marble Contact paper
Directions:
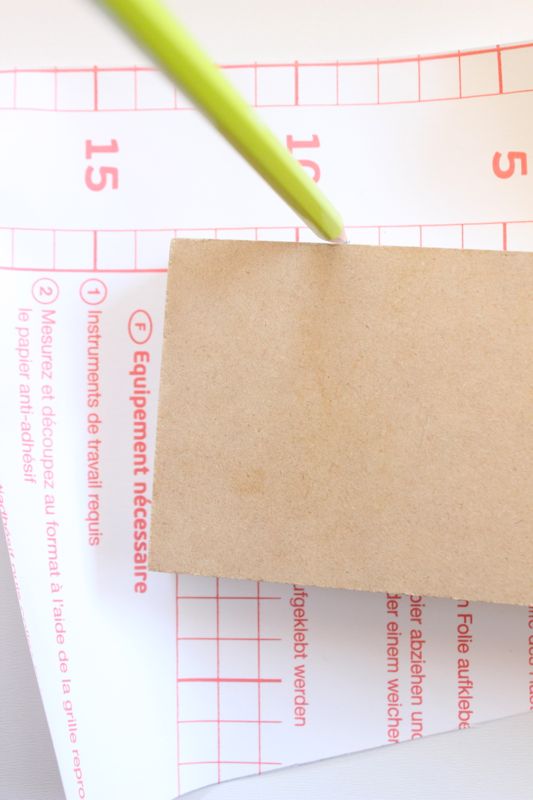
Step 1: Cut wood to dimensions you want. Our wood is about 3 inches x 15 inches. Home Depot was amazing and did it for us in-store for free. Gather all other materials.
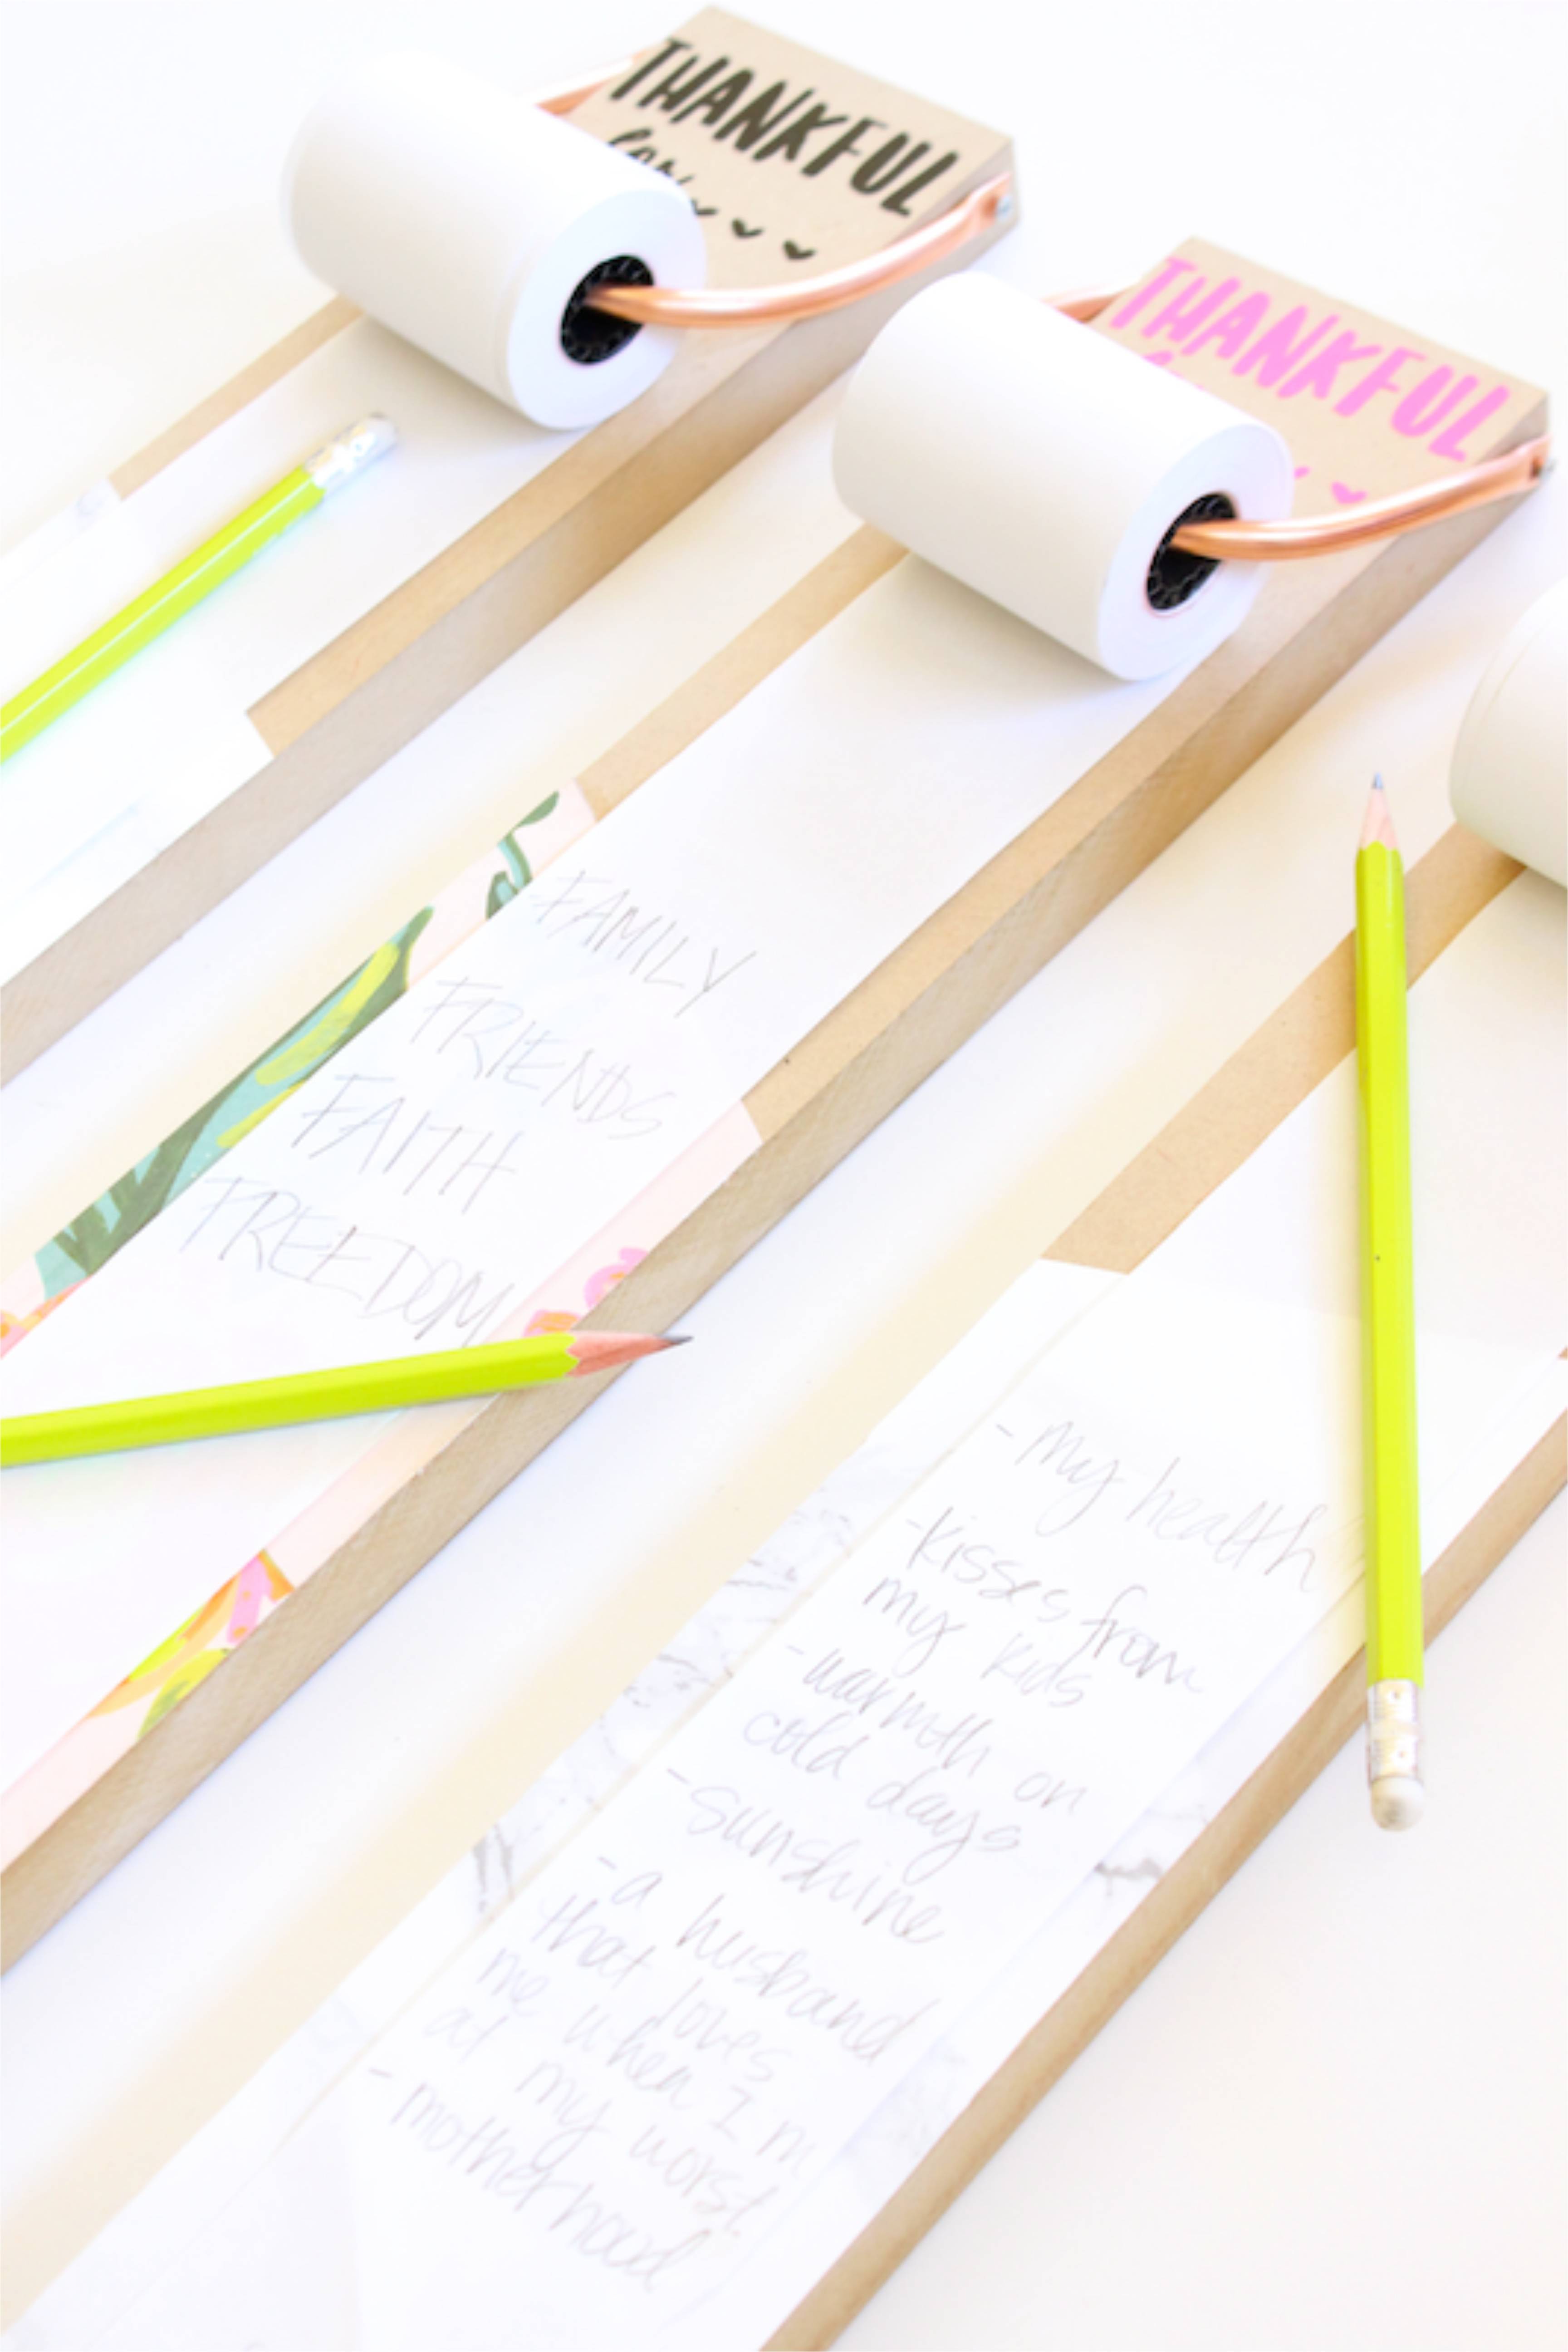
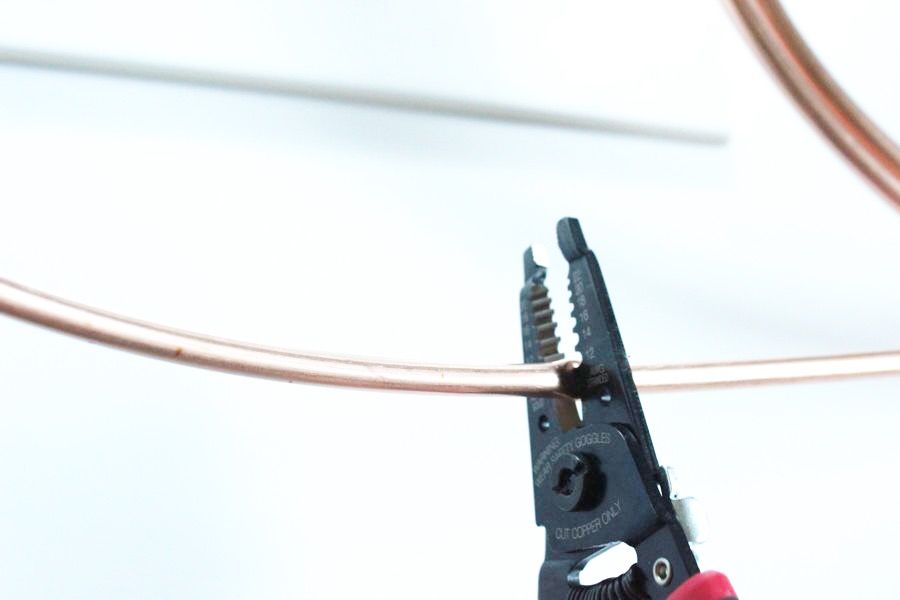
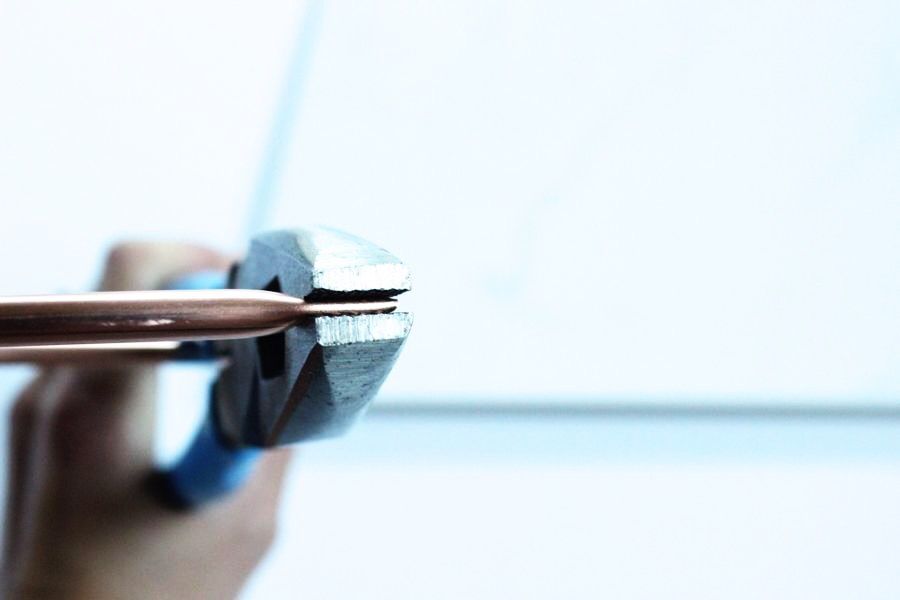
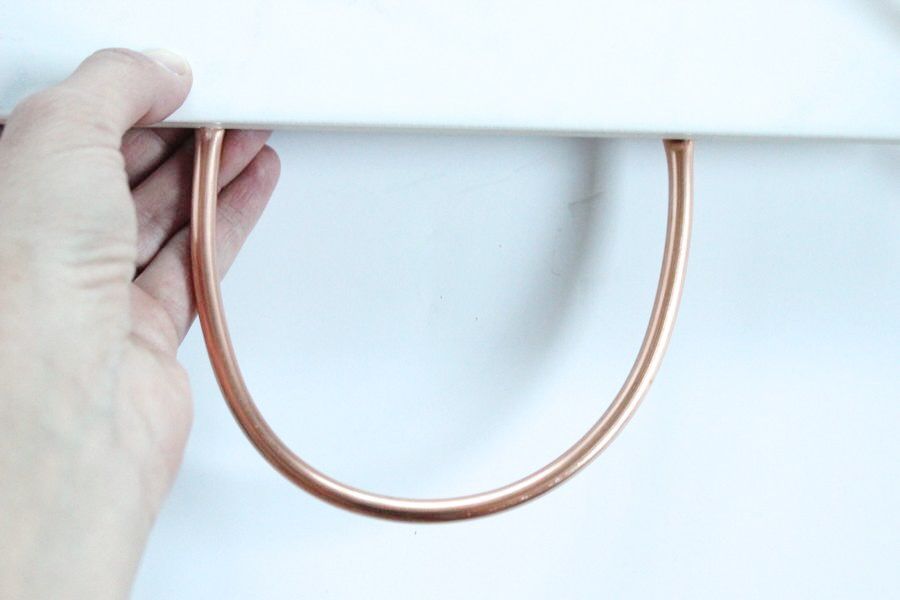
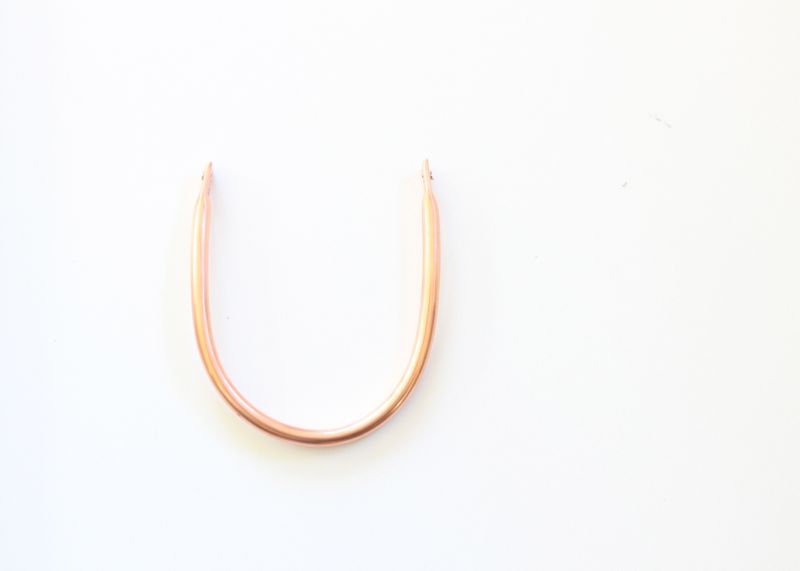
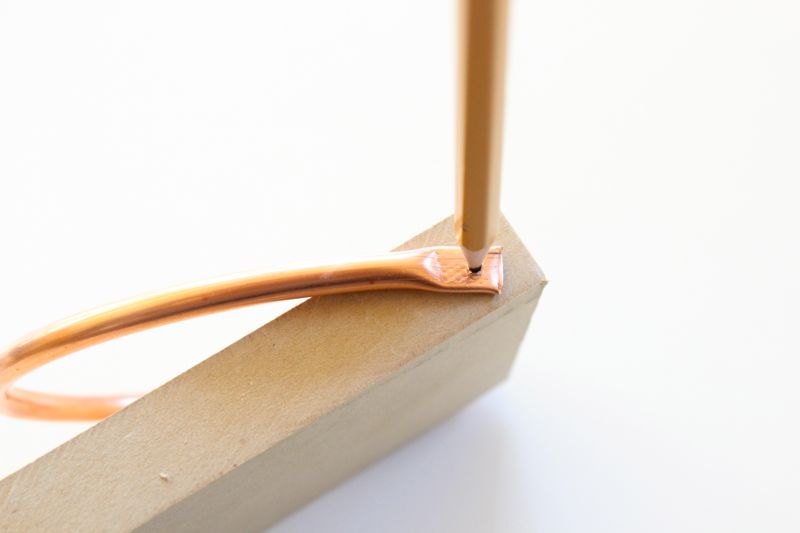
Step 2: Cut copper coil with pliers. Measure {eyeball method} the amount you will need for a U shape to reach from the left side of the wood to the right. Test out the width of the copper on the wood, and trim it down if need be. We liked the copper to hang down from the top of the wood in a U shape, so we could include the vinyl text on top.

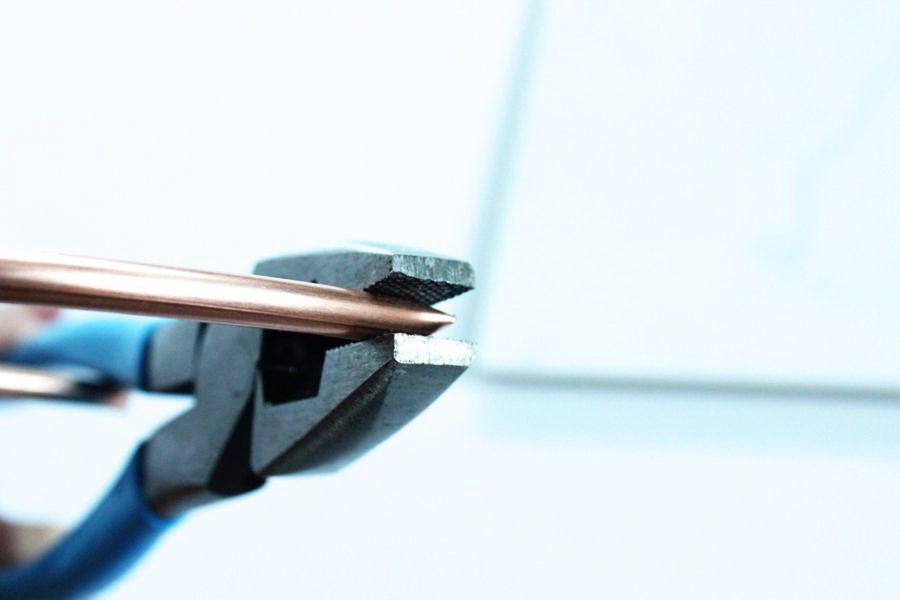
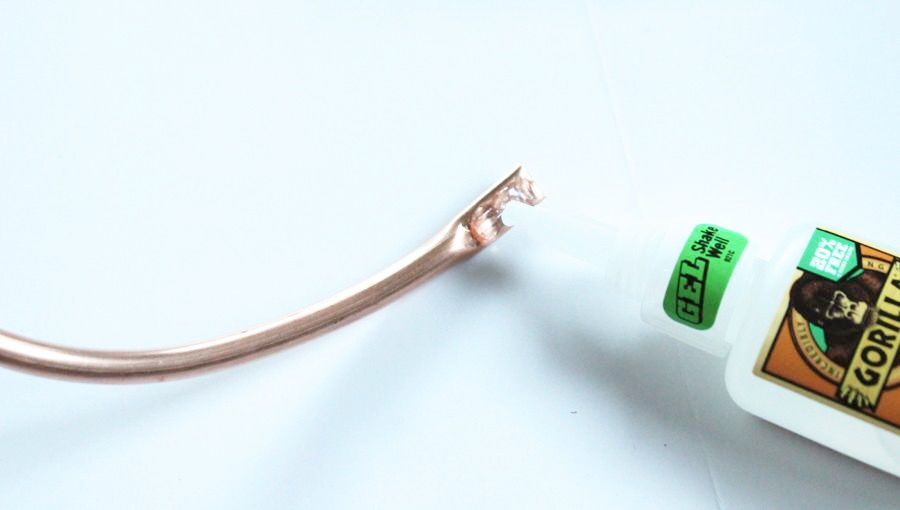
Step 3: Gently bend the copper in a U shape. Do not bend it into a V because it is difficult to re-shape. This step is easy, and even small muscles can do it. Use the pliers to flatten both sides of the copper so it aligns right next to each edge of the wood.
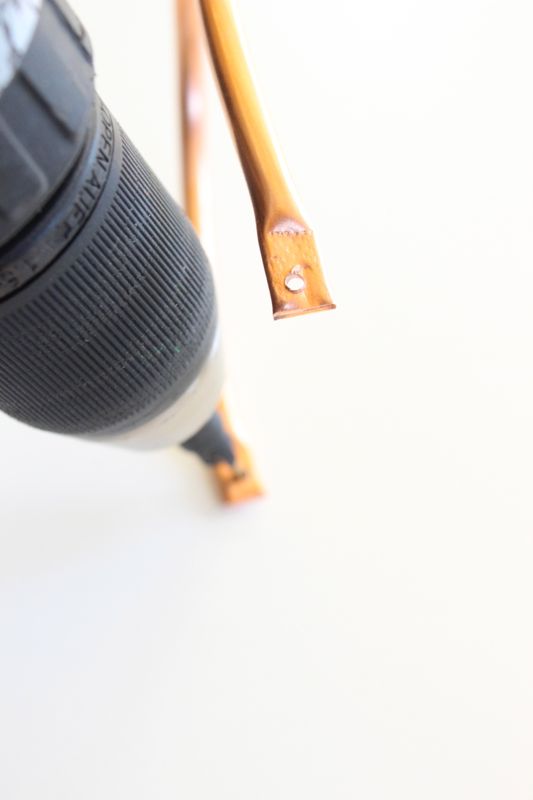
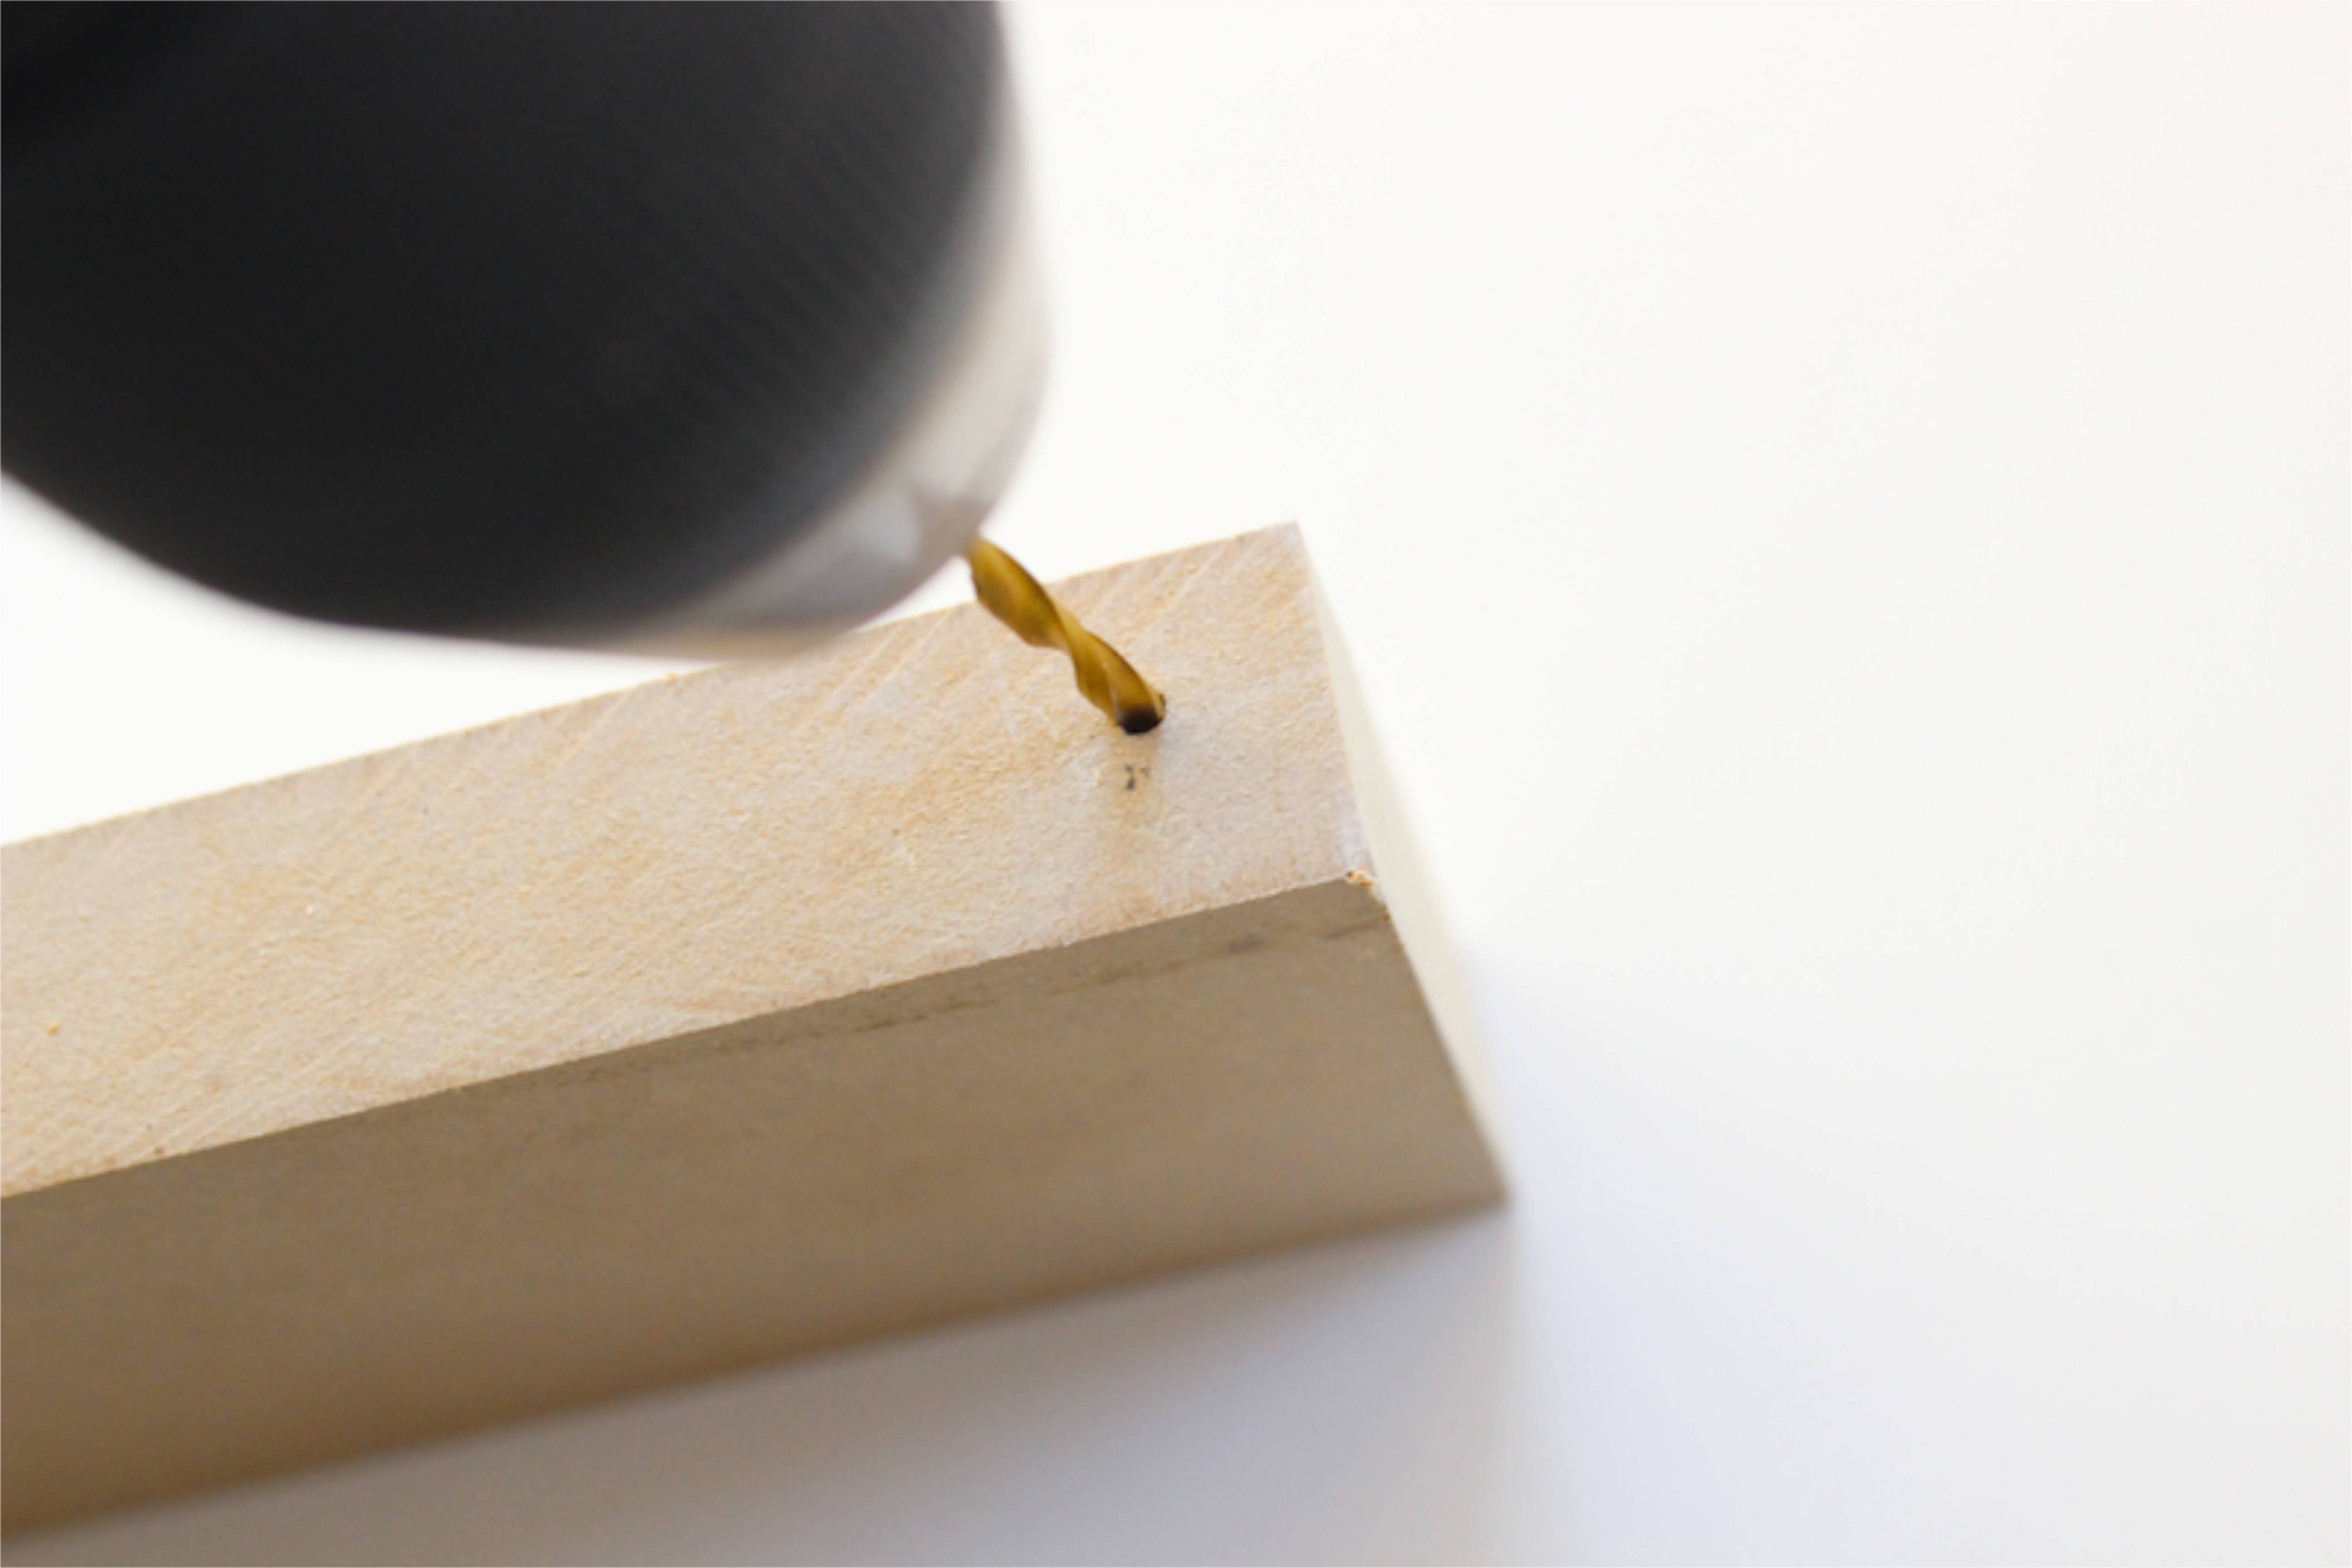
Step 4: Use a drill with a small metal bit to make small holes on each side of the copper, in the center of the flat part. Press down firmly as you drill so it doesn’t move in the middle of your drilling.
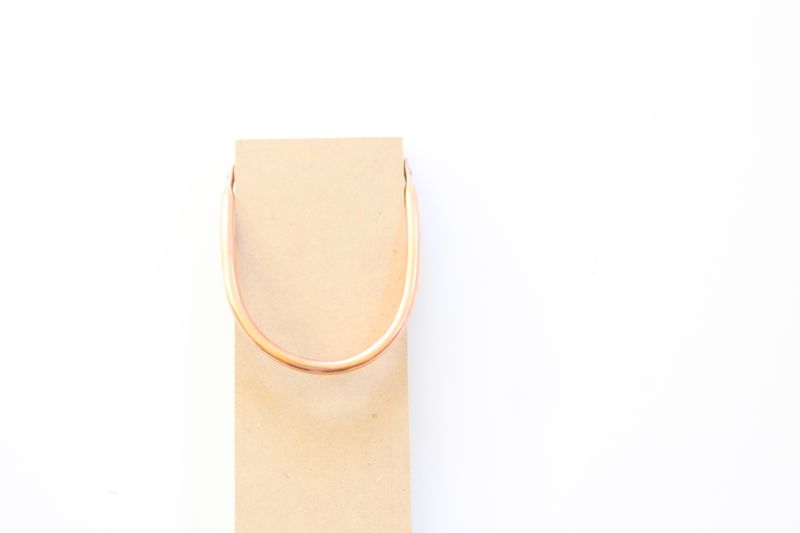
Step 5: Align the copper piping just the way it will sit on the wood. Use a pencil to mark the spot on each side of the wood, so you will know where to drill the holes to screw it in place.
Step 6: Drill ‘pilot’ holes in the wood on the pencil marks. Do not drill the entire length of the screw, only about ¼ size of the screw, so you can screw in the screws the remainder of the way. Pilot holes guarantee your screw won’t break off and your wood won’t split.
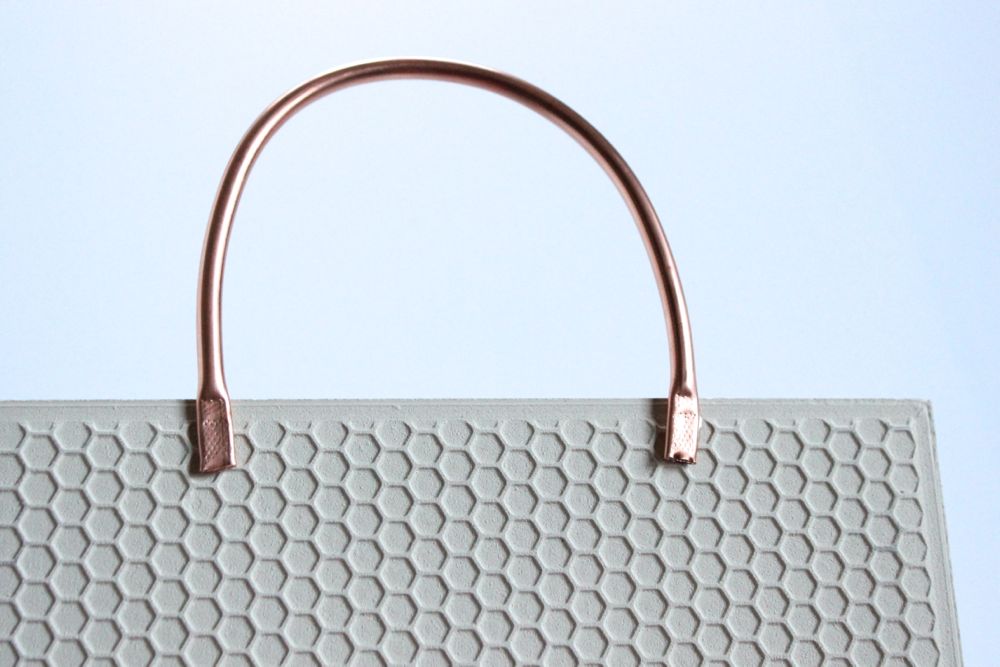
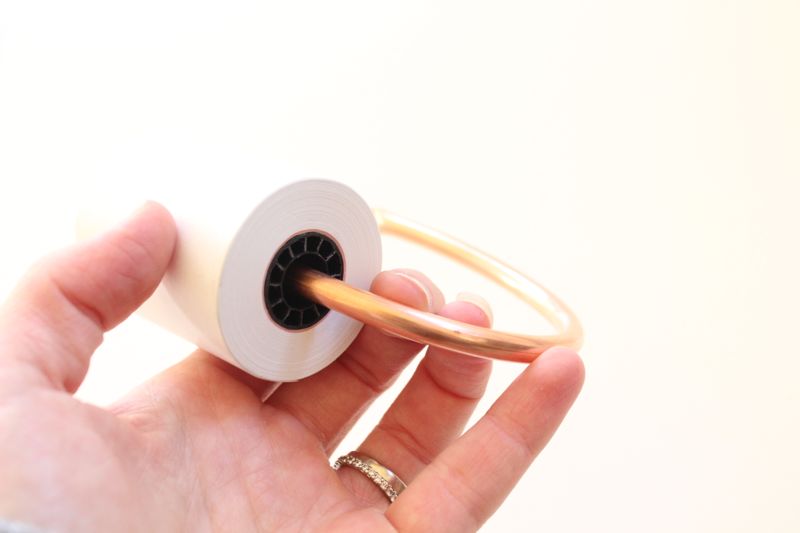
Step 7: Insert one end of the copper piece through the center of the thermal paper roll and push it until the paper roll is on the center of your U-shaped copper piece. Make sure the paper roll {the way it rolls out on the wood} lies flat on the wood, which will be easier to write on.
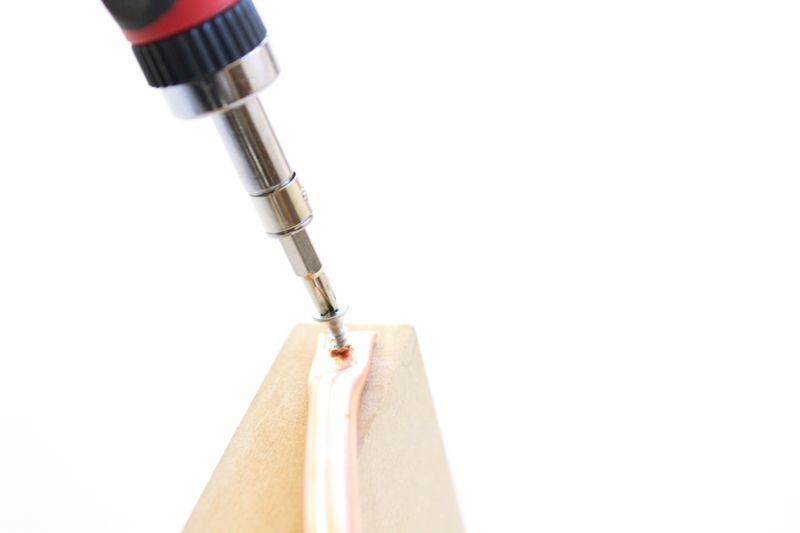
Step 8: Align each end of the copper to the holes on each side of the wood, and screw the small screws into the holes.

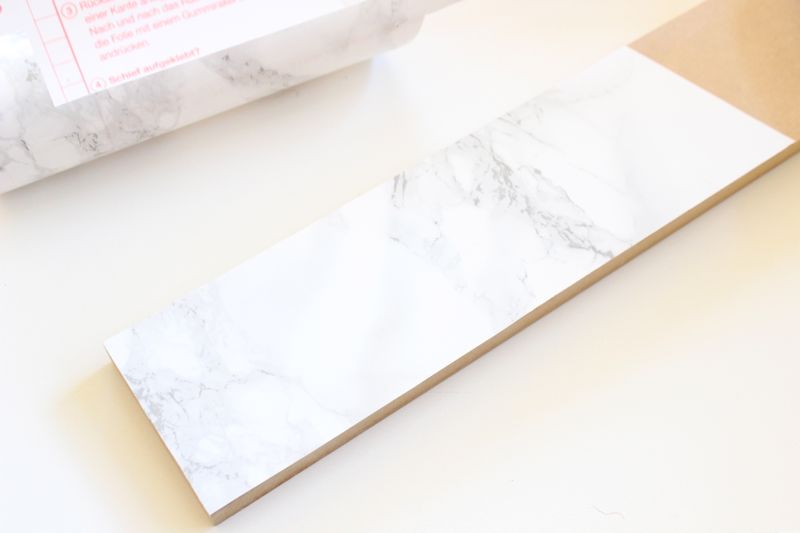
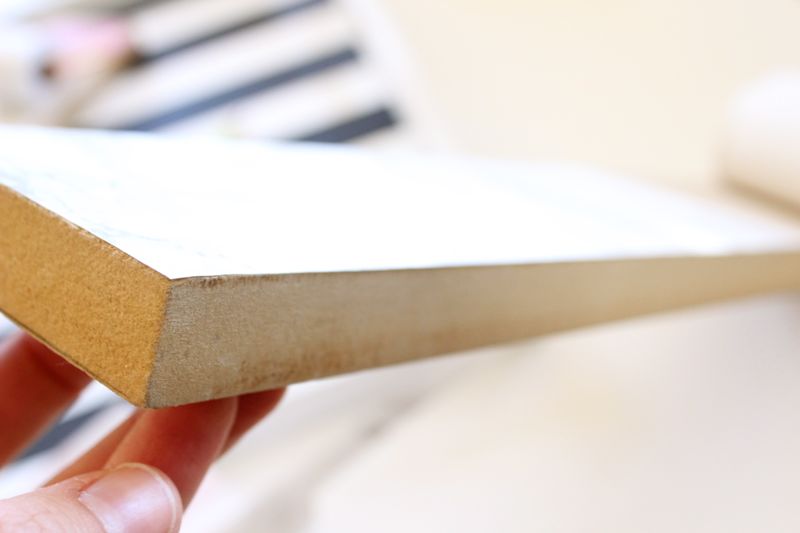
Step 9: Trace the wood on the back of the Rifle Paper Co. wrapping paper and the faux marble. Add an angle on the top for a color-block effect. For the marble, cut the piece out, remove the backing and stick onto the wood. For the wrapping paper, cut it out, apply a thin layer of Mod Podge to the wood and the back of the wrapping paper. Place it on the wood and use a straight edge to make sure there are no bubbles. You can add a layer on Mod Podge on top of the paper if you want. We chose not to.

Step 10: Design a Grateful for design on the Silhouette Software. Follow the vinyl instructions on the box, and look at a previous post here to see how we do it. Add the vinyl on the top of the wood.
Step 11: Pull the paper down to the bottom of the wood. Wrap the hair tie around the bottom of the wood to keep the paper in place.
Step 12: Begin to reflect and write down all that your grateful for. Make it a part of your daily routine and it will change your life for the better. Do it once a day, twice a day or three times a day – just do it. Thanksgiving is a great time to start.