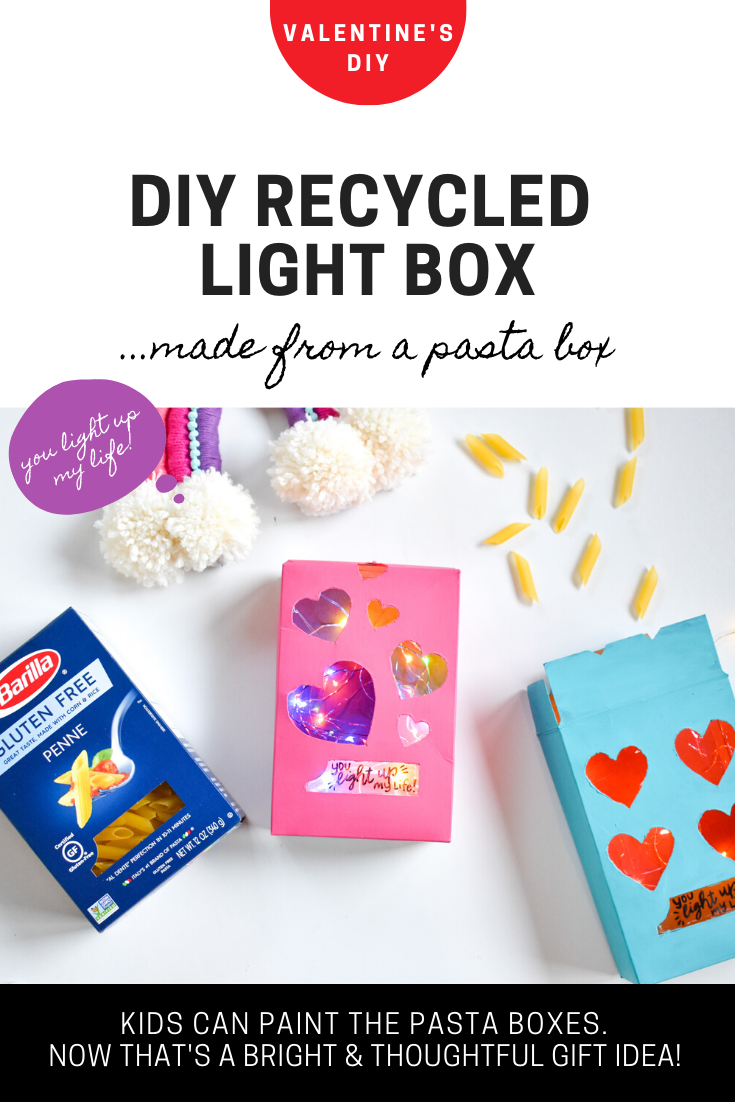
We are Italian, so we eat a lot of pasta. It’s our love language. We still dream of all the delicious pasta we ate everyday in Italy. We love to cook pasta for our families, too. Whether it’s with red sauce, or a creamy pesto sauce, and topped with meat or vegetables, we love to cook it…and devour it. Most of us are gluten free, and initially (years ago), pasta just wasn’t the same. Now, there are so many wonderful gluten free options at the store, we cannot even tell the difference. It’s so yummy. Barilla is hands-down our favorite. It tastes delicious, and it’s easy to cook. Plus, we can buy spaghetti noodles, lasagna no-boil noodles, penne and more! This post is not sponsored by Barilla (we genuinely love their products), although we would love to make some recipes sponsored by them. Hint, hint!
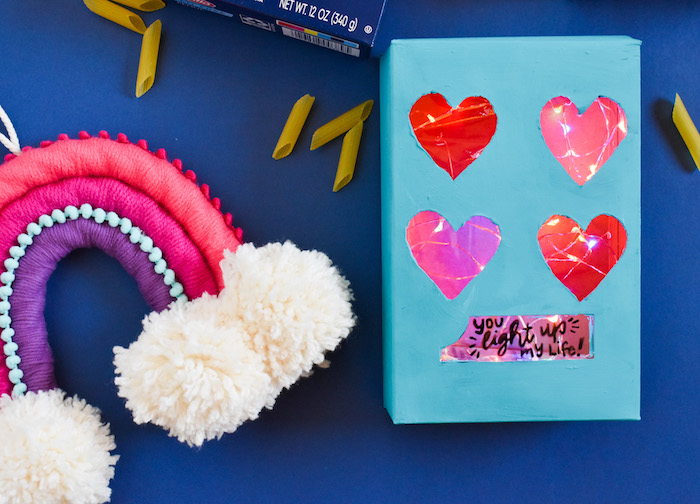
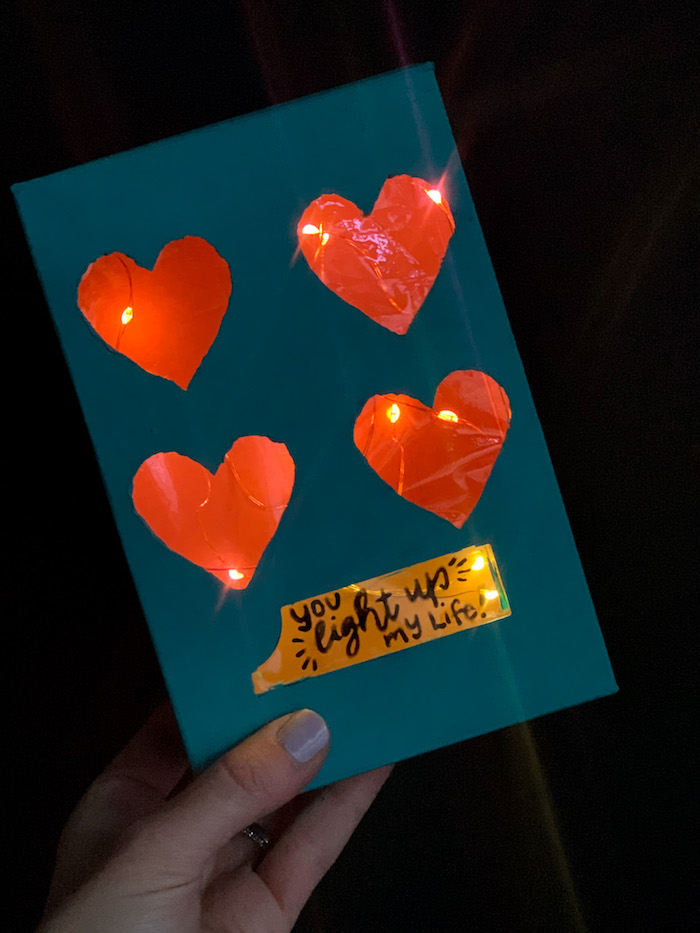
Recently, our Barilla gluten free penne box not only inspired a meal, but also a craft. We recycled the box, and transformed it into a DIY light box for Valentine’s Day. Now, that’s a bright idea worth sharing! The kids helped paint the boxes, and we cut the hearts, so it was a family effort. This DIY project costs very little money, it can be shipped to a loved one, aka grandparents, easily because it’s very lightweight, and when lit, it’s magical. It’s hard not to feel the love when those lights comes on inside the box. If you have little ones that want to continue crafting after they decorate the box, save some noodles, and paint them too. Send a pretty DIY necklace along with the box.
Let’s get started…
Materials:
- Barilla pasta box
- Acrylic paint (optional: glitter and stickers)
- Paintbrush
- cellophane paper
- Xacto knife
- double-sided tape
- twinkle lights (remote-operated, color or white lights work)
- Paint pen, Elmer’s, fine tip
Directions:
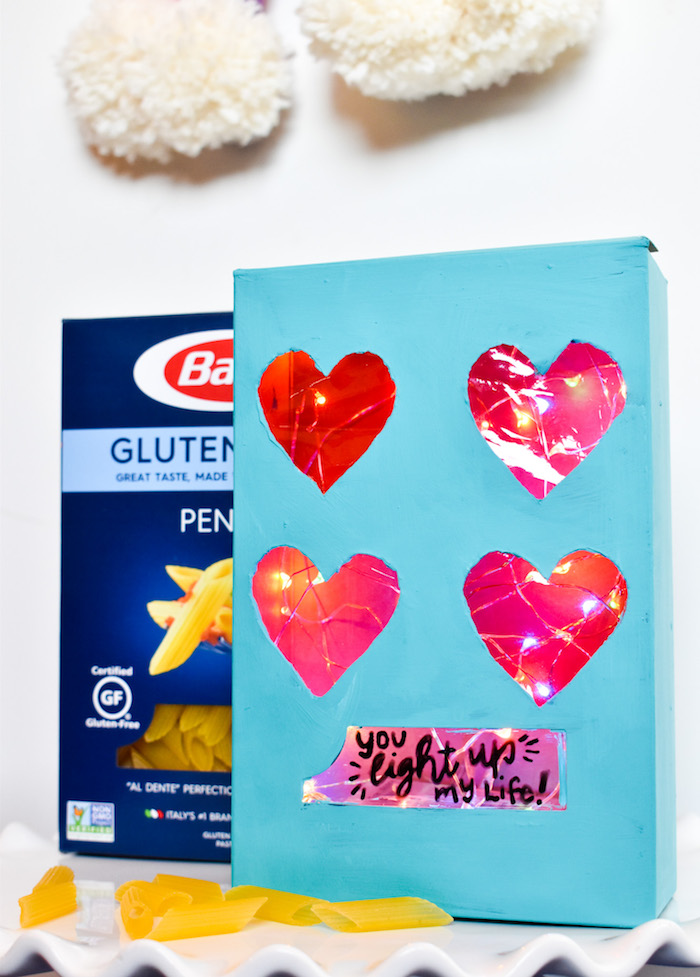
Step 1: Find a heart printable on the internet. Print it. Tape it on top of the box, and begin to cut with the Xacto knife.
Step 2: Paint the box. Two coats is best, depending on the saturation and paint color you choose.
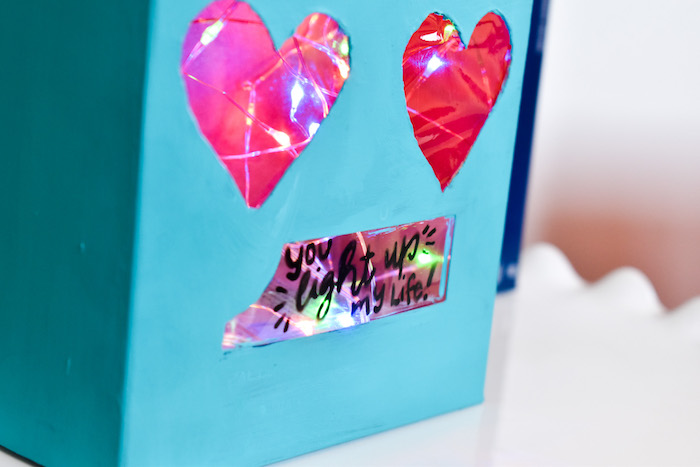
Step 3: Once paint is dry, cut small boxes of cellophane sheets to match the size of each heart. Place the small square over the heart, to make sure it fits. Add a small square of double sided tape to each corner of the box. Now, carefully use your fingers to place the cellophane box inside the pasta box behind the heart you sized it for. Press down on each corner so it stays in place. Repeat until all the hearts have a colorful cellophane sheet behind them.
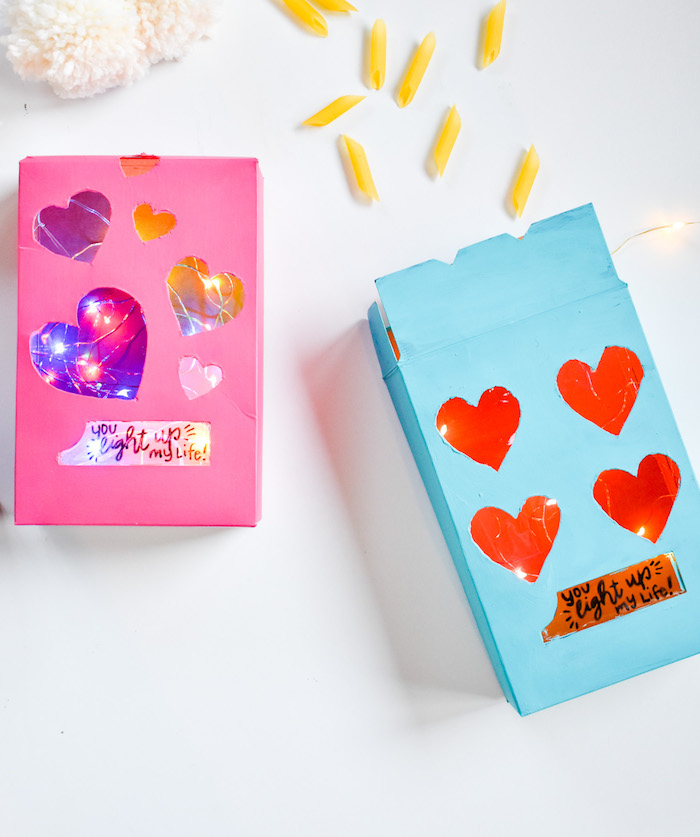
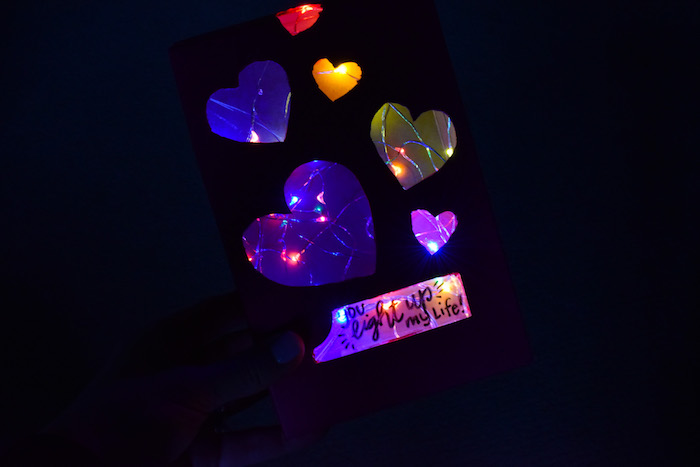
Step 4: Place twinkle lights inside. Move them around as you need. As far as twinkle lights go, the colorful ones were the brightest, and we liked them the best. But, white lights are pretty, too. These are so small, the battery pack can be glued inside the box, but not sure they will be the brightest due to 20 fairy lights on each string. If you use a small pasta box, these would work great, and you get more of them, so more bang for your buck.

Step 5: With the paint pen, add a cute phrase like, “You light up my life.” on the bottom clear cellophane strip already on the pasta box. If you want to make it extra special, you can add a photo behind one of the hearts, too.
Happy Valentine’s Day!
This post contains affiliate links. If you purchase any of the items, we may make a small commission, at no extra cost to you. Thanks for supporting our family blog.