DIY Woodland Winter Cake Topper

chocolate-cake-wood-slice-rabbit-tree-white-joy-sign-diy-cake-topper

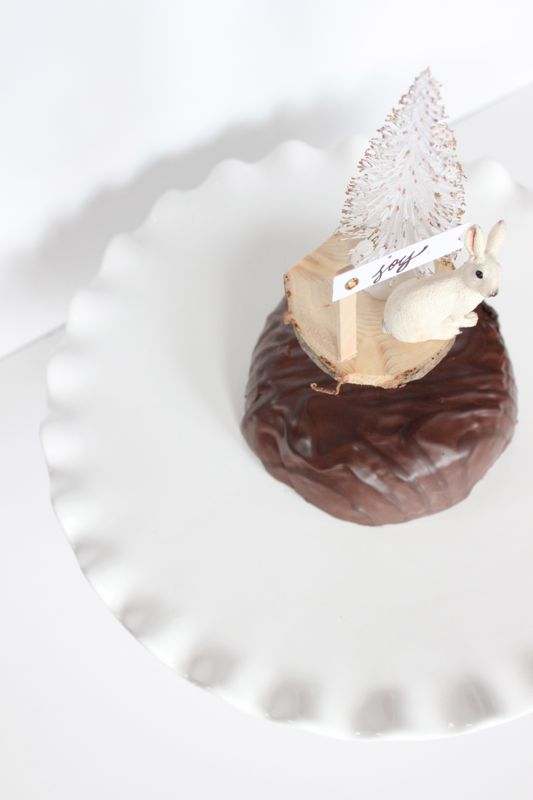
We are experiencing a love affair with bottle brush trees and wood slices this winter. And, as usual, crushing on white and gold, too. Our kids think Christmas is tomorrow with all the holiday blog projects lying around the house – it’s a tease for them, and almost an overwhelming reminder of the upcoming holidays for us. At least they get to enjoy some of the benefits of shooting a DIY winter cake topper – shoot the cake, and eat it too.

chocolate-cake-wood-slice-rabbit-tree-white-joy-sign-diy-cake-topper

If you’re celebrating a winter birthday, or want to impress guests this holiday season with an adorable DIY winter cake or pie topper, just go out and chop a tree {you can buy them already cut from Michael’s if a lumberjack isn’t in your repertoire}, bust out the gold leaf paint, and glue.

Materials You’ll Need:
Wood slices
Cake pop sticks
Mini woodland animal figures – deer, rabbit, bear, squirrel
Thin popsicle sticks
Mini banner flags
Gold leaf paint
Hot glue gun

Directions:

Dab the ends of the  bottle brush tree with gold leaf paint. You can’t mess this up – just dab here, and there and everywhere.

Write a word, name or phrase on the paper banner.

Use a hot glue gun to glue the tree, animal and popsicle stick with paper banner on the wood slice. I cut the popsicle stick in half to make it shorter.

white-tree-rabbit-joy-sign-gold

Glue ‘legs’ on the bottom-side of the wood slice with the cake pop sticks that will stick into the cupcake, cake or pie.

rabbit-wood-slice-diy-cake-topper-tree-joy

chocolate-cake-wood-slice-rabbit-tree-white-joy-sign-diy-cake-topper


Easter Watercolor Bunny Tail Cups

watercolor-bunny-tail-easter-cups-pink-blue-green-cotton-diy

One of our favorite Easter memories from childhood is the year the Easter bunny brought us chicks. Yes, real live chicks. And, they were green and pink. Sounds totally inhumane, and honestly we have no idea how they did it, or whether it was permanent or not. But, all we know is that the Easter bunny brought us colorful chicks, and we got to feed, pet and care for them for a whole week before we had to bring them back home to a local farm.

Besides our brief stint with chicks, the only real pet we had throughout our childhood was a rabbit. Sweet Thumper.

Painting these DIY bunny tail paper cups brought back memories of our pet rabbit, and the fun memories chasing him all over the yard.

These would make for a cheap and easy addition to your Easter table setting, or a lovely gift filled with candy or small gifts…so let’s hop to it.

pink-bunny-watercolor-easter-cups-cotton-ball-diy-rabbit-easter

You’ll Need:

  • paper cups {.97 cents for 10}
  • watercolor paints {quality brand like Windsor and Newton, brush and cup of water}
  • cotton balls
  • hot glue gun

How To:

  • Print and cut an outline of a rabbit you find online.
  • Place the rabbit on the cup and lightly trace around it with a pencil.
  • Dip your brush into watercolor paint, and a touch of water and paint within and just on the pencil outline {so you don’t see it} of the rabbit.
  • Let dry.
  • Glue the cotton ball on the tail of the bunny.

blue-green-easter-bunny-diy-cups-watercolor-kid

Hoppy Easter!

{images via j. sorelle}