mirror mirror on the wall

YOU are the most beautiful of them all.

You better believe it, sister!

Now that I’m a mom, for some reason I look at the mirror A LOT less. Sometimes at the end of the day, quite honestly I’m alarmed at what I see looking back at me. Nonetheless, everyone needs a mirror and why not make it a statement piece? Today I’m inspired to do so. Maybe I would see myself more often and do some touch-ups here or there! 🙂

Michelle at 4 men, 1 lady astounds me with this food and dessert table she put together for her son’s christening…let me point out that she just moved into a new home, and with almost everything still in boxes and the house being remodeled…talk about resourceful and talented.

Mandi at Vintage Revivals helps us get our own Anthropologie look at home with an acid mirror.

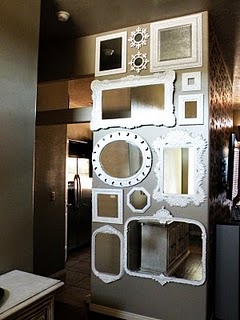
And I love her wall of mirrors…when you see the price tag, you will love it even more.
This wedding photographed by Cameron Ingalls highlights mirrors that turn a rustic barn shabby chic.

This mirrored wall makes the room appear larger, and it looks great with the white color in the room.

Three vintage mirrors make for the most romantic and decorative headboard in this shabby chic room.

Martha Stewart inspires the nautical in us with this DIY rope mirror.

{images via Vintage Revivals, 4 men 1 lady, Greer Loves, Home Interior Design Themes, She Knows and Martha Stewart}
chalkboard fun

I am fabulous
I am fabulous
I am fabulous

Much better than the notes we use to write on the chalkboard during detention after misbehaving in school

I will not pass love notes during class

…don’t you agree?

Now that you’re out of school and not getting into classroom trouble, have some chalkboard fun!

You can find Chalkboard paint in a bucket or in a spray can at your local home improvement store, such as Home Depot, and don’t feel limited to use just black. Hudson Paint offers a rainbow of chalk paint colors. And, get even fancier and more creative with must-have chalk ink {colorful chalk in a pen form}.

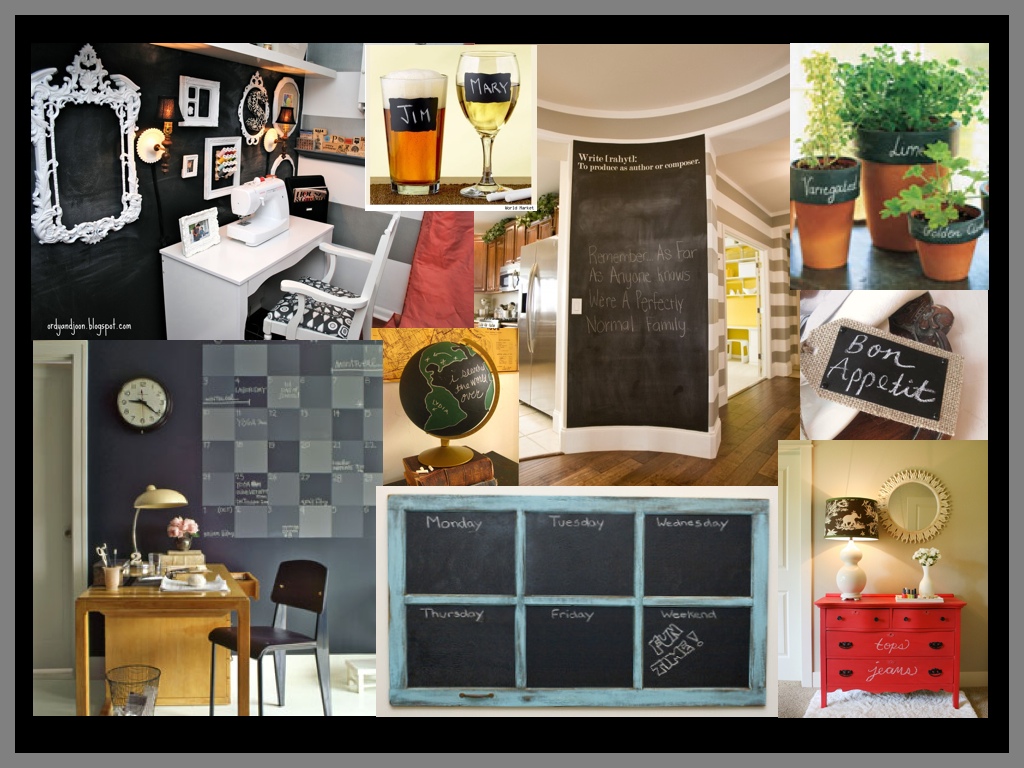
Chalkboard Wall with Frames: I love this office space designed by The Adventure of Ordy and Joon.

Chalkboard Label Glasses: Label your drinks with your own chalkboard stickers or purchase these glasses from Pier1

 Chalkboard Wall: Three Men and a Lady created a perfect place to jot down notes for the whole family to see in her entry with a chalkboard wall.

Chalkboard Pots: Remember what herbs you planted with this easy-to-do chalkboard potted label by Martha Stewart Living.

Chalk Wall Calendar: Stay organized with this calendar from The Martha Stewart Show.

Chalkboard Globe: Mark all the places you’ve visited or let your children learn their geography with this great globe idea from Design Sponge.

Chalkboard Window Pane: Repurpose an old window pane with chalkboard paint with these tips by Sweet Home.

Chalkboard Place Cards: Make sure your guests know their seat with these adorable place cards at Blue Pearls etsy shop.

Chalkboard Dresser: Remember which drawer your pants, socks and underwear are in with this cute idea from HGTV.

OK, two more adorable projects I just have to share…

Chris at Celebrations at Home has an easy DIY chalk project you can do for a fabulous backdrop at a party.

Finally, chalkboard chargers. You can always customize with guest names and kids will love it too. Tatertots and Jello has the how-to you can follow here.

{images via The Adventures of Ordy and Joon, Martha Stewart, Design Sponge, Blue Pearls, Sweet Home, Three Men and a Lady, Celebrations at Home, HGTV and Pizzazzerie}

DIY pearl necklace

We love the look of a chunky pearl necklace, but we don’t always love the price tag associated with it. Erica at P.S. I Made This put together a step-by-step tutorial on how to make one yourself. You can find relatively inexpensive pearl necklaces, and I love the idea of using an antique brooch for a little sparkle.

Inspiration Board

DIY Version


For the how-to video, visit fashionista.com.

 {images via P.S. I Made This}

adorable diy cake stands

When I first saw these DIY cake stands, I just knew I had to make them. There was a warning from the creative inventor, Jennie from A Well Crafted Party, that whoever tries to make one will be addicted and just have to make more. She was right. I admit, I’m addicted. Now you can be too. Thanks, Jennie.

DIY Cake Stand Tutorial, featured at Bump Smitten.

Materials:
1 plate— 4-inch plates make great cupcake stands
1 candle stick, goblet or sundae glass
Epoxy
1 heavy book
1 can of spray paint
1 can of acrylic sealant {I skipped this step due to time}

Instructions:
1. Spray paint your candle stick, goblet or sundae cup the color you wish the base of your cake stand to be.
2. Find your plate—any plate will work {square or round} but I recommend using one that has the color or image you would like as this will not be painted to keep the cake stand food friendly.
3. Affix the plate to a candle stick, goblet or sundae cup {the larger the base, the more sturdy the cake stand} using a glue made for ceramics and glass.
4. Place a heavy book on top of the stand and let the epoxy set according to directions. After the epoxy has set you should be able to pick up the stand with no movement from the candlestick or plate.
5. Before use, wash the top of the plate with dish soap and water. The stand is not dishwasher safe but is food-friendly as long as food is not touching the painted surfaces.

Read more detailed instructions from the original tutorial on Bump Smitten here.

P.S. I’ve used these stands for cupcakes, food displays and votives. Let your creativity fly.

{images via Bump Smitten}

DIY photo lantern

photo lantern

One of my fave DIY projects has made an appearance several times on this blog…diy photo lanterns. I’ve made them for a several parties, and people continue to make comments about how much they love them. So, I’m going to keep a good thing going and attempt to share my how-to instructions to make this easy, affordable DIY project that will impress your guests with their personal touch and warm, soft glow…and have you looking like a little Ms. Martha Stewart.

You’ll Need:
black and white vertical photos
vellum paper
lanterns {I bought mine from Pier 1, but have seen adorable lanterns at Pottery Barn Home Décor too}
double-sided tape
scissors
candle {real or fake will work}

How To:
Measure the openings on the lantern where the photos will be placed
Edit black and white photos on a computer program to the exact size of the lantern openings {I just used Microsoft Word to adjust the size accordingly}
Print the photos on vellum paper on a laserjet printer
NOTE: An ink jet printer does not work as well because the ink is too wet once printed on the vellum
If needed, cut the photos and adjust them accordingly
Place a small piece of double-sided tape on the corners of the lantern opening
Place the photo on the glass and press gently on all sides and corners
Put a candle inside the lantern and light it before party guests arrive
voila

photo lantern with candle

{p.s. this makes a great gift for your mother or mother-in-law with photos of the grandkids, or a bride with engagement photos}

photo lantern with candle inside