Cocktail to Cupcake: Gluten Free Champagne Cupcakes

cupcake-cocktail-strawberry-champagne-white-bubbly-dessert

Pop. Fizz. Clink. Bake.

Yes, you read that right – we added the word bake at the end of Pop. Fizz. Clink.

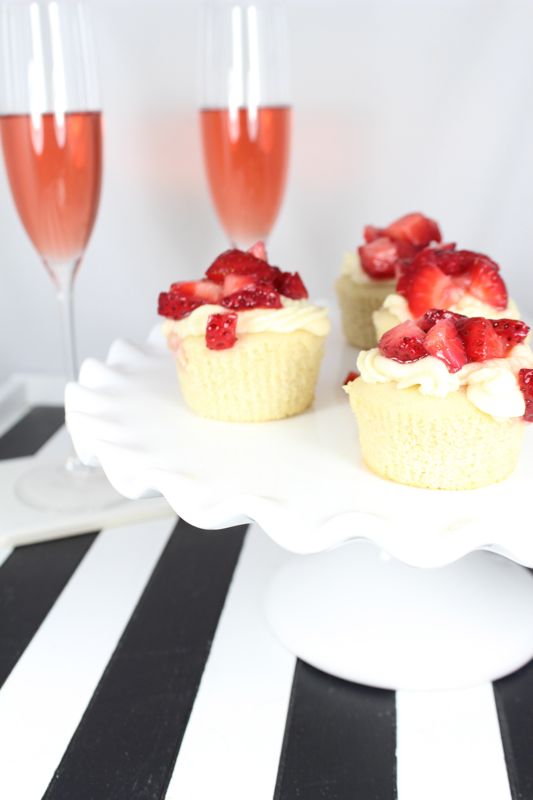
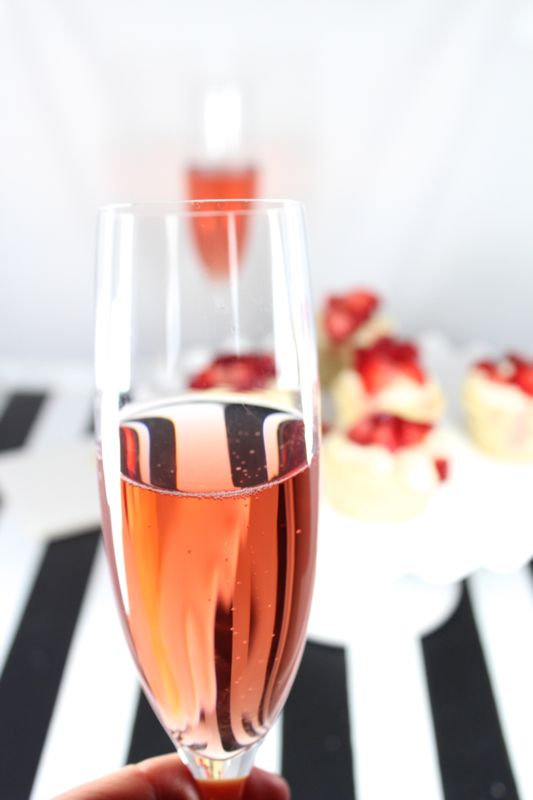
We can do that because we had some bubbly action in our kitchen as we participated in the Wayfair Cocktail to Cupcake Campaign. The fun challenge was to make a yummy cupcake with our favorite cocktail on the ingredient list. We love our Italian bubbly, and we wanted to make it gluten free so we could actually eat it. The result is a delicious Gluten Free Champagne Cupcake.

Sip and bake – now that’s something we can get use to.

cupcake-cocktail-strawberry-champagne-white-bubbly-dessert

Gluten Free Champagne Cupcakes
servings: about 16
recipe adapted from DC Cupcakes

Ingredients:
Champagne Cupcakes

  • 1.5 cups gluten free flour
  • 1 cup gluten free oat flour
  • 8 tablespoons unsalted butter
  • 1/2 tsp baking powder
  • 1/4 tsp salt
  • 1.5 cups sugar
  • 2 eggs
  • 2 1/4 tsp vanilla extract
  • 1 1/4 cup milk
  • 1 tablespoon Champagne

Champagne Buttercream Frosting

  • 16 tablespoons unsalted butter
  • 3.5 cups powdered sugar
  • 1 tsp half and half
  • 1 tsp vanilla extract
  • 1/8 tsp. salt
  • 1/2 cup champagne
  • 1 cup strawberries, diced

Directions:
Champagne Cupcakes

Pre-heat the oven to 350 degrees. Set cupcake liners in the cupcake baking pan.

In a medium bowl, cream the butter and slowly add the sugar. Blend with an electric mixer until combined.

Add the eggs, and blend.

Pour the vanilla, champagne and milk in a separate measuring cup.

Combine the flours, baking powder and sugar in a separate medium bowl.

Pour 1/3 of the flour mixture to the butter mixture, followed by 1/3 of the milk mixture. Continue this process until all the flour and milk is fully combined. Do not over mix.

Pour the batter into the cupcake liners {fill 1/2-3/4 of each liner}.

Bake for about 20 minutes or until you insert a toothpick and it comes out clean.

Let the cupcakes cool.

Champagne Buttercream Frosting

In a medium bowl, cream the butter and add the sugar slowly. Beat with an electric mixer until well mixed.

Add the vanilla, milk, salt and champagne, and beat until the mixture is fluffy.

Then, place in piping bag and decorate your cupcakes.

Top the cupcakes with your diced strawberries, then place a safe, indoor mini sparkler on top.

cupcake-cocktail-strawberry-champagne-white-bubbly-dessert

Enjoy! And remember, you don’t always have to drink your cocktail. You can eat it, too.

cupcake-cocktail-strawberry-champagne-white-bubbly-dessert

cupcake-cocktail-strawberry-champagne-white-bubbly-dessert

This #Cocktail2Cupcake post is sponsored by Wayfair, but we would love them and their products even if it wasn’t. Thanks for supporting the wonderful companies that support us. 

CocktailtoCupcake

DIY ABC Block Cupcake Topper

baby-blocks-cupcakes-shower-semi-homemade-abc-sprinkles-frosting

A B C
It’s easy as, 1 2 3
As simple as, do re mi
A B C, 1 2 3

These DIY ABC Block Cupcake Toppers are easy and adorable…and edible if you just can’t help yourself. It’s semi-homemade, so it will look like you took the time to make it special, but you don’t even have to turn on your oven. Win, win!

baby-blocks-cupcakes-shower-semi-homemade-abc-sprinkles-frosting

Ingredients:

Directions:

  • Make groups of 6 cookies on the counter.
  • Add frosting to one edge of a cookie {this will be your base}, and quickly place another cookie along the line of frosting.

baby-blocks-cupcakes-shower-semi-homemade-abc-sprinkles-frosting

  • Repeat until you have 4 sides. Every time you add a cookie, be sure to add frosting along its side, so it can stick to the cookie next to it. Be gentle with the block while the frosting is still wet.

baby-blocks-cupcakes-shower-semi-homemade-abc-sprinkles-frosting

  • Once you have all the sides, add frosting to the tops of all the cookies, and add the top cookie.
  • Gently place the block on the counter, and let the frosting dry for 5-10 minutes until it hardens.
  • Pour a pile of sprinkles in a small bowl.
  • Add a small strip of frosting along all the sides and side-by-side dip the wet frosting into the pile of sprinkles until its fully coated. After all the sides have been covered with sprinkles, set aside to let dry.

baby-blocks-cupcakes-shower-semi-homemade-abc-sprinkles-frosting

photography by Meredith Moran Photography 

emily + randy

We love pretty weddings. And, we really love pretty weddings with a DIY touch. Emily and Randy’s wedding had it all – a pretty bride and handsome groom, a lovely setting, creative DIY’s, a yummy dessert table, a gorgeous ceremony backdrop and an amazing photographer to capture it all, Connie Dai Photography.

Today, Emily, the bride {and now happy newlywed} shares her tips for how she added personal DIY touches to her wedding day, and why you should try it too.

In Emily’s words…I definitely recommend DIYing as much as you can. It adds such a personal touch to your big day, and including those items as decorations in your home after the wedding are awesome reminders of the day. Honestly, putting on some tunes and creating beautiful things is great therapy during an often stressful time!

After you read about the easy DIY’s, please visit Connie Dai Photography to see more gorgeous photos for this beautiful couple’s special day. You won’t regret it – they are stunning. And it’s not just us that thinks so – Style Me Pretty thought so too.

DESSERT TABLE
Emily_Randy_Chatfield_Botanic_Gardens_Web_369

Glass Cake Stands
Find glass plates and glass candlesticks from a dollar store and E-6000 glue from a craft store such as Hobby Lobby or Michaels.
Glue a candlestick to the center of the bottom of a plate.
Let dry.
Leave as a single plate for small cakes, or add a couple of layers for a unique cupcake stand.

The other cake table pieces, the green box chalkboard and the compartment stand, were both from World Market.
Emily_Randy_Chatfield_Botanic_Gardens_Web_372

Emily_Randy_Chatfield_Botanic_Gardens_Web_371

Chatfield_Botanic_Gardens_Web_370

ESCORT CARD FRAME
Emily_Randy_Chatfield_Botanic_Gardens

Find an empty frame (Hobby Lobby had a perfect wooden frame to go well with our details)
Buy chicken wire at a home-improvement store {hopefully your handy husband has a staple gun. If not, buy one or thumb tacks or something similar should work}!
Stretch chicken wire over the back of the frame and staple periodically around the frame.
Trim excess chicken-wire with wire cutters and bend any sharp edges.

WOODEN RING BOX
Emily_Randy_Chatfield_Botanic_Gardens_Conniedaiphotography

Check the wooden crafts aisle at Hobby Lobby or Michaels for inspiration for easy decoration projects.
Find a small box to hold rings.
Stain the pre-made wooden crafts. I bought one brown stain and one grey stain. For some projects I used only one color, and for others, I mixed the two colors together for variety and a nice rustic color.
Paint on your new initial by hand or with a stencil in a contrasting color of paint.
Voilà! Cheap, simple, and fun wedding projects!

Emily_Randy_Chatfield_Botanic_Gardens_


Emily_Randy_Chatfield_Botanic_Gardens_Web_007

Thanks Emily and Randy. And, thank you Connie Dai Photography.

{images via Connie Dai Photography}

sweet peony

We’re obsessed with peonies, so when we saw these pretty images by Becky Young Photography from her sister’s bridal shower, and peonies were in the details, we were in love.

The soft colors, ribbon backdrop, sweet peony arrangements by the one and only Cori Cook and desserts made for one lovely bridal shower. And according to Cori, the bride, Jenny, is as sweet as pie. We want to meet her…and see her August wedding!


VENDOR LOVE
photography: Becky Young Photography
florist: Cori Cook 

{images via Becky Young Photography}

susan + michael

We love this wedding for it’s pretty simplicity, but also its DIY touches, lovely lace, vintage accessories and the most stunning floral bouquets and arrangements! Tables were set with burlap runners lined with lace borders. Such a pretty combo.  Centerpieces by one of our faves, Cori Cook, were a mix of old wooden planter boxes with beautiful arrangements of juliet garden roses, succulents, roses, veronica, cafe au lait dahlias, scabiosa pods, astible, sweet pea, lavender and seeded eucalyptus. The details and the setting made for a beautiful garden wedding.

Thanks for Harper Point for sharing the amazing photos with us. Ya’ll are good!

VENDOR LOVE
Photography: Harper Point Photography
Flowers: Cori Cook Floral Design
Paperware: Paper + Ink
Rentals/Vintage Props: A Vintage Affair Rentals
Venue: The Tapestry House

{images via Harper Point Photography}