Unique Gift’s with Inspiring Quotes for Everyone On Your List

Oh my goodness – where does the time go? I can’t believe we are hours away from ringing in the year 2014. Sorry we have been MIA. Between the holidays, our family and friends – we took time away from the computer. And, to be honest, it was fantastic and much needed!

We hope you had a wonderful holiday season, filled with love and laughter! The hustle and bustle of Christmas was somewhat overwhelming this year, but we finally took a breath to sit and enjoy the magic of Christmas day. Now our houses took like a toy store exploded, and we are trying to find new homes for all the wonderful gifts we received.

As I sit and reflect on this year, I am so grateful. So, I took some time to find some of the quotes that either inspired me this year…or they are already inspiring me for next year. And, the good news is that quotes can come in all shapes and forms, to remind us everyday of the strength that lies within us, and the beauty that’s all around us.

Kiss Your Life, Sugarboo Designs via Layla Grace

Do More Journal, Ecojot
they have fabulous products…check out their site here


She believe she could Tote bag
, Miss Harry


Believe Typographic Print
, Rach Illustrates

Porcelain Ornament, mb art studios

Downloadable Cards, Enjoy It by Elisa Blaha


What would you attempt Paperweight
, Uncommon Goods

Kiss Slowly Tray, Ben’s Garden via Nordstrom

{images via Layla GraceecojotMiss Harry, Rach Illustrates, mb art studio, Uncommon GoodsEnjoy It by Elisa BlahaNordstrom}

How to Create a Black, White and Gold Glitter Bar

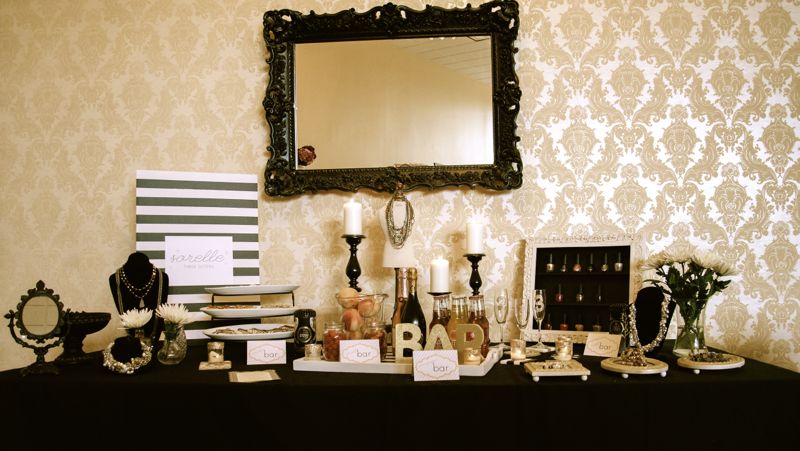
Here’s one of the details from our Sparkle from Head to Toe photo shoot we told you about Fri {the one featured on Hostess with the Mostess}.

We created the perfect party for women to kick off the holiday season and really SHINE. The sparkle party gave women a chance to gossip with friends over cocktails and cookies, try on and shop for jewelry by local artists, and paint their nails at a OPI nail painting station. Women deserve to Sparkle from Head to Toe…and this party let them do just that!

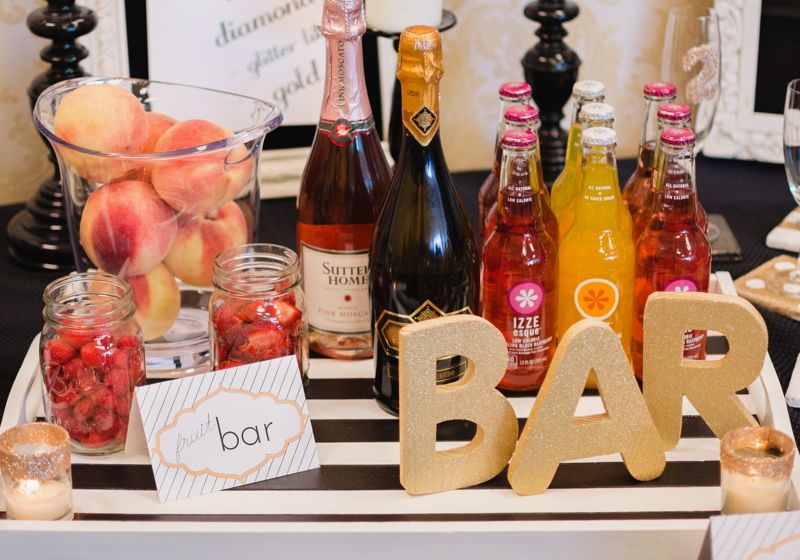
As you know, every good party needs a bar. With a small space, and a tight budget, we created a DIY bar from a tray. It’s a great accessory for any holiday party, bachelorette party, birthday party, or just a night with the ladies. Here’s how you can do it too.

DIY Black and White Striped Bar Tray

You’ll Need
Tray
Paint
Paint brushes
Painters tape
Wood letter from your local WalMart, Hobby Lobby or Michaels
Gold Glitter Spray Paint

How To
Clean and sand the tray if necessary.
Spray paint the whole tray with white primer.
Once primer is dry, paint entire tray white. Repeat once for two coats.
Add Painter’s Tape where you want stripes. My tray had the perfect lines carved into it, so I just lined the tape up with those.
Paint the non-taped parts black. I used a brush to paint for more control, instead of spray paint. Repeat for a total of 2 coats.
After 24 hours, pull the tape from the tray.
If you have any touch ups to do, use a small brush and paint to fix.
For the letters, it’s best to use the primer to spray paint so you don’t see the wood grain under the glitter.
Once the primer is dry, spray paint with glitter spray paint.
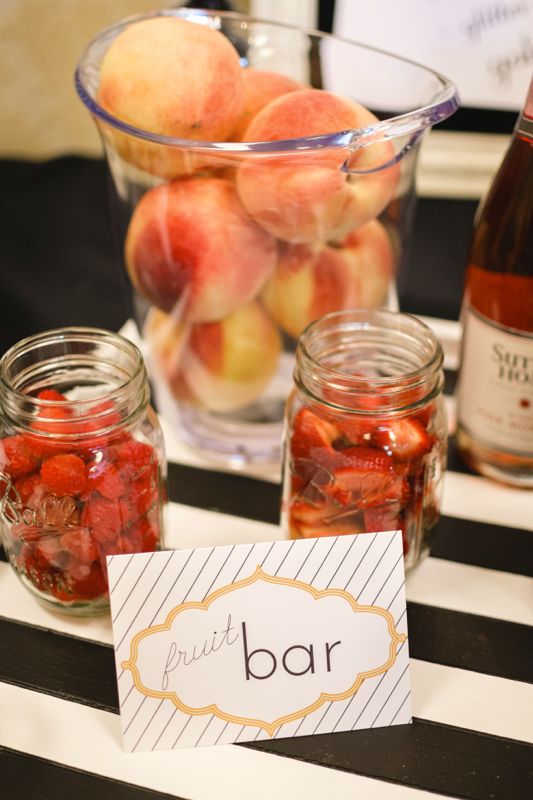
Accessorize the bar with champagne, Izze drinks and fresh fruit.

Labels printed and sparkled by FLEUR DE LIS, custom paperie.

{via Tutto Bella}

a merry DIY christmas

You know me – love me some DIY! And, when our list of people to buy for is long, it can get expensive. If your feeling crafty, you still have time to make friends and neighbors gifts made with love. Here’s some great ideas from some very talented folks.

DIY Woodslice Chalkboard, Lisa Leonard Blog
…you can also add your friends monogram on it

Chalkboard Printable for Cute and Cozy Toes All Winter, Tailored Expressions

Sharpie Mug, Life Styled Simply

DIY Chalkboard, Shanty-2-Chic

DIY Acrylic Tray, A Fabulous Fete

DIY doormat, Lisa Leonard Blog

 {images via Tailored ExpressionsLife Styled Simply, Shanty-2-Chic, A Fabulous Fete, Lisa Leonard Blog}

Black, White and Gold Glitter Party on Hostess with the Mostess

We’re thrilled and totally giddy to tell you that our latest party, Sparkle From Head to Toe, is featured on Hostess with the Mostess {Party of 5} today. OMG! Please take a moment and check it out here. Click on Sparkle From Head to Toe by Tre Sorelle.

We had so much fun styling this shoot…and we pulled it off with 5 kids under 5 running around behind-the-scenes, a first trimester preggo and very nauseous sister, a patient and kid-loving photographer {thanks Meredith Moran}, and our wonderful mom who made sure the kids were well cared for, and made sure we were done in 2 hours…in time to make it to Sunday mass.

We wanted to create a sparkly party to give women a chance to gossip with friends over cocktails and cookies, try on and shop for jewelry by local artists, and paint their nails at a OPI nail painting station. Women deserve to Sparkle from Head to Toe…and this party let’s them do just that! And it’s the perfect time of year to throw a sparkly party – or add it to the planning boards for your next bachelorette party, birthday party or ladies get together.

Thanks to OPI and Nicole by OPI for sending us gorgeous polish colors, and thanks for Kathryn Giarratano Jewelry to letting us model her gorgeous hand-made jewelry, and of course Jenna at Fleur de Lis for designing a beautiful invitation.

Check back in with us this week – we’re sharing details and tutorials on how to make the DIY striped tray bar and the small frames-turned-into trays/party favors.

VENDOR LOVE
Photography: Meredith Moran Photography
Jewelry: Kathryn Giarratano, contact trejsorelle@gmail.com for more info/to order
Nail Polish: OPI  and Nicole by OPI
Personally Speaking
Honey Ryder
Kissed at Midnight
Totally in the Dark
Luke of the Draw
Invitations and Printed Supplies: Fleur de Lis, a paperie
Cookies: Homemade
Location: Fleur de Lis, a paperie

 {images via Meredith Moran Photography}


DIY Twig and Branch Snowflakes for a Rustic Holiday

I love all different holiday ‘decor’ styles. Some days I wake up and want everything to be white. Other days, I want gold metallic to glisten the room and every so often, I want colors that are merry and bright. But, I always love a touch of country or mountain rustic.It’s warm and inviting…and reminds me of Christmas in Colorado, especially the mountains of Colorado.

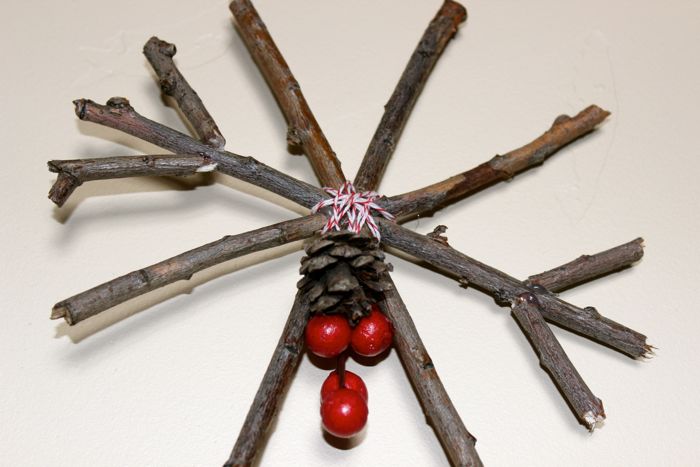
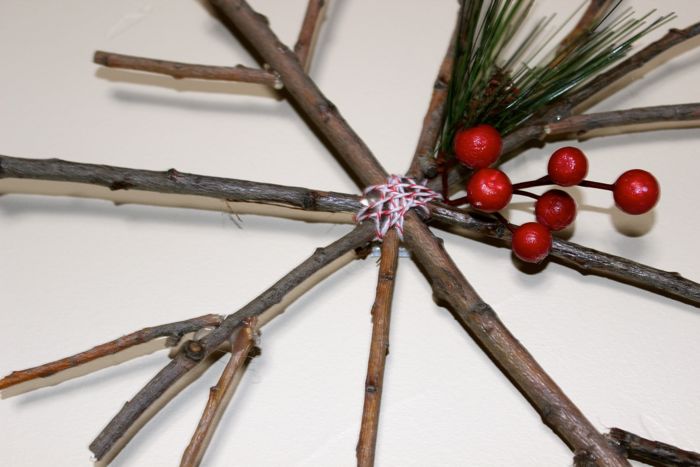
I had a box of twigs and branches in the garage that were just waiting to be sculpted into something…and after a recent shopping trip to Pier 1, I was determined to create DIY snowflakes out of branches, just like their branch snowflake ornaments. It only took about 2 hours, and I saved $14 per snowflake.

You’ll Need:
Thin twigs or branches that can be easily broken with hands {about 20-30}.
Hot glue and glue gun
Red and white twine
Faux greenery and berries {I bought 3 small bunches of greenery for $1 each}

How To:
Find one straight and strong twig for your snowflake ‘base’ {I positioned it vertically on the table}.
Find another twig and ‘eye’ the length as you slant it sightly to the left from your ‘base’. Snap the twig in half, and glue each side to the sides of your ‘base stick’.
Continue to add more sticks around your ‘base’ to complete your snowflake – measure to make sure lengths are really close, snap and glue. You can design it as you like, even adding smaller twigs that branch out from the larger ones.
Once your snowflake is complete, use twine to wrap around each stick in the center, and tie a knot in the back. I did this so it looked more festive, and it covered the hot glue.
Pull apart your faux greenery and glue the pieces onto your snowflake.
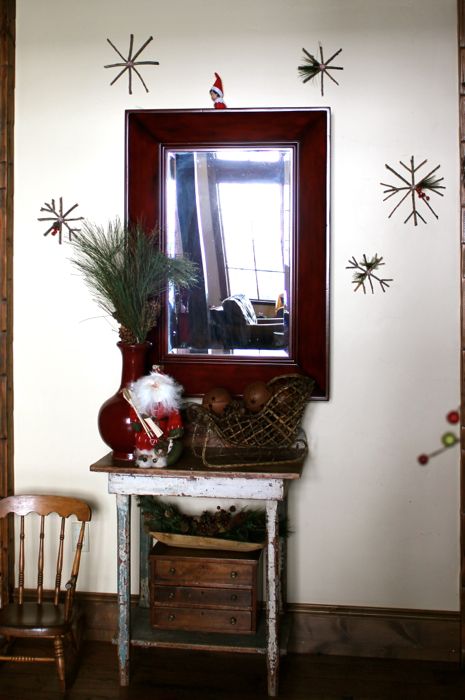
You can either use the twine to create a ‘hanger’ to hang these as ornaments, or use Command velcro to adhere to the wall. I only use 4 small pieces of the Command adhesives, and cut them into small squares.


{images via Tutto Bella}