Modern and Chic Baby Girl Nursery

nursery_jsorelle

Star light , star bright,
First star I see tonight,
I wish I may, I wish I might,
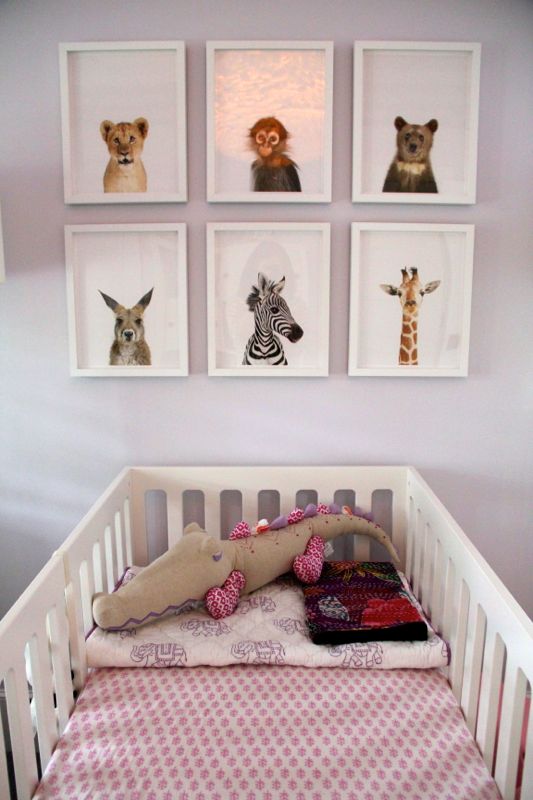
Have THIS NURSERY I wish tonight.

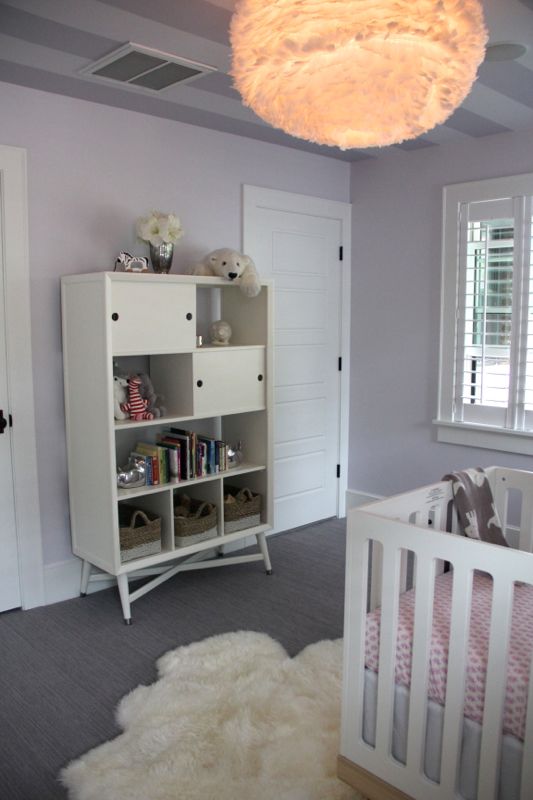
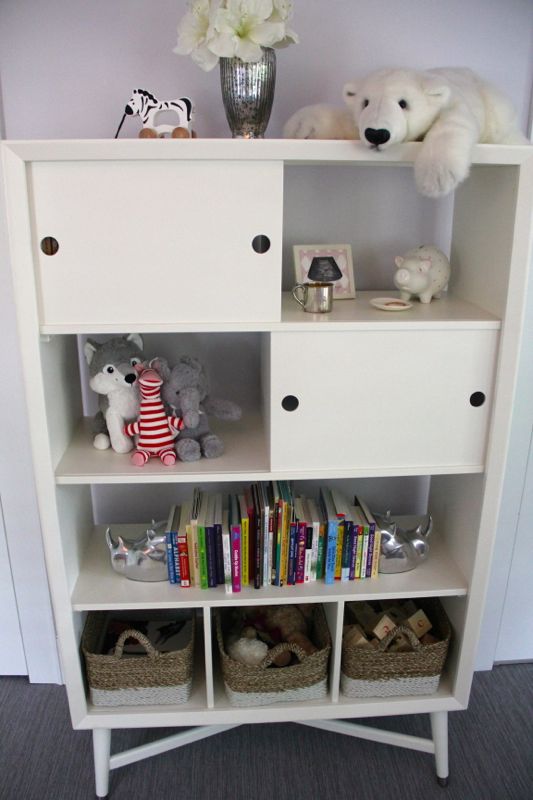
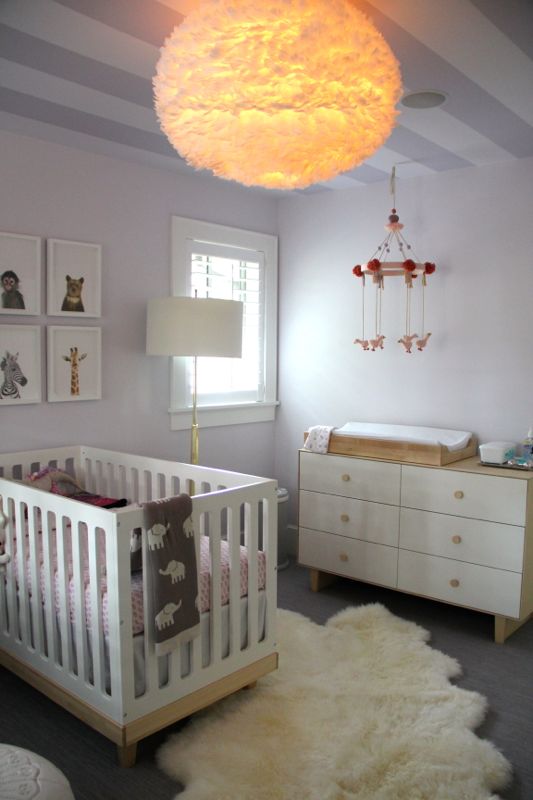
We are in love with this nursery of our dear friend, Shannon, and her beautiful baby girl. We oohed and ahhed at the sight of the feather light, the white poof, the animal prints and then we looked up and were delighted to see a striped ceiling! It’s a lovely nursery, and a beautiful space that will remain a classic, soft and modern chic room for years to come. Thanks for sharing it with us, Shannon. And, for those of you lusting after the space and wondering where you can buy the items – Shannon shared all her shopping stops with us below. The light made my daughter’s Christmas list…and it’s definitely a gift to me! 🙂

nursery_jsorelle

baby girl nursery_jsorelle

baby girl nursery_jsorelle

baby girl nursery_jsorelle

SHOPPING LOVE

Classic Crib & Merlin (Rhea) Dresser (plus Changing Station accessory): Oeuf, giggle
Sheepskin Rug: Safavieh, Overstock.com
Book shelf: Dwell Studio 
Como Glider: Monte Design
Ottoman: Serena & Lily
Pink Plastic Elephant: Eames, Design Within Reach
Animal Prints: The Animal Print Shop by Sharon Montrose
Geese Mobile: blabla
Ceiling Light:  VITA

{photos via friend of beautiful baby girl}

colorful bing lounge, part 2

You already saw 10 beautiful finds for your home. So, here’s part 2 of our Create Your Own Bing-Inspired Lounge at home.

bing lounge part 2_jsorelle1. Colorful Frames, DIY or Etsy
2. Terrarium 1 and Terrarium 2, Urban Outfitters
3. Vintage Tea Cups, Etsy
4. Porcelain Rabbit Head, Pure Home
5. Natural Tree Stump Side Table, West Elm
6. Orange Chair, Wayfair
7. White Chair, Ikea

  {image via Justin Hackworth and Brooke Dennis for Alt Summit}

10 beautiful finds for your home

Bing impressed us all with a cozy and beautiful lounge during Alt 2014. It was a colorful mountain modern and vintage ‘home away from home’. It was the place to meet and greet throughout the week…and it couldn’t have been a more lovely setting. After 3 days, the room was disassembled, and we wanted more of that Bing prettiness in our own homes. So, today we found pieces we are sharing with you to Create Your Own Bing-inspired Lounge At Home!

Stay tuned next week because we have part 2 to this Bing lounge.

bing lounge_recreateyourown-1

1. Succulent Letters, Flora Grubb
2. Antique Window Pane, Etsy
3. Deer Head, Etsy
4. Orange Dining Chair, Overstock
5. Wood Crates, Wayfair
6. Floral Rug, Home Depot
7. Yellow Metal Counter Stools, Overstock
8. Lemon Metal Side Chairs, Overstock
9. Wood Bench, Overstock
10. Orange Metal Accent Table, Overstock or DIY paint this Wire Coffee Table orange

 {image via Justin Hackworth and Brooke Dennis for Alt Summit}

DIY Curly Girl Designs Coasters and Gift

DIY coasters

I think I am slightly obsessed with coasters! I want to make them for everyone. So, when I received DIY coasters from Kimi as a hostess gift, and she revealed how she and her mom {love you Barb} made them {the secret ingredient was napkins}, I knew I had to make some. They looked so good, I couldn’t believe it. Maybe I’m late in the game to discover this and this is so 90s or maybe they were on to something BIG…either way, I love it. I have so many fun napkins, always in need of a great gift…and who doesn’t need something to prevent a water ring from their cocktail?

DIY Napkin and Tile Coasters
{thanks Kimi and Barb}

You’ll Need:
Cute Napkins {mine were from Curly Girl}
4 white 4×4 tiles from Home Depot
Modge Podge {the regular kind you use with a brush, and also the spray…I used the spray this time to prevent streaks, and it worked, but you can definitely still use the regular kind}
Cork Board from Michaels

How To:
Peel all the layers of the napkin away from the top layer and cut it along its creases. With the Curly Girl napkins I used, 1 napkin gave me 4 perfect squares for 4 tiles.
Add about 1 tablespoon of Modge Podge to the tile and spread out with a foam brush.
Place the napkin on the tile and press down the sides along the sides of the tile. Careful not to pull as the napkin is thin and can tear.
Make sure all sides, corners and bubbles are pressed down.
Let dry for about an hour to two.
Gently tear the sides of the napkin ‘left over’ to the edge of the tile. It should tear easily. I didn’t need a scissors.
Spray the tiles with the Modge Podge and let dry for 20 minutes. Repeat the spray steps 2 more times. Don’t forget to spray the sides and corners. If you apply Modge Podge with a brush, I would apply at least 2 to 3 layers.
Cut the cork board into squares slightly smaller than 4×4.
Apply Gorilla Glue to the cork board and press down on tile. I applied a smaller square on the cork, as Gorilla Glue spreads 3-4 times as it adheres. If you over-apply, it will leak through the sides and will be really difficult to remove.
Place a heavy book on top of the cork board and tile, and in the morning {or 2 hours}, you will have a lovely set of coasters.

DIY napkin coasters

DIY coasters

DIY tile coasters

{images via j. sorelle}

tgif

1. We have some incredibly amazing opportunities, adventures and projects in the near – very, very near – future…so be sure to follow us via Facebook, Twitter and Instagram to stay in the loop. It’s going to be good.

2. My hubby was sweet enough to make this for my mom for mother’s day. One flower per grand baby {7}…and she loved it. Check out the free plans to make this DIY for someone you love thanks to the sisters of Shanty 2 Chic.DIY sunflower centerpiece

3. If you love shutters as much we do, your heart will swoon when you see this.

4. Look out, DIY Geronimo!!!

5. I HATE to fly. Period. But this made me laugh.