The Secret To The Best Glitter Nails


beauty hack for the best glitter nails

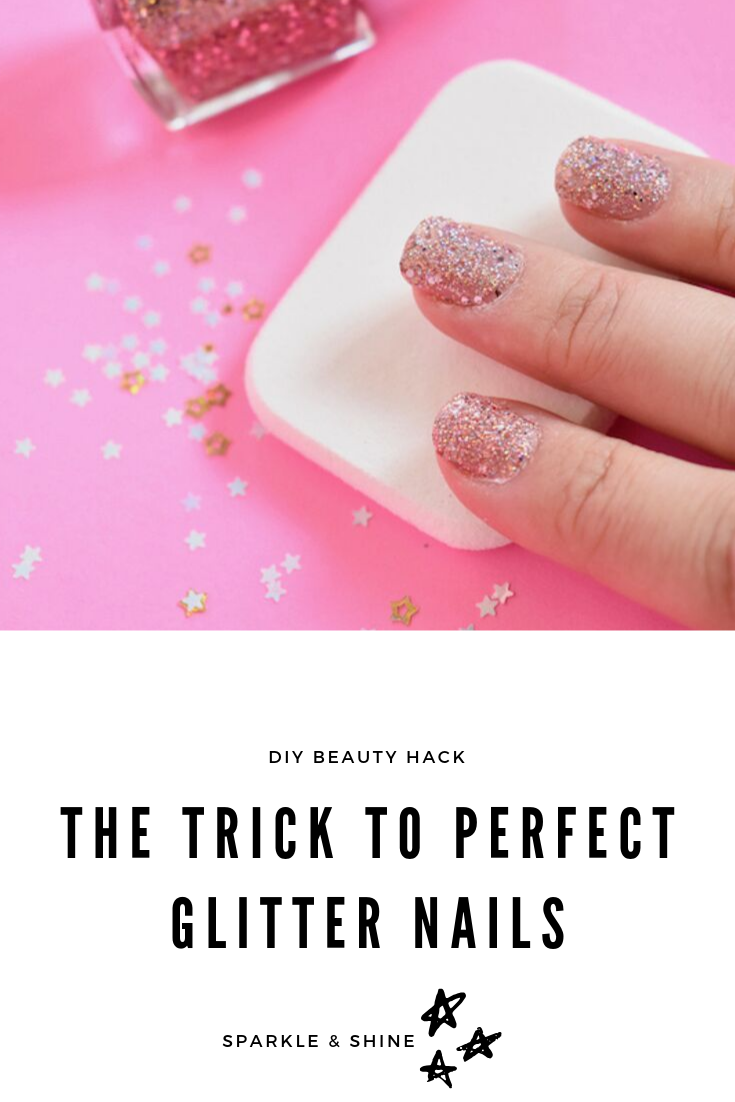
You know when you want to get your sparkle on, but when you try to paint glitter on your nails (the traditional way), you have to do like 100 strokes to TRY to get it covered in glitter, and it just doesn’t look good?? Yep, us too. Well, someone smart found this genius way to add glitter to your nails. We tried it. We love it! It’s so simple. YOU can do it. This is going to be our go-to this holiday season.

We shared all the details here on Momtastic.

beauty hack for the best glitter nails

Make This Pretty Hair Accessory: DIY Hair Pins

DIY hair clips with words for teens and tweens

We love the hair pin trend! It’s such a fun way to accessorize, plus it makes those dreaded bad hair days a whole lot cuter! Ladies (teens, tweens and young girls, too), it’s time to let our hair do some of the talking. We made some DIY hair pins with words, and they are a huge hit.

What’s your hair line? Follow our simple tutorial on Momtastic, and start accessories that beautiful hair! This DIY is too easy not to make a couple.

DIY hair clips with words for teens and tweens

Must-Wear DIY Shoes With Fringe Embellishment


DIY FRINGE SHOES (1)


In the winter, we embellish with vintage jewels. In the summer, we embellish with fringe.

Visit Momtastic to see what item we upcycled to make these fabulous DIY shoes with fringe embellishment. It’s a totally doable DIY, and a must-wear shoe! Target wins again with the base of the shoe!

diy shoes with fringe embellishment


Note: affiliate links in this post. 

DIY Perler Bead Earrings You’re Girls Will Love

DIY enchanting fairy garden

We’ve made animals, geometric shapes, flowers and rainbows from the tiny, amazing Perler beads in the past, but this week’s craft was a first for us. We made DIY Perler bead earrings. The colorful and affordable DIY jewelry is so versatile because the color combos are endless, plus so many pairs can be made in a day. Our daughters made some for themselves, and then pairs for friends. We customized with vinyl shapes and letters, but also made multi-color earrings with large and small Perler beads. It was fun!

Here’s how we did it. We can’t take full credit for this idea. The super talented Kimberly of A Girl and A Glue Gun originally posted about this craft idea. Thanks for always sharing such amazing idea, Kim.

Materials: 

Directions:

Step 1: Place a piece of parchment paper on a baking sheet, and then set perler beads on top of it. If you want the circular multi-color ones, you need to put two small perler beads inside the big beads. If you want one solid color, you just need to melt one perler bead.

DIY perler bead earrings

DIY perler bead earrings

Step 2: Melt them at 350 degrees for about 38 minutes. Let them cool. You can see the difference in size once the big and littler perler beads are melted.

DIY perler bead earrings

DIY perler bead earrings

Step 3: Add vinyl shapes or letters to the front of the earrings.

DIY perler bead earrings  DIY perler bead earrings

Step 4: Use a dab of E-6000 on the back on the earring pin post, and then push onto the back of the perler bead (the flat side). Let dry for at least 24 hours.

DIY perler bead earrings


DIY perler bead earrings

Step 5: Make DIY cards to gift to people from cardstock, or add the colorful cuteness to your ears.

DIY perler bead earrings

DIY perler bead earrings


*THIS POST CONTAINS AFFILIATE LINKS

Spread Hope & Cheer With A DIY Cloud and Rainbow Card

DIY paper and yarn card and rainbow wall decor

We worked with ASTROBRIGHTS® Papers this month to celebrate their 50th Anniversary. To mark the #50yearsbright milestone, Astrobrights Instagram feed is featuring a different color from their rainbow assortment of paper every day to celebrate 50 years. We are so thrilled to be a part of the paper party! Our color is Stardust White™, which was the perfect color for our magical clouds cards, packed with a rainbow punch.

We created a DIY paper cloud card with an inspirational quote (link to the free printable is below), and a rainbow of yarn hanging from it. It’s such a fantastic craft for people of all ages, and a thoughtful card that can be sent to friends and family who are going through a tough time, and need a bit of cheer and hope in their day. It’s like sending sunshine in the mail! Plus, once it serves its purpose of a card, you can hang it on a bedroom or office wall for a colorful and uplifting piece of home decor.

THE FREE PRINTABLE IS AVAILABLE HERE (the full card version) and HERE (if you want to fold the paper to make a card, and not have cloud lines on the second page of the card). They are almost the same – just a cutting preference.

Visit the Astrobrights Instagram feed to see all the amazing projects being featured, and also our IG to learn about how we made the card, and details on how enter in the Astrobrights 50th Anniversary contest to win a $500 American Express card. Hurry, the contest ends June 19, 2019.

DIY rainbow card of cheer