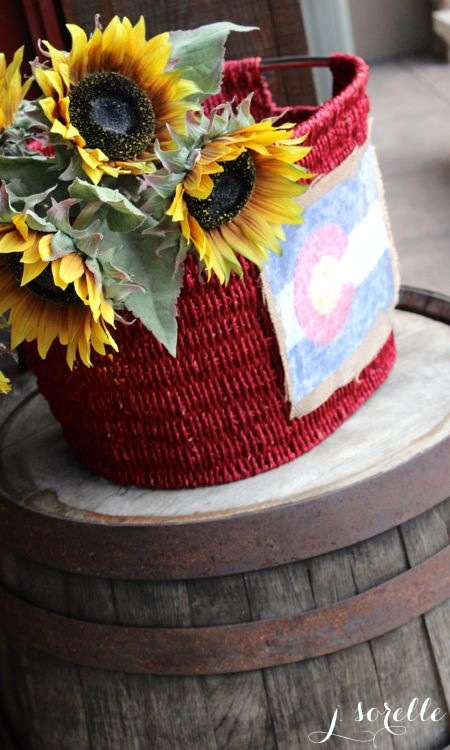
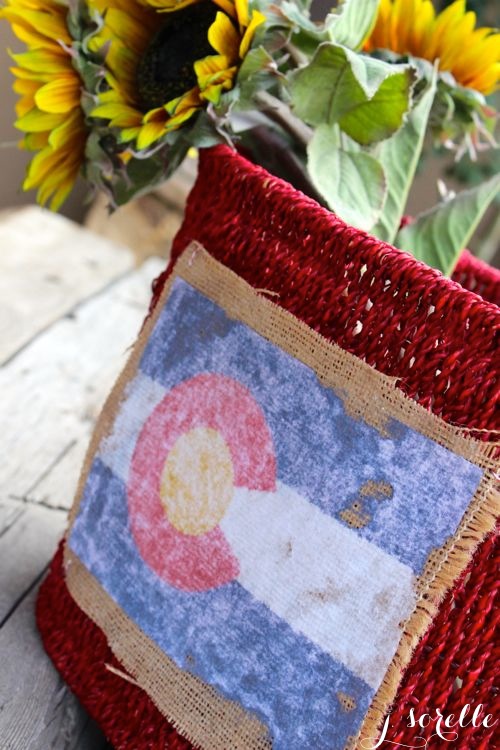
August 1 marks Colorado’s 138th birthday. Happy {early} Birthday Colorful Colorado! Being born and raised Colorado girls, we love to represent our state and give its flag some love. We also love burlap. So, we combined the two and created a piece of art…or a basket accessory.
You’ll Need:
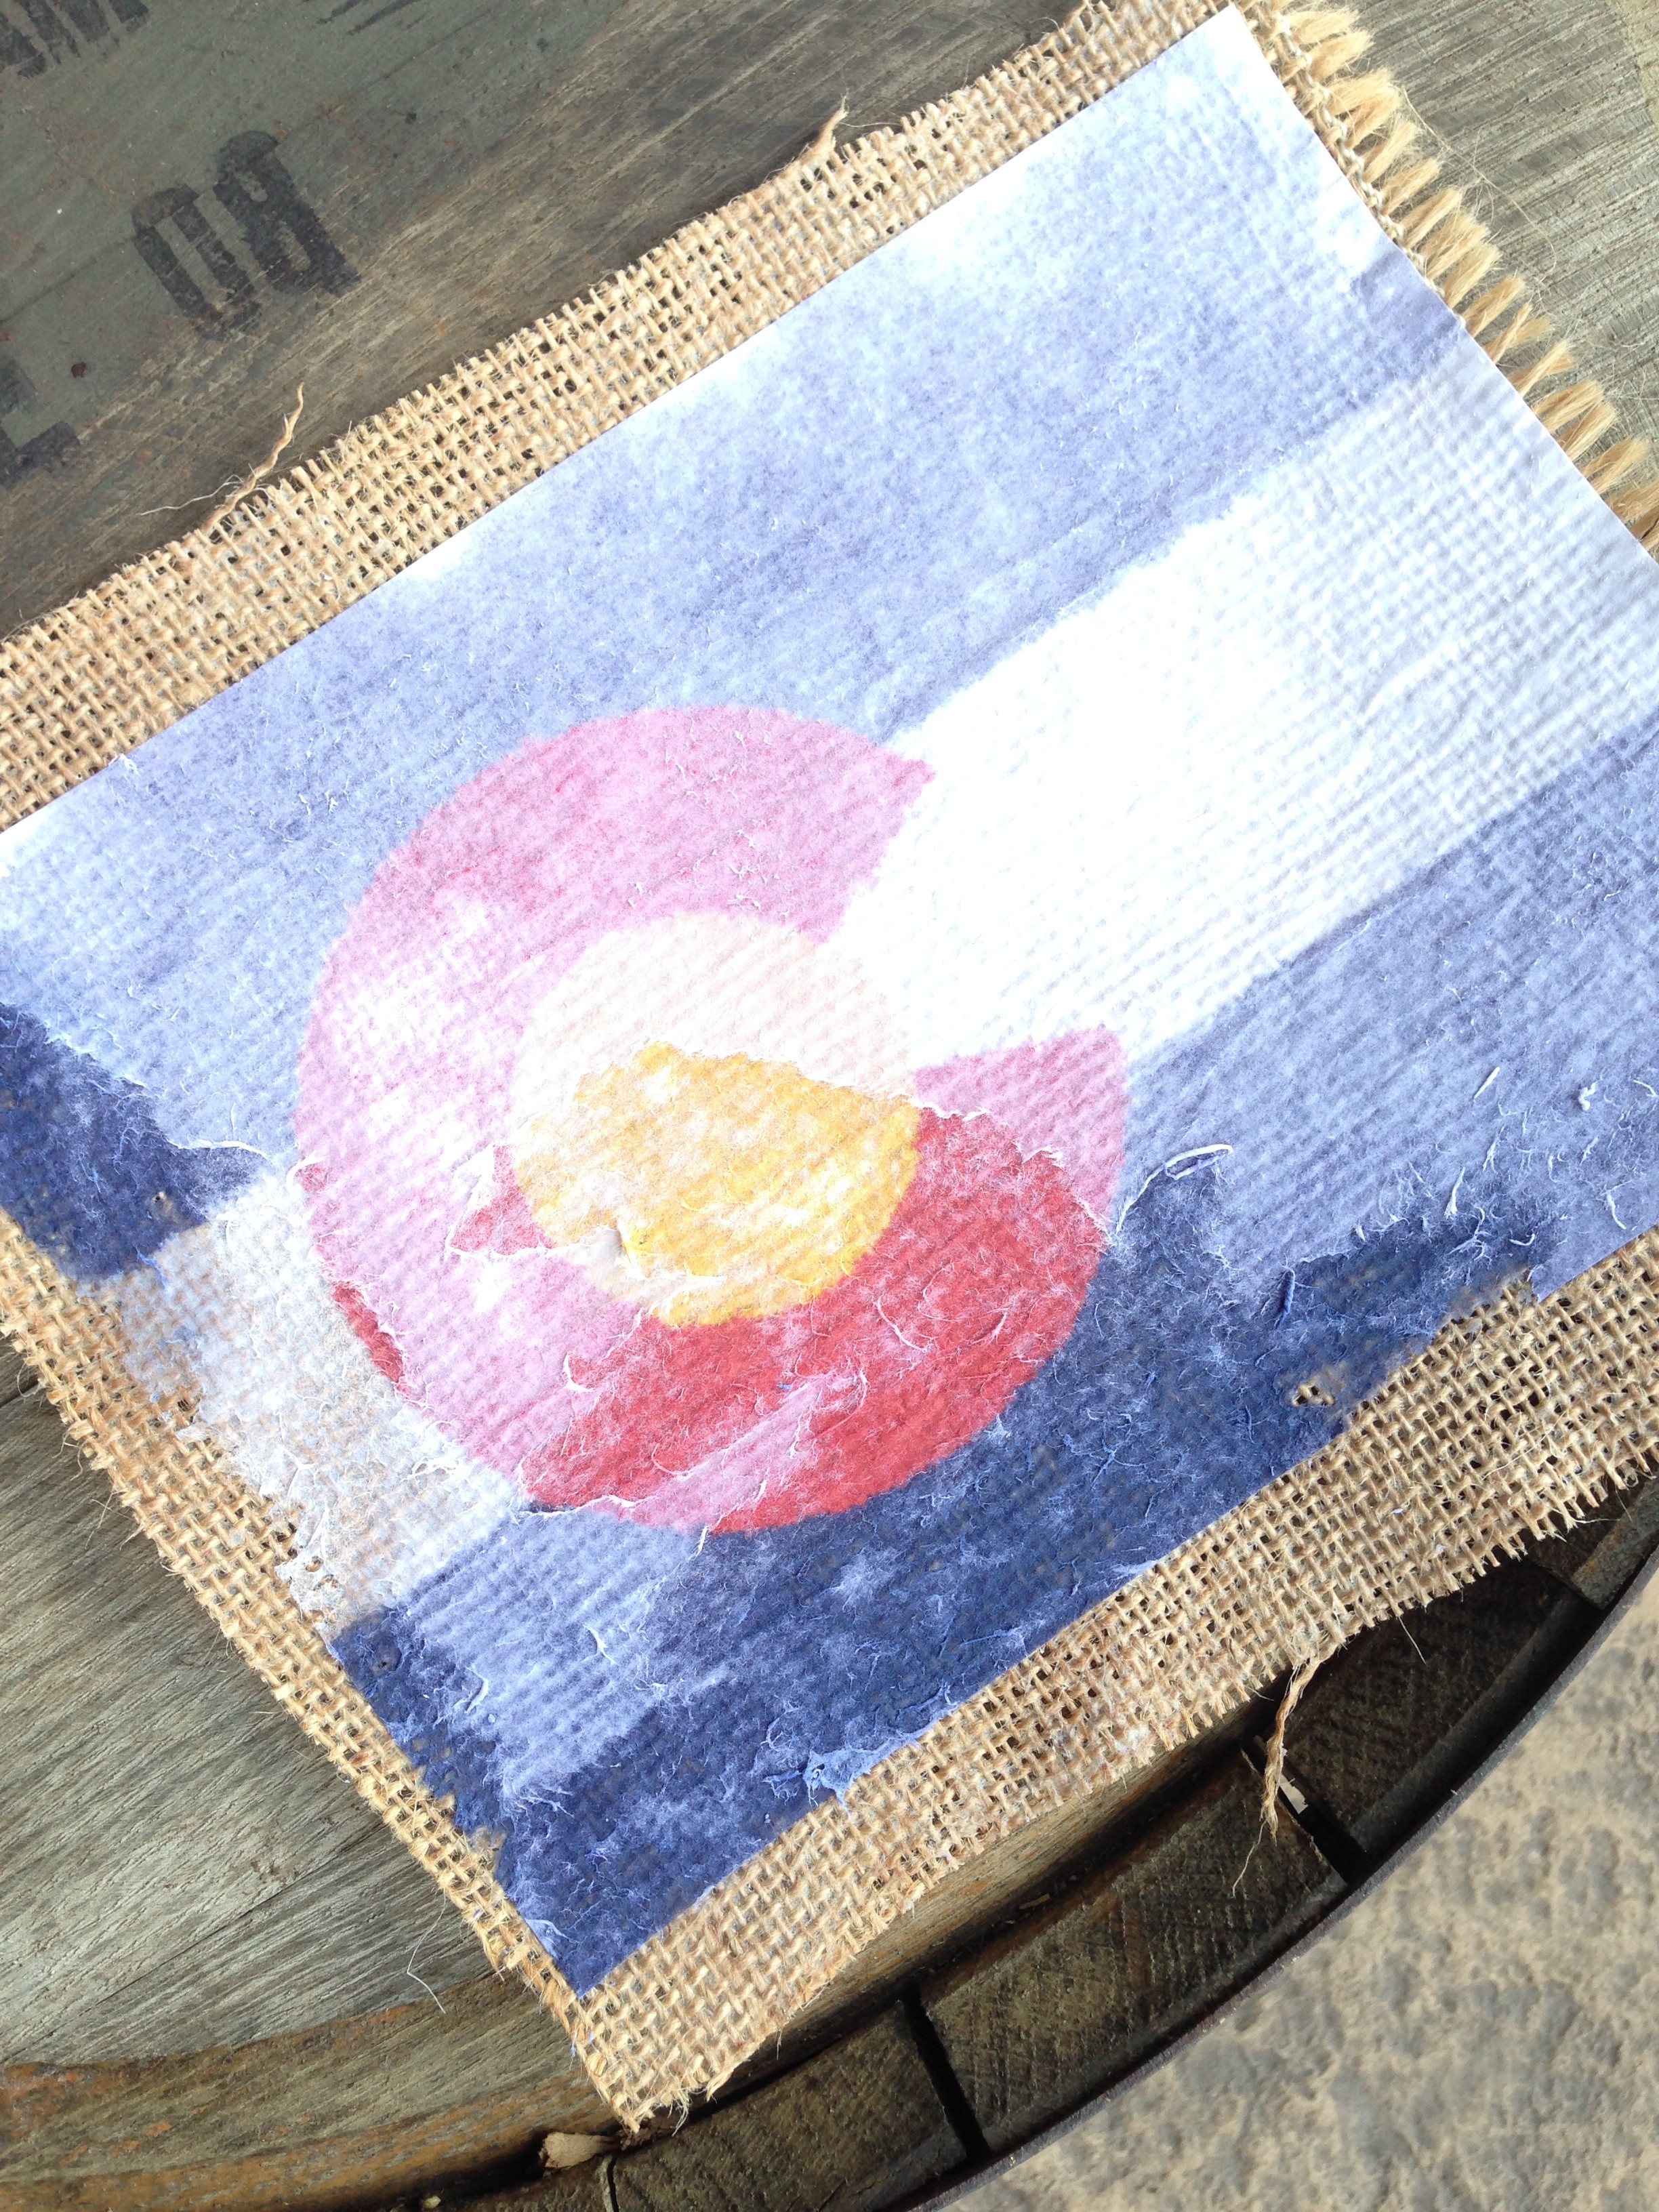
a piece burlap
a photo of the Colorado flag {we used regular, white printer paper}
Golden GAC 800 Medium from Golden Paints
brush
How To:
Print a photo of the Colorado flag.
Use a brush to apply the gel medium to the item you plan to add the photo to.
Place the image, face down, on the item you are adding the photo to, in this case, a piece of burlap.
Gently press down and rub all areas on the back of the photo so the medium is applied, without bubbles, to the entire photo.
Wait for the medium to dry. We waited about 2 hours.
Use a wet wash cloth to ‘wet’ the back of the photo. The photo will look wet, and if it doesn’t, you may have to add more water to the wash cloth. Once the paper looks transparent, rub the paper with your hand or the wash cloth gently – it will peel the ‘paper pulp’ and reveal your transferred image.
We added the DIY Colorado burlap flag to a red basket with twine, and added lovely sunflowers. This would also be pretty framed, or mounted on an old, antique piece of white wood.

{images j. sorelle}