honey bear

This is the cutest honey bear I’ve ever seen! Seriously, it’s so creative, and sweet! This would be darling decor during the month of October or at Thanksgiving.

My sister-in-law’s friend Molly shared a tutorial of this adorable project with us today. She was inspired by a similar honey bear she saw in her PT clinic in North Carolina. Thank you, Molly, for sharing it with us.

Here’s her inspiration…

And, here’s her ‘take’ on it. Job well done, Molly.

From Molly…I bought three large pumpkins.  One for the Honey pot.  Two for the bear. For the honey pot, you can see how I carved a top out and then obviously scooped out the “guts.”  I wrote HONEY with a pencil and then took various tools–mostly different screw drivers to carve each letter.  Make sure to leave enough room in between so the letters can be fairly thick. You can fill the honey pot with candy (in a bag). 
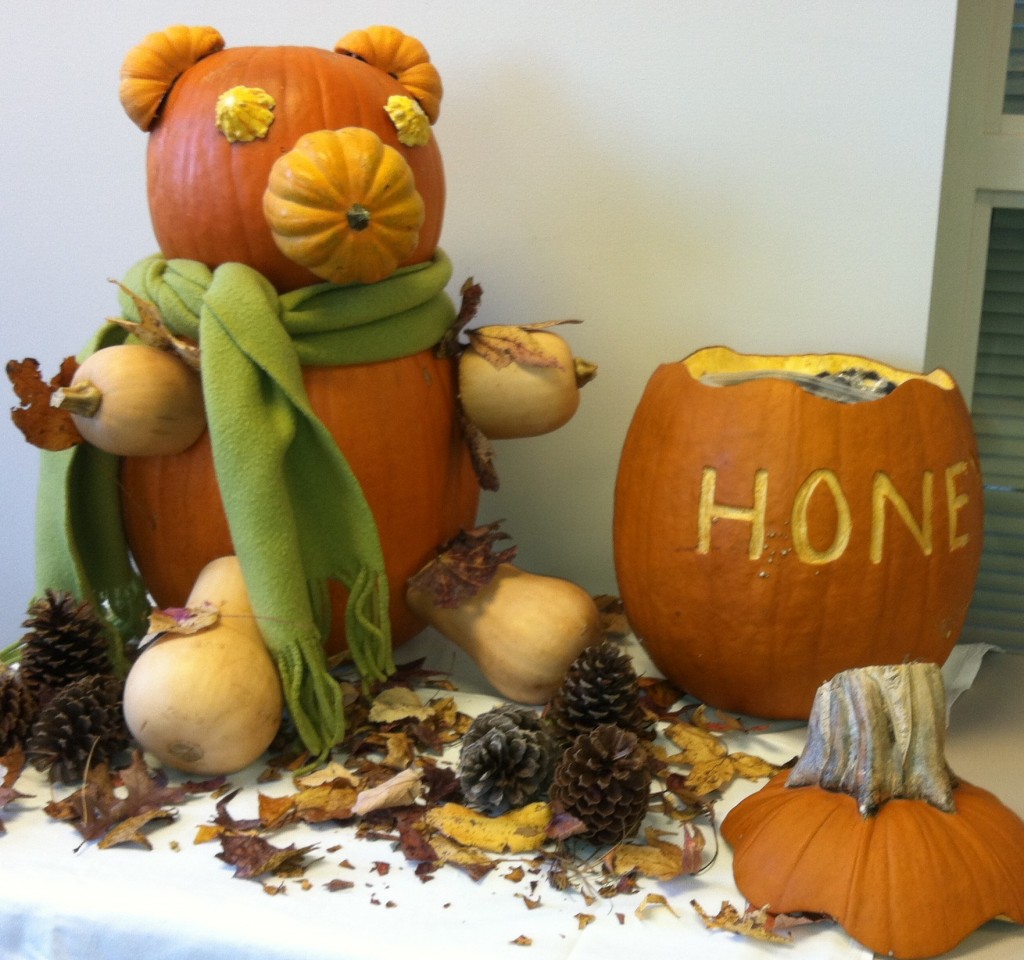
The bottom part of the bear–I just cut off the stem of that pumpkin because it was a fairly flat pumpkin, and then I placed the top pumpkin on top of the bottom one.  I thought it might fall off, but it never did.  I didn’t want to cut the bottom one for risk of rotting.  I cut the stem off the top pumpkin also.  The ears are just small-sized pumpkin that I sliced off part of each one so it would fit against the head.  I actually used heavy-duty toothpicks to stick into the ears and into the head.  I did the same thing for the nose.  The eyes were made of a different pumpkin and on those I actually cut off the end and them scraped them out.  I only stuck a toothpick into the head and just let the eyes rest on it.
The feet are a type of squash that I just laid at the base of the bottom pumpkin.  The arms were a little difficult in that toothpicks would not hold them so I used very small dowel rods and put them into the large pumpkin, and then into the arms.  A scarf was placed around the head and body.  I finished it off with pinecones and colored leaves.
Tip from Molly: I googled how to “preserve” a pumpkin but did not have success.  I tried to clorox the first honey pot, and then added shellac on it, but it still rotted after about 5 days.  I’m sure it would do great outdoors or in cooler weather. 
{images via Molly}

layered halloween dip

Layered dip is a must-have at our family’s Halloween get together, and it should be at yours, too! It’s the perfect app because it’s SO EASY and so delicious.

You will need:

{amount depends on the size of the dish, but you can use extra of your fav layers}

picante sauce
refried beans {Rosarita’s Spicy Jalapeño gives it an extra kick}
mexican style blend cheese
black olives, cut in halves
sour cream
guacamole {I made my own using avocado, picante, sour cream, garlic salt, pepper, Jalapeño flavored Tabasco and a splash of lime juice}
diced green chilis
green onions, sliced
tomatoes, diced

DIRECTIONS:

Using a pie dish, or any other dish, cover a thin layer of each ingredient in this order:
beans, salsa, guacamole, diced green chilis, green onions, cheese, tomatoes, sour cream and olives

{tip: for a special Halloween dip, put sour cream in a plastic baggie, cut a tiny hole in one of the corners, and decorate like you would a cake}

Yep, that’s IT! How easy is that?
I promise, every bite will be gone. You’ll be the hit of the party 🙂

Thanks to our fabulous cousin, Nikki, for inspiring us this year 🙂 xo

{images via Tutto Bella}


diy halloween

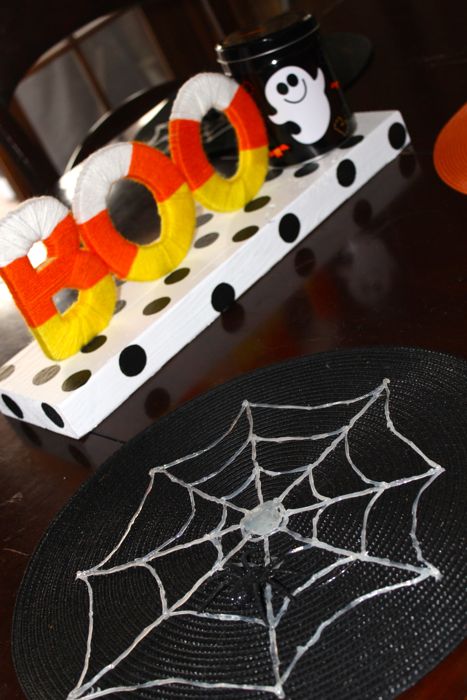
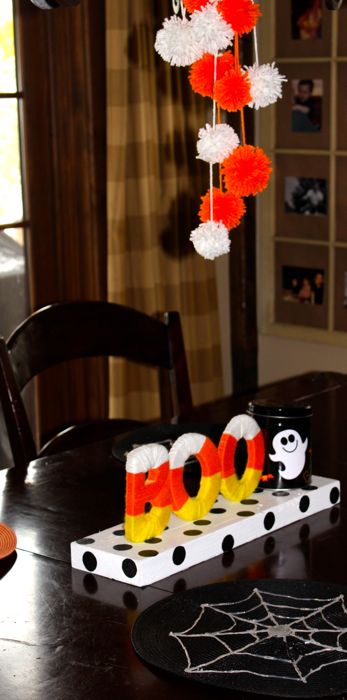
In addition to the DIY hot glue gun spider webs, I wanted to add a little Halloween touch to our table. I like the colors of the original candy corn, but can’t stand the taste, so with a little yarn, paint and some diy tips, this simple Halloween table came to life in an afternoon, without having to eat a single candy corn.

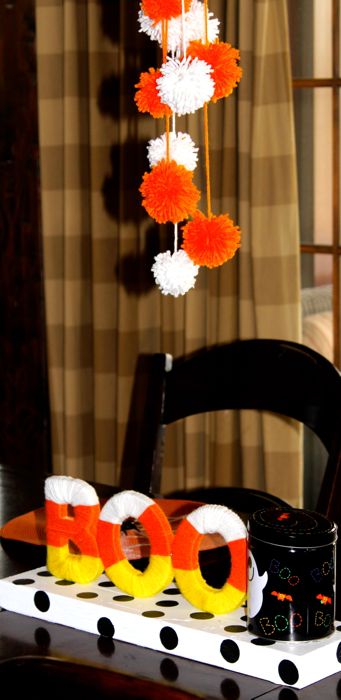
I found the best way to make yarn pom poms was to follow Creature Comforts video tutorial. She explains it so well, and you will be addicted! Very easy and cute! I used yarn to tie them to one another to make a ‘yarn chandelier’.

As far as the BOO treat station, as we call it, I bought wood letters from Hobby Lobby, and wrapped them in yellow, orange and white yarn {inspired by the candy corn}. I didn’t follow a tutorial, just did it as I went along, but My Sister’s Suitcase has a similar approach to the one I took, and they provide a great tutorial. I took a piece of raw wood from the garage, painted it white, and used a circle-shaped brush to add black polka dots to it. Once dry, I used a hot glue gun to glue the letters and candy container in place. It was simple, and the kids love it…as it’s their favorite spot to stop at the end of the day for a treat.

{images via Tutto Bella}

{recipe} mini patriotic pound cakes

Hope you all had a wonderful 4th of July holiday. We had a terrific weekend with family and friends at the pool, on the golf course and at fabulous parties {you will see party details soon}.

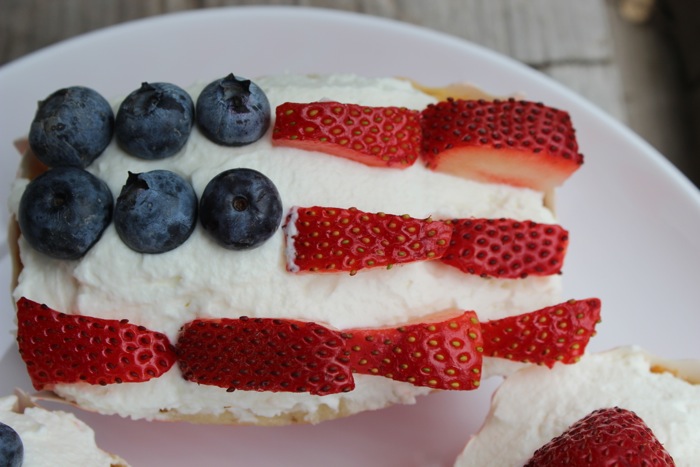
We had some glitches last week on our blog {convenient with a holiday, huh?}, so forgive us for not getting some of our patriotic posts to you. Good news is this recipe is easy and versatile. You don’t need to decorate with red, white and blue. Use fresh strawberries and blueberries if you want – but design it with someone’s name, a flower or even shapes.  Keep this in your recipe books because it is the best pound cake recipe ever! It’s the perfect summer time dessert. It’s slightly revised from my grandma’s recipe, and I think my grandma is one of the best cooks I’ve known. I will always cherish the special times I spent in the kitchen with her.

Mini Pound Cake
makes 14 or 1 loaf

Ingredients
1/2 cup butter {softened}
1 cup sugar
2 eggs
1.5 cups whole milk
2 cups flour
2 tsp baking powder
1 tsp vanilla
1/2 tsp salt

How To
Add butter, eggs and sugar and mix with a blender until well blended.
Add salt and baking powder to the flour, then add the flour and milk, alternating each {while blending}.
Add vanilla and blend.
Pour into baking cups {you do not need to grease baking cups, however if you are using a standard loaf baking tin, you need to grease the pan}
Fill the baking cup 1/2-3/4 full.
Bake at 350 degrees for 20-23 minutes. If you are making a standard loaf, cook for 50 minutes.
Stick a toothpick in the loaf or mini loaf, and if its comes out clean, it’s done.
Top with whipped cream and decorate with fruit.

Whipping Cream
2 cups heavy whipping cream
2-3 tablespoons powdered sugar
1/2 tsp vanilla.

Whip on a medium to medium-high speed until cream gets thicker and forms peaks.

Savor each bite! I know I do.

{images via Tutto Bella Blog}

patriotic playlist

We all know music can really make or break a party. Today and tonight, we plan to gather around the grill, golf course, pool, campfire and watch fireworks as we celebrate our nation’s freedom. Call me a sap, but when I hear God Bless the USA, my eyes well up with tears! I really have ‘a moment’ as I watch fireworks and hear that song. So, we’ve put together a list of our favorites so you can have your own ‘moments.’ It will take no time at all with iTunes or Spotify!

Ray Charles with Alicia Keys, America The Beautiful or
Ray Charles, America the Beautiful

Dierks Bentley, Home

Whitney Houston, The Star Spangled Banner

Toby Keith, Courtesy Of The Red, White And Blue (The Angry American)
Lee Greenwood, God Bless The U.S.A.Tim McGraw, If You’re Reading This
LeAnn Rimes, God Bless America
Crosby & Nash, My Country Tis Of Thee
Don McLean, American Pie
Tom Petty And The Heartbreakers, American Girl
Katy Perry, Firework
Sugarland, Everyday America
Miley Cyrus, Party In The U.S.A.
Bruce Springsteen, Born In The U.S.A.
Toby Keith, American Soldier
John Mellencamp, Our Country – Rock Version
Neil Diamond, America
John Mellencamp, Jack & Diane
Brooks & Dunn, Only In America
Martina McBride, Independence Day

{videos via YouTube}