honey bear

This is the cutest honey bear I’ve ever seen! Seriously, it’s so creative, and sweet! This would be darling decor during the month of October or at Thanksgiving.

My sister-in-law’s friend Molly shared a tutorial of this adorable project with us today. She was inspired by a similar honey bear she saw in her PT clinic in North Carolina. Thank you, Molly, for sharing it with us.

Here’s her inspiration…

And, here’s her ‘take’ on it. Job well done, Molly.

From Molly…I bought three large pumpkins.  One for the Honey pot.  Two for the bear. For the honey pot, you can see how I carved a top out and then obviously scooped out the “guts.”  I wrote HONEY with a pencil and then took various tools–mostly different screw drivers to carve each letter.  Make sure to leave enough room in between so the letters can be fairly thick. You can fill the honey pot with candy (in a bag). 
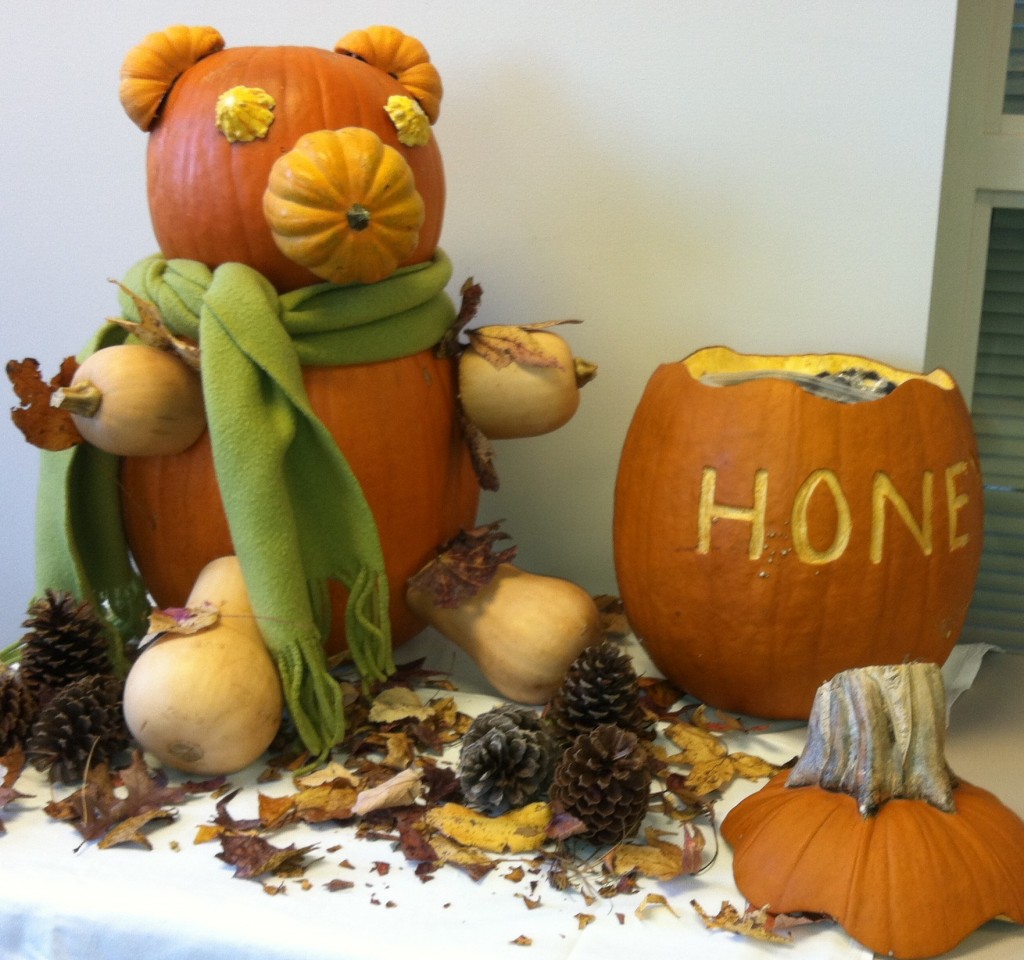
The bottom part of the bear–I just cut off the stem of that pumpkin because it was a fairly flat pumpkin, and then I placed the top pumpkin on top of the bottom one.  I thought it might fall off, but it never did.  I didn’t want to cut the bottom one for risk of rotting.  I cut the stem off the top pumpkin also.  The ears are just small-sized pumpkin that I sliced off part of each one so it would fit against the head.  I actually used heavy-duty toothpicks to stick into the ears and into the head.  I did the same thing for the nose.  The eyes were made of a different pumpkin and on those I actually cut off the end and them scraped them out.  I only stuck a toothpick into the head and just let the eyes rest on it.
The feet are a type of squash that I just laid at the base of the bottom pumpkin.  The arms were a little difficult in that toothpicks would not hold them so I used very small dowel rods and put them into the large pumpkin, and then into the arms.  A scarf was placed around the head and body.  I finished it off with pinecones and colored leaves.
Tip from Molly: I googled how to “preserve” a pumpkin but did not have success.  I tried to clorox the first honey pot, and then added shellac on it, but it still rotted after about 5 days.  I’m sure it would do great outdoors or in cooler weather. 
{images via Molly}

layered halloween dip

Layered dip is a must-have at our family’s Halloween get together, and it should be at yours, too! It’s the perfect app because it’s SO EASY and so delicious.

You will need:

{amount depends on the size of the dish, but you can use extra of your fav layers}

picante sauce
refried beans {Rosarita’s Spicy Jalapeño gives it an extra kick}
mexican style blend cheese
black olives, cut in halves
sour cream
guacamole {I made my own using avocado, picante, sour cream, garlic salt, pepper, Jalapeño flavored Tabasco and a splash of lime juice}
diced green chilis
green onions, sliced
tomatoes, diced

DIRECTIONS:

Using a pie dish, or any other dish, cover a thin layer of each ingredient in this order:
beans, salsa, guacamole, diced green chilis, green onions, cheese, tomatoes, sour cream and olives

{tip: for a special Halloween dip, put sour cream in a plastic baggie, cut a tiny hole in one of the corners, and decorate like you would a cake}

Yep, that’s IT! How easy is that?
I promise, every bite will be gone. You’ll be the hit of the party 🙂

Thanks to our fabulous cousin, Nikki, for inspiring us this year 🙂 xo

{images via Tutto Bella}


tgif


1. Honeycrisp Apples are in the bins at grocery stores – they are my absolute favorite. They are delicious as ia, with cheese, peanut butter, or this time of year decorated with delectable caramel. Babble hooks you up with 9 creative ideas for caramel apples.

2. These sparkly flats from Gap are calling my name. And, so is this bag with a big bow.

3. I’m adding this DIY Mirror made of Shims to my to do list, but first I’m going to make these DIY Clipboard Frames.

4. I really like Brené Brown, researcher/storyteller, who studies human connection. She studies shame, courage, worthiness and vulnerability. I first saw her on Oprah, and really liked her. She is personal, funny, real and her research is powerful and helpful. Here’s the TEDtalk that made her BIG. If you get time this weekend, watch it. I’m reading her book, Daring Greatly: How the Courage to Be Vulnerable Transforms the Way We Live, Love, Parent, and Lead, right now. It’s good, ya’ll.

In the intro, she referenced a speech that Teddy Roosevelt gave in 1910. It’s so well said. In it, Roosevelt said:

It is not the critic who counts; not the man who points out how the strong man stumbles, or where the doer of deeds could have done them better. The credit belongs to the man who is actually in the arena, whose face is marred by dust and sweat and blood; who strives valiantly; who errs, who comes short again and again, because there is no effort without error and shortcoming; but who does actually strive to do the deeds; who knows great enthusiasms, the great devotions; who spends himself in a worthy cause; who at the best knows in the end the triumph of high achievement, and who at the worst, if he fails, at least fails while daring greatly.”

5. If you love lentils like me, you can stay warm this weekend with this healthy lentil soup I made this week. Delicious.

Vegetable and Lentil Soup
serves 8

Ingredients
3/4 of a 1 pound bag of green lentils rinsed
Boiling water
1/4 cup extra-virgin olive oil
1 onion, chopped
3 medium garlic cloves, minced
2 large leeks, chopped
1 tsp Kosher salt and freshly ground pepper to taste
1 tsp dried thyme
1 tsp ground cumin
6 celery ribs, diced
6 medium carrots, diced
2 quarts chicken stock
1 cup water
1/4 cup tomato paste
2 tablespoons dry red wine
Freshly grated Parmesan cheese, for serving

How To
In a large heat-proof bowl, cover the lentils with boiling water for 15 minutes. Drain, rinse and set aside.

Heat olive oil in a large pot. Add the onions, garlic, leeks, salt, pepper, thyme and cumin and cook over medium heat, stirring occasionally, until the vegetables tender, about 20 minutes.

Add the celery and carrots and cook until they begin to soften, about 15 minutes.

Then, add the chicken stock, water, tomato paste and lentils to the pot.

Increase the heat to high, cover and bring to a boil. Uncover, reduce the heat to low, stirring occasionally, until the lentils are tender, about 1 hour.

Stir in the red wine.

Serve hot with a sprinkling of Parmesan, and croutons if you desire.

{image via Sugarboo Designs, Lavender Fields Online…we love Sugarboo!}

diy halloween

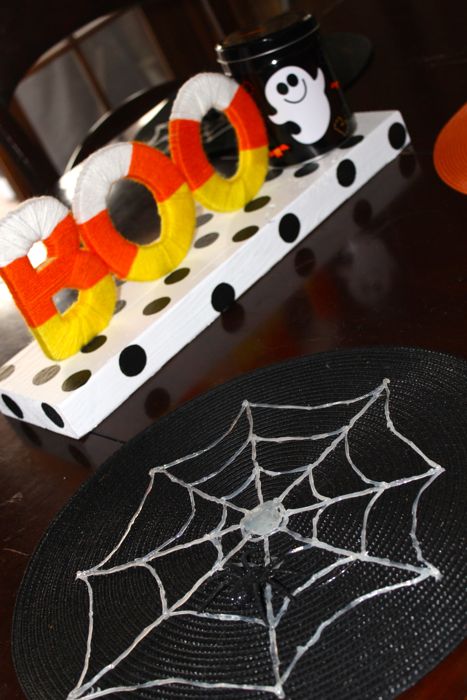
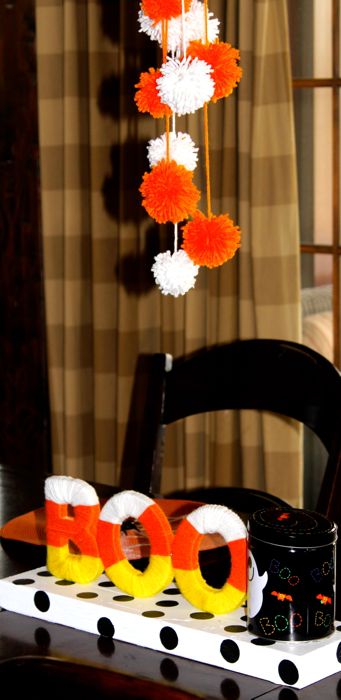
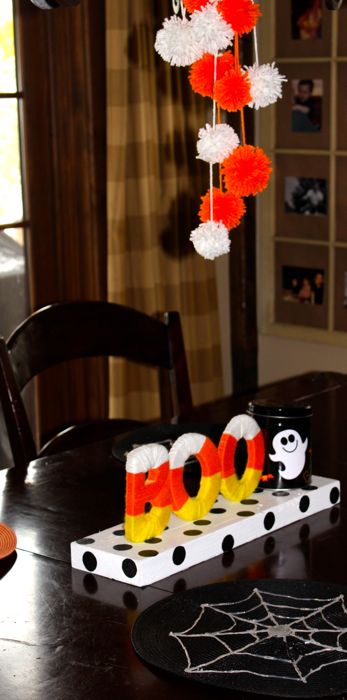
In addition to the DIY hot glue gun spider webs, I wanted to add a little Halloween touch to our table. I like the colors of the original candy corn, but can’t stand the taste, so with a little yarn, paint and some diy tips, this simple Halloween table came to life in an afternoon, without having to eat a single candy corn.

I found the best way to make yarn pom poms was to follow Creature Comforts video tutorial. She explains it so well, and you will be addicted! Very easy and cute! I used yarn to tie them to one another to make a ‘yarn chandelier’.

As far as the BOO treat station, as we call it, I bought wood letters from Hobby Lobby, and wrapped them in yellow, orange and white yarn {inspired by the candy corn}. I didn’t follow a tutorial, just did it as I went along, but My Sister’s Suitcase has a similar approach to the one I took, and they provide a great tutorial. I took a piece of raw wood from the garage, painted it white, and used a circle-shaped brush to add black polka dots to it. Once dry, I used a hot glue gun to glue the letters and candy container in place. It was simple, and the kids love it…as it’s their favorite spot to stop at the end of the day for a treat.

{images via Tutto Bella}

spun in a web of…

glue!

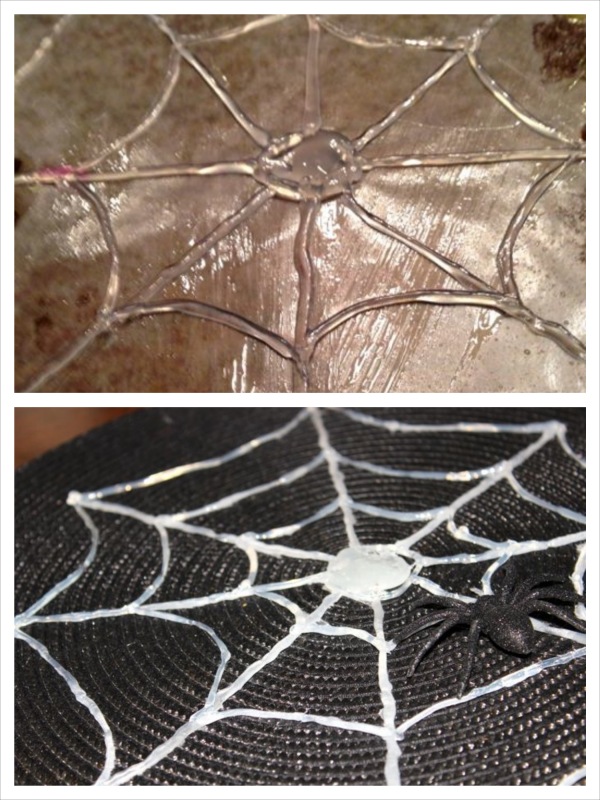
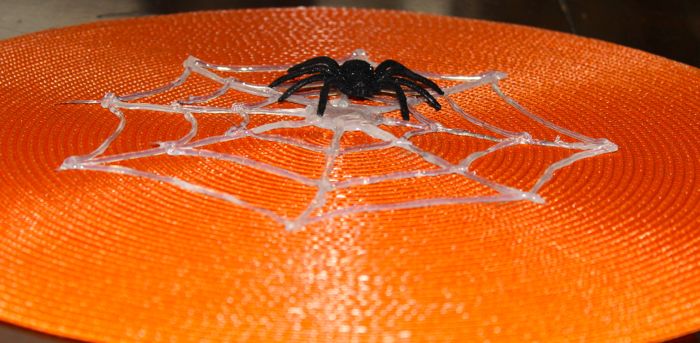
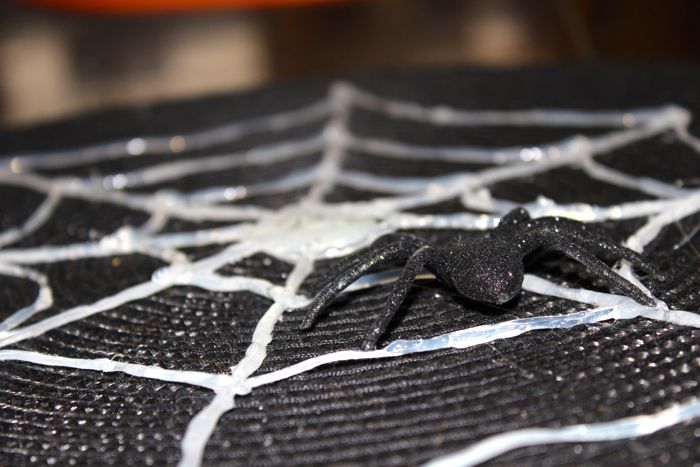
Looking for a super-duper easy and cute Halloween DIY? Look no further. Spin your own spider web’s this Halloween…using a hot glue gun. I used my webs as an accessory for a festive table setting, but these can be hung or displayed in so many ways.

All You Need:
Hot Glue Gun and Glue Sticks
Wax paper
Olive Oil {an oil spray may work too}

How To:
Cut the wax paper into a square, or the shape/size you want your spider web to be.
Spray, paint, or rub the olive oil onto the wax paper with your fingers. I found that the olive oil helped the glue not to stick when I pulled it from the paper.
Use your hot glue gun and design. I free-handed the webs {clearly}, but I suppose you could put a stencil/photo under the wax paper, and follow the lines.
Once your design is finished, gently pull the glue web from the wax paper. If it sticks in a few spots here and there, just gently pull the wax paper from the glue.

More images of my complete Halloween table setting, and other fun DIY projects to come this week.

{image via Tutto Bella}