Martha Stewart’s team sent out an newsletter e-mail with information about an Egg Decorating competition, and although they probably had thousands upon thousands of applicants, part of me thought, ‘why not just attempt a semi-creative egg and see how it turns out, and maybe I can enter?’ Well, it turned out to be a fun project for the kids and I on a cold day, and I like the way it turned out.
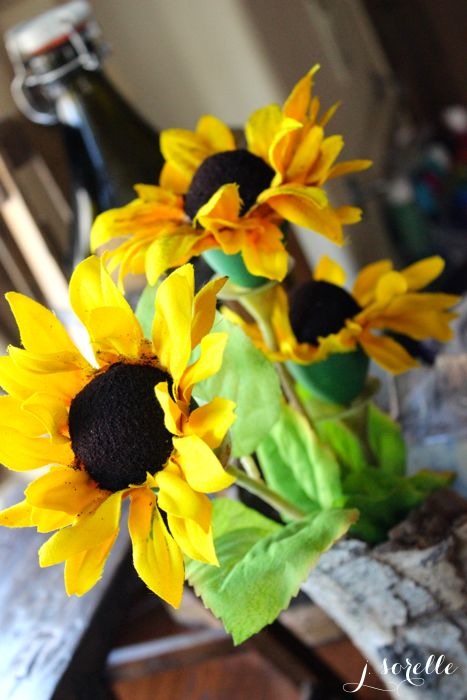
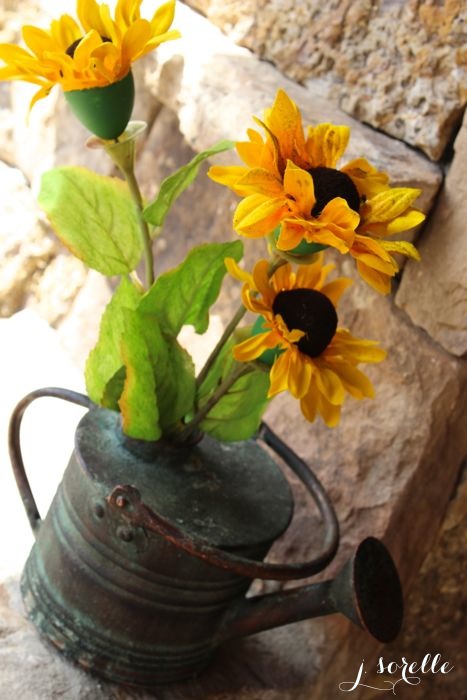
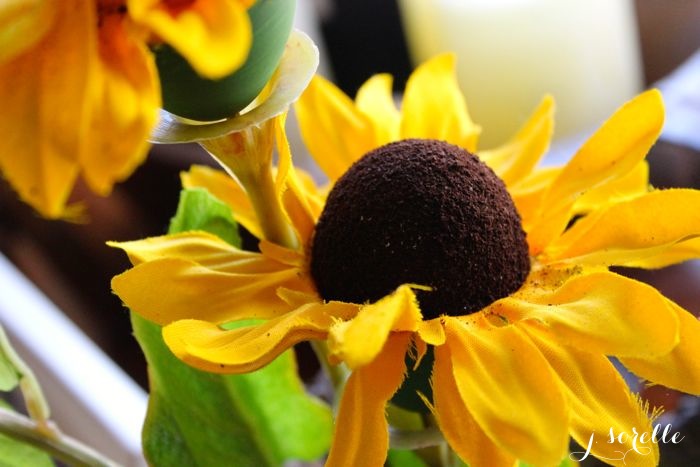
I know sunflowers do not typically go hand-in-hand with Easter, but the texture with the ground espresso {oh, and the amazing smell} and the bright yellow color lured me in. Maybe you can follow some of the same steps below and use eggs to create Tulips for your Easter table? If you do, pretty please send me photos.
You’ll Need:
sunflowers
hard, white eggs {they are not plastic, but more plaster and do not open}
hot glue gun
a screwdriver {to screw or drill a hole into the bottom of the egg}
green acrylic paint
scissors
ground coffee or espresso beans {they add the sunflower texture}
How To:

1. Find a sunflower you can part with, and remove it from the stem {I was able to just pull mine off}, and remove all the greenery under the leaves.
2. Cut a circle in the center of the flower – I guessed at the size, and when it was too small, I cut it to make it larger.
3. Slide the flower over the egg and put a little tu-tu {otherwise known as sunflower leaves tu-tu} on it. If it fits snugly, fantastic, and if not, add some hot glue to keep it in place.
3.5. {not pictured} Use a screwdriver or nail and hammer to put a small hole in the bottom side of one egg. I did this, with not much muscle strength.
4. Pull all the leaves back and hold them with your hand. Add a generous, but not too heavy, amount of Modge-Podge.
5. Gently rub the Modge-Podge covered egg in espresso or ground coffee beans.
6. Insert a toothpick in the hole, and paint green acrylic paint on the bottom of the egg. Then place in cardboard or styrofoam to let it dry.
Once it’s dry, add the egg flower back to the stem {mine had little stems to keep them in place}.
You will have an egg-stra special centerpiece for your Easter party!!

{images via j. sorelle}