Warm Up With Chic & Cozy Coats This Winter

IMG_5138

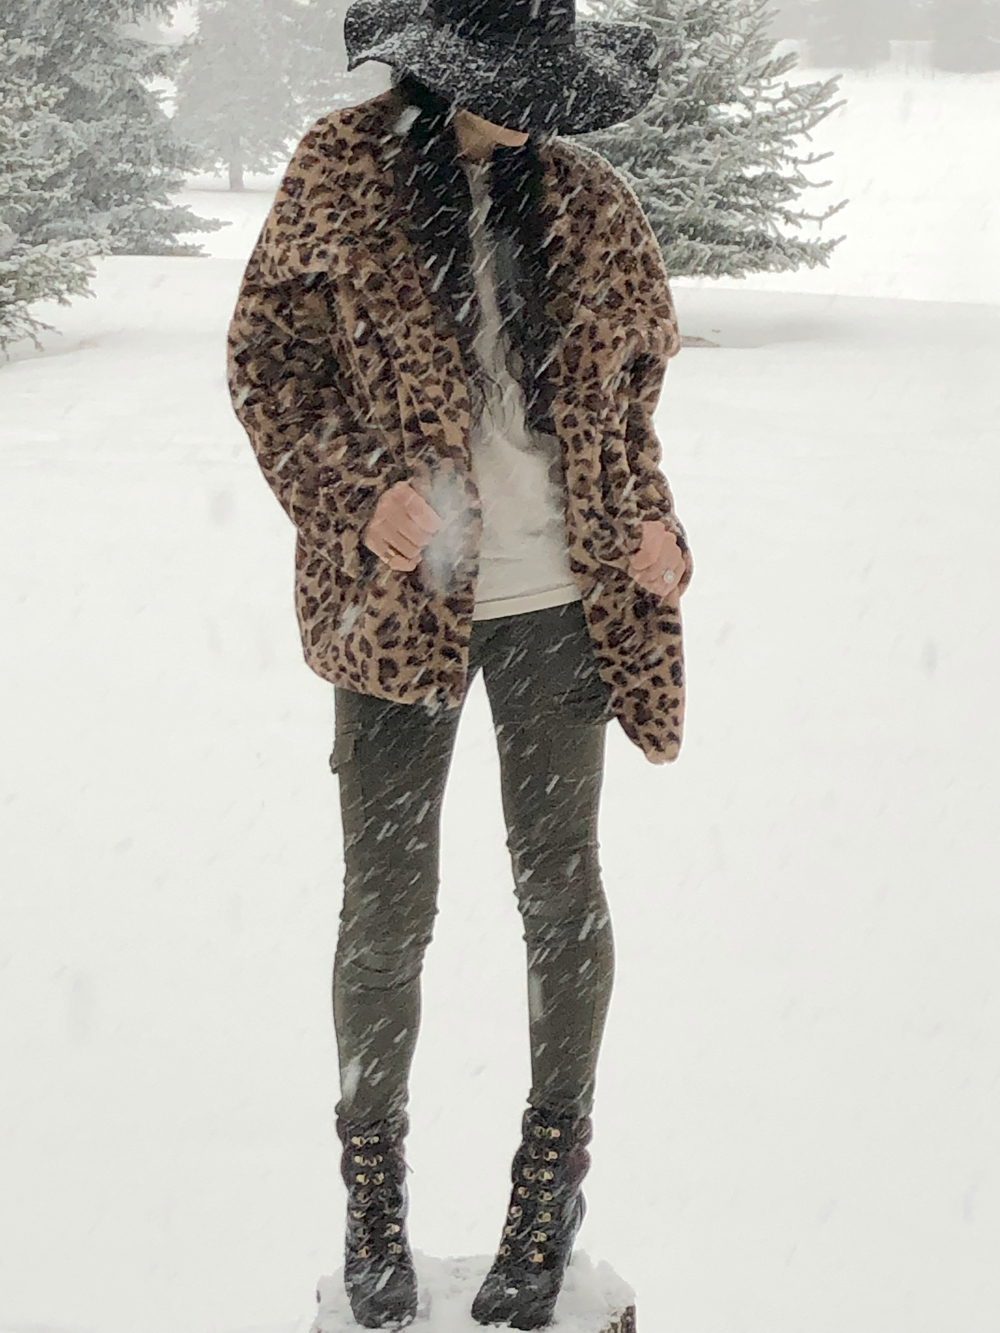
It’s a winter wonderland in the Rocky Mountains this weekend. December is starting out strong with lots of snow! Everyone loves the feeling of being snuggled by a warm, furry teddy bear, especially on snowy days. As adults we don’t cuddle with our teddy bears like our children do; but lucky for us this winter, fashion trends are giving us beautiful options for all those cozy vibes. But, instead of a bear, it’s in the form of a coat. Whether you call them furry, fuzzy, cozy, or teddy, all these coats feel and look amazing! Here’s some of our favorite faux fur coats of the season.

DIY Woodland Winter Cake Topper

chocolate-cake-wood-slice-rabbit-tree-white-joy-sign-diy-cake-topper

We are experiencing a love affair with bottle brush trees and wood slices this winter. And, as usual, crushing on white and gold, too. Our kids think Christmas is tomorrow with all the holiday blog projects lying around the house – it’s a tease for them, and almost an overwhelming reminder of the upcoming holidays for us. At least they get to enjoy some of the benefits of shooting a DIY winter cake topper – shoot the cake, and eat it too.

chocolate-cake-wood-slice-rabbit-tree-white-joy-sign-diy-cake-topper

If you’re celebrating a winter birthday, or want to impress guests this holiday season with an adorable DIY winter cake or pie topper, just go out and chop a tree {you can buy them already cut from Michael’s if a lumberjack isn’t in your repertoire}, bust out the gold leaf paint, and glue.

Materials You’ll Need:
Wood slices
Cake pop sticks
Mini woodland animal figures – deer, rabbit, bear, squirrel
Thin popsicle sticks
Mini banner flags
Gold leaf paint
Hot glue gun

Directions:

Dab the ends of the  bottle brush tree with gold leaf paint. You can’t mess this up – just dab here, and there and everywhere.

Write a word, name or phrase on the paper banner.

Use a hot glue gun to glue the tree, animal and popsicle stick with paper banner on the wood slice. I cut the popsicle stick in half to make it shorter.

white-tree-rabbit-joy-sign-gold

Glue ‘legs’ on the bottom-side of the wood slice with the cake pop sticks that will stick into the cupcake, cake or pie.

rabbit-wood-slice-diy-cake-topper-tree-joy

chocolate-cake-wood-slice-rabbit-tree-white-joy-sign-diy-cake-topper


How to Create DIY Ice Votives for Winter Ambiance

DIY ICE VOTIVES_jsorelle

As I made pasta sauce last week, I was about the throw away the cans of tomato paste and whole, peeled tomatoes, when I thought about their potential for my next project. They lived up to my expectation as the perfect prop to make DIY ice votives. I learned as I went along, and hopefully simplified it for you below so you can warm up the outside of your home this winter. I loved the results, and with the romantic snow falling outside, I wish I had more cans to make more votives! Try it before the snow melts and add it to next year’s winter to-do! Here’s how you can do it flawlessly.

DIY Ice Votives
NOTE: materials below makes 2 ice votives at a time, so multiply materials accordingly, or work on this project over the course of several nights, freezing two votives per day.

You’ll Need:

Water

Rocks

2 28 oz cans, emptied and rinsed

2 14 oz cans, emptied and rinsed

Cold temperature outside, or a freezer

How To:

Fill the large can less than halfway with water.

Fill the small 14 oz cans with rocks.

Place the small can inside the large can – the water should not overflow in the small can, so adjust the water accordingly. The top of the water should be about an inch from the top of the small can.

Move the small can so it’s in the middle of the larger can, with even spaces all around it.

Place the can carefully outside or in the freezer.

In the morning, the water should be frozen.

When It’s Time to Reveal Your Ice Votive

The ice takes about an hour to melt if you want to just let it sit, but who has that kind of time. I don’t, so I just held the cans of frozen water and rocks under the faucet and ran hot water over it for a minute or two. Fill the small can of rocks with hot water so it loosens and ‘releases’ from the ice. Run it across the top of both and you will see it melt.

Once the ice has melted enough to loosen the cans, remove the small can from the large can, and slowly and gingerly tip the large can over slightly so you can gently catch the ice votive.

Find a spot outside on your table, place them on a tray, line them up for a grand entry or make a spot in the snow for your ice votives.

You can fill with either real votive candles {I used real votives}, but it may be better to use flameless candles so the ice doesn’t melt too fast. On a cold week, mine lasted the entire week.

diy ice votives_jsorelle

diy ice votives_jsorelle

winter warmth ice votives

winter diy_ice votives_jsorelle

{images via J. Sorelle}

Sweater and Legging Fall and Winter Fashion

= swegging. And, I want a pair of them!

So, I know I should be telling you about some of my favorite collections and pieces from New York Fashion Week {I loved all the black and white on the runway…I hope to share my faves with you soon}. But it’s colder here in the Rocky Mountains and the trees are a beautiful palette of rich red, burnt orange, deep yellow and crisp green, so my mind is slooowwwlly transitioning to fall. I’m in denial that fall is already here. I’ve been reluctant to ‘go there’ with colder weather fashion, but today I’m warming up to the idea…

Free People Sweater Leggings, Free People {$68}
{mom…I want a pair of these sweggings:)}


Mossimo Supply Co. Juniors Sweater Skirt
, Target {$25}

Over the Knee Twisted Cable Boot, UGG Australia {$250}


 Payton Belted Long Cardigan, Nordstrom {$118}

Chalet We Dance Boot, ModCloth {$88.99}

Leigh Sweater, Club Monaco {$129.50}

{images via Free People, Target, UGG Australia, Nordstrom, ModCloth, Club Monaco}