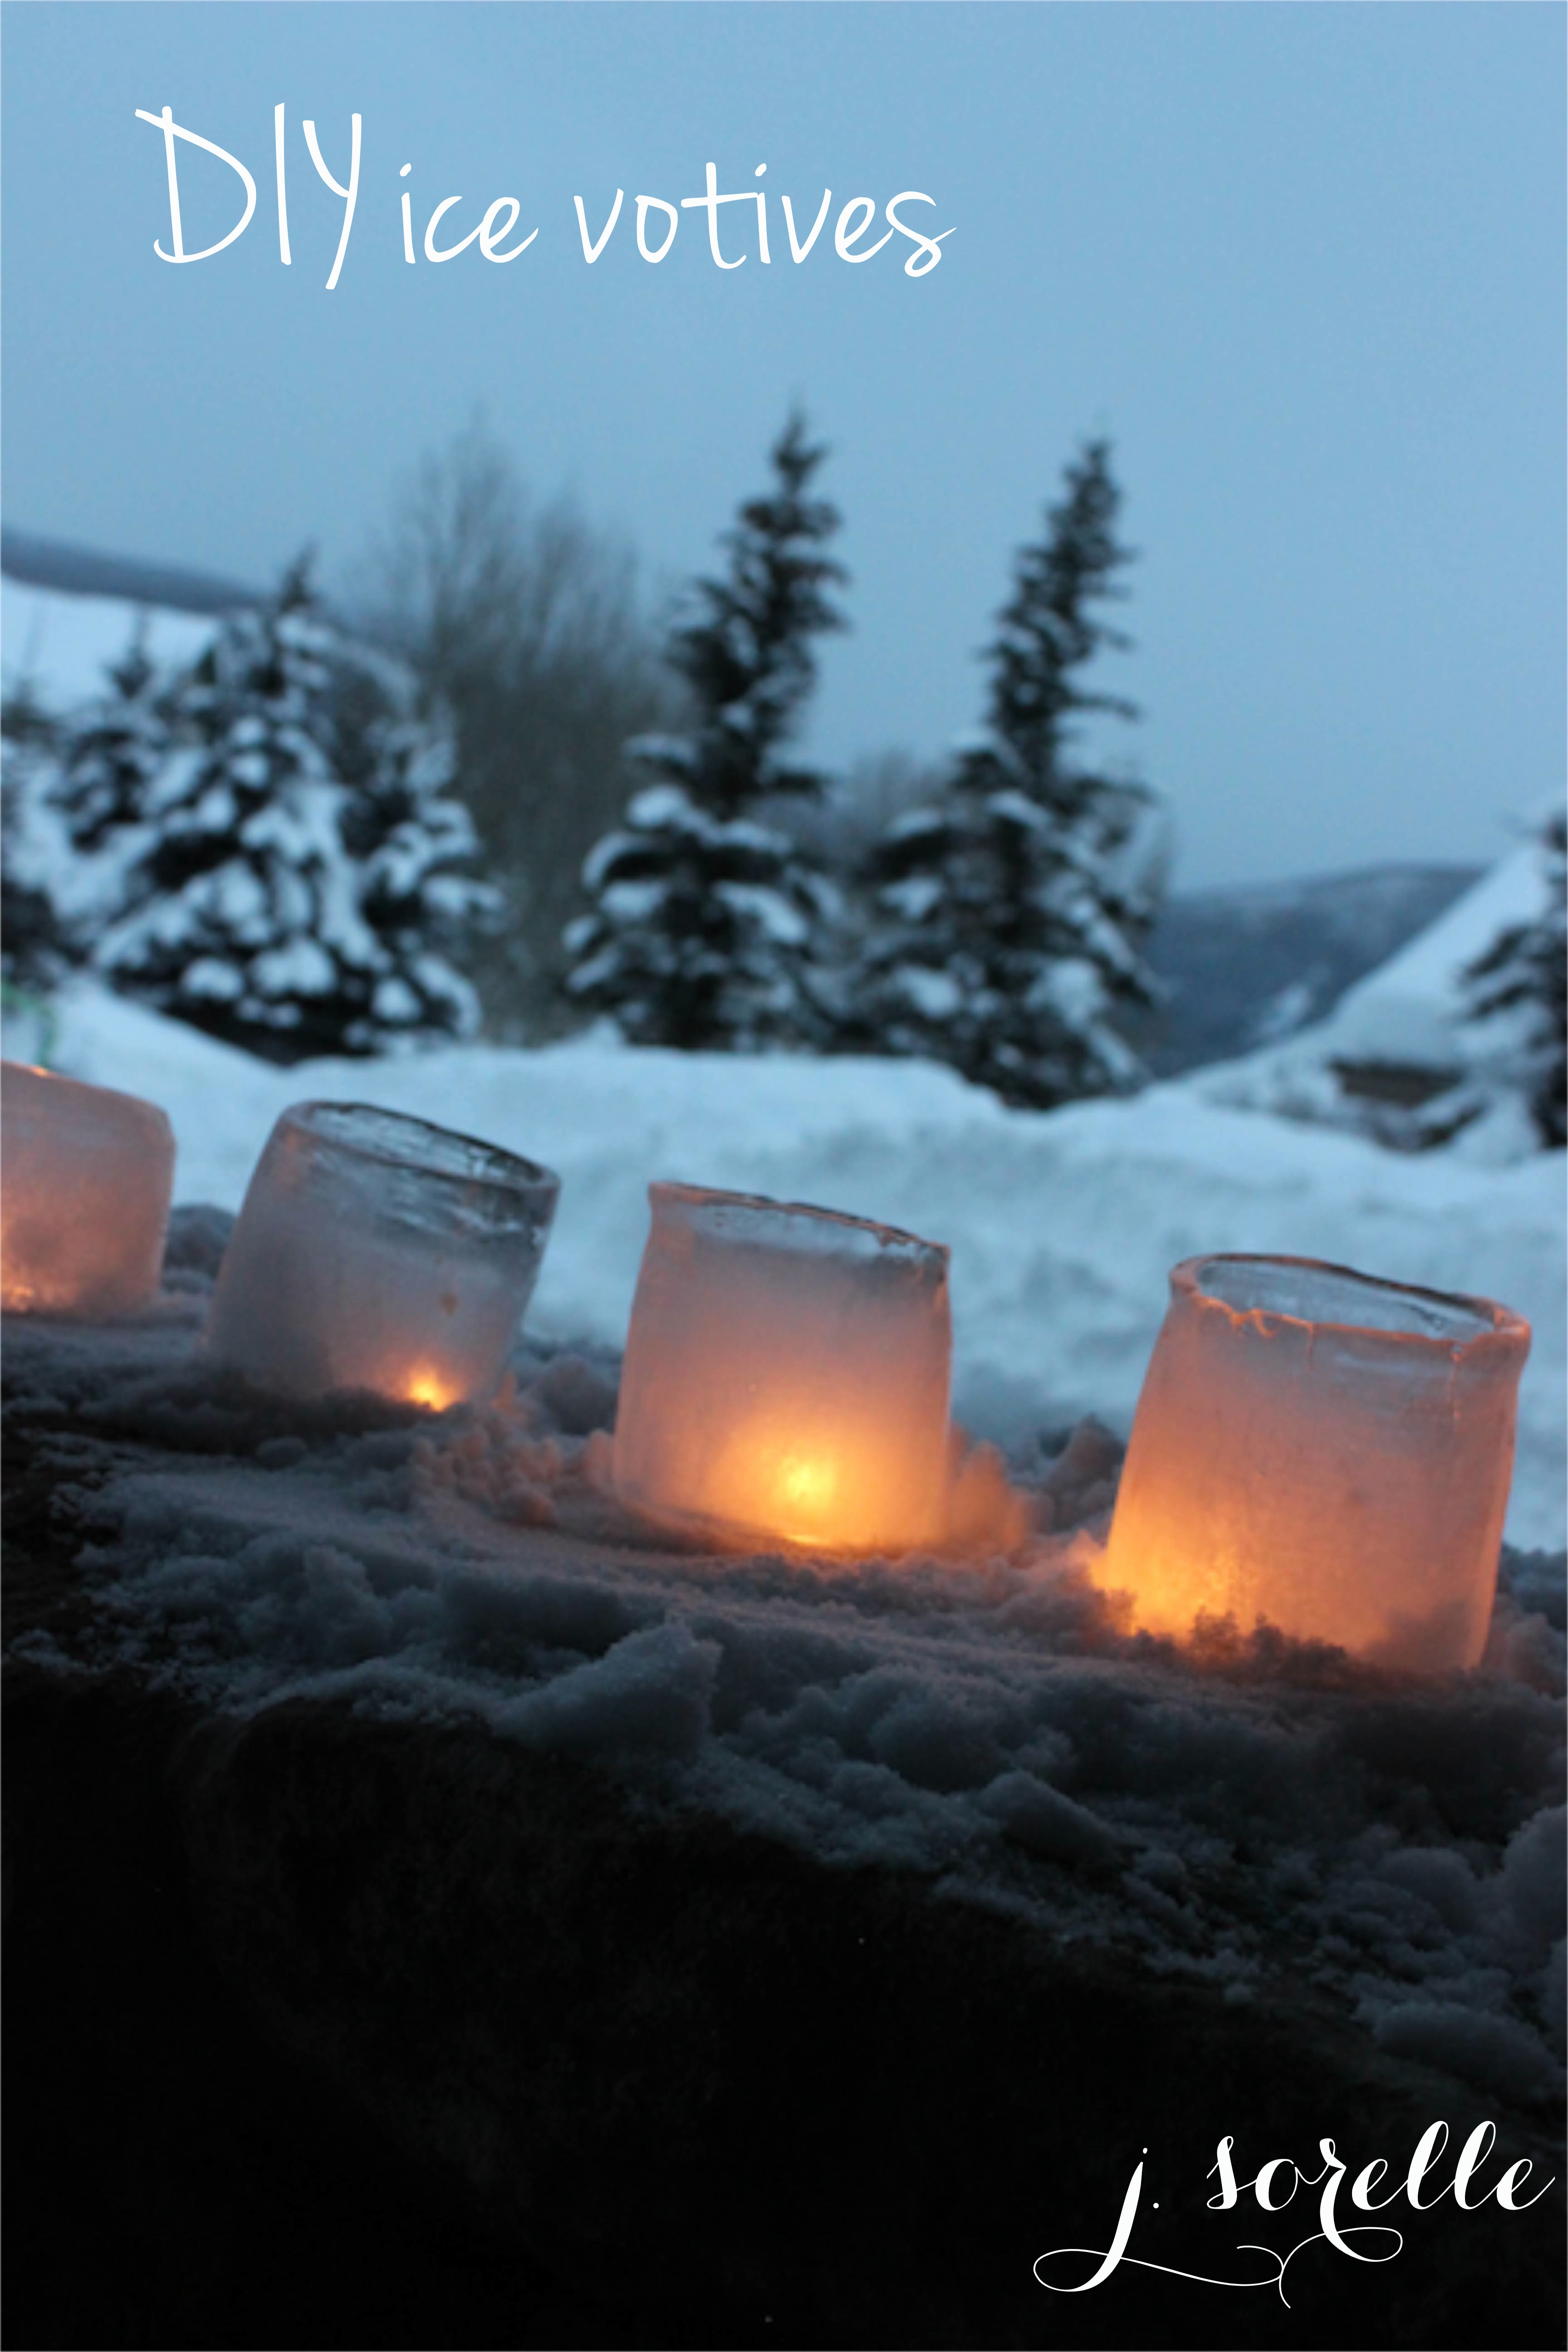
As I made pasta sauce last week, I was about the throw away the cans of tomato paste and whole, peeled tomatoes, when I thought about their potential for my next project. They lived up to my expectation as the perfect prop to make DIY ice votives. I learned as I went along, and hopefully simplified it for you below so you can warm up the outside of your home this winter. I loved the results, and with the romantic snow falling outside, I wish I had more cans to make more votives! Try it before the snow melts and add it to next year’s winter to-do! Here’s how you can do it flawlessly.
DIY Ice Votives
NOTE: materials below makes 2 ice votives at a time, so multiply materials accordingly, or work on this project over the course of several nights, freezing two votives per day.
You’ll Need:
Water
Rocks
2 28 oz cans, emptied and rinsed
2 14 oz cans, emptied and rinsed
Cold temperature outside, or a freezer
How To:
Fill the large can less than halfway with water.
Fill the small 14 oz cans with rocks.
Place the small can inside the large can – the water should not overflow in the small can, so adjust the water accordingly. The top of the water should be about an inch from the top of the small can.
Move the small can so it’s in the middle of the larger can, with even spaces all around it.
Place the can carefully outside or in the freezer.
In the morning, the water should be frozen.
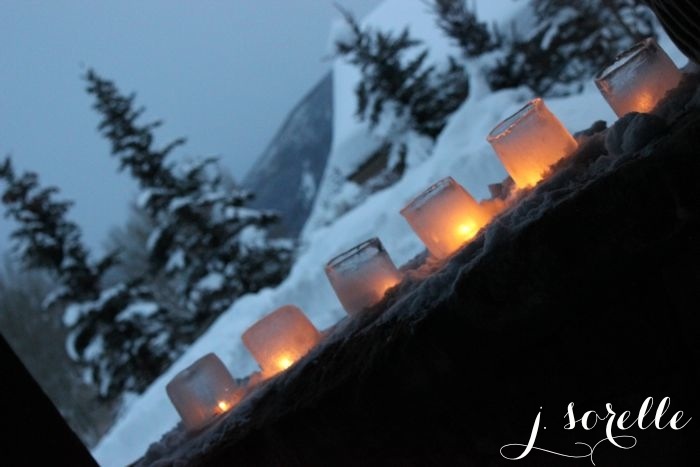
When It’s Time to Reveal Your Ice Votive
The ice takes about an hour to melt if you want to just let it sit, but who has that kind of time. I don’t, so I just held the cans of frozen water and rocks under the faucet and ran hot water over it for a minute or two. Fill the small can of rocks with hot water so it loosens and ‘releases’ from the ice. Run it across the top of both and you will see it melt.
Once the ice has melted enough to loosen the cans, remove the small can from the large can, and slowly and gingerly tip the large can over slightly so you can gently catch the ice votive.
Find a spot outside on your table, place them on a tray, line them up for a grand entry or make a spot in the snow for your ice votives.
You can fill with either real votive candles {I used real votives}, but it may be better to use flameless candles so the ice doesn’t melt too fast. On a cold week, mine lasted the entire week.


{images via J. Sorelle}