Gaga Over These DIY Diaper Babies

DIY diaper babies for baby shower idea

It’s been awhile since I have purchased, or changed a diaper. I don’t miss changing dirty diapers at all, but I do miss the days when my kids were tiny. The days of those precious newborn smells, first giggles, first steps and holding those tiny hands passed by in the blink of eye. Working with diapers again had me reminiscing on all those wonderful times.

Whether the days of diapers are in your past, present or future, these DIY diaper babies are worth making. They make the perfect gift for new moms, or a fun baby shower activity.

I shared all the details with Momtastic, so check it out here.

DIY Perler Bead Earrings You’re Girls Will Love

DIY enchanting fairy garden

We’ve made animals, geometric shapes, flowers and rainbows from the tiny, amazing Perler beads in the past, but this week’s craft was a first for us. We made DIY Perler bead earrings. The colorful and affordable DIY jewelry is so versatile because the color combos are endless, plus so many pairs can be made in a day. Our daughters made some for themselves, and then pairs for friends. We customized with vinyl shapes and letters, but also made multi-color earrings with large and small Perler beads. It was fun!

Here’s how we did it. We can’t take full credit for this idea. The super talented Kimberly of A Girl and A Glue Gun originally posted about this craft idea. Thanks for always sharing such amazing idea, Kim.

Materials: 

Directions:

Step 1: Place a piece of parchment paper on a baking sheet, and then set perler beads on top of it. If you want the circular multi-color ones, you need to put two small perler beads inside the big beads. If you want one solid color, you just need to melt one perler bead.

DIY perler bead earrings

DIY perler bead earrings

Step 2: Melt them at 350 degrees for about 38 minutes. Let them cool. You can see the difference in size once the big and littler perler beads are melted.

DIY perler bead earrings

DIY perler bead earrings

Step 3: Add vinyl shapes or letters to the front of the earrings.

DIY perler bead earrings  DIY perler bead earrings

Step 4: Use a dab of E-6000 on the back on the earring pin post, and then push onto the back of the perler bead (the flat side). Let dry for at least 24 hours.

DIY perler bead earrings


DIY perler bead earrings

Step 5: Make DIY cards to gift to people from cardstock, or add the colorful cuteness to your ears.

DIY perler bead earrings

DIY perler bead earrings


*THIS POST CONTAINS AFFILIATE LINKS

DIY 3D Frames With The Most Adorable Floral Crowns

DIY 3D FLOWER FRAMES

Spring has sprung, which makes us so so happy. Give us all the flower projects because the snow is on it’s way out, and green leaves and beautiful blooms are going to take center stage once again.

We’ve always wanted to wear floral crowns. I can’t believe we haven’t done it in real life yet. We really need to add that to our bucket list. But, now at least a photo of us with floral crowns lives on our walls, which is enough to make us smile.

All the how-to details are on Momtastic. Mom would love one for Mother’s Day, just sayin’…

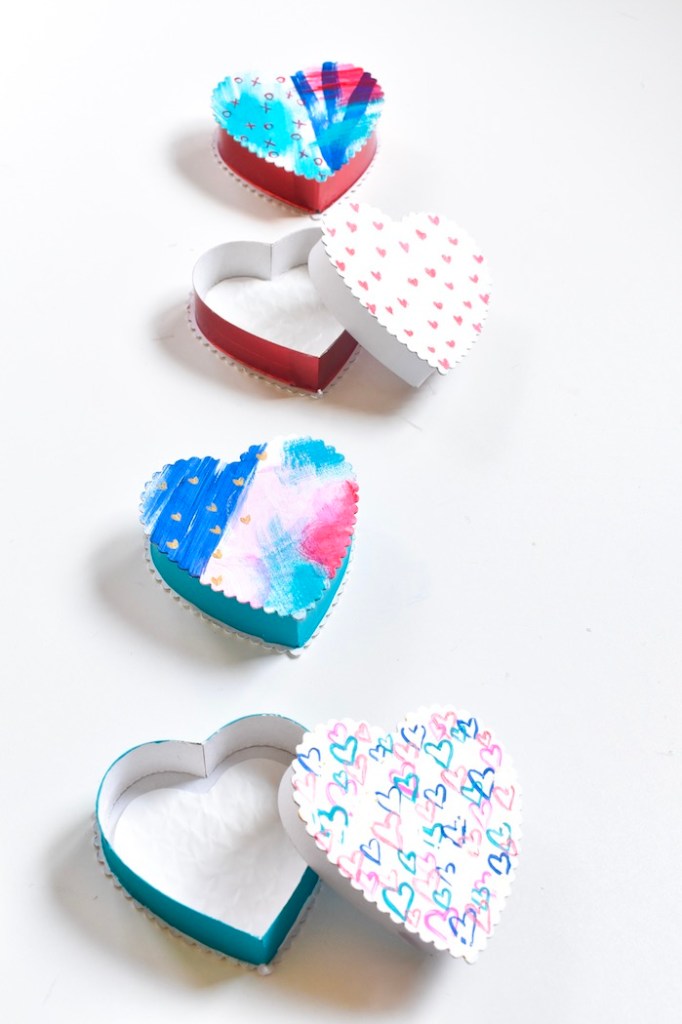
Valentine’s Day DIY: Sweet Heart Packaging

diy heart-gift-boxes-diy-art-project

This project reminded me of my grandma, because she use to love Russell Stover  chocolates. I don’t know anyone who loved those tiny chocolates like she did. I don’t even know if she had a favorite flavor inside the famous heart-shaped boxes, but still to this day, when I see those boxes, I think about her. It was really nice to have quiet moments to think about her while I painted the hearts. So many of my memories about my grandparents revolve around food. Coffee in the mornings with my grandparents, delicious biscuits and gravy at their dining room table after a sleepover, homemade perogi’s, Twizzlers stored in my grandparents kitchen cupboard, and the countless homemade meals that nourished my body and soul. Life is so sweet with all those memories!

Whether you have someone you buy Russell’s candy boxes for, or want to send a sweet gift to a loved one this Valentine’s Day, this craft is for you! This would also be an adorable gift for grandparents – just let the kids paint the art on the box! You can fill the boxes with anything small you want to give including jewelry, doTERRA oils, lipgloss, notes, tea bags or money. It’s a keepsake people can keep on their dresser, too!

Materials:

  • Russell Stover heart shaped boxes (found them on sale for $1 each in the Valentine’s Day section of the grocery store, which was better than the $10 pre box online)
  • Acrylic paint
  • Paintbrushes

Paint, paint and paint some more. That’s it! I painted the outside of the box white first, and then the colorful design on top of that.

If you plan to buy keep the chocolates inside the heart-shaped boxes, don’t paint the inside of the box. You can paint the outside, and it will still be food safe. Also, the bottom of the box (where the label is) is not as shiny as the top, so you can paint the bottom white, and then flip the box so it’s the top with your design on it.

diy heart-gift-boxes-diy-art-project

diy heart-gift-boxes-diy-art-project

diy heart-gift-boxes-diy-art-project

diy heart-gift-boxes-diy-art-project

diy heart-gift-boxes-diy-art-project


Gnome For the Holidays

diy gnome wine toppers

We love our wine, and a glass of wine is better when shared with a friend, that’s for sure. Give wine to friends and family this holiday season, or have friends over and make sure wine is ready at the bar, with these adorable DIY gnome wine bottle toppers. They add that extra touch of homemade love and cuteness to an ordinary bottle of wine, and they are so easy to make. No sewing required.

Momtastic has all the details here.

Thanks to Cole and Dainer  for sharing some of the fluffy faux fur from her amazing blankets for the gnome beards. The fur on her blankets is like heaven on my family’s skin when we have snuggle sessions.

Cheers to a happy holiday!