Amazing Resin Projects To Try This Weekend (Just In Time For Valentine’s Day)

resin hair clip and heart keychain

Resin is one of those mediums we see everywhere, and it’s been on our must-try list for a long time. We’re happy to report that we finally got around to it. We made some fun heart-themed gifts for Valentine’s Day – DIY keychains and DIY resin hair clips. We’re basically obsessed with all the amazing things you can make with resin and epoxy, and hope this is just the beginning of the things we will create. There is somewhat of a learning curve with resin, at least for us, so hopefully this is a helpful tutorial, and you will be crafting with resin in no time.

Kimberly at A Girl and A Glue Gun has so many tips and trick when working with resin and epoxy, and we highly recommend watching her videos. She made some amazing coasters, jewelry and keychains.

DIY Resin Keychains & Hair Clips

Materials:

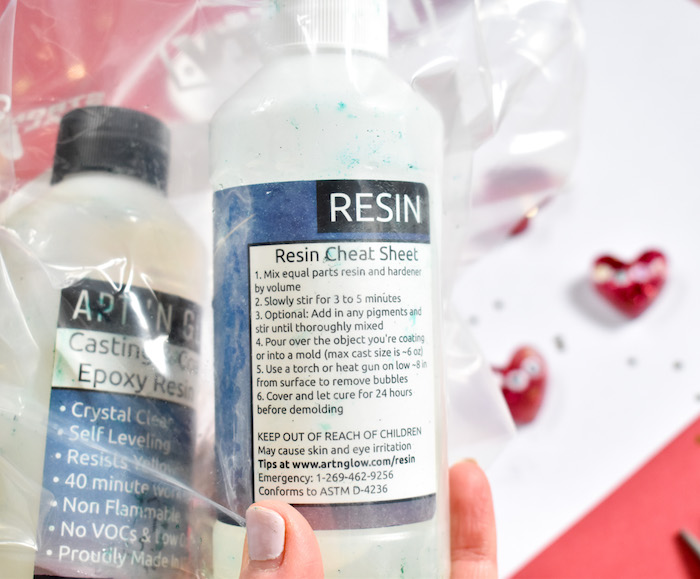
  • Art ‘N Glow Resin – if this doesn’t arrive in time from Amazon, your local Michaels or Joann’s has resin, too
  • Heart silicone mold (Walmart for $4)
  • Hair clip set
  • Keychain accessories or this keychain kit (helpful if you want to make alphabet letters in the future)
  • Glitter (just about any glitter or small sequins will work – you can even use dyes, alphabet beads and dried flowers and photographs). We did’t use the dye this time. We have used it before, and it works great)
  • Small disposable cups and popsicle sticks
  • Disposable table cloth and disposable gloves (very important – it was messy for us)
  • Multi-purpose lighter or match
  • e-6000 or clear gorilla glue (the other that doesn’t expand)

Directions:

First, we want to apologize for the fact that we don’t have photos of the process. Our hands were wet with resin and didn’t want to mess with a camera at the same time.

Step 1: Follow the directions that come with the resin kit, very carefully. Put on gloves, and set up space with disposable cloth. It’s crucial is have good airflow while stirring and pouring resin. We always have a window open close to the craft table when working with resin. Fresh air is your friend with this one. The first step will be to pour a small (1-2 tbsp or so) amount of resin and hardener in separate cups, then pour an equal amount of each into another cup. The two you pour in together is what you’re going to pour into your project, so estimate the right amount. You will have to stir the two together very slowly for 3-5 minutes. You will see some bubbles – we have found that the slower you stir, the smaller and less bubbles (which is a good thing). Once you are done stirring, pour in another cup, and then add your glitter, a couple drops of dye or whatever you are putting inside. Stir and/or mix it in with a popsicle stick.

art n glow resin

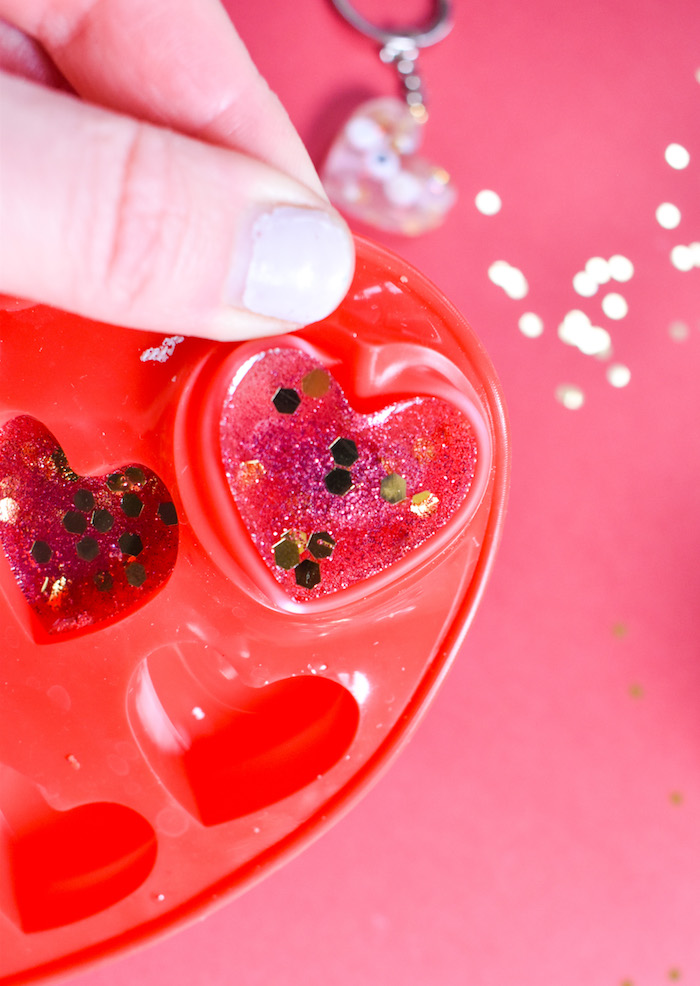
Step 2: Pour the resin and add-ins in the molds.

For Hair Clips: You will want to carefully pour to the top of the hair clip molds. If any excess overflows, carefully swipe off with the side of a popsicle stick or wipe with paper towel. You can move any sprinkles or glitter around with a toothpick if you need to.

Hearts: Pour about halfway, not to the top of the mold. If you are adding small alphabet beads, pour a tiny amount of resin in the heart, and then add the beads (you can use a toothpick to help place or wiggle them around), hold a flame close to the top of the resin if any bubbles (they will pop magically), and then pour the rest of the resin to cover the letters The heart should be about 1/2 to 3/4 full.

Step 3: Once the resin is in the mold, you will want to take your lighter and hold it closer to the surface of the resin. We learned this from A Girl and A Glue Gun. It’s amazing – the bubbles pop when the fire gets near it. Carefully hover the lighter over the surface of the resin to get out all bubbles.

Step 4: Wait 24 hours for resin to completely dry/cure. This is super important. It’s hard to do, but you can do hard things! Once 24 hours has passed, push the object through.

diy resin hair clips with glitter and heart sequins

diy resin hair clips with glitter and heart sequins


diy resin keychains with glitter and heart sequins

diy resin hair clips with glitter and heart sequins

Step 5:
Hair Clips: You’re ready to glue the heart resin clip topper onto the actual metal clip. Add e-6000 glue to the metal clip and place the resin topper to the clip. Use chip bag clips to keep the resin in place on the clip. Let dry for at least 2 hours, but 12 is preferable.

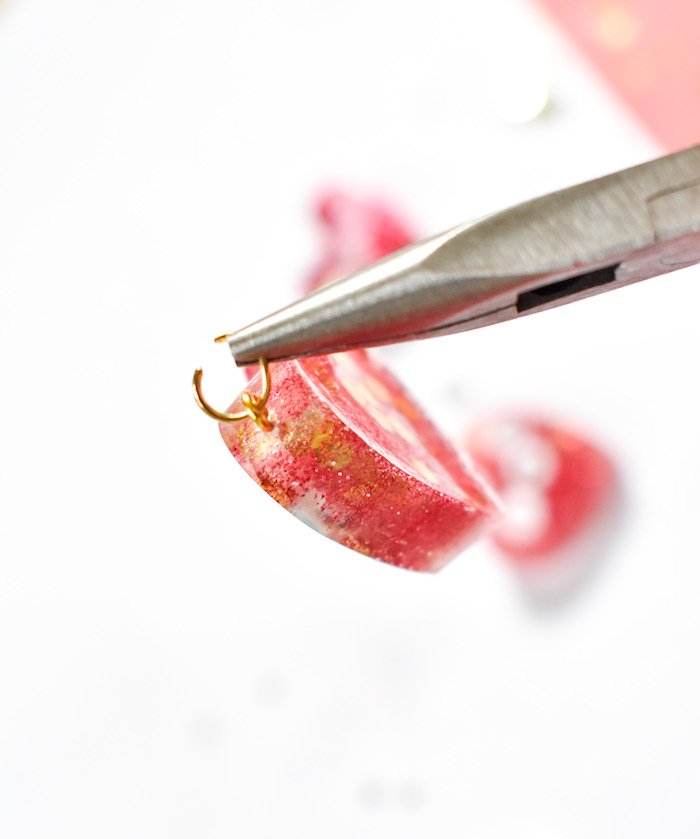
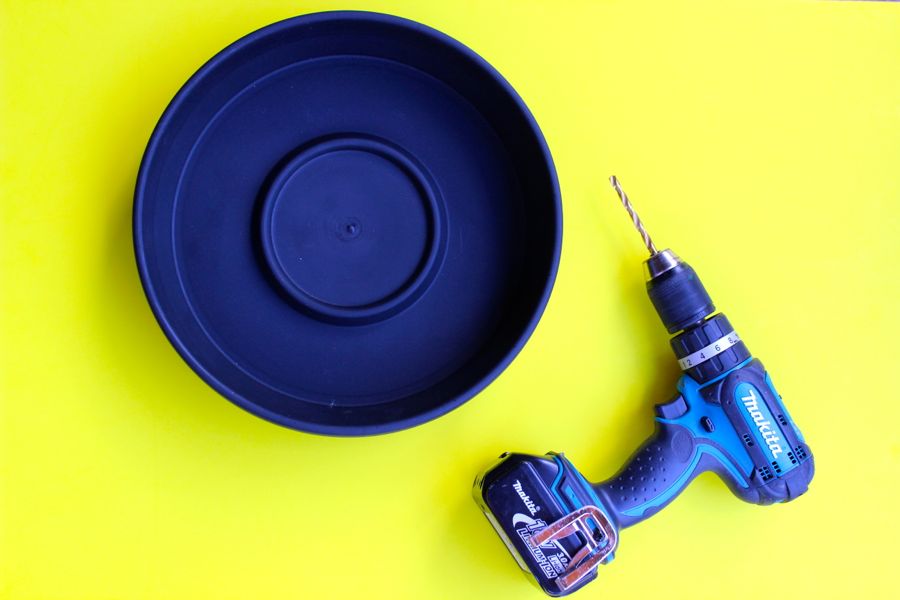
Heart keychain: To make this a keychain, you will need the kit mentioned above with the keychain loops, screws and mini drill. Drill a hole smaller than the screw into the top of the letter, so you can twist the eye screw nice and snug in the letter. If you don’t have a drill (like us), you can use a jewelry pliers to twist the eye screw into the letter. It can be frustrating at first, but after a couple twists, it will hold in place, and then you twist further until it’s fully in the letter. Next, add the letter, and you have a darling new keychain.

diy resin keychains with glitter and heart sequins

diy resin keychains with glitter and heart sequins

diy resin keychains with glitter and heart sequins

diy resin keychains with glitter and heart sequins

diy resin keychains with glitter and heart sequins

Valentine’s Day DIY: Sweet Heart Packaging

diy heart-gift-boxes-diy-art-project

This project reminded me of my grandma, because she use to love Russell Stover  chocolates. I don’t know anyone who loved those tiny chocolates like she did. I don’t even know if she had a favorite flavor inside the famous heart-shaped boxes, but still to this day, when I see those boxes, I think about her. It was really nice to have quiet moments to think about her while I painted the hearts. So many of my memories about my grandparents revolve around food. Coffee in the mornings with my grandparents, delicious biscuits and gravy at their dining room table after a sleepover, homemade perogi’s, Twizzlers stored in my grandparents kitchen cupboard, and the countless homemade meals that nourished my body and soul. Life is so sweet with all those memories!

Whether you have someone you buy Russell’s candy boxes for, or want to send a sweet gift to a loved one this Valentine’s Day, this craft is for you! This would also be an adorable gift for grandparents – just let the kids paint the art on the box! You can fill the boxes with anything small you want to give including jewelry, doTERRA oils, lipgloss, notes, tea bags or money. It’s a keepsake people can keep on their dresser, too!

Materials:

  • Russell Stover heart shaped boxes (found them on sale for $1 each in the Valentine’s Day section of the grocery store, which was better than the $10 pre box online)
  • Acrylic paint
  • Paintbrushes

Paint, paint and paint some more. That’s it! I painted the outside of the box white first, and then the colorful design on top of that.

If you plan to buy keep the chocolates inside the heart-shaped boxes, don’t paint the inside of the box. You can paint the outside, and it will still be food safe. Also, the bottom of the box (where the label is) is not as shiny as the top, so you can paint the bottom white, and then flip the box so it’s the top with your design on it.

diy heart-gift-boxes-diy-art-project

diy heart-gift-boxes-diy-art-project

diy heart-gift-boxes-diy-art-project

diy heart-gift-boxes-diy-art-project

diy heart-gift-boxes-diy-art-project


DIY Lip Balm Pouches Just In Time For Valentine’s Day

diy-lip-balm-in-red-and-pink-pouches-with-hearts

We love our essential oils, and one of our favorite goodies to make with our oils is DIY lip balm. Our lips are so dry in the winter, plus we love when we can put pure ingredients on our lips. Valentine’s Day is coming up, and for those that want kissable lips, or want to give a gift of kissable lips, we recommend DIY essential oil lip balm.

Read our DIY lip balm tutorial for the ingredients and instructions. To jazz it up a bit for gift giving, make a cute holder for it – a DIY lip balm pouch. It’s almost like a lip balm sleeping bag. It’s a cute DIY that can be made into all shapes and sizes. We made heart-shaped pockets to hold gift cards for teachers. You can also make DIY felt pouches to hold tissues, treats, and even larger pockets for photos and sweet notes.

This DIY project is incredibly easy. Here’s how we did it.

Materials:

Directions:

Step 1: Cut felt (we bought a pretty library of felt from Target, and it’s thicker than traditional felt, which worked well) into a rectangle larger than the width of the lip balm tube.

red-pink-felt-with-pink-hearts

Step 2: Once you have the pieces cut, thread a needle (don’t forget to tie a knot on the end), along the edges of two rectangles that are lined up. We do not have any sewing skills whatsoever, and we did it! Just go in and out of the felt, which will create a cross stitch pattern. Leave the top of the rectangle open so you have an opening for the lip balm.

diy-lip-balm-pouches-red-pink-felt-craft

diy-lip-balm-in-red-and-pink-pouches-with-hearts

diy-lip-balm-in-red-and-pink-pouches-with-hearts

Hope you find a way, even if it’s a wave or hug, to spread the love on Valentine’s Day!

SHOP THE POST:

DIY Let Love Grow Plant

let-love-grow-plant

Dolly Parton said it best, Let Love Grow.

When we really look around, in spite of the horrific hatred we see daily on the news, we find that love still exists. In fact, love is all around. But, sometimes we need a little reminder. To us, the heart shape, whether big or small, signifies love. Inside of us, it represents this beautiful life with every heart-pumping beat; but outside of us, the shape represents love, goodness and kindness. When we open our eyes, minds and hearts, we find that not only is love everywhere, but hearts are, too. And, with every heart we spy with our eyes, it’s an opportunity to reflect on the love in our lives, and how we can share it with others.

Last week, we saw a heart designed on the top of our latte. Everyday, as our children learn to draw hearts, we pause to think about the love and joy that lives in their hearts {and the role we play in shaping what love looks like in their world}. Every time we send and receive a handwritten note from a loved one, it’s signed with a heart. And, just the other day, one of our kids saw a heart-shaped cloud in the sky.

Recently, we used our green thumbs to create a green heart to remind us to let love grow. The plant can be transplanted outdoors if it outgrows the container, and good news – it’s a perennial – so it will come back year after year.

let-love-grow-plant-yellow

Materials:

  • Plastic Pot Saucer, Home Depot
  • Sedum Tile Ground Cover
  • Scissors, sharp {garden scissors}
  • Potting Soil
  • Chalkboard sign, small stick and pen

Directions:

Drill several holes into the plastic saucer. We drilled one in the center and four evenly spaced around the saucer.

planter-drill-yellow

planter-yellow

Fill the planter 1/2-3/4 full with dirt.

planter-with-dirt

Remove the entire square tile of Sedum from the container and flip it over. Use chalk to draw your design, or eye-ball it. We chose a heart, and without lines to follow, we began to cut.

greenery-ground-cover-plants

plants

Place the heart in the center of the saucer with dirt, and then fill in all the surrounding space with dirt.

heart-plant-greenery-yellow-ombre

Make a sign – Let Love Grow or Love Lives Here – and insert it in the dirt.

let-love-grow-chalkboard-sign

let-love-grow-planter-yellow

let-love-grow-greenery-planter


DIY Salt and Pepper Shakers

salt-pepper-kitchen-heart-initials-valentine-kitchen-diy-love-hostess-gift

We just can’t get enough of that crazy little thing called LOVE this Valentine’s Day.

This DIY tutorial brings us back to our teenage, high school days when we wore split heart necklaces. You know, when you wore one half of the necklace that said Best, and your bestie wore the other half that said Friend. Well, we have matured {ever so slightly}, so we revised the split heart trend. This time, we are not wearing it around our necks, we are shaking it in our kitchens.

Shaking it with mini, personalized salt and pepper shakers.

Separately the shakers look like two half hearts with initials…

heart-valentine-diy-gift-love-salt-pepper-hostess

…but together, they make a complete pair.

salt-pepper-shaker-gift-heart-initial-valentine-diy-hostess

This DIY took about 10 minutes, and we’re adding it to our list of favorite hostess gifts, engagement gifts, anniversary gifts, going away and bridal shower gifts.

And, for this Valentine’s Day, let your loved one, or good friend know that you go together like salt & pepper.

DIY Split Heart Salt & Pepper Shakers

You’ll Need:

  • Mini salt and pepper shakers. We found ours at a kitchen store for about $2 each.
  • Silhouette Vinyl {BTW, all heat transfer is 35% off right now with code SORELLE}
  • Silhouette Transfer Paper or lint roller {good alternative}
  • Silhouette electronic cutting machine. If you don’t have one, an alternative is enamel paint to paint on the hearts.
  • Salt
  • Pepper

How To:

  • Design your heart art using the Silhouette Software. I used a free design that had a heart in it, and edited it. Make sure you cut the heart in half {via the software} before you click cut.
  • Place your Vinyl on the cutting mat {black side facing up}, click print and watch the tool work its magic.
  • Peel away the vinyl you’re not using. Place the transfer paper over half the heart and use a straight edge {credit card, etc} across it to make sure the vinyl sticks to the transfer paper.
  • Pull the paper up and half your heart should be stuck to the paper.
  • Place the image on one of the shakers. You will need a credit card or a straight edge to smooth our all bubbles.
  • Peel away the transfer paper slowly and your vinyl should stick to the item.
  • Repeat the steps above to add the other half of the heart to the remaining shaker.
  • Fill the shakers with salt and pepper.

valentine-gift-salt-pepper-diy-shaker-hostess-gift-heart

valentine-diy-salt-pepper-shaker-gift-hostess-initial-heart

{image via j. sorelle}