{free printable} I Spy Game for Thanksgiving

ispywithmylittleeye_jsorelle

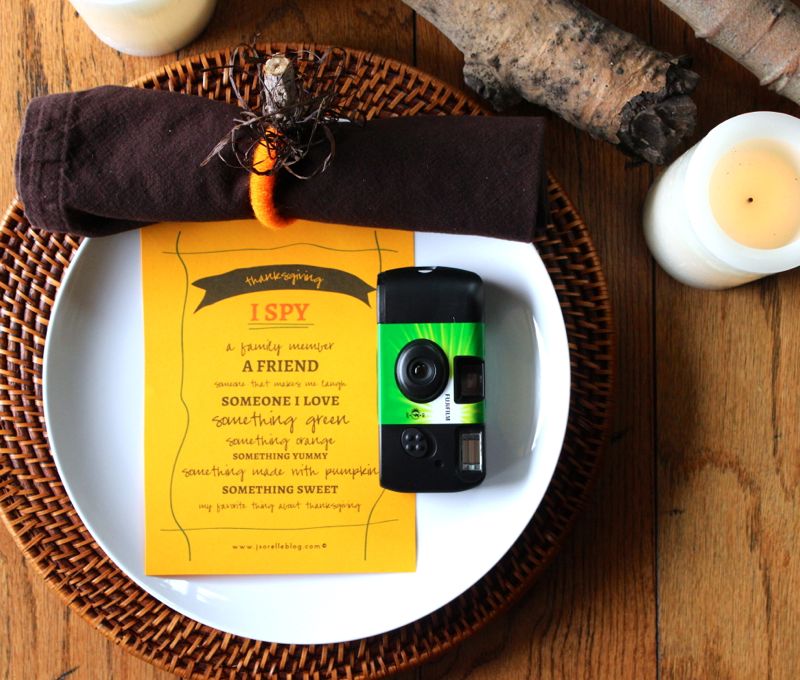
One of our kid’s favorite games to play at the dinner table is I Spy. So this year, we’re happy to bring the tradition of I spy with my little eye to the Thanksgiving table. And, we’re also going retro with the use of a disposable camera. We can’t believe how ‘old school’ that seems with all the high-tech electronics nowadays. But for the kiddos, they can use and abuse the camera, and feel like a professional photographer for the evening, and you don’t have to worry about the state of your expensive phone. And, the best part of all – you can really see Thanksgiving through your children’s eyes. Don’t we all wish we could see the world through the eyes of our children on a daily basis – what a beautiful gift that would be?!

thanksgiving i spy with my little eye

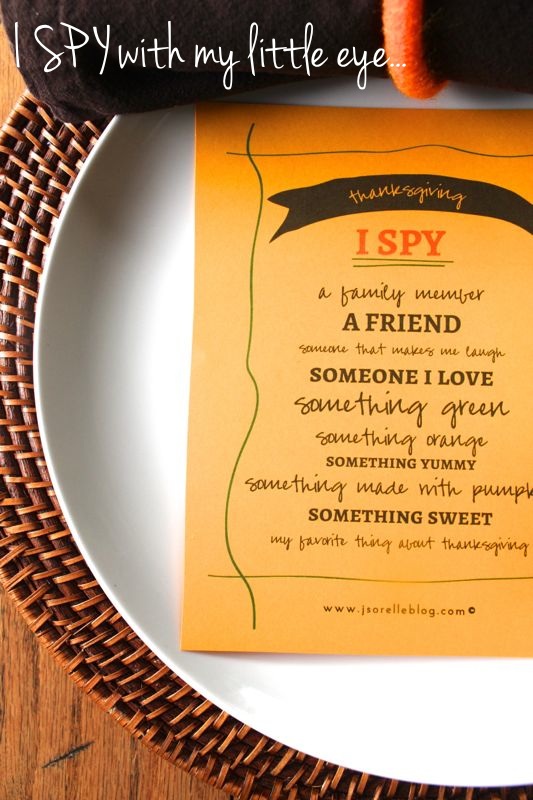
Fleur de Lis created a cute and FREE printable for you that you can download here.

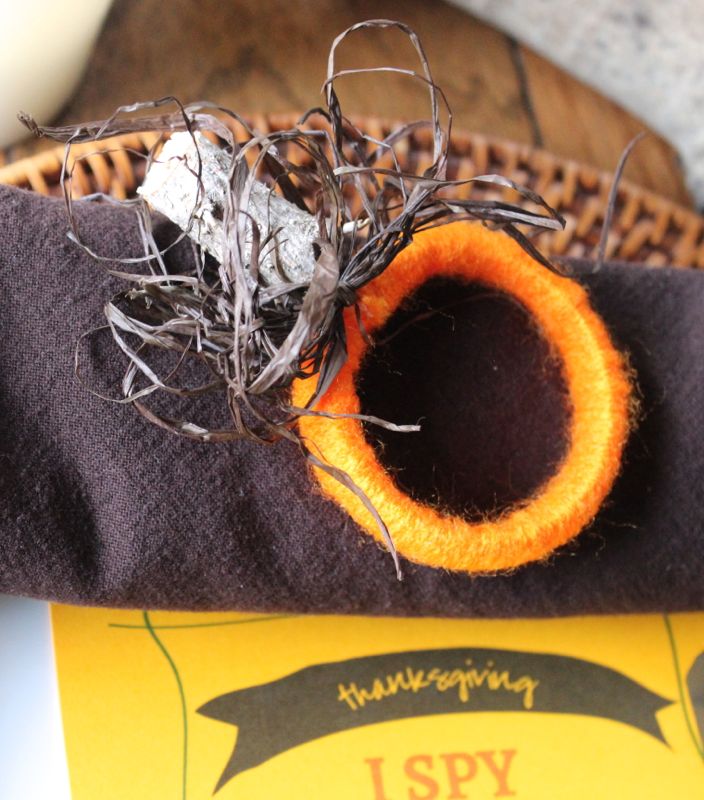
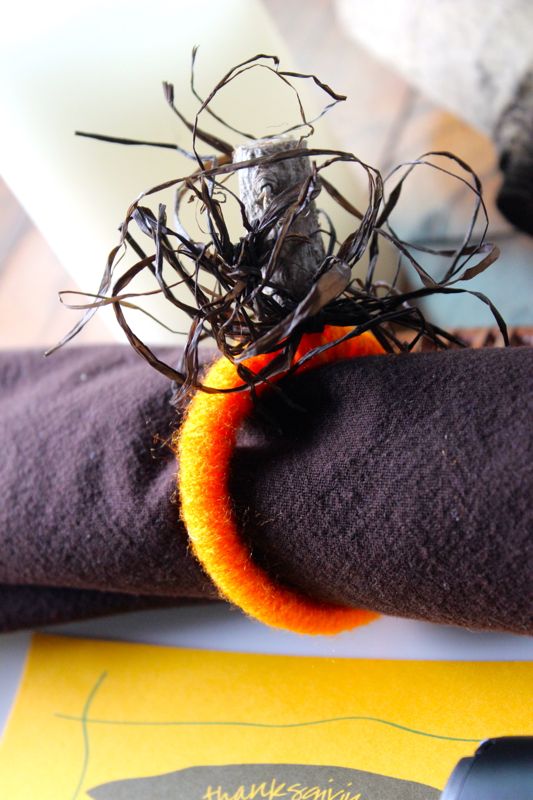
If you’re up for a DIY, we made the little DIY pumpkin napkin ring from a shower curtain ring. We wrapped the shower curtain ring in yarn, used a hot glue gun to keep the ends of the yarn in place, and topped it with a small branch and raffia bow. It took about 5 minutes!

thanksgiving i spy

thanksgiving i spy and diy pumpkin napkin ring

{images via j. sorelle}

DIY Jenga Game on Thanksgiving

Get your game face ready {with a grateful heart, of course} for a fun game we call DIY Jenga Game of Gratitude. It’s a game the whole family can play together on Thanksgiving. Visit Momtastic to see how we added our own special, Thanksgiving-twist to the classic game.

The memories you will create with your family while ‘prepping’ the game, and listening to what your kids have to say, is reason enough to do it.

jenga game of gratitude

{images via j. sorelle}

thanksgiving inspiration

Please accept our apology for a non-complete post that accidentally went ‘live’ yesterday. 

We’ve searched high and low for our favorite Thanksgiving inspiration from the blogosphere, and here are our faves so far this year…

We love the colors, gold confetti, feathers, natural touch of the cotton centerpiece and the salad plates in this gorgeous table setting by A Place for Us, with accessories by West Elm. You have to see the rest of it here.

There is no better time to reflect on the people around us, family and friends, things or people we are grateful for and even past family traditions or past Thanksgivings…and I think the best way to do that at the dinner table is to create a photo table runner. We saw the beautiful one featured on Ruffled Blog, so why not recreate for your Thanksgiving table? It’s on my to-do list.

Kids Thanksgiving Placemat, My Sister’s Suitcase
The kids will be fully entertained with this adorable and FREE printable.

This Thanksgiving, think about Paying Gratefulness Forward. We love this idea by Small Fry. Read more about it here.

We love this simple place mat idea for adults or kids by Skies of Parchment that can be easily made with Kraft paper. It’s a great activity for guests too.

We LOVE these customizable Word Search Placecards. So adorable, and a fun activity. Read this full tutorial at My So Called Crafty Life.
 This Pumpkin Spice Hot Chocolate by Good Life Eats looks amazing! Find the recipe here.

Think about adding a mini treat to this year’s dessert table with these Apple Pie Cheesecake Bites by Baked by Rachel. OMG delish!

{images via A Place for UsMy Sister’s SuitcaseRuffled Blog, Small Fry, Good Life Eats, Skies of ParchmentMy So Called Crafty Life and Baked by Rachel}

Holiday Paint Chip Ideas

Paint chips are more than just samples to bring home to see what looks good on the wall next to your kitchen…they are the source of fabulous DIY, colorful projects! While I love so many day-to-day paint chip DIY’s, we love these particular projects for the upcoming holidays.

Paint Chip Table Runner, Eclectically Vintage
Impress your Thanksgiving or Christmas friends and family with a colorful, maybe even ombre table runner, made of paint chips.

Owl Paint Chip Wall Art, The Homes I Have Made
Owls are so relevant this time of year, and personally, I think they are hoot-rific. This framed Owl Paint Chip Art would look great for a fall entry.

Now that you have Owl art for Thanksgiving, you will need a framed piece of art for Christmas. This one is perfect by The Red Thread Blog

Paint Chip Trees, Hubby Made Me
Omg, we just LOVE these trees for gift tags! Cinnamon stick trunks – oh, what cuteness!

Paint Chip Gift box, How About Orange
Wrap your small gifts this year in a handmade, paint chip box.

Paint Chip Snowmen Bookmarks, Bam Crafty Mammas
These adorable snowmen are sold out, but you can totally re-create yourself! And, instead of ornaments, make them into bookmarks! It would be a great craft to do with kids on a snowy day. 

Paint Chip Banner, Rebekah Gough via A Bit of Sunshine When Skies Are Grey
This DIY would make for a lovely Merry Christmas sign, JOY banner, etc for the holidays
 

{images via Eclectically Vintage, The Home I Have Made, The Red Thread Blog, Hubby Made Me,  How About Orange, Etsy via Bam Crafty MammasRebekah Gough}

honey bear

This is the cutest honey bear I’ve ever seen! Seriously, it’s so creative, and sweet! This would be darling decor during the month of October or at Thanksgiving.

My sister-in-law’s friend Molly shared a tutorial of this adorable project with us today. She was inspired by a similar honey bear she saw in her PT clinic in North Carolina. Thank you, Molly, for sharing it with us.

Here’s her inspiration…

And, here’s her ‘take’ on it. Job well done, Molly.

From Molly…I bought three large pumpkins.  One for the Honey pot.  Two for the bear. For the honey pot, you can see how I carved a top out and then obviously scooped out the “guts.”  I wrote HONEY with a pencil and then took various tools–mostly different screw drivers to carve each letter.  Make sure to leave enough room in between so the letters can be fairly thick. You can fill the honey pot with candy (in a bag). 

The bottom part of the bear–I just cut off the stem of that pumpkin because it was a fairly flat pumpkin, and then I placed the top pumpkin on top of the bottom one.  I thought it might fall off, but it never did.  I didn’t want to cut the bottom one for risk of rotting.  I cut the stem off the top pumpkin also.  The ears are just small-sized pumpkin that I sliced off part of each one so it would fit against the head.  I actually used heavy-duty toothpicks to stick into the ears and into the head.  I did the same thing for the nose.  The eyes were made of a different pumpkin and on those I actually cut off the end and them scraped them out.  I only stuck a toothpick into the head and just let the eyes rest on it.
The feet are a type of squash that I just laid at the base of the bottom pumpkin.  The arms were a little difficult in that toothpicks would not hold them so I used very small dowel rods and put them into the large pumpkin, and then into the arms.  A scarf was placed around the head and body.  I finished it off with pinecones and colored leaves.
Tip from Molly: I googled how to “preserve” a pumpkin but did not have success.  I tried to clorox the first honey pot, and then added shellac on it, but it still rotted after about 5 days.  I’m sure it would do great outdoors or in cooler weather. 
{images via Molly}