Merry Everything: DIY Soy Essential Oil Candle

merry-everything-diy-holiday-candle

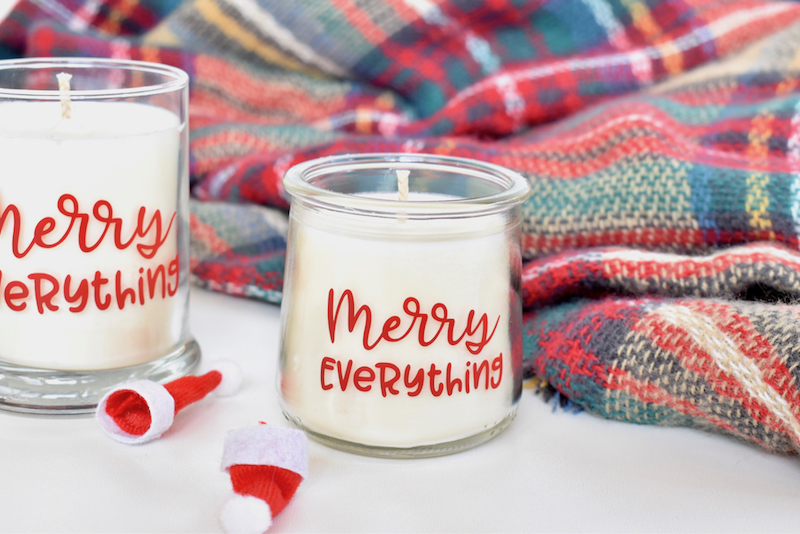
We have our favorite brands of store-bought candles from Anthropologie, Paddywax and Homesick. We will continue to buy them, but we’ve (actually just Jessica) has always wanted to make her own DIY candles. Since it’s the holiday season, and all the warm and fuzzy vibes are everywhere, now was the time to attempt our first DIY candle. Happy to report, I’m hooked. I can’t wait to play with all the scents. I love the smell of doTERRA’s Holiday Joy. It smells like Christmas, which makes me happy.

Materials:

  • Soy candle wax,
  • Essential oils, Holiday Joy by doTERRA
  • Candle wick
  • Glass jars
  • Hot glue gun and hot glue
  • Candle pitcher, double boiler pot
  • pencil or popsicle stick (to hold the wick in place while the candle hardens)

Directions:

Step 1: Melt the wax. I filled a pot 1/4-1/2 full of water, and set the boiler pot inside. Pour 3 cups of wax flakes in the boiler pot, and turn the stove to high to melt the wax.

Step 2: While the wax is melting, prepare the candle jar. Use the hot glue gun to gun the wick to the bottom of the jar. Wrap the top of the wick around a pencil or stick and set on top of the jar in the middle. This will keep the wick in place while the candle hardens.

Step 3: Once the wax has melted, wait a couple minutes until the wax cools to add the oils.  The 3 cups wax made two candles for me, and I used approximately 75 drops oils. It seems like a lot, I know, but when the wax hardens, the smell weakens, and I wanted to smell all those amazing scents. If you plan to a combination of 3 to 4 oils, use about 20 drops of each.

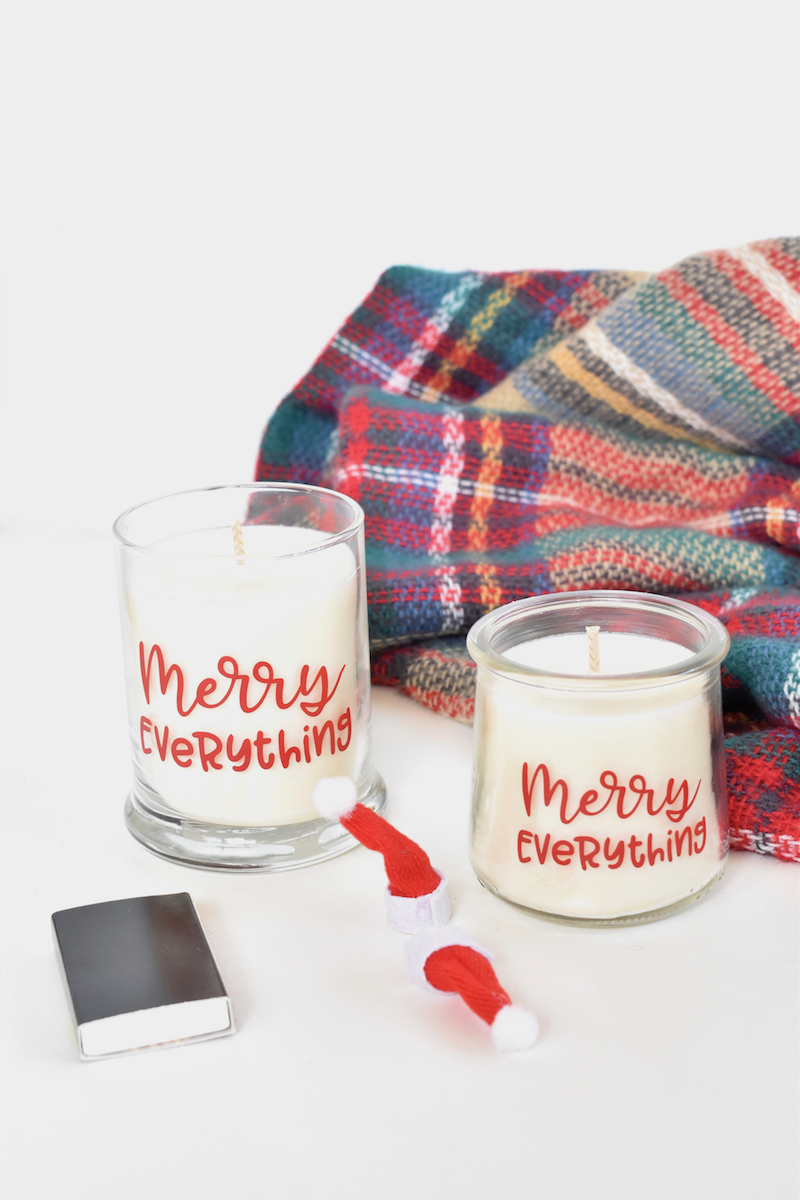
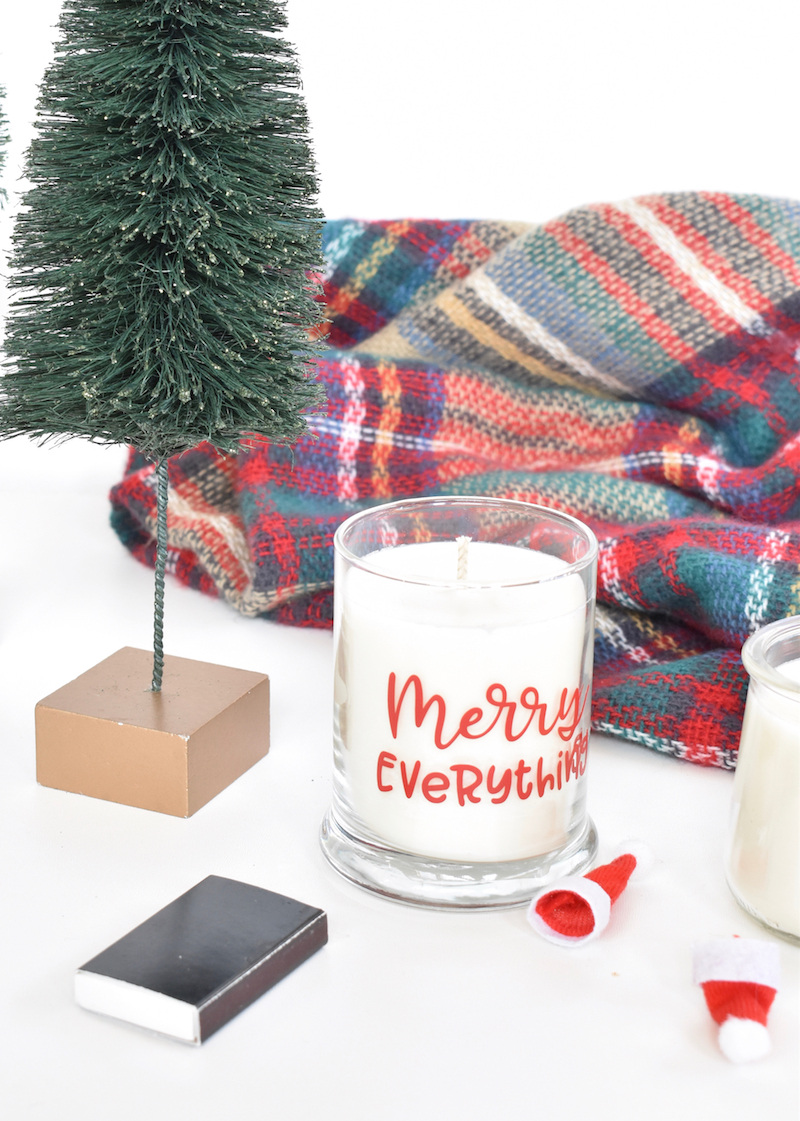
Step 4: Let the candle harden for 24 hours. Once it’s set (and white, no longer clear), cut the wick and add a label. I use my Silhouette CAMEO cutting machine to design and cut a Merry Everything vinyl design.

Have a merry and bright Christmas, everyone!

merry-everything-diy-holiday-candle


merry-everything-diy-holiday-candle


*This post contains affiliate links

SHOP THE POST:
[show_shopthepost_widget id=”3393868″]


It’s Beginning To Look A Lot Like Christmas

modern-and-plaid-christmas-decorations-in-a-small-space

I (Jessica) shared tips on how to make a small space feel like home for Christmas on Real Simple, and not only was it a dream to write for Real Simple (pinch me), it was an added bonus to keep the holiday decor I bought and made for the post. I’ve been in the Christmas mode since October – I like to think of it as just extending the joyful season!

Part of this photo shoot was homemade, and the other half store-bought, just the way I like it. I always love a homemade touch, but life was simplified by buying the rest. One of my favorite parts of this shoot was the small businesses in the Vail Valley I got to work with, such as the Cole and Dainer (blanket) and the LA Antler Co antlers. Jenna made the cute Merry and Bright printable (available in our Etsy shop  here for $5, as well as two others).  I made the wreaths, color-blocked the white houses from Target with black paint, and I’m just mad for those plaid paper fans on top. The cozy fireplace from Home Depot has been keeping us warm, too.

modern-and-plaid-christmas-decorations-in-a-small-space

Thanks to all the amazing people and vendors whose products made it feel so festive! Check out their stuff below – they make excellent Christmas gifts, birthday gifts, housewarming gifts, etc.

Chestnut Hill 68” Electric Fireplace with Sliding Barn Door: Home Depot
Blanket: Cole & Dainer
Antlers: LA Antler Co
Artwork: Merry and Bright and Deer Print
Gnomes: Rubyjane | Valleygirl
Metallic Candles/: West Elm Deco Mercury Candleholders and Organic Shaped Mercury Candleholder
Plaid Paper Fans: Parties That Pop

modern-and-plaid-christmas-decorations-in-a-small-space

See more from the photo shoot, and all the holiday space-saving ideas here.

* This post contains affiliate links 

SHOP THE POST:
[show_shopthepost_widget id=”3393858″]


Warm Up With Chic & Cozy Coats This Winter

IMG_5138

It’s a winter wonderland in the Rocky Mountains this weekend. December is starting out strong with lots of snow! Everyone loves the feeling of being snuggled by a warm, furry teddy bear, especially on snowy days. As adults we don’t cuddle with our teddy bears like our children do; but lucky for us this winter, fashion trends are giving us beautiful options for all those cozy vibes. But, instead of a bear, it’s in the form of a coat. Whether you call them furry, fuzzy, cozy, or teddy, all these coats feel and look amazing! Here’s some of our favorite faux fur coats of the season.

[show_boutique_widget id=”779558″]

DIY Wood Box Frame With Colorful Tissue Paper

diy-wood-box-frames-with-tissue-paper-mod-podge-kids-art-project

These wood boxes have been sitting in my garage for 6 months. I had an original plan for them, and honestly I can’t remember if it didn’t work or fell through. Whatever the reason, I’m really glad I had them, because these DIY wood frames with tissue paper were born. My daughter and I spent the afternoon crafting these frames for friends and family, and then we made extra frames to add to the gallery wall in her room. They are such a happy and colorful addition!

The wood box frames are from Oriental Trading. If you haven’t had a chance, enter in the drawing for $250 gift card to Oriental Trading. You can buy these wood box frames, and a whole lot more! Oh my goodness, the things we could buy and the parties we could decorate for $250! Enter here.

Materials:

Directions:

Step 1: Rip or cut tissue paper into lines/shapes. You can go for a “ripped” look, or a more precise “cut” look. For the confetti, buy a package of pre-cut confetti, or use a hole punch to make circles.

wood-box-mod-podge-foam-brush-art-craft-colorful-tissue-paper

Step 2: Apply a thin layer of Mod Podge to the wood box, and add pieces of tissue paper. Gently press down on the paper so it is “stuck” on the wood box, and try to remove line/bubbles without ripping the paper.

rainbow-tissue-paper

Step 3: Once you have the design you want, add a layer of Mod Podge over the entire wood box and tissue paper. It will appear white, but that’s ok because it will dry clear. Once it’s dry, you can apply another layer of Mod Podge if you want. After you applied the Mod Podge, and it’s completely dry, flip the wood box over and use an X-acto knife to trim the excess tissue paper around the edges.

tissue-paper-confetti-mod-podge-wood-boxes-art-project

tissue-paper-confetti-wood-boxes-art-project

tissue-paper-confetti-wood-boxes-art-project

tissue-paper-wood-box-frame-xacto-knife

Step 4: Once the Mod Podge is completely dry, find the top/center of the box to add the bulldog clip. Make a small dot with a pencil, and then drill with a small drill bit. Align the bulldog clip with the drilled hole, and then use a screwdriver to tighten a screw.

tissue-paper

teal-bulldog-clip-screw-rainbow-frame

Step 5: Clip a 4×4 photo in place. Now, you have a colorful, adorable frame. You can make 12 of them for $17.

diy-wood-box-frames-with-tissue-paper-mod-podge-kids-art-project

diy-wood-box-frames-with-tissue-paper-mod-podge-kids-art-project

diy-wood-box-frames-with-tissue-paper-mod-podge-kids-art-project

diy-wood-box-frames-with-tissue-paper-mod-podge-kids-art-project

Note: This post contains affiliate links. 

Dirty Pour Art: It’s All In The Pour

dirty-pour-artwork

We discovered the coolest way to make DIY art, and you don’t need a painter’s bone in your body. It’s called Dirty Pour art. Basically, the pre-mixed paint is poured into one cup, and when poured onto a canvas, it creates swirled and marbled effects. We tried Dirty Pour art for the first time, and we are addicted. It creates the most beautiful print. It’s a MUST try.

We shared a tutorial at Momtastic. Check out all the dirty little details hereIMG_3162