DIY Tea Organizer Gift

diy-tea-organizer-yogi-coffee-mug-gift-colorful-tabs

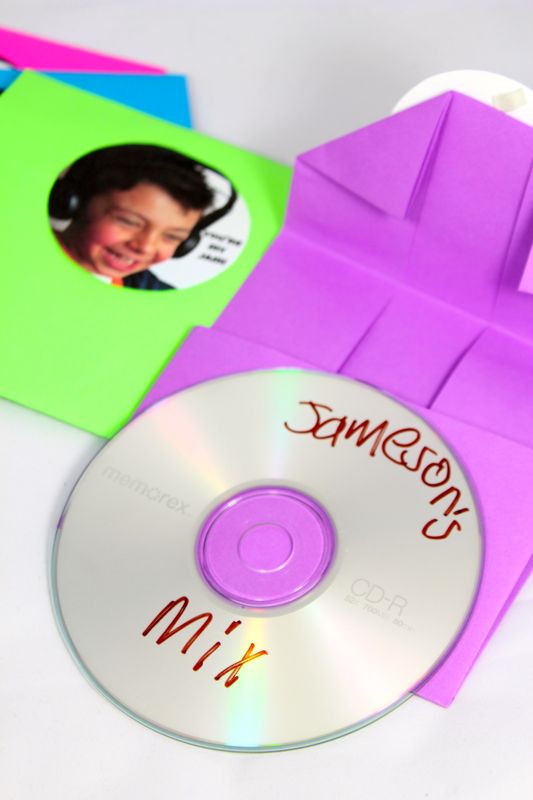
We love tea. It’s a recent can’t-live-without routine these days. We also can’t get enough of the Target Dollar bins – seriously, we can’t get out of that section in under 30 minutes. Those 4 mini aisles bring us joy, and fabulous finds. We combined a recent Target find with tea, and we’re obsessed!

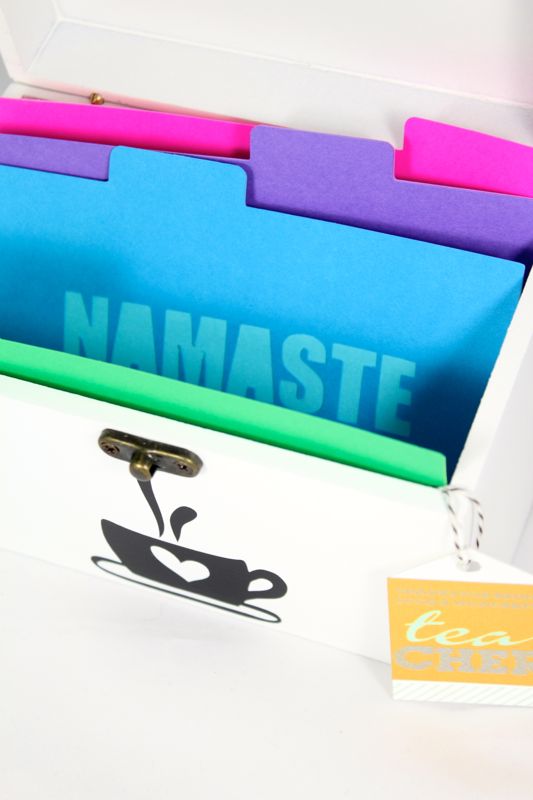
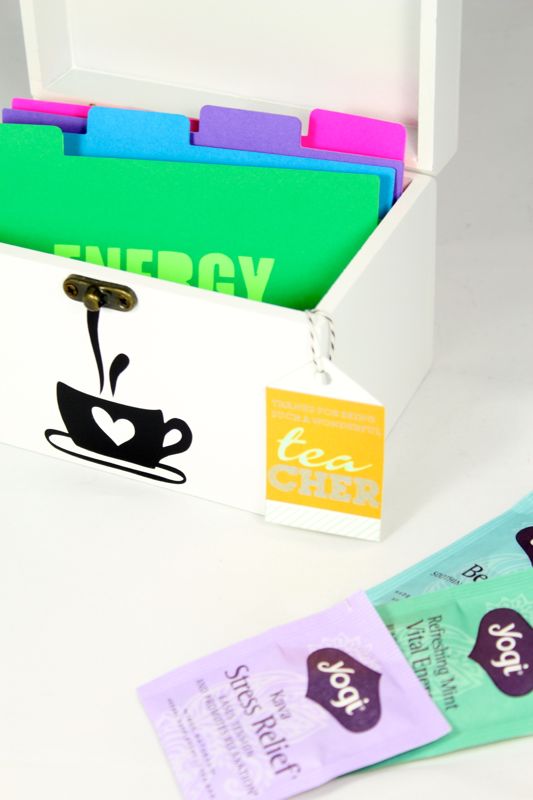
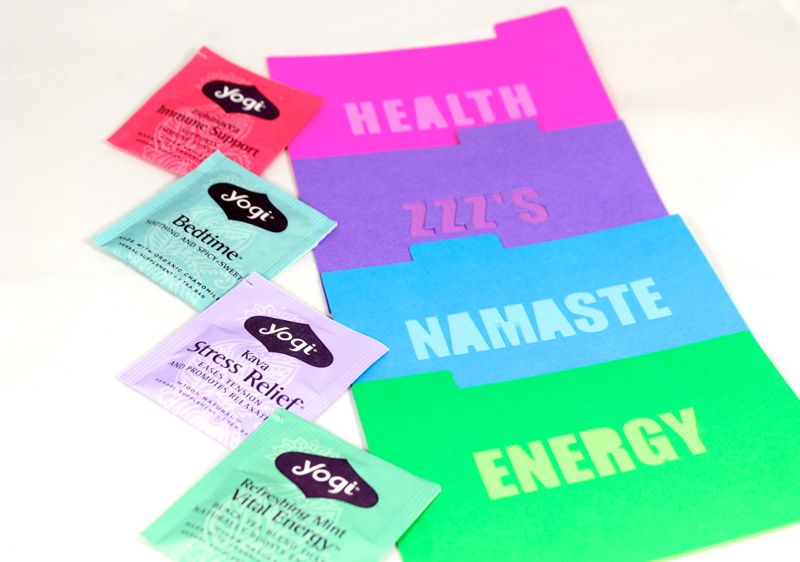
Everyone needs a tea organizer like this for the office, for the classroom and for the home. It’s pretty, efficient and simple. We organized our tea by moods and needs because there is a tea bag for just about everything. Our teachers are the lucky recipients of this one, but we have a feeling this will be a go-to DIY gift.

Materials:

Directions:

Gather your favorite tea bags. We used some of our favorites from Yogi.

-teacher-gift-diy-tea-bags-organizer-wood-box-black-coffee-mug-health

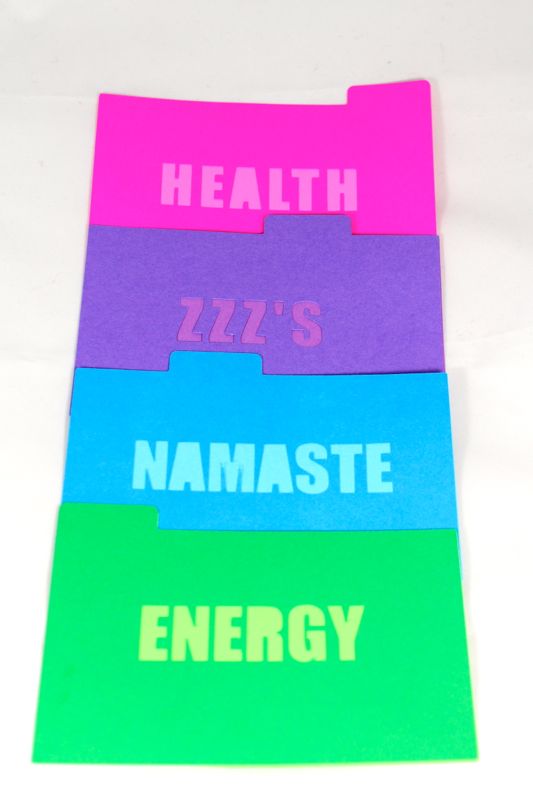
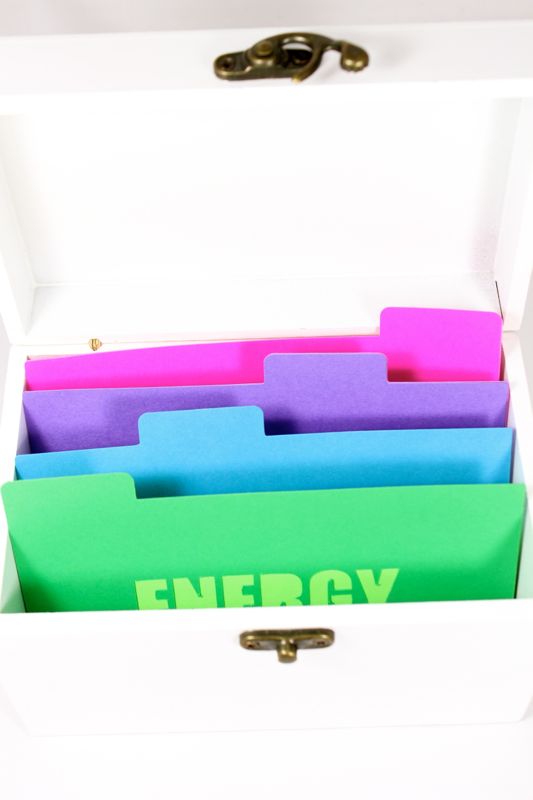
Design the tabs/labels in Silhouette Design Store. We chose to organize with the words Energy, Healthy, ZZZ’s and Namaste. We layered the file folders so there was color behind the letters. Make sure the tabs fit inside your organizer. Cut {let the printer do the cutting} and glue.

-teacher-gift-diy-tea-bags-organizer-wood-box-black-coffee-mug-namaste-zzz-health

-teacher-gift-diy-tea-bags-organizer-wood-box-black-coffee-mug

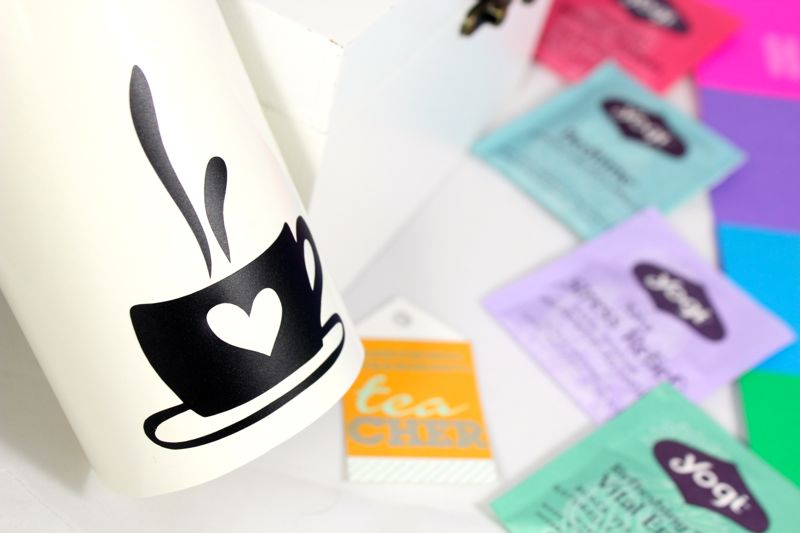
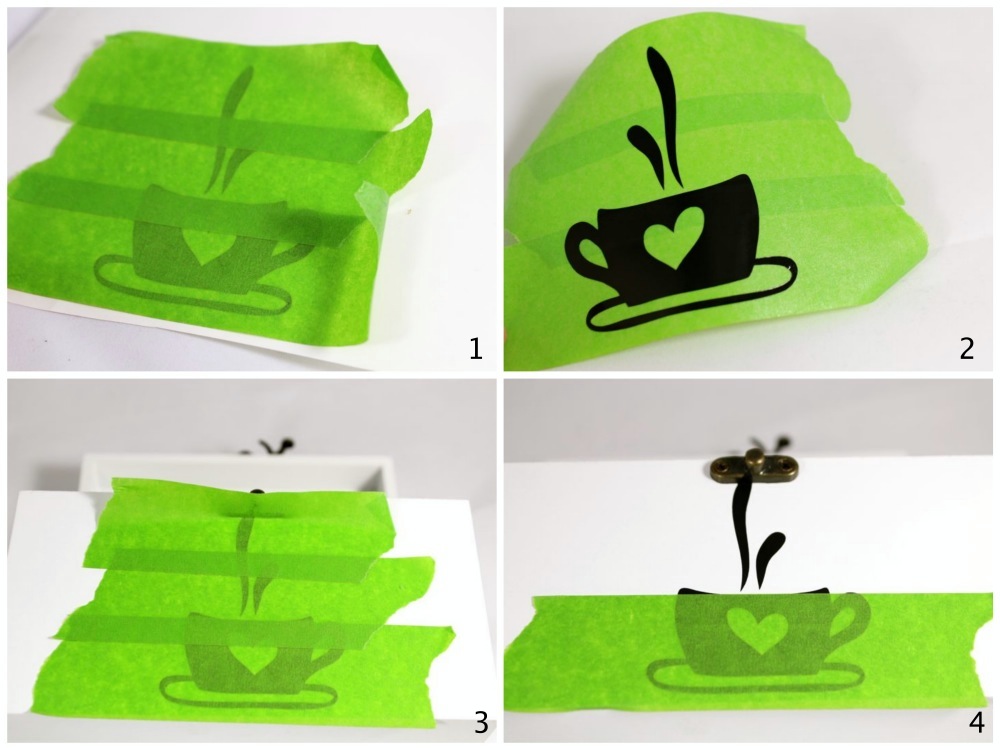
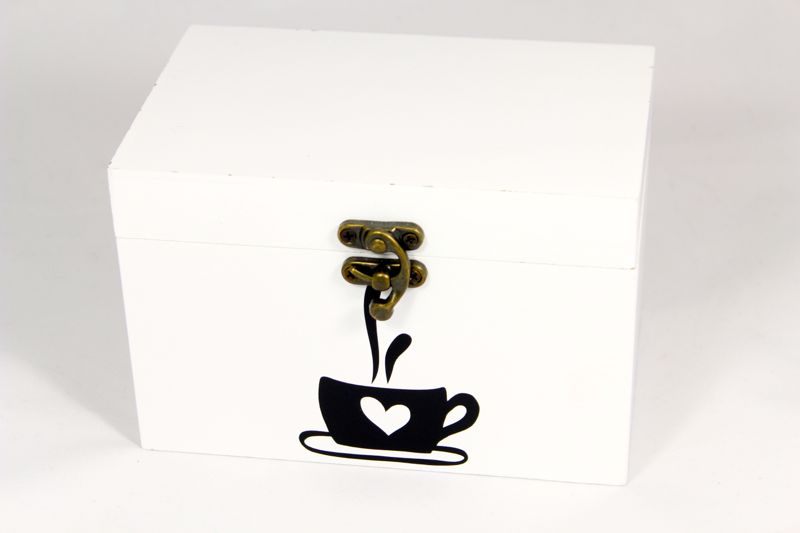
Design and cut the coffee mug with Silhouette. We did not have the vinyl transfer paper, so we used Frog’s Tape, and it worked like a charm.

silhouette-black-coffee-mug-heart-diy-tea-gift

white-box-black-vinyl-green-tape-coffee-mug-diy-gift

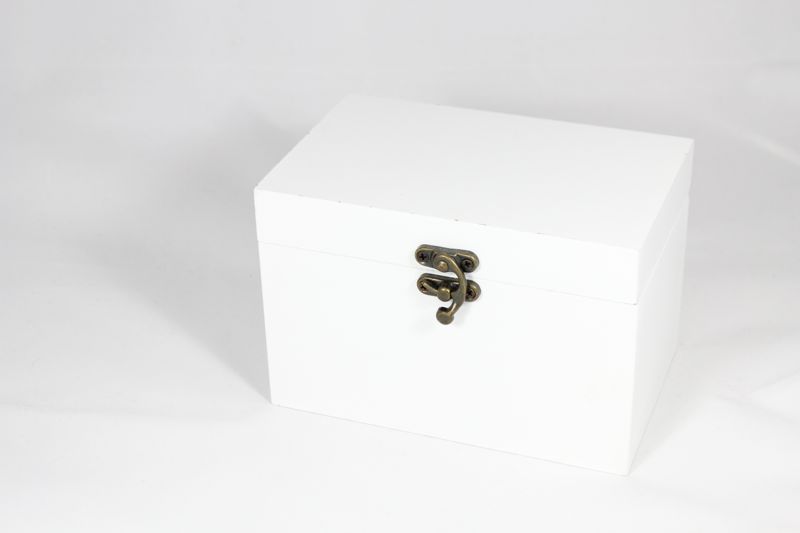
Here’s the white box before…

white-box-black-coffee-mug-heart-tea-diy-gift

and after.

white-box-black-coffee-mug-heart-tea-diy-gift

Place the tabs/file folders and tea bags inside the wood box.

-teacher-gift-diy-tea-bags-organizer-wood-box-black-coffee-mug

white-wood-box-diy-gift-tea-teacher-energy

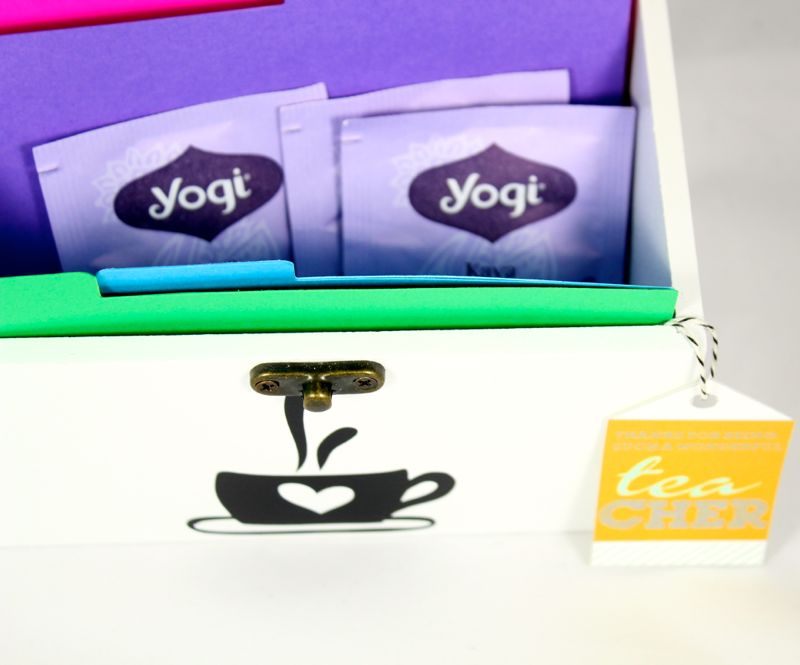
Print the free You’re a Wonderful Tea-cher label, and hang from a piece of twine and tape from the inside of the wood box.

-teacher-gift-diy-tea-bags-organizer-wood-box-black-coffee-mug

namaste-tea-wood-box-diy-gift-blue-paper-teacher


You’re My Jam, Valentine

cd-your-my-jam-diy-music-cd-valentine-boy-headphones

This Valentine idea is a non-candy, peanut, gluten, and dairy-free option. Hooray. Plus, it’s fun, gender-neutral, and it’s got rhythm. Jessica’s son loves music, so he wanted to share some of his faves with his friends this Valentine’s Day. Not many classics made his list – Everything is Awesome, I like to Move It and I’m in Love with a Monster made his top 3.

Jenna had a good point when she asked if anyone actually uses CDs anymore; however, our kids still listen to CDs in the car. So, with some leftover CDs, colorful paper from Astrobrights, a camera and computer, we went to work.

Materials:

Directions:

Take a photo of your child with headphones. This part was fun. Edit the photo with the free and amazing editing software, PicMonkey. We made the image into a circle in this software, and added the words, You’re My Jam. Print and cut the photos.

cd-your-my-jam-diy-music-cd-valentine-boy-headphones
Burn the CDs.

cd-your-my-jam-diy-music-cd-valentine-boy-headphones

Make DIY cd sleeves with paper by following this tutorial. It’s super easy, y’all {we didn’t use the template – just looked at the photos}.

Insert the CD into the sleeve, close and glue the photo of your child onto the CD holder.

cd-your-my-jam-diy-music-cd-valentine-boy-headphones

Don’t forget to check out some of our past Valentines.

Ryan Gosling on your underwear. Yes, please.

You’re a Cutie Valentine.

Got some fuzzy feelings this Valentine’s Day. We’ve got some DIY emoji’s for that.

DIY heart magnets that are as good as gold.

You’ve been hit by Cupid’s pencil arrow.

Wear your heart around your neck.

We love you like Hot Chocolate loves Marshmallows.


Painted Aloe Plant

love-heals-aloe-plant-gift-valentines-day-pink-hearts-diy

We have always had every reason to believe in love. This year our grandparents will celebrate their 60th wedding anniversary {once celebrated by our other grandparent’s, also}. Our parents will celebrate 38 years together in August. We had an amazing childhood in a house full of love, and a large family that loved us unconditionally. We fell in love with and married our high school sweet hearts. Love was easy. Until it wasn’t. Love hurt us in 2015. It hurt us, particularly one of us, bad.

For the first time, love wasn’t enough. What? Love is always enough, isn’t it? Well, not when the person on the receiving end stomps on it, cheats on it, is reluctant to receiving it and lies through it without any remorse. Can you tell one of the high school sweet hearts wasn’t really sweet after all?

So, does love really just stink? Some of you may answer yes and some may answer no – either is ok and the answer is likely based on your current situation or your life’s circumstance thus far.

Well, we are not love experts, but we do know that love is complicated and hard, love is essential, love can unite, love can instigate change, love can cause heartbreak, love comes in many forms, love is passion and ultimately love heals.

We have a little aloe plant, also known for it’s healing properties, we lovingly named Hope. Hope because we are hopeful for all the wonderful things love will bring our way. And, because now she has LOVE HEALS and hearts written all over her! It’s a good, hopeful reminder for us all.

This is a 5-minute project anyone can do. And, it may just bring a little love to you.

love-heals-aloe-plant-gift-valentines-day-pink-hearts-diy

Materials:

  • Aloe plant
  • Sharpie Oil-Based Paint Pens

Directions:

All you have to do is draw. Sweet!

Give the DIY painted aloe plant as a gift this Valentine’s Day, or any day! Love isn’t just limited to one day in a calendar year – it lives in us 365 days a year – if we let it!

Maybe it’s not about the fairytale ending, it’s about the journey. Make love a part of your story, in whatever form it may be. There is no sense in living our lives without love.

love-heals-aloe-plant-gift-valentines-day-pink-hearts-diy

love-heals-aloe-plant-gift-valentines-day-pink-hearts-diy

love-heals-aloe-plant-gift-valentines-day-pink-hearts-diy

love-heals-aloe-plant-gift-valentines-day-pink-hearts-diy

Valentine’s Day Party for Kids

bananas-for-you-yellow-valentines-day-party-kid-birthday-hearts

This Valentine’s Day party is simple, and a bright dose of yellow sunshine in the middle of a snowy, cold winter. It’s just what we needed, and it’s just what our kids needed to celebrate love this Valentine’s Day. Love comes in all shapes and forms, and we try to teach and show them what love means everyday. Love for themselves and love for others.

As you know, it’s wonderful when the sibling bickering subsides and they can hug, kiss and play with one another. We captured it on camera, so next time they are fighting, we can remind them how much they love each other.

Banana’s For You stemmed from a recent find similar to those Silly Bandz we were obsessed with in 2010. The tiny banana bracelets are going to be our kids Valentine’s this year, but we wanted to have a little extra fun at home, too. It was an everything banana party, including the color yellow, banana ice cream, banana cut-out details, and banana bracelets.

bananas-for-you-yellow-valentines-day-party-kid-birthday-silly-bandz

Materials:

Directions:

  • Cut out the letters for Banana’s For You. We used our amazing Silhouette to cut out the letters, bananas, hearts and arrows.

bananas-for-you-yellow-valentines-day-party-kid-birthday-hearts This Valentine's Day party is simple, and a bright dose of yellow sunshine in the middle of a snowy, cold winter. It's just what we needed, and it's just what our kids needed to celebrate love this Valentine's Day. Love comes in all shapes and forms, and we try to teach them what love means everyday. Love for themselves and love for others. It's wonderful when the sibling bickering subsides and they can hug, kiss and play with one another.  We captured it on camera, so next time they are fighting, we can remind them how much they love each other.  Banana's For You stemmed from a recent find similar to those Silly Bandz we were obsessed with. The tiny banana bracelets are going to be our kids Valentine's this year, but we wanted to have a little extra fun at home, too. It was everything banana, including the color yellow, banana ice cream, banana cut-out details, and banana bracelets.  bananas-for-you-yellow-valentines-day-party-kid-birthday-silly-bandz  Materials:  Astrobrights Paper, yellow and pink yellow washi tape banana bracelets X-acto knife Double-sided tape bowls or ice cream pint containers Directions:  Cut out the letters for Banana's For You. We used our amazing Silhouette Electronic cutting tool to cut out the letters, bananas, hearts and arrows. bananas-for-you-yellow-valentines-day-party-kid-birthday-hearts  Find a wall and use washi tape to hang the letter and bananas. bananas-for-you-yellow-valentines-day-party-kid-birthday-hearts-cupids-arrow     bananas-for-you-kid-party-valentines-day-diy-yellow-banana-pink-hearts  For the placemats, trace a banana on yellow paper with a black sharpie. Fill in the ends and lines in the middle with black marker. Use an X-acto knife to cut the side of the top-half of the banana and the line down the middle, half-way down. This will be the 'peel' effect. Place double-sided tape on all 4 corners and tape to a sheet of pink paper. Draw the name of the child on the pink paper under the banana peel, and add the words PEEL ME on top of the banana peel. banana-peel-me-placemat-kid-party  banana-peel-me-placemat-kid-party  banana-peel-me-placemat-kid-party-ice-cream-pint  banana-peel-me-placemat-kid-party  Glue or tape the small size bananas and mini hearts on the lid of the pint container. banana-peel-me-placemat-kid-party-silly-bandz-banana-ice-cream-pint  Make banana ice cream. Follow this recipe. It's amazing - frozen banana's blended in a food processor literally makes ice cream. Fill a bowl with toppings so the kids can their chocolate fix. banana-chocolate-ice-cream-party-yellow-bananas-for-you  Serve and par-tay. ice-cream-valentines-party-bananas-for-you-yellow-hearts  ice-cream-valentines-party-bananas-for-you-yellow-hearts  ice-cream-valentines-party-bananas-for-you-yellow-hearts  ice-cream-valentines-party-bananas-for-you-yellow-heartsice-cream-valentines-party-bananas-for-you-yellow-hearts

  • Find a wall and use washi tape to hang the letter and bananas.

bananas-for-you-yellow-valentines-day-party-kid-birthday-hearts-cupids-arrow


bananas-for-you-kid-party-valentines-day-diy-yellow-banana-pink-hearts

  • For the placemats, trace a banana on yellow paper with a black sharpie. Fill in the ends and lines in the middle with black marker. Use an X-acto knife to cut the side of the top-half of the banana and the line down the middle, half-way down. This will be the ‘peel’ effect. Place double-sided tape on all 4 corners and tape to a sheet of pink paper. Draw the name of the child on the pink paper under the banana peel, and add the words PEEL ME on top of the banana peel.

banana-peel-me-placemat-kid-party

banana-peel-me-placemat-kid-party

banana-peel-me-placemat-kid-party-ice-cream-pint

banana-peel-me-placemat-kid-party

  • Glue or tape the small bananas and mini hearts on the lid of the pint container.

banana-peel-me-placemat-kid-party-silly-bandz-banana-ice-cream-pint

  • Make banana ice cream. Follow this recipe. It’s amazing – frozen banana’s blended in a food processor literally makes ice cream.
  • Fill a bowl with yummy toppings so the kids can their chocolate fix.

banana-chocolate-ice-cream-party-yellow-bananas-for-you

  • Serve and par-tay.

ice-cream-valentines-party-bananas-for-you-yellow-hearts

ice-cream-valentines-party-bananas-for-you-yellow-hearts

ice-cream-valentines-party-bananas-for-you-yellow-hearts

ice-cream-valentines-party-bananas-for-you-yellow-hearts

If you loved this, you’re going to love these IG feeds:
@astrobrights
@silhouetteamerica
@jsorelle3
@mustardgifts


DIY Concrete Heart Magnets with Gold Leaf

love-you-diy-concrete-hearts-gold-gilding-valentines-day

Our first experience with concrete, thanks to The Home Depot, was a good one. We kept it simple, and made it all about the ambiance. It left an impression with us, because concrete continues to make the DIY supply list. We never thought we would mix concrete for a Valentine’s Day DIY simply for the idea of creating a heart of stone, but we never thought life would turn out as it did in 2015 either. Life continues to surprise us!

Make some DIY concrete heart magnets with gold gilding this Valentine’s day for friends who truly have hearts of gold.

love-you-diy-concrete-heart-magnets-gold-gilding-valentines-day

Materials:

Directions
Mix 1-2 cups concrete with water. I gradually added water until it was the right consistency, about ¼ cup. Mix thoroughly.

Spray the entire heart mold with cooking spray.

Use a spoon to fill the heart cavities with concrete. Make the top of the hearts as even and as smooth as you can.

Once all the hearts are filled, wipe the top of the mold {in between the hearts} with water and a paper towel. Let the hearts dry for 5-12 hours.

Push the hearts out of the molds – they should just ‘pop’ out.

Wipe the hearts with a dry paper towel to get the excess gravel off.

Apply E-6000 to small magnets and glue to the back of the hearts. Let sit for an hour.
love-you-diy-concrete-hearts-magnets-gold-gilding-valentines-day

Apply gilding adhesive with random strokes. Follow the directions on the packaging, but you will have to wait until the adhesive dries {when it turns from white to clear, its tacky and ready}.

Press gold leaf sheets onto the clear spots.

Let the gold dry for 2 hours, and then use a soft brush to brush off the excess gold.

Seal the hearts.
love-you-diy-concrete-heart-magnets-gold-gilding-valentines-day
Hooray, you made concrete hearts of gold. Now you can hang a pretty printable from the magnets like this Love You one from Avery Street Design.

love-you-diy-concrete-heart-magnets-gold-gilding-valentines-day

love-you-diy-concrete-heart-magnets-gold-gilding-valentines-day