DIY Red, White and Blue Ice Bucket

red-white-blue-ice-bucket-july-4th-wine-cooler

It’s about that time when red, white and blue are just about the only colors on our minds. Yes, one of our favorite holidays, July 4th, is coming up, and this year we’re adding a DIY fruit ice bucket to our party to do’s.

A DIY patriotic ice bucket is the perfect July 4th accessory, and it’s so easy and cheap to do. Guests will love the extra touch of red, white and blue, and they will enjoy their chilled beverage.

red-white-blue-diy-ice-bucket-fruit-diy-july-fourth-wine-cooler

red-white-blue-ice-bucket-july-4th-wine-cooler

Materials:

  • water
  • large bucket, we used a plastic one from Party City
  • small buckets {small enough to fit inside large bucket and large enough to fit a wine bottle or beer can}
  • blueberries, fresh or frozen, at least 2 cups
  • strawberries, fresh or frozen, sliced, 2-3 cups
  • weight, such as a rock
  • wine or beer

Directions:

Fill about 1/3 of the large bucket full of water, then drop in all the strawberries. Freeze for at least 5-8 hours.

strawberries-in-a-bucket

Place 2 small buckets on top of first layer of ice, add weight inside {we used a rock}, and fill another 1/3 of the bucket with water. Do not get water inside the small bucket because it will be more difficult to remove the buckets from the ice. Freeze for about 5-8 hours.

buckets

For the final layer, fill the remaining 1/3 of the container fill of water, and then drop in blueberries. Freeze for 8 hours.

blueberries-in-a-bucket

Remove from the freezer. Pour boiling water inside the small buckets and gently twist to remove from the ice. Additionally, run the outside of the large bucket with  hot water from the sink faucet. After about 15 seconds on each side, the ice cooler will be easily removed, and the layers should look like this.

red-white-blue-diy-ice-bucket-july-fourth-party

Carefully flip the ice cooler out from the bucket with your hands and set on a tray. Fill the holes with wine or beer. We couldn’t decide because beer, well, it’s all-American and those Budweiser cans are so patriotic and awesome. But, the vino lovers that we are couldn’t resist the taste and look of the red and blue Relax Wine bottles of wine.

budweiser-beer-red-white-blue-ice-bucket-diy-fourth-of-july-beer-cooler


relax-wines-red-white-blue-ice-bucket-wine-cooler

red-white-blue-ice-bucket-budweiser-beer-diy-cooler


relax-wines-red-white-blue

Cheers!

Important Note: We took photos of this DIY ice bucket with wine we had in the liquor cabinet, and after review of photos, while the wine was good, for the ultimate patriotic post, the wine bottle {and beer} needed to be more festive in color. Enter, Relax Wines and Budweiser beer! However, the ice bucket had to be re-frozen during a several hour photo shoot intermission, and a thin ‘film’ of ice formed over every layer, so the color of the DIY ice bucket was dulled, and the lines of the red, white and blue blurred. You win some, you lose some. Either way, we love our bucket, but honestly, it will be more vibrant than our photos if you have the right alcohol the first time around. 

How to Create a Black, White and Gold Glitter Bar

Here’s one of the details from our Sparkle from Head to Toe photo shoot we told you about Fri {the one featured on Hostess with the Mostess}.

We created the perfect party for women to kick off the holiday season and really SHINE. The sparkle party gave women a chance to gossip with friends over cocktails and cookies, try on and shop for jewelry by local artists, and paint their nails at a OPI nail painting station. Women deserve to Sparkle from Head to Toe…and this party let them do just that!

As you know, every good party needs a bar. With a small space, and a tight budget, we created a DIY bar from a tray. It’s a great accessory for any holiday party, bachelorette party, birthday party, or just a night with the ladies. Here’s how you can do it too.

DIY Black and White Striped Bar Tray

You’ll Need
Tray
Paint
Paint brushes
Painters tape
Wood letter from your local WalMart, Hobby Lobby or Michaels
Gold Glitter Spray Paint

How To
Clean and sand the tray if necessary.
Spray paint the whole tray with white primer.
Once primer is dry, paint entire tray white. Repeat once for two coats.
Add Painter’s Tape where you want stripes. My tray had the perfect lines carved into it, so I just lined the tape up with those.
Paint the non-taped parts black. I used a brush to paint for more control, instead of spray paint. Repeat for a total of 2 coats.
After 24 hours, pull the tape from the tray.
If you have any touch ups to do, use a small brush and paint to fix.
For the letters, it’s best to use the primer to spray paint so you don’t see the wood grain under the glitter.
Once the primer is dry, spray paint with glitter spray paint.
Accessorize the bar with champagne, Izze drinks and fresh fruit.

Labels printed and sparkled by FLEUR DE LIS, custom paperie.

{via Tutto Bella}

10 ways to host a fabulous backyard par-tay

It’s summertime, and there’s nothing like hosting a lovely party outside. I know the summer in the mountains only lasts 3 months, so I better get my party on. Here’s 10 ways to help you host the perfect summer night out…in your backyard!

1. CREATE A BAR
Most people cannot build a permanent outside bar, and when you live somewhere like we do, where its cold all winter and winter lasts forever, it doesn’t make sense to have an outdoor bar. The good news is bars can come in all shapes and sizes, so it can be versatile. From a trendy bar cart on wheels, to a small tray like this beautiful rustic one from Pottery Barn, a DIY cooler or even a bucket – as long as there is liquor, and all the accessories – IT WORKS! This kitchen cart from Ikea could be a rocking bar cart. And, this is an affordable option from CB2 and I just LOVE this one from Pottery Barn. If you just want to add a shelf to your wall you can flip down when there is a party, then flip back up when it’s over, this one is perfect inspiration.

2. STOCK THE BAR
Now, you must stock the bar. Make sure you have an ice bucket and tongs, a cocktail shaker, bottle opener and limes. Essentials are vodka, rum, tequila and gin. Don’t forget the mixers, seltzer’s and juices. Try mixing a signature cocktail for the evening, and place it in a cute container so it can be self-serve. You should 6 or 8 of each of the following: short glasses, tall glasses and stemware. I love melamine for the summer. Mix and match glasses if you need to – makes for an eclectic look, which I love. I’m obsessed with these glasses from Sur La Table.

3. CREATE A LIVING ROOM OUTSIDE
A comfortable environment will make people feel at-home. You should provide comfortable seating for friends. That can be folding chairs stored in your garage, wicker furniture or a comfy love seat. Pillows add a pop of color and personality, and also add that extra level of comfort. Like a living room, only outside. I love the collection of outdoor pillows at Pier1.

4. LIGHT THE NIGHT SKY
Create an ambiance with lighting. You can create an intimate setting, a colorful setting or a soft glow. You can opt for candles like this. Or, for more of a rustic look, we love these. For an industrial look, we love these caged lights from Target.

5. SET THE MOOD
Create a playlist for the evening. Oldies. Pop Hits. Soft rock. Country. Have a little something for everyone.

6. ENTERTAINMENT
Play traditional games like Bocce or Horseshoe, or bring another fun game into the mix.

7. SURROUND YOURSELF WITH BLOOMS OR GARDEN HERBS
For a nice touch, decorate with flowers from garden beds or herbs in pots. Depending on the flowers you choose, it can create a sweet aroma, and it makes for a pretty setting. It doesn’t have to be large bouquets – even single bloom flowers and bud vases would do the job.

8. SERVE YUMMY APPS
With these family favorites, your guests will be ‘wowed.’ The Avocado and Corn dish will be devoured.  

9. FIRE UP THE GRILL
Slice meat and veggies and make a variety of kabobs pre-party, or get everyone involved and they can make their own kabob with an array of chicken, steak and veggie options. This recipe from Two Peas and their Pod looks delish.

10. SATISFY THOSE SWEET TEETH
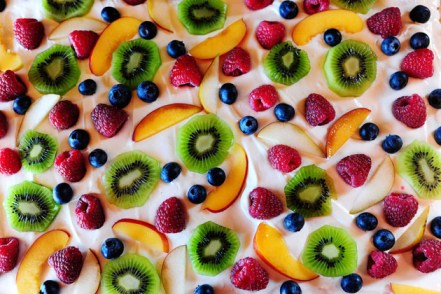
Serve a yummy dessert, like this Fruit Pizza. Check out the recipe from The Pioneer Woman.

{images via A Curated Lifestyle, Style Me Pretty, One Kings Lane, Style at Home, Sunset, The Pioneer Woman}

spring fling

I totally admit that I’m addicted to sugar. I crave it, and need to get my cravings under control. BUT, before I do, I’m going to make this Spring Fling cake a few more times. I LOVE chocolate, and this cake doesn’t have an ounce/pinch/smidgen of it…and it’s still my FAVORITE cake. And with all the fruit, you can justify it being just a tad bit healthy for you!

I discovered The Market from a former co-worker/supervisor {Betsy, one of the coolest ladies ever…I was so lucky}. And, when I first had a piece of this cake, I was in heaven. A cake made with zucchini…who knew it could be so divine?

This recipe was posted in the Rocky Mountain News {a newspaper no longer in publication} a few years ago and it wasn’t until a few weeks ago, I was brave enough to make my own version. My laziness crept in as I called to order the cake 6 hours before a party, but my procrastination and over-budgeted wallet prevented me from buying, so I made it! I tweaked it a bit and recently made for my grandma’s Mother’s Day celebration. It was a hit!

Buon Appetito!

Spring Fling Cake
recipe adapted from The Market via Rocky Mountain News
serves 12-15 people

{I made this a double layer cake, but if you want to make it just like The Market does, make this a 3 layer cake…yummy}

Cake
2 1/2 cups finely shredded zucchini
1 1/4 cups sugar
1/4 cup olive oil
1 cup sour cream
1 tablespoon vanilla extract
3 1/2 cups all-purpose flour
1/2 teaspoon baking soda
1/2 teaspoon baking powder
1 pinch salt
5 eggs

Frosting
{I double this recipe because this cake is best with thick layers of frosting in the middle of the zucchini cake layers}
1 cup cream cheese
1/4 cup butter
1 cups powdered sugar
1/2 cup heavy cream
1/2 teaspoon vanilla extract

Fruit
1 pint strawberries, cleaned, stemmed and sliced
4 kiwi fruits, peeled and sliced
2 mangoes, peeled and sliced
1 pint blueberries

Directions
Preheat oven to 350 degrees
Grease and flour a 10 inch cake pan {I’ve used round and square, and they both worked great}
In a large mixing bowl, combine shredded zucchini, eggs, sugar, oil, sour cream and vanilla
Combine the dry ingredients in another bowl, then add to the wet zucchini mixture
Pour batter into prepared cake pan and bake for 50-70 minutes
Cool on rack for 10 minutes, then remove from cake pan
Cake should look like this when removed from oven

To assemble cake, cut the cooled cake in half lengthwise {creating two or three layers}.
Inside the cake should look liked this…it’s so dense and yummy!

For frosting, whip the cream cheese with butter until smooth. Gradually add the powdered sugar, mixing until combined
In another bowl, whip the cream until stiff, then fold the whipped cream and 1/2 teaspoon vanilla into the frosting mixture

Find the cake platter or dish you are going to serve the cake on – it’s too heavy to move once assembled.

Spread frosting over the first layer…be VERY generous with the frosting {I think it needs to be the same thickness, or slightly smaller, than the size of the cake layers}
Add a layer of fruit. I used mainly strawberries and kiwi inside the cake

Place the remaining cake layer on top and frost
The Market does not frost the sides; however I did and it was delicious
On the top of the cake, arrange the fruit to your liking


Jodi helped me decorate the cakes, and she made an N with blackberries for Nani

P.S. The cake can be made a day prior and refrigerated…and I’m told, and have to agree, leftovers of the cake the 2nd day, after being in the fridge, might be better than when freshly made.