Cheers To A DIY Christmas Stocking With A Wine Spout

diy-red-christmas-stockings-with-a-wine-spout-making-spirits-bright-holiday-bar

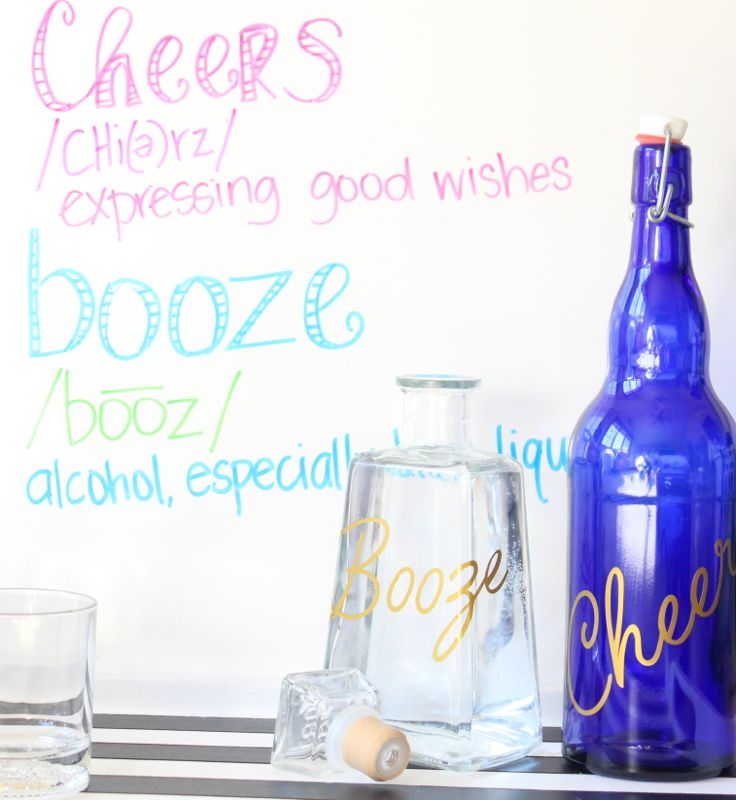
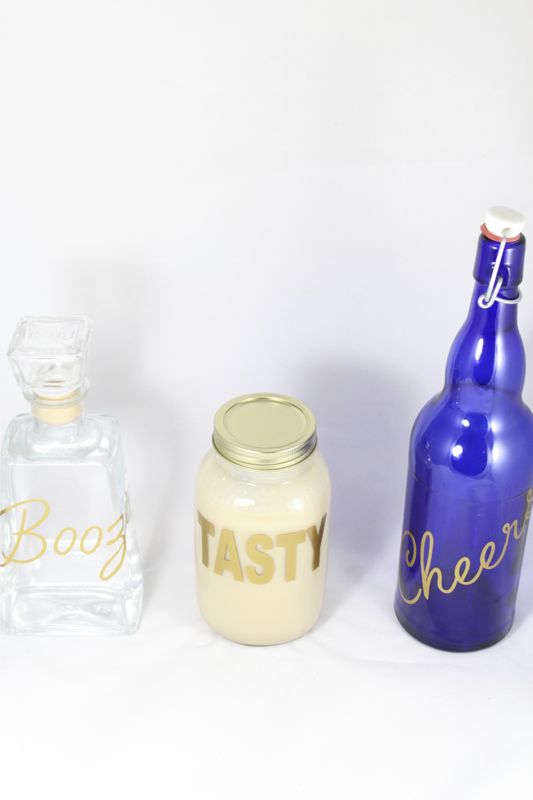
‘Tis the season for holiday parties, gift-giving and all things merry and jolly! We pour more wine around the holidays with all the parties, dinners and let’s face it, stress. So, wine was on our minds when we crafted our next DIY Christmas gift idea.

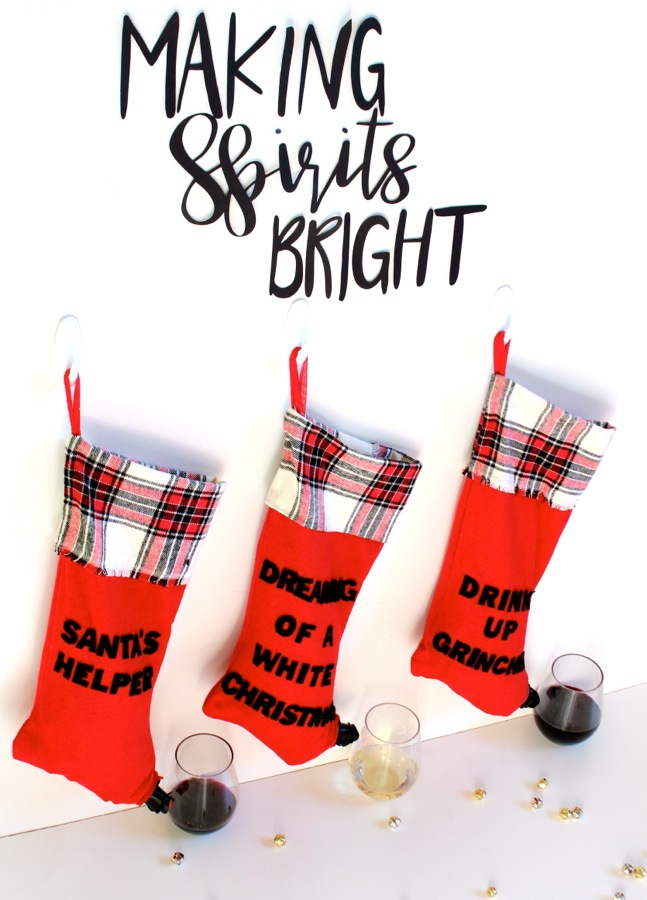
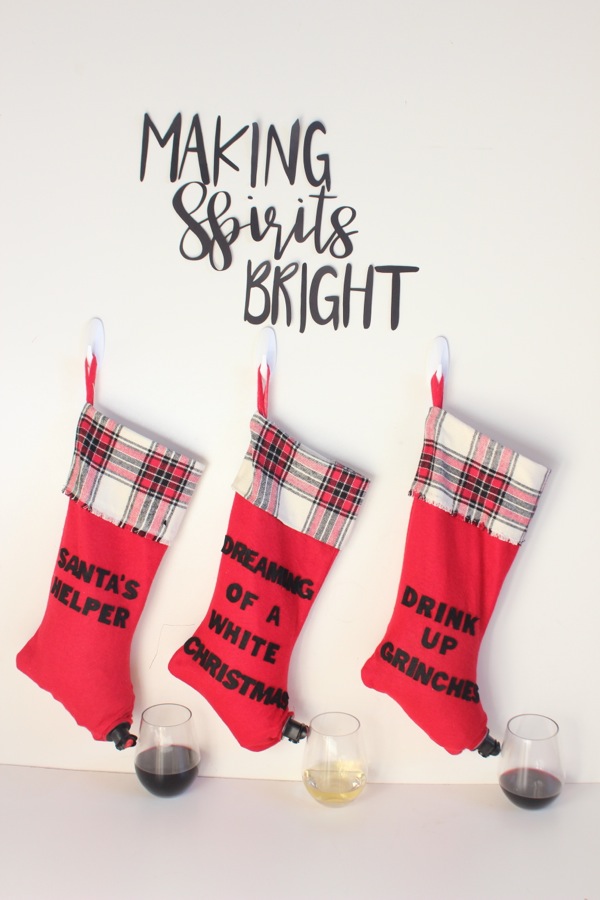
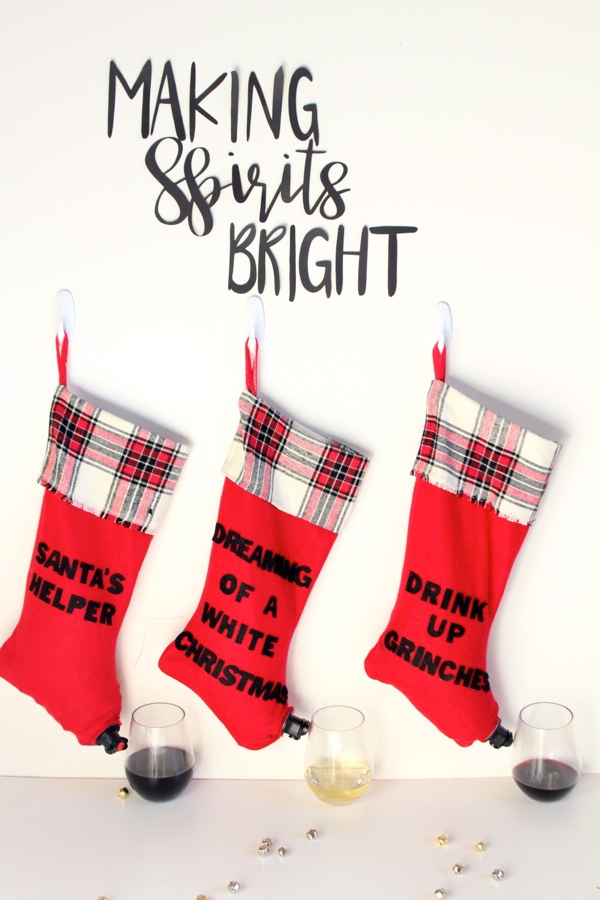
For this DIY, we’re changing the classic line from the Twas the Night Before Christmas poem that reads, “…the stockings were hung by the chimney with care, in hopes that St. Nicholas soon would be there,” to instead say, “…the stocking were hung by the bar with care, in hopes that friends and family soon would be there.” Yes, we’re hanging our families stockings in the living room like we always do for Santa, but we’re hanging a few extra in the bar this Christmas, and giving them to friends to spread good cheer. Christmas is all about making spirits bright, right?

diy-red-christmas-stockings-with-a-wine-spout-making-spirits-bright-holiday-bar

This DIY wine stocking makes for the perfect gift for friends, neighbors and family. Plus, it’s a really fun topic of conversation whether you’re at a party, or having a quiet night in with the girls.

Anyone and everyone can (and should) make these DIY Christmas stockings. Here’s how we made the ultimate stocking stuffer.

Materials:

  • Stockings, .98 cents at Wal-Mart, or other great options at big name retailers
  • Felt
  • Scissors
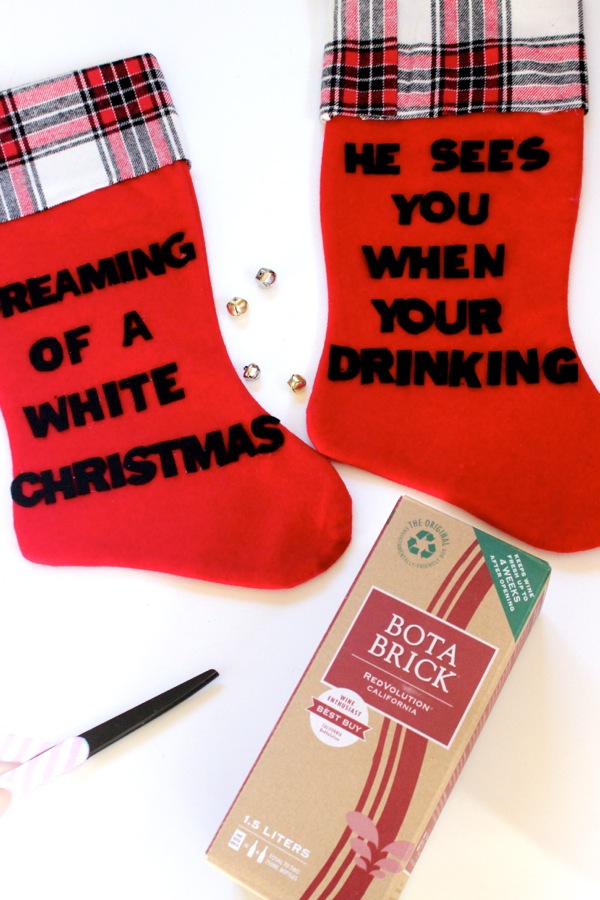
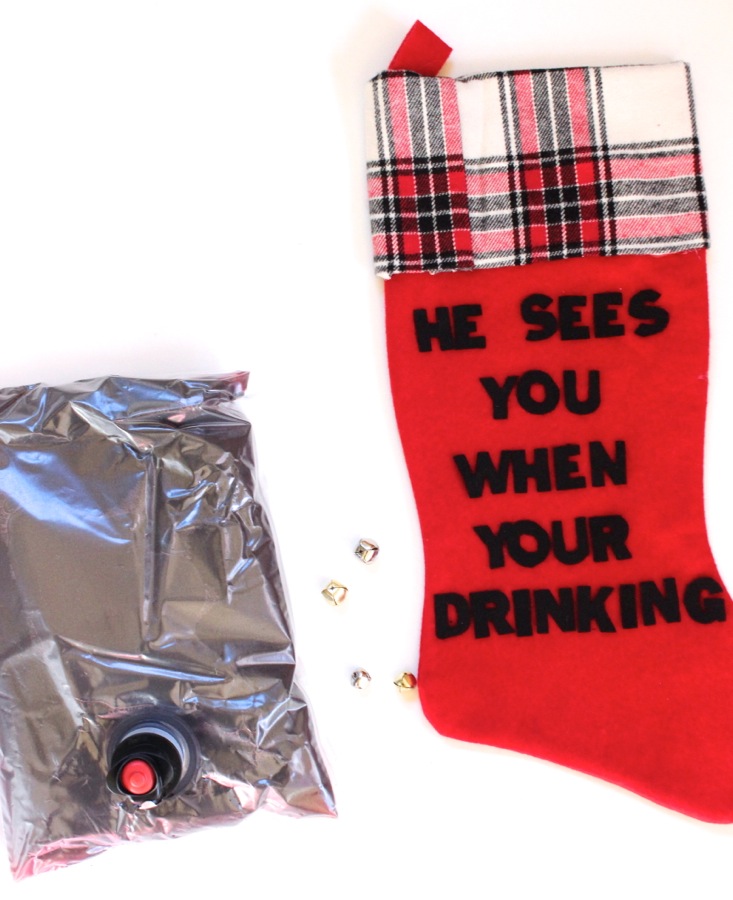
  • Boxed wine (we used Bota Box)
  • Hot glue and hot glue gun

Directions:

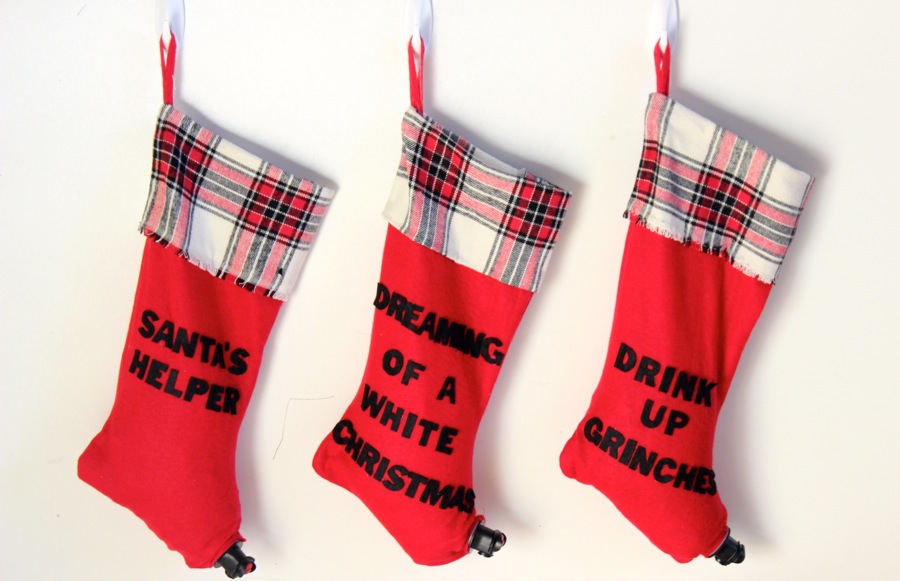
Step 1: First, we upgraded the stockings with about a $3 plaid fabric investment. We didn’t use a needle and thread – just scissors and a hot glue gun. Before the plaid, there was a thick strip of white felt.

red-and-plaid-stockings-with-funny-lines-diy-boxed-wine-stocking-holder

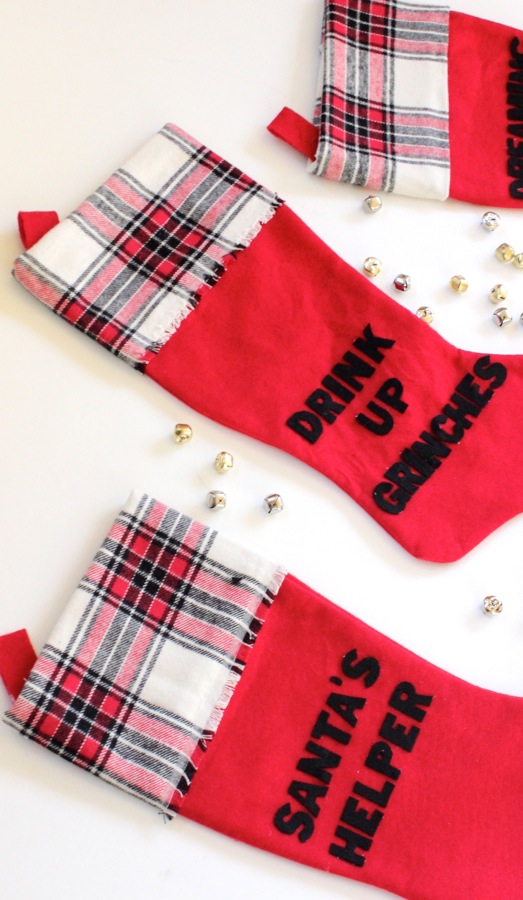
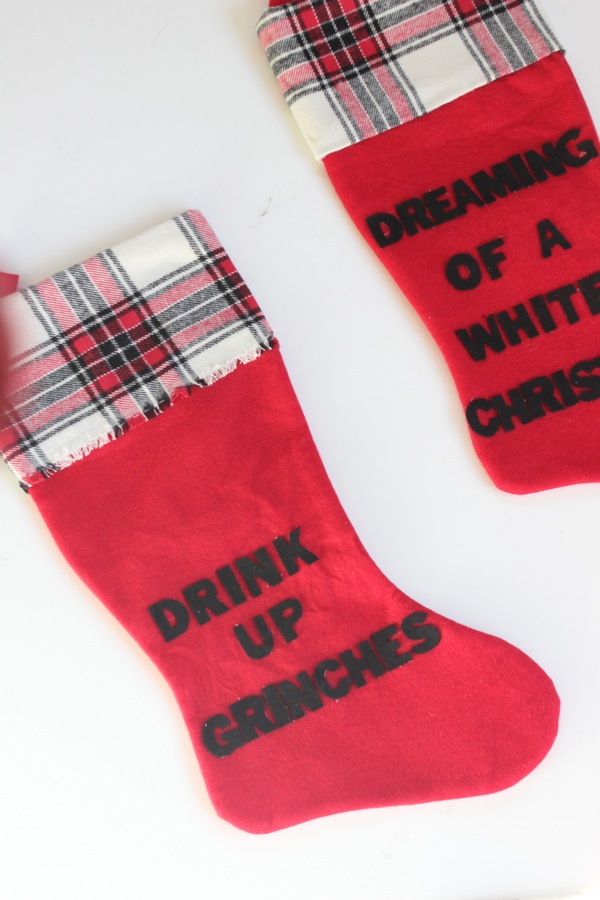
Step 2: Cut out letters for the fun quotes. We went with, Drink Up Grinches, Santa’s Helper, He Sees You When Your Drinking and Dreaming of a White Christmas. We had black letter stickers and just traced as we cut with the scissors. You can freehand the letters though, maybe even using good vinyl stickers to save yourself cutting time all together.

red-stockings-black-felt-letters-he-sees-you-when-your-drinking

Step 3: With a hot glue gun, glue the letters to the stocking.

red-stocking-dreaming-of-a-white-christmas

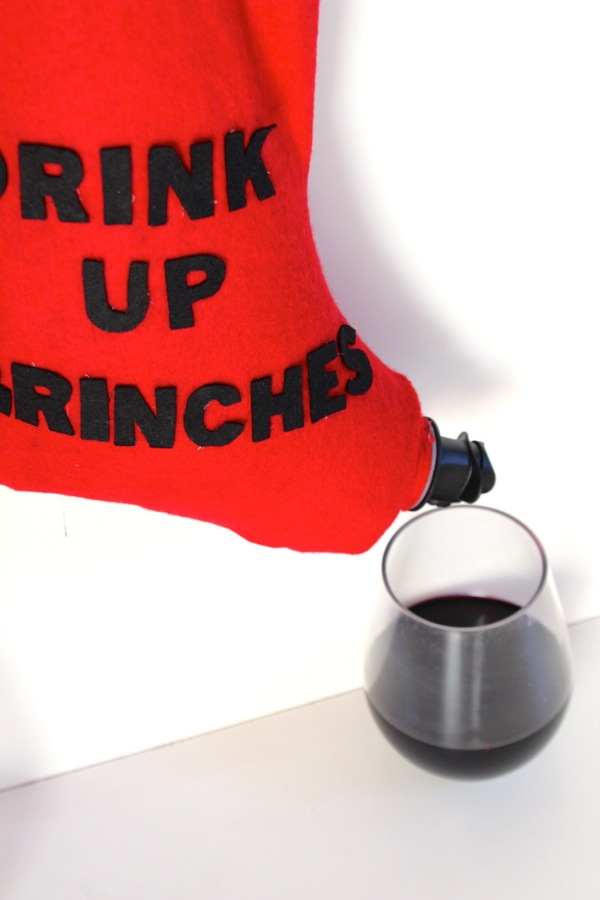
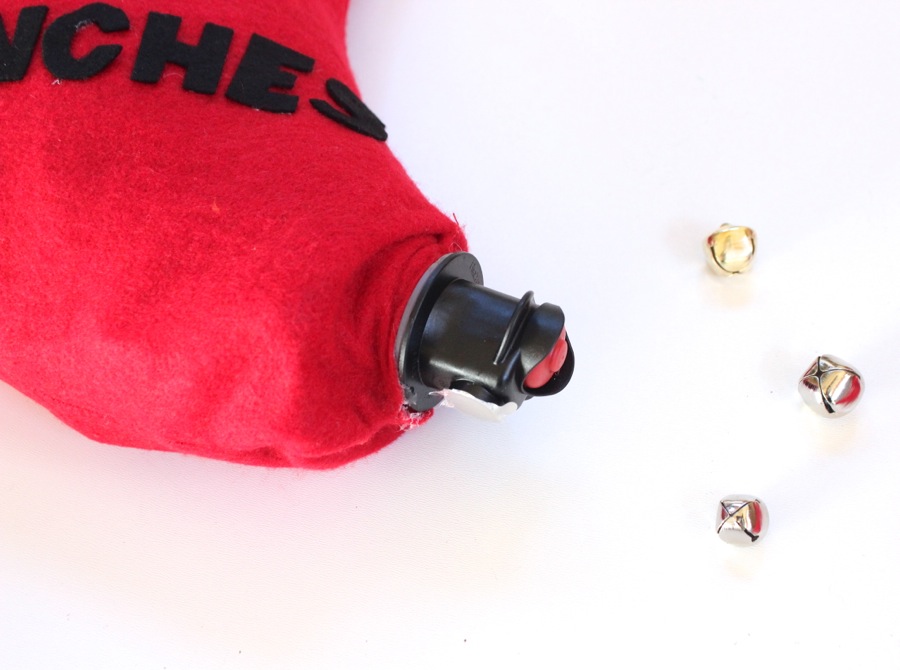
Step 4: Cut out a small hole in the front toe part of the stocking. If it’s too big, you can always hot glue the fabric tight around the wine pull tab.

scissors-red-stocking-wine-bag

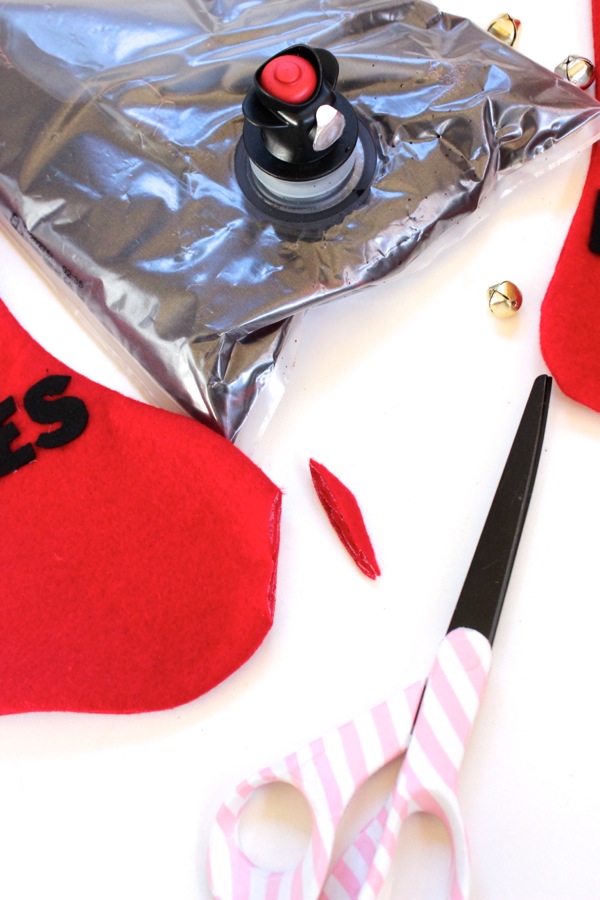
Step 5: Insert the wine bag in the stocking and pull the wine tab through the hole in the toe.

red-and-plaid-stockings-with-funny-lines-diy-boxed-wine-stocking-holder

boxed-wine-bag-red-plaid-stocking-he-sees-you-when-your-drinking

diy-wine-stocking-holder-red-vino-and-plaid-stocking

diy-stocking-that-holds-wine

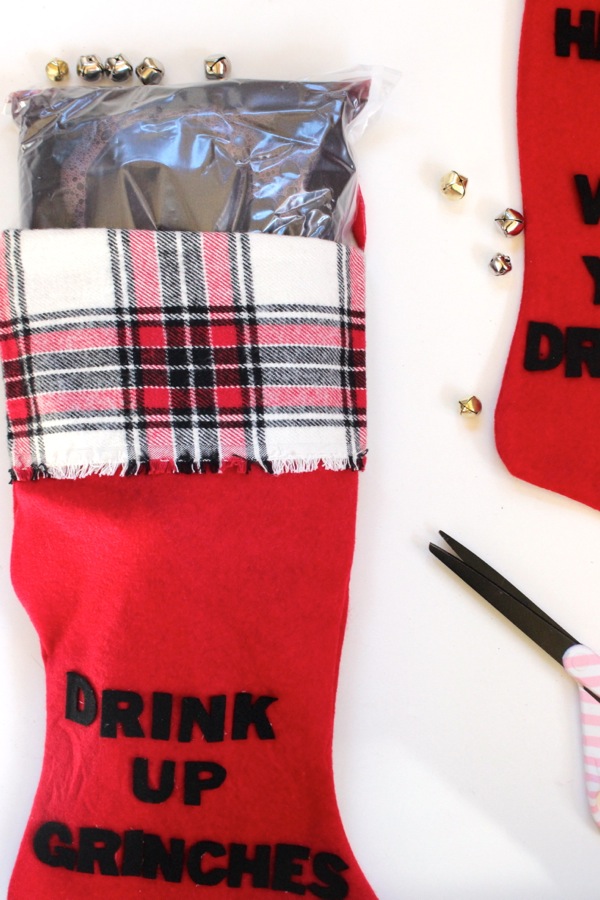
Step 6: Hang and pour. Cheers!

making-spirits-bright-holiday-bar-with-red-wine-stockings

diy-red-christmas-stockings-with-a-wine-spout-making-spirits-bright-holiday-bar

diy-red-christmas-stockings-with-a-wine-spout-making-spirits-bright-holiday-bar

diy-red-christmas-stockings-with-a-wine-spout-making-spirits-bright-holiday-bar


DIY Typography Decanter

booze-cheers-bar-diy-decanter

Nordstrom is one of our favorite places to shop. The shoes, the fashion, the return policy, the cafe – we love all of it! We noticed a fun Booze Decanter and Stopper throughout the holidays, and we never quite stopped thinking about it. Thankfully, we were able to re-create a DIY Booze decanter with our Silhouette cutting machine, and our minds {and bar} are at peace…at least for now.

Materials:

Instructions:

Assemble empty glass bottles you can transform into DIY typography bottles.

empty-glass-bottles

Design your labels with the Silhouette software. Print according to package instructions.

Once the vinyl is cut, remove the excess vinyl around the words, and place Frog’s Tape over the words.

cheers-gold-vinyl

Pull the tape up, and the words should be attached to the tape.

booze-gold-vinyl-green-tape

Press the tape and words onto the bottle, and get all the bubbles out with a straight edge {we used a credit card}.

booze-gold-vinyl-green-tape-decanter

Pull the tape up from the bottle, and the vinyl should stay in place on the bottle. You may have to use one finger to press down on the vinyl if the font is thin and it comes up with the tape, but we didn’t have to on this project.

booze-gold-vinyl-green-tape-decanter

Once all the tape is removed, you should have a new DIY typography decanter. Fill with alcohol and say cheers!

booze-gold-vinyl-green-tape-decanter

For this project, we took it one step further and got a little Typography happy! We couldn’t do just one bottle! This DIY project makes for a really fun addition to any bar, and a great hostess gift.

tasty-cheers-booze-bottle-decanter-bar

booze-gold-vinyl-green-tape-decanter

cheer-blue-bottle-diy-decanter-water-entertaining

tasty-booze-cheers-diy-decanter-bar

Not only did we create several bottles, but we couldn’t have a bottle that holds alcohol without actual alcohol in it. With St. Patrick’s Day several days away, we ventured into making our own Bailey’s Irish Cream. My girlfriend, Kacey, made a delicious batch of our favorite Irish cocktail for a birthday brunch recently, and we couldn’t believe homemade Bailey’s could be so good. We’ve revamped a couple of recipes to make our homemade version, but most are similar.

Homemade Bailey’s Irish Cream
adapted from several recipes

Ingredients:

  • 1 cup + 1 tablespoon Jameson Whiskey
  • 1 pint half and half
  • 1 can Eagle’s Condensed Milk
  • 2 tablespoons chocolate syrup
  • 1 teaspoon Vanilla
  • 1 tsp. instant espresso mixed with 1 tsp. boiling water

Instructions:

Place all ingredients in a blender, and blend. If you don’t blend for 30 seconds or more, we found that our Bailey’s had some chunks from the cream, so continue to blend until smooth.

Keep in a sealed glass jar in the fridge for up to 2 weeks. Give it to a friend as a gift this St. Patrick’s Day, too!

homemade-baileys-irish-cream-tasty-bottle-clover


How to Create a Black, White and Gold Glitter Bar

Here’s one of the details from our Sparkle from Head to Toe photo shoot we told you about Fri {the one featured on Hostess with the Mostess}.

We created the perfect party for women to kick off the holiday season and really SHINE. The sparkle party gave women a chance to gossip with friends over cocktails and cookies, try on and shop for jewelry by local artists, and paint their nails at a OPI nail painting station. Women deserve to Sparkle from Head to Toe…and this party let them do just that!

As you know, every good party needs a bar. With a small space, and a tight budget, we created a DIY bar from a tray. It’s a great accessory for any holiday party, bachelorette party, birthday party, or just a night with the ladies. Here’s how you can do it too.

DIY Black and White Striped Bar Tray

You’ll Need
Tray
Paint
Paint brushes
Painters tape
Wood letter from your local WalMart, Hobby Lobby or Michaels
Gold Glitter Spray Paint

How To
Clean and sand the tray if necessary.
Spray paint the whole tray with white primer.
Once primer is dry, paint entire tray white. Repeat once for two coats.
Add Painter’s Tape where you want stripes. My tray had the perfect lines carved into it, so I just lined the tape up with those.
Paint the non-taped parts black. I used a brush to paint for more control, instead of spray paint. Repeat for a total of 2 coats.
After 24 hours, pull the tape from the tray.
If you have any touch ups to do, use a small brush and paint to fix.
For the letters, it’s best to use the primer to spray paint so you don’t see the wood grain under the glitter.
Once the primer is dry, spray paint with glitter spray paint.
Accessorize the bar with champagne, Izze drinks and fresh fruit.

Labels printed and sparkled by FLEUR DE LIS, custom paperie.

{via Tutto Bella}

Black, White and Gold Glitter Party on Hostess with the Mostess

We’re thrilled and totally giddy to tell you that our latest party, Sparkle From Head to Toe, is featured on Hostess with the Mostess {Party of 5} today. OMG! Please take a moment and check it out here. Click on Sparkle From Head to Toe by Tre Sorelle.

We had so much fun styling this shoot…and we pulled it off with 5 kids under 5 running around behind-the-scenes, a first trimester preggo and very nauseous sister, a patient and kid-loving photographer {thanks Meredith Moran}, and our wonderful mom who made sure the kids were well cared for, and made sure we were done in 2 hours…in time to make it to Sunday mass.

We wanted to create a sparkly party to give women a chance to gossip with friends over cocktails and cookies, try on and shop for jewelry by local artists, and paint their nails at a OPI nail painting station. Women deserve to Sparkle from Head to Toe…and this party let’s them do just that! And it’s the perfect time of year to throw a sparkly party – or add it to the planning boards for your next bachelorette party, birthday party or ladies get together.

Thanks to OPI and Nicole by OPI for sending us gorgeous polish colors, and thanks for Kathryn Giarratano Jewelry to letting us model her gorgeous hand-made jewelry, and of course Jenna at Fleur de Lis for designing a beautiful invitation.

Check back in with us this week – we’re sharing details and tutorials on how to make the DIY striped tray bar and the small frames-turned-into trays/party favors.

VENDOR LOVE
Photography: Meredith Moran Photography
Jewelry: Kathryn Giarratano, contact trejsorelle@gmail.com for more info/to order
Nail Polish: OPI  and Nicole by OPI
Personally Speaking
Honey Ryder
Kissed at Midnight
Totally in the Dark
Luke of the Draw
Invitations and Printed Supplies: Fleur de Lis, a paperie
Cookies: Homemade
Location: Fleur de Lis, a paperie

 {images via Meredith Moran Photography}


buzzworthy {continued}

Yesterday we showed you some amazing eye candy from the grand opening celebration of Eclectic Hive’s new warehouse. Today, we’re sharing the rest of the beautiful party…and some of their inventory.

Epicurean Catering catered the event, and did a fantastic job creating a ‘hive’ look. The tubes in the wire netting below had delicious soup in them. And I was told the honey bacon brittle was yummy.

For those of you LOVING the aspen tree bar like me, it is a white bar frame that they can slide different panels in such as the aspen trees you see here, corrugated metal and hedge wood grass to name a few.

And now, here’s just a glimpse of some treasures in their warehouse that may just be perfect for your next event.

VENDOR LOVE

Eclectic Hive (warehouse/decor)
The Workshop
 (event planning/coordination)
Jensen Sutta Photography (photography)
Peak Beverage (drinks)
LMD Productions (lighting)
Jacob Sanchez of DanceTrax Productions (music)

{images via Jensen Sutta}