Monogram It: Favorite Personalized Gifts

pink-marble-planner-diy

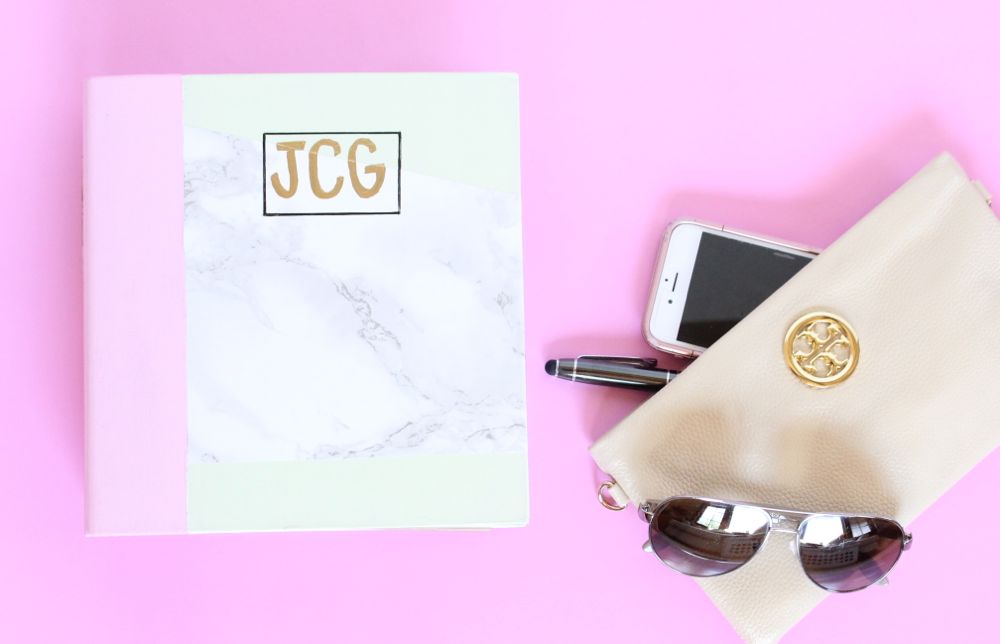
We made a traditional DIY planner for Darby Smart and Michaels semi-recently. The video was so fun to make. Check it out here. Our final touch on the cover of the planner was a monogram. We believe you can never go wrong with a monogram.

Monogram gifts are among our favorite things. We love everything about them. Since gift-giving season is upon us, we’re going to help you get a head start on some shopping, and every item can {and should} be monogrammed.

[show_boutique_widget id=”477928″]

Mark and Graham Acrylic Cuff | Moon and Lola Acrylic Dalton Charm | GiGi New York All in One Bag Black Embossed Python {this is Jessica’s favorite clutch, thanks to her chic friend, Shannon} | Monogram Belly Mug | Mark and Graham Copper Ice Bucket | Canvas with Leather Weekender Bag | Monogrammed Garland Ring Dish | Glitter Monogram Letter | Dipped Personalized Journal | Patterned Hotel Keychain | Monogrammed Door Mat | Initial Bar Pendant | Monogram Lacquer Tray | Plaid Throw | Raw Wood Board | Monogram Tote | Monogrammed Water Bottle 

Voting Idea for Kids: DIY Ballot Voting Booth

boy-vote-red-white-stripes-america-election-day

What an election circus it’s been this year?! We’re happy to see it end. Our ballots are in. We will be tuning in to see the results on Election Day!

Our kids have been hearing about the election from every direction. They are too young to cast their vote on Nov. 8, but with an election at school, they still feel like they are part of a voting process, at their level.

Their school ballot has really fun issues. Oh, to be a kid again where the word donut is actually on the ballot. Bravo to the creative moms that created the ballot ‘issues,’ and the idea of this mock election at school.

ELECTION BALLOT FOR KIDS

Dessert
the school will vote on the best dessert, and the there will be a party with the winning dessert served
Donut vs. Cupcake

Charity
$100 will be given to the charity chosen
Toys for Tots vs. Make a Wish

School Theme Song
the song will be played at all sporting events for the year
Can’t Stop the Feeling, Justin Timberlake vs. Hands Clap, Fitz and the Tantrums

Election week is full of activities. First, the kids will spend some time completing this sentence, “If I were President, I would…” Those papers will line the school hallways, then go home to parents, which is sure to be a priceless document to hold on to forever. Next, the kids will register to vote during lunch. Finally, on Nov. 8 the kids will cast their votes, just like America. Their voice will be heard.

Of course, the kids need a proper voting booth, so we went to work.

This is so easy, and took less than 1 hour.

boy-vote-red-white-stripes-america-election-day

Materials:

  • Duct tape, red, white and blue
  • Large box
  • X-acto knife
  • Silhouette America electronic cutting machine

Directions:

Find a big box at your local Home Depot, or appliance center dumpster.

Line the front and back of the box with red and white strips of duct tape.

Line the sides of the box with strips of blue duct tape.

Fold over pieces of the white duct tape, and cut out stars. Use double-sided tape to stick the stars on the blue sides of the box.

boy-vote-red-white-stripes-america-election-day

Use an X-acto knife to cut a slit in the front for kids to drop their ballots.

boy-vote-red-white-stripes-america-election-day

Add the letter VOTE to the front of the box. We used our Silhouette America electronic cutting machine to cut the letters.

Now, get the kids to VOTE.

boy-vote-red-white-stripes-america-election-day

DIY Girl Power Headbands

img_7602

We made some DIY girl power headbands for Momtastic, and they have become a favorite among our girls…and us! They are fierce, sweet and bold, plus the DIY work out accessory is so easy, it takes less than 10 minutes. Imagine the many ways they can be customized for gifts and sports teams!

Who runs the world…girls! Now, go and show ’em how brave, strong and fearless you are.

brave-warrior-girl-power-headbands-diy

DIY Halloween Tee: Witchful Thinking

witchful-thinking-tee-diy-grey-shirt-witch-hat

It’s wishful thinking to think that we will dress up every year on Halloween. It can be fun, but it’s not our most favorite holiday to celebrate, so we typically don’t dress up. We dress the kids cute and call it good. Our favorite part about the holiday is celebrating at our aunt and uncle’s house. The party is loud, the food is good, the homemade costumes rock and the laughter echoes throughout the house. We love a good tradition that is carried on for generations…don’t you?

If you semi-like Halloween, don’t care for it at all, or have a party to go to but don’t want to dress up, this DIY semi-costume is for you. It’s a last-minute, really easy DIY tee that can be made in less than 10 minutes. Procrastinators, you got this!

This Witchful Thinking tee is cute, and you won’t be totally lame at this year’s party with black pants and a witches hat to fancy it up a bit.

Where our witches at?

witchful-thinking-tee-diy-grey-shirt-witch-hat

Materials:

  • Cotton t-shirt
  • Iron-on letters
  • Iron

Directions:

Step 1: Cut out letters for WITCHFUL THINKING.

Step 2: Follow iron-on letter package instructions.

witchful-thinking-tee-black-witch-hat-halloween-diy-costume

Step 3: Wear it and have fun!

witchful-thinking-tee-diy-halloween-costume-black-witch-hat

witchful-thinking-tee-diy-grey-shirt-witch-hat

DIY Pumpkin Succulent Planter

pumpkin-succulent-planters

Our love for succulents has never faded. We love them, year-round! So, recently when we took a trip to find pumpkins at a garden center and saw pumpkin planters with succulents, we were head-over-heels in love. We made our own versions of the pumpkin planter {we bought the one with the skeleton}. This no-carve Halloween arrangement can be made for friends and family this Halloween and Thanksgiving season, and when pumpkin season is over, transfer the arrangement to a more festive winter holiday base.

halloween-fall-pumpkin-succulent-planter

Materials:

  • Mini pumpkins, faux or real
  • Succulents, mini
  • Hot glue
  • Skulls and other fairy-size decorations
  • Moss, Spanish Moss
  • Glitter hairspray

Directions:

Step 1: Gather supplies.

pumpkin-plants-succulent-moss

Step 2: Glue a handful Spanish Moss to the top of the pumpkin.

pumpkin-glue

pumpkin-planter-with-moss

Step 3: Insert the small succulents into the moss. Use a little hot glue if you have to keep them in place.

pumpkin-planter-succulent

Step 4: Add any other types of moss and mini stems to the top of the pumpkin. Finally, glue a skull or fairy-garden accessory on top.

succulent-planter-skull-pumpkin

Step 5: Spray hair glitter on the arrangement. This can be wiped off later, but the sparkle is so cute!

glitter-spray-pumpkin

You’re done. To keep the succulents alive, spray them with water.

succulent-planters-pumpkin-arrangements-skull

pumpkin-succulent-planter-halloween

succulent-pumpkin-planter

pumpkin-succulent-planter

succulent-planter-pumpkin-halloween-centerpiece-diy