DIY Halloween Tee: Witchful Thinking

witchful-thinking-tee-diy-grey-shirt-witch-hat

It’s wishful thinking to think that we will dress up every year on Halloween. It can be fun, but it’s not our most favorite holiday to celebrate, so we typically don’t dress up. We dress the kids cute and call it good. Our favorite part about the holiday is celebrating at our aunt and uncle’s house. The party is loud, the food is good, the homemade costumes rock and the laughter echoes throughout the house. We love a good tradition that is carried on for generations…don’t you?

If you semi-like Halloween, don’t care for it at all, or have a party to go to but don’t want to dress up, this DIY semi-costume is for you. It’s a last-minute, really easy DIY tee that can be made in less than 10 minutes. Procrastinators, you got this!

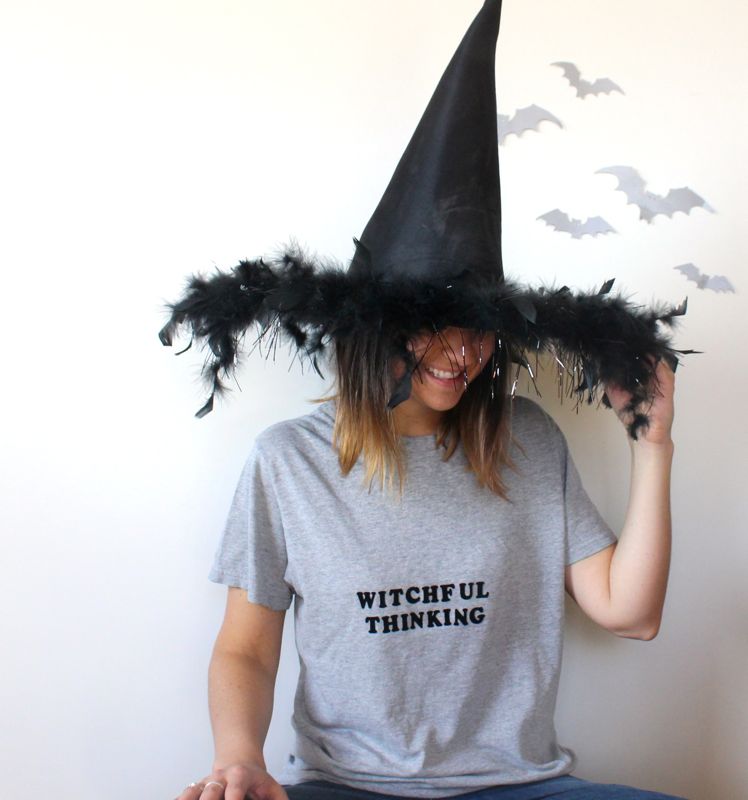
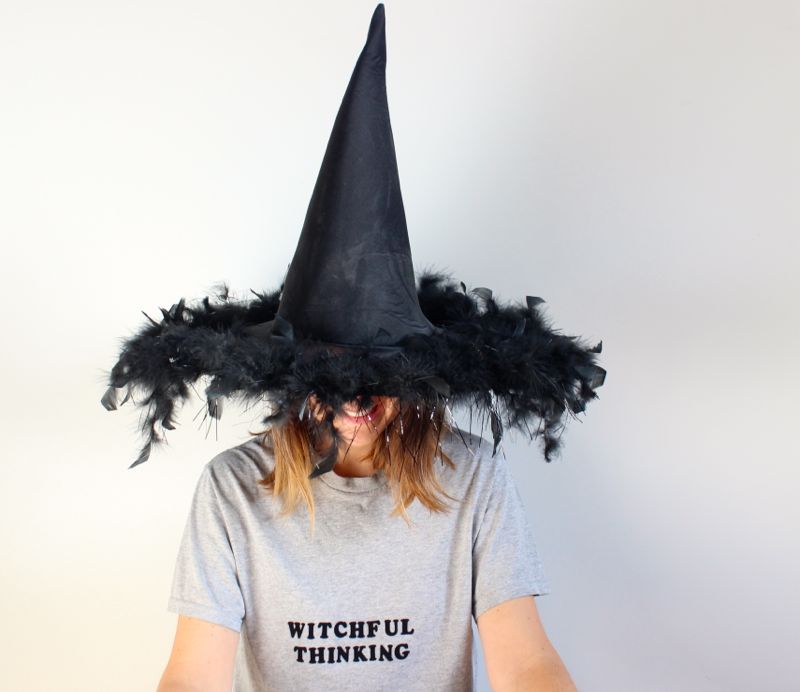
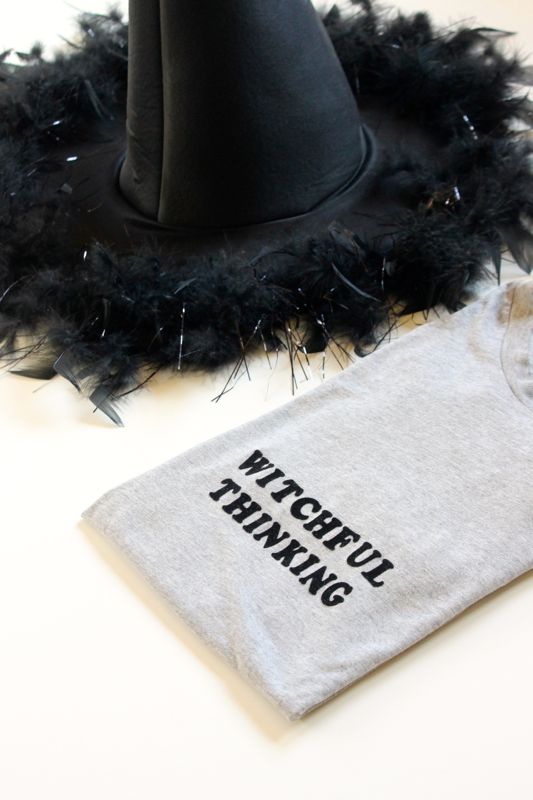
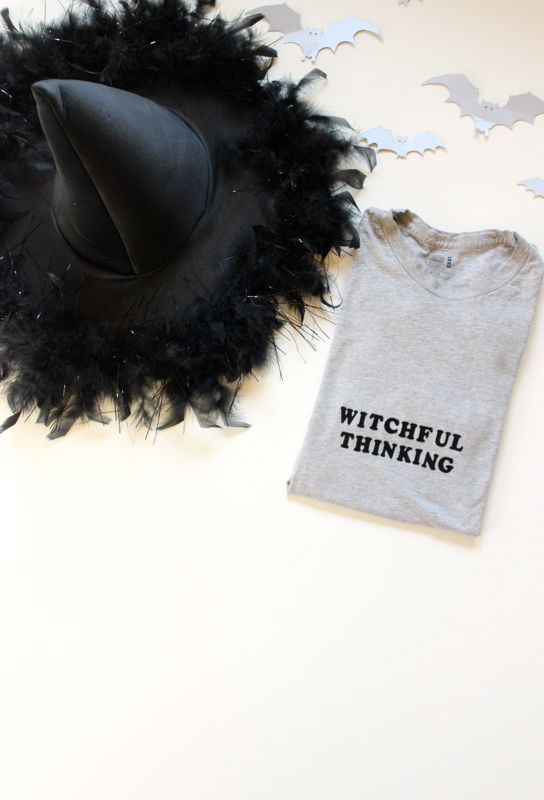
This Witchful Thinking tee is cute, and you won’t be totally lame at this year’s party with black pants and a witches hat to fancy it up a bit.

Where our witches at?

witchful-thinking-tee-diy-grey-shirt-witch-hat

Materials:

  • Cotton t-shirt
  • Iron-on letters
  • Iron

Directions:

Step 1: Cut out letters for WITCHFUL THINKING.

Step 2: Follow iron-on letter package instructions.

witchful-thinking-tee-black-witch-hat-halloween-diy-costume

Step 3: Wear it and have fun!

witchful-thinking-tee-diy-halloween-costume-black-witch-hat

witchful-thinking-tee-diy-grey-shirt-witch-hat

DIY Witch and Mummy Halloween Nail Polish

mummy-witch-halloween-nail-polish-diy-holiday-gift

We typically opt for a cute and fun Halloween, instead of a scary and creepy one. We’ve never loved haunted houses or frightening people. We like costumes and carving pumpkins, apple cider and trick or treating with our large Italian family.

Since we were babies our mom and aunt made our ‘themed’ Halloween costumes, and every year we celebrate together. Following the annual chaos of hello hugs, oooh’s and ahhhs over costumes and hundreds of flashing camera lights, the men grab a cigar and take the kids trick or treating. The women stay inside where its warm to chat, eat chili and hot dogs and drink our wine. It’s a special tradition, and we are grateful to share it with our own kiddos.

Being into the cute part of Halloween, this DIY is so us!

These DIY witch and mummy Halloween nail polish bottles would make for a great, non-candy Halloween party favor or a unique Halloween gift.

Witch color are you going to pick for this year’s Halloween nails? We’re going with Essie Bahama Mama.

If your rainbow-loving self is admiring the DIY spider web in the background, you can see how we did it here.

halloween-nail-polish-favor-witch-broom-mummy-spider-web-rainbow-hat-white-party-diy

You’ll Need:

  • Nail Polish
  • Paper, Astrobrights
  • White rafia paper ribbon
  • Googly eyes
  • Hot Glue
  • Nail File
  • Rafia
  • Twine

How To:

For the mummy, glue two eyes on the nail polish bottle. Dab a small amount of hot glue on the top of the bottle, then add white rafia ribbon, and start to wrap. You can do one continuous wrap, or cut, add a dab of glue and continue to wrap. When the entire bottle is covered, dab another small amount of hot glue, so the mummy’s wrap stays in place.

mummy-nail-polish-diy-halloween-favor-gift-ribbon-white-googly-eyes

mummy-nail-polish-diy-halloween-favor-gift-ribbon-white-googly-eyes

For the witch, make a small witches hat with a free mini-hat template online {or free-hand} and glue it to a black, doughnut-cut circle. Slide it over the nail polish handle. For the witches broom, place a handful of rafia around one end of the nail file, and tie twine around it to keep it in place. Use a tiny dab of hot glue to keep the twine in place.

witch-nail-polish-diy-halloween-gift-black-hat-orange-nail-file-broom-favor


witch-nail-polish-diy-halloween-gift-black-hat-orange-nail-file-broom-favor


witch-nail-polish-diy-halloween-gift-black-hat-orange-nail-file-broom-favor