DIY Marbled Coasters & DIY Yarn Wall Hanging

bronco-party-blue-orange-super-bowl-50-football-yarn-wall-hanging

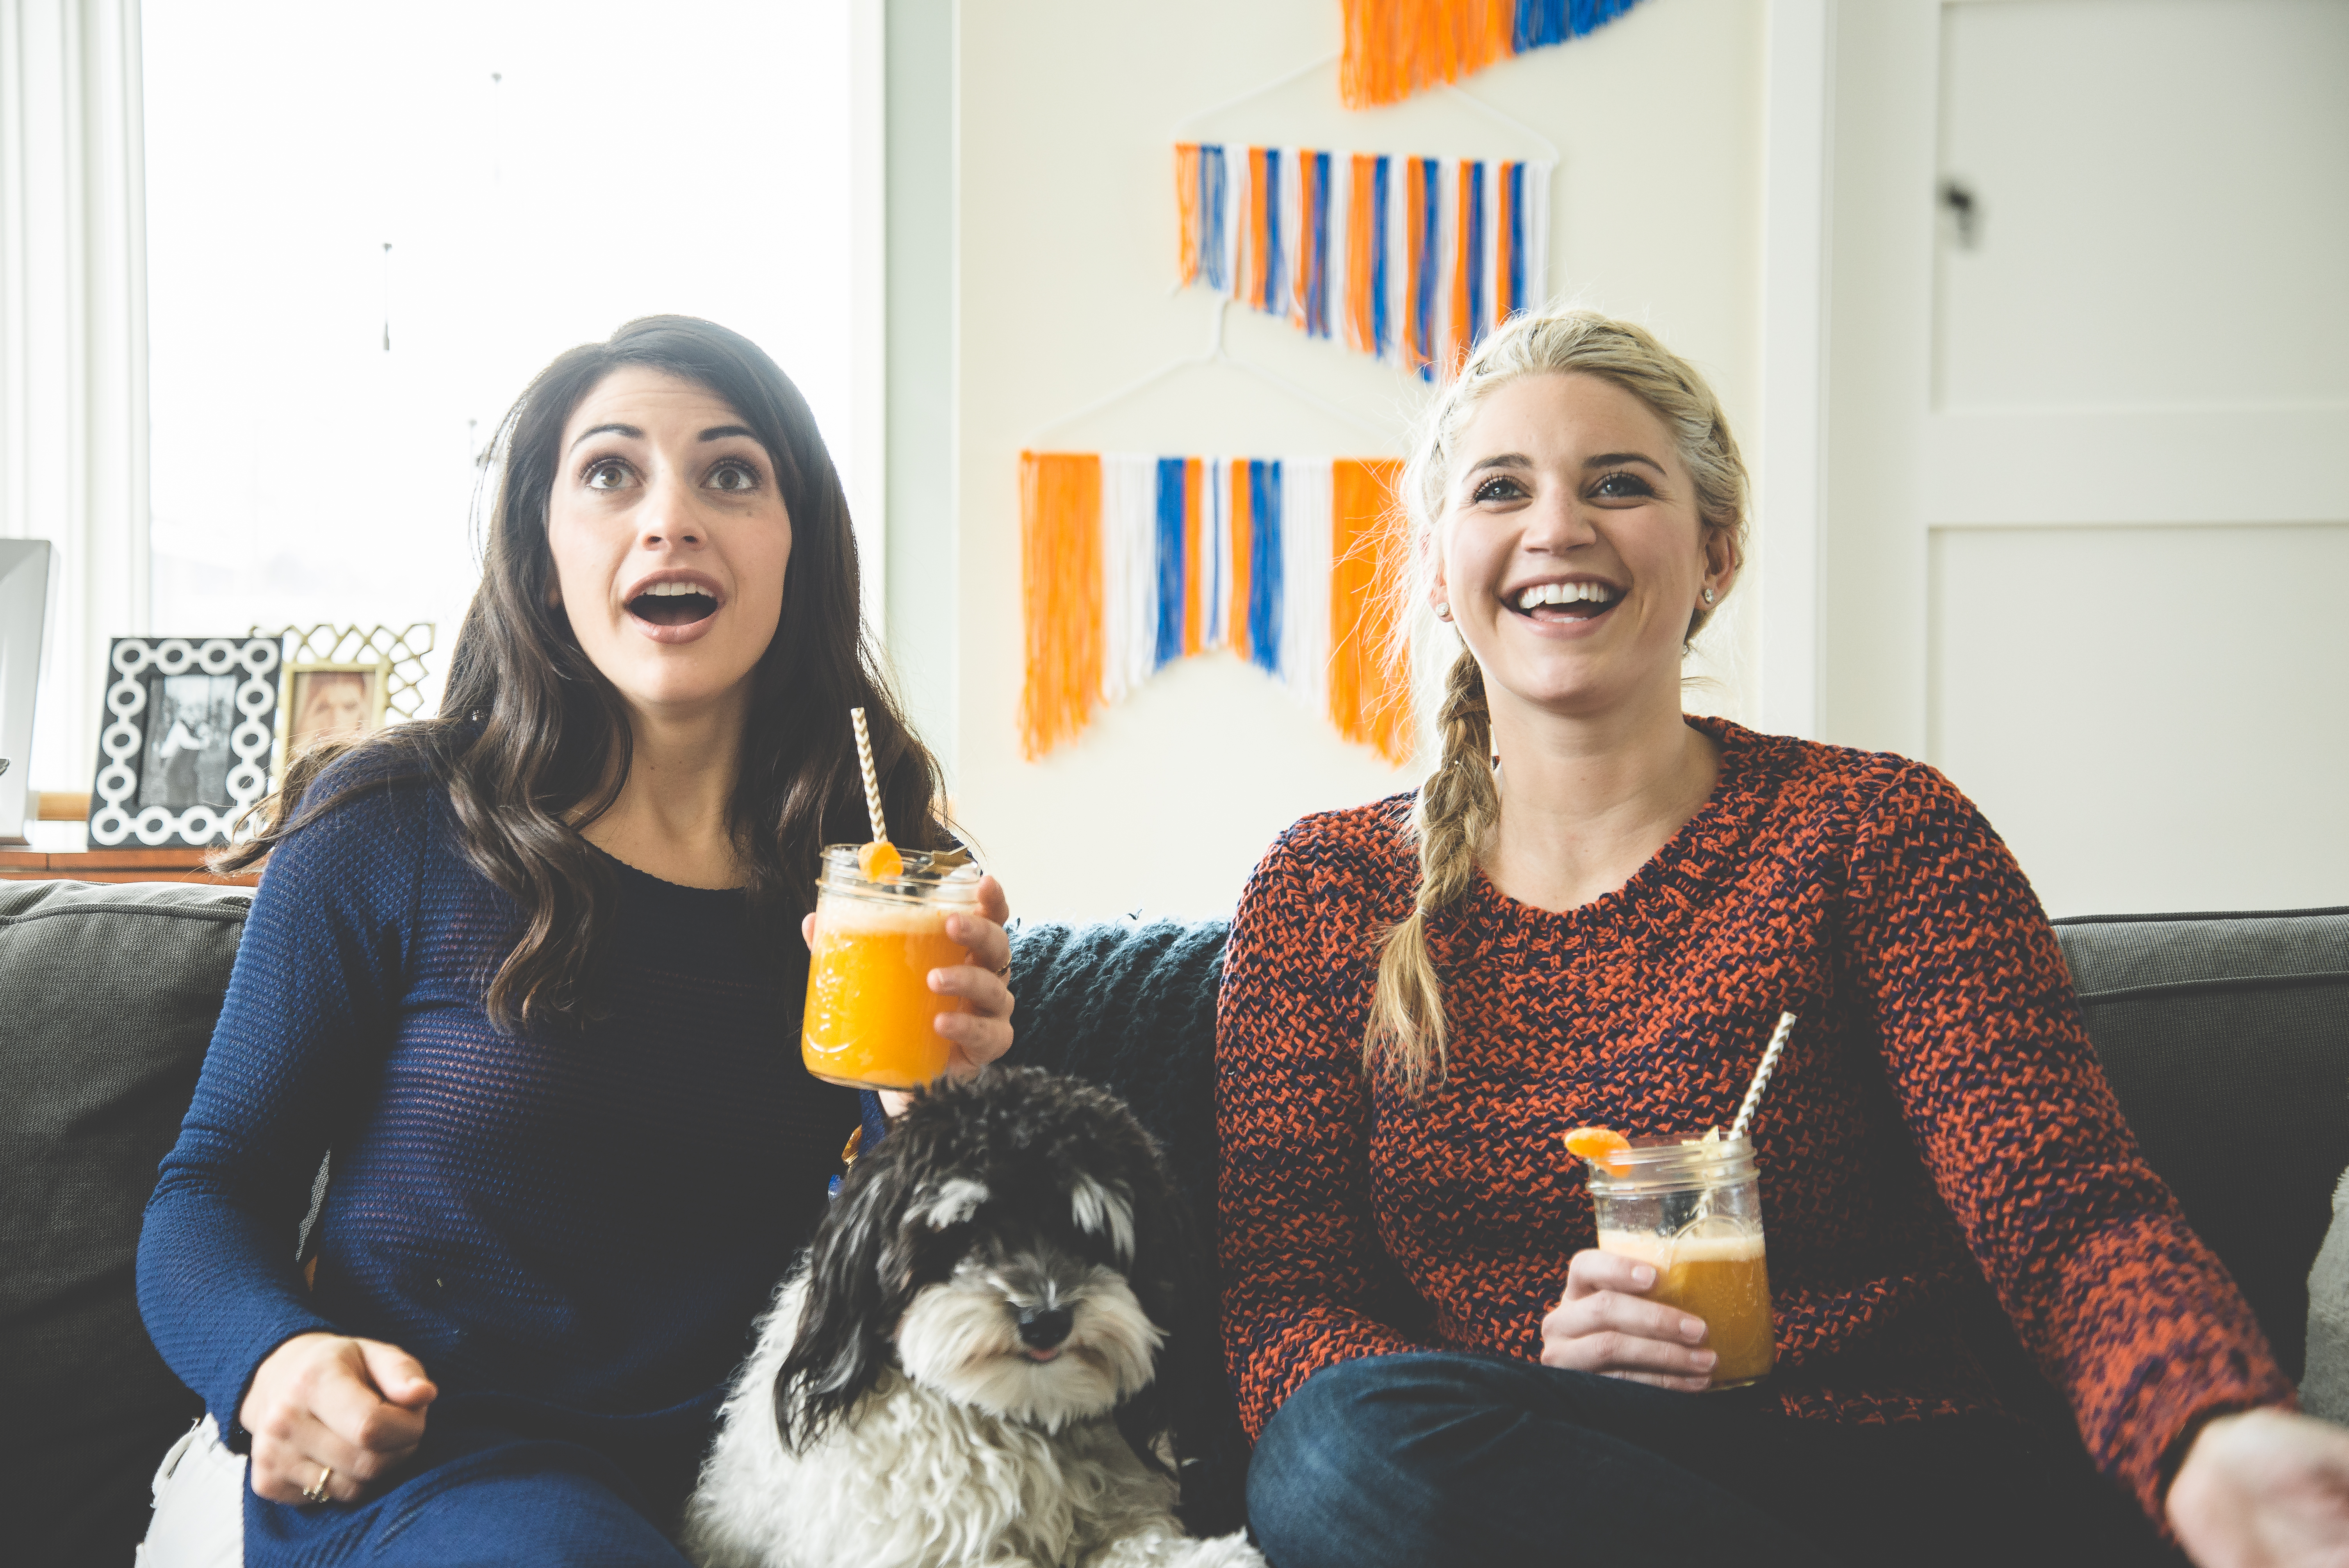
We are still dreaming orange and blue from our Super Bowl 50 Broncos party yesterday. If you haven’t seen it, take the time. It’s got it all – fashion, pretty girls {Jodi and Kaitlin from The Every Hostess}, a bar cart with really good Vodka and a special cocktail recipe.

bronco-party-blue-orange-super-bowl-50-football-yarn-wall-hanging

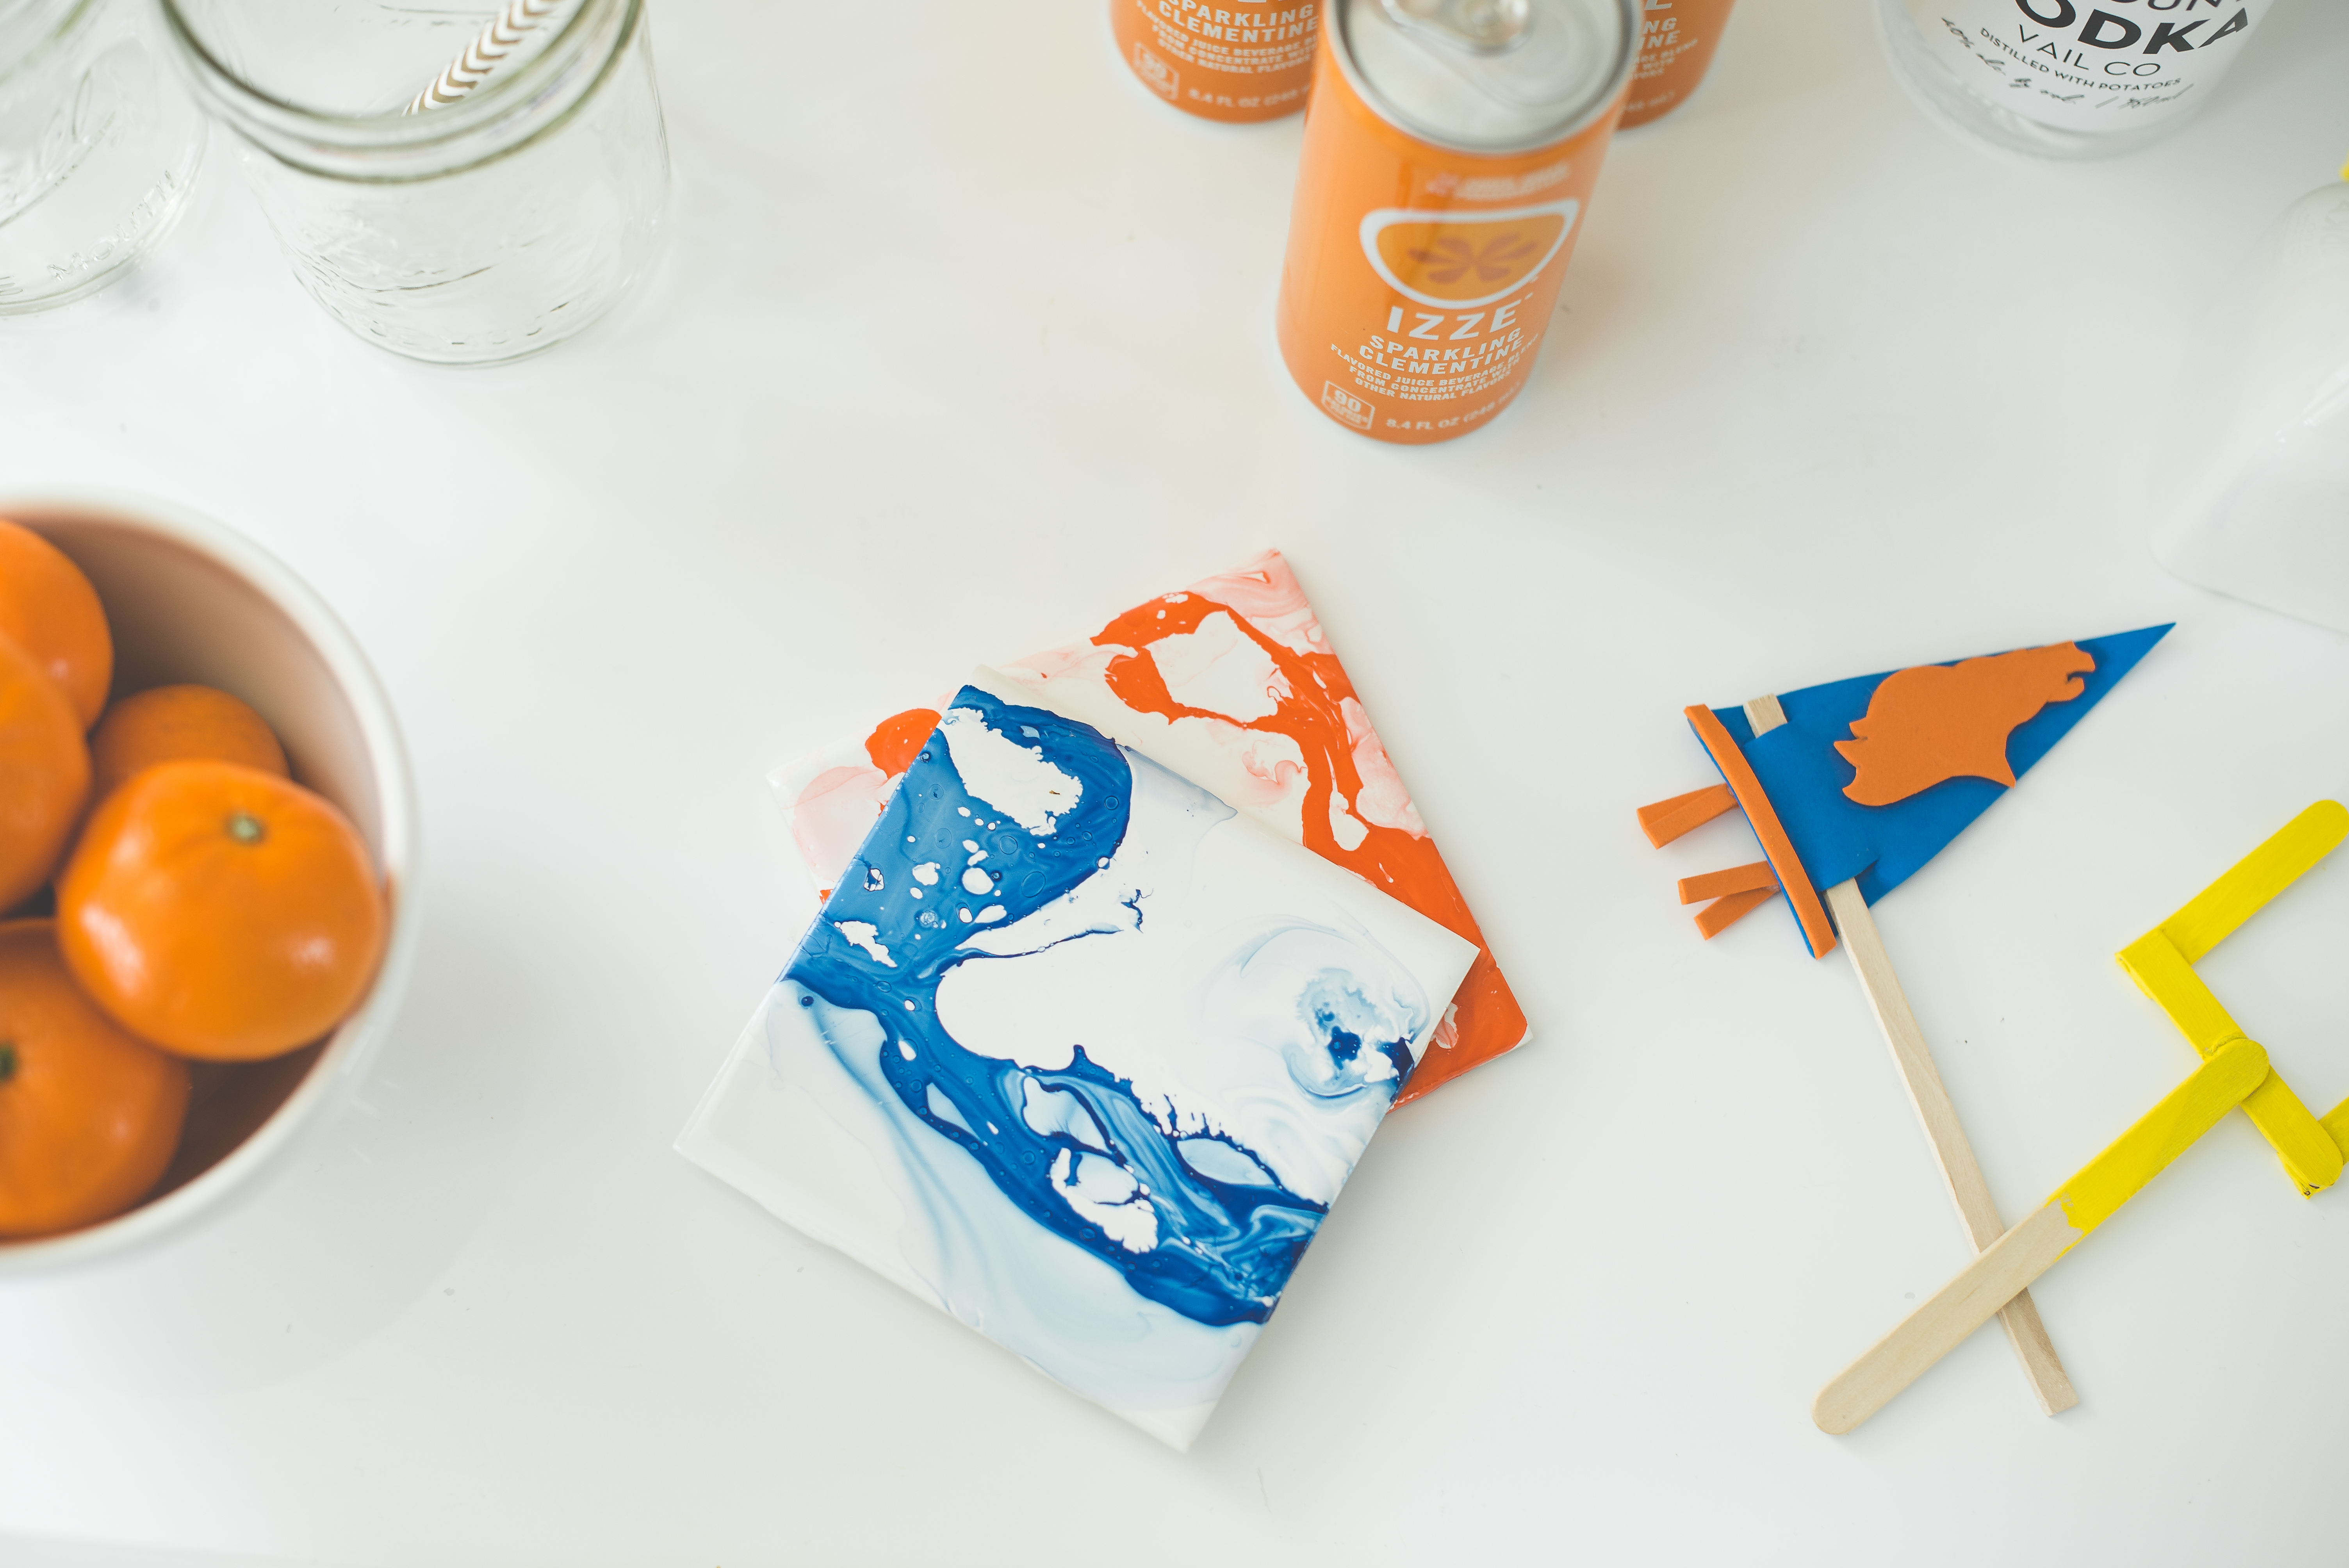
As promised here’s DIY #1 from the shoot yesterday, DIY Bronco Marbled Coasters.

Keep reading for the second tutorial – DIY Yarn Wall Hangings.
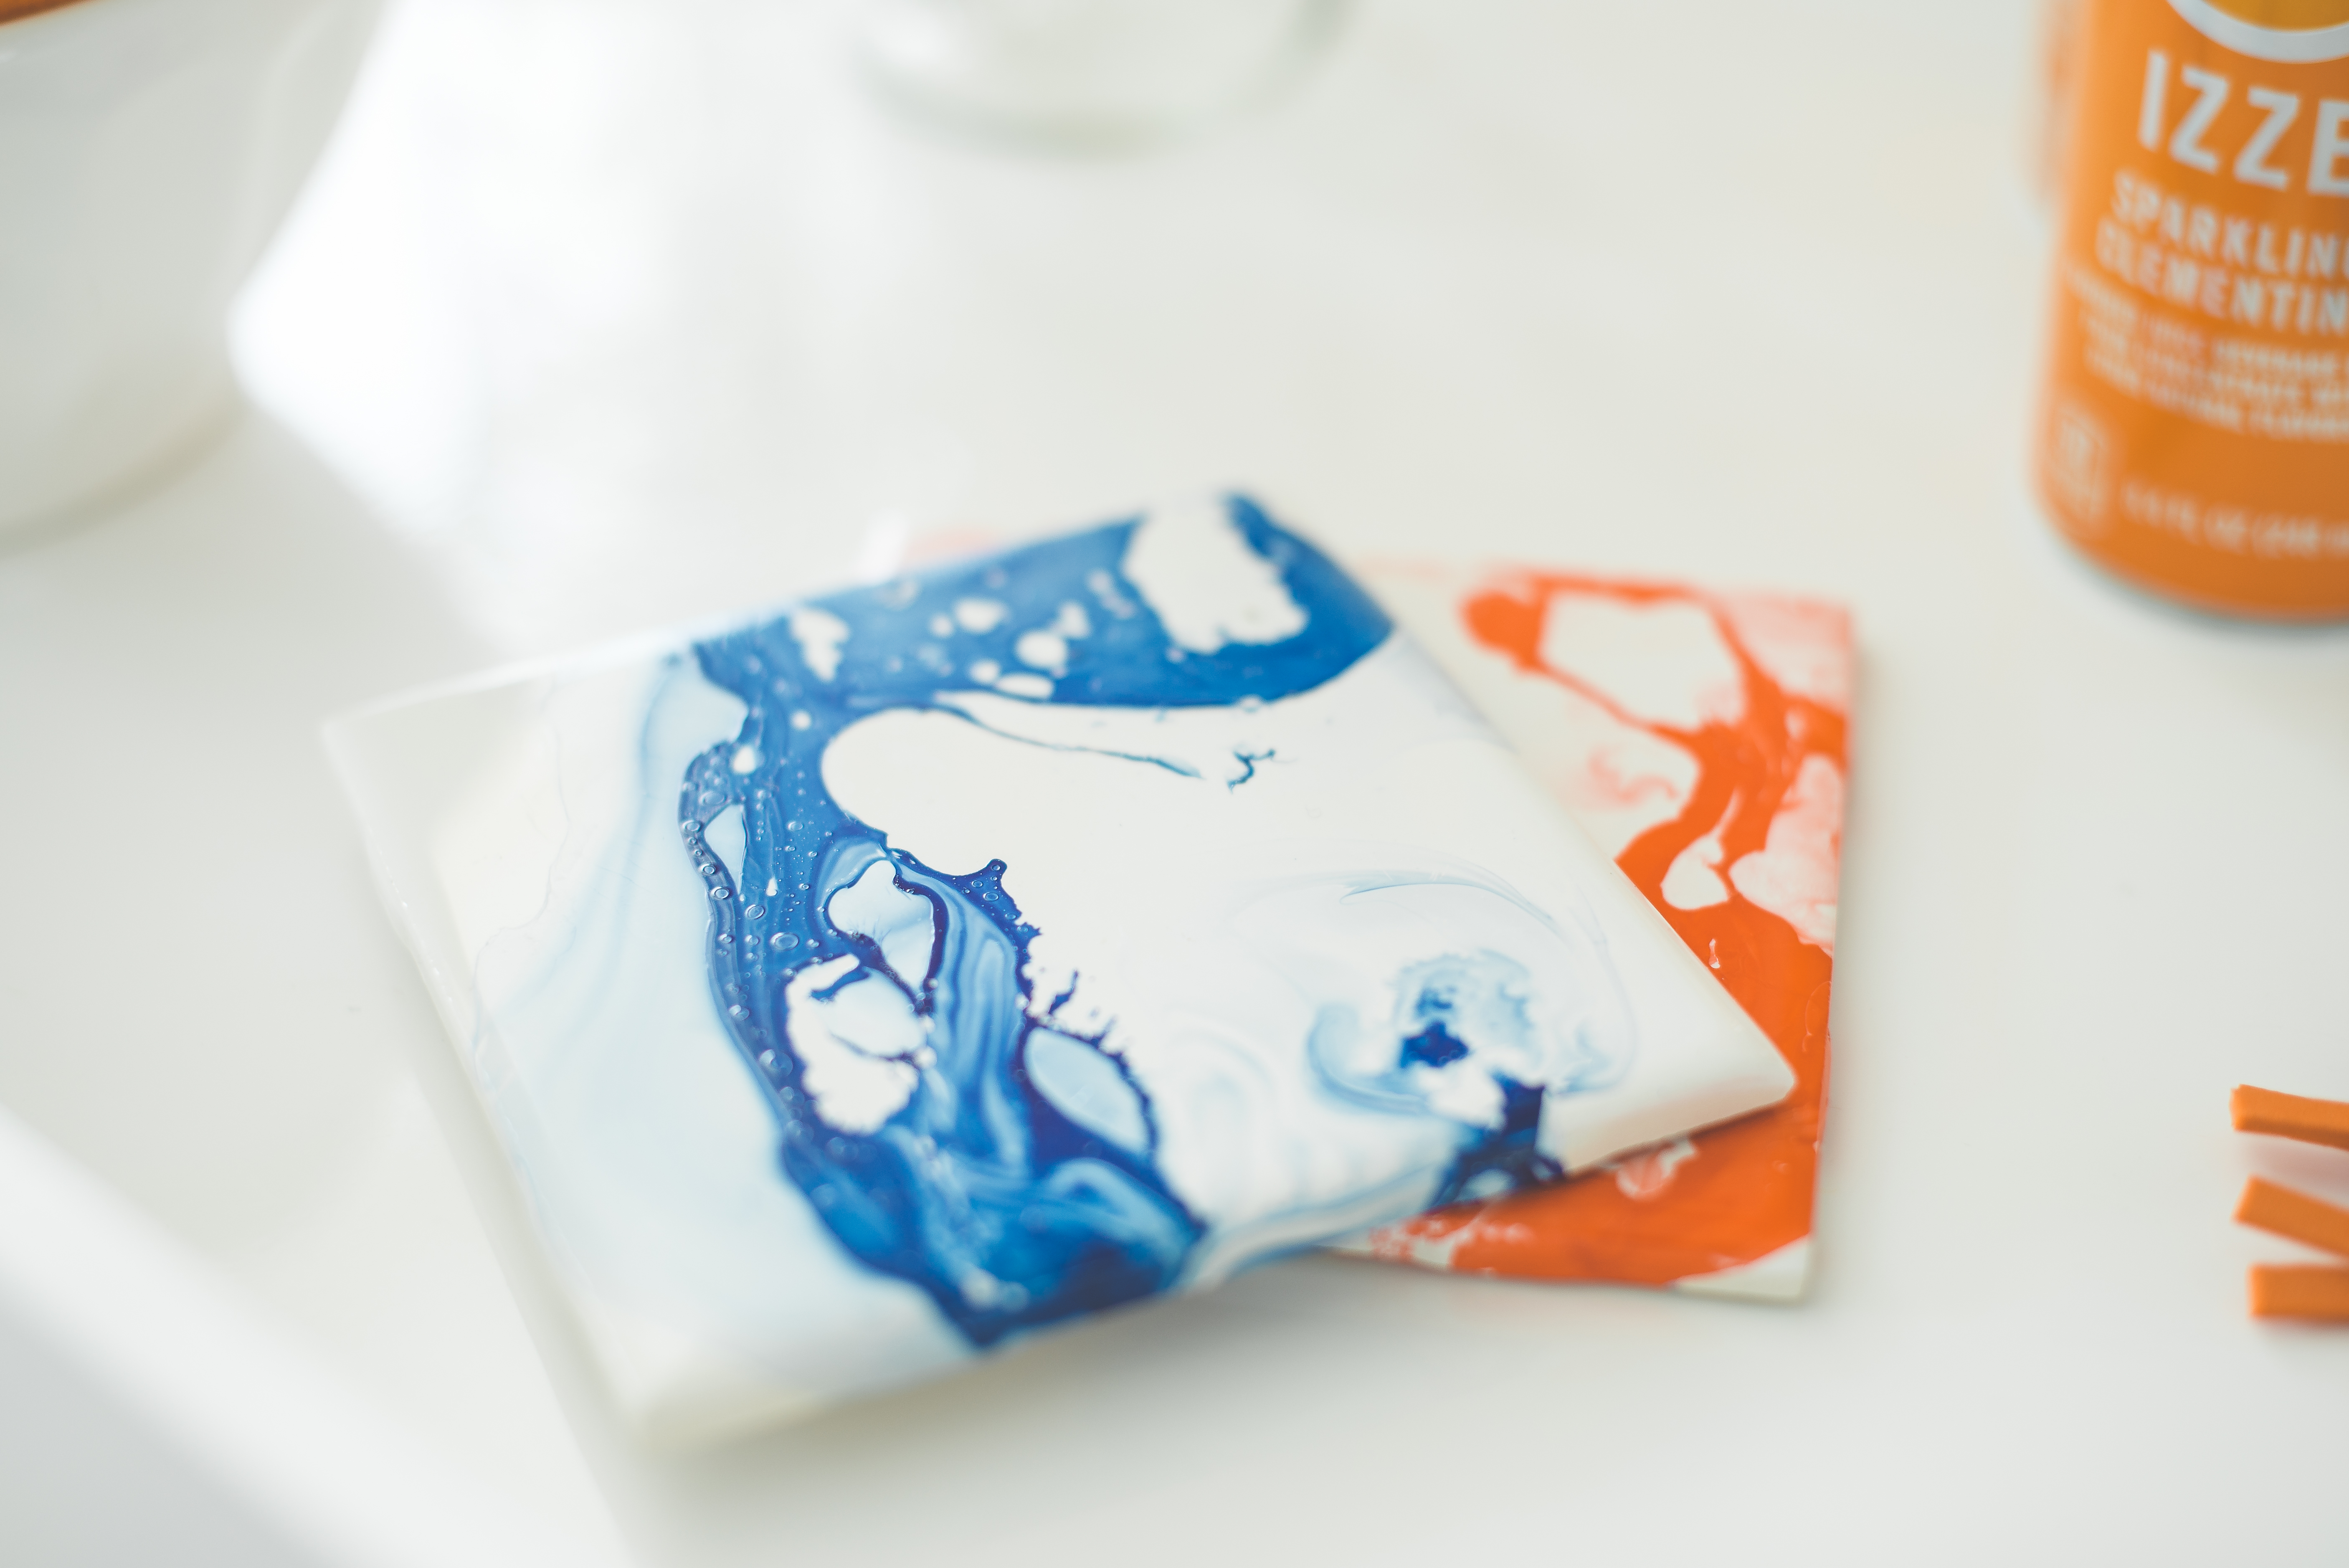
DIY-marbled-coasters-blue-orange-nail-polish-bronco-party-for-the-ladies

Materials:

  • 4X4 white tile, The Home Depot
  • Nail polish
  • Disposable Container
  • Warm water
  • Toothpick
  • Disposable Gloves
  • Felt pads

Directions

Fill a throw-away container with really warm water.

Drop 4-8 drops of nail polish into the water. We chose to do one color for each coaster.

Swirl the polish in a swift manner with the toothpick. Quickly, dip the entire coaster into the water with your gloves on. Once the coaster dips under the water, it will ‘collect’ all the polish.

Pull the coaster up out of the water. The nail polish will be swirled on top. Let them air-dry.

Once dry, add felt pads to the bottom.

Add them to your serving tray or bar cart.

oranges-party-serving-tray-broncos-diy-marbled-coasters

Love the pop of color from the coasters. They make for a lovely hostess gift, too.

bronco-party-blue-orange-super-bowl-50-football-marbled-coasters

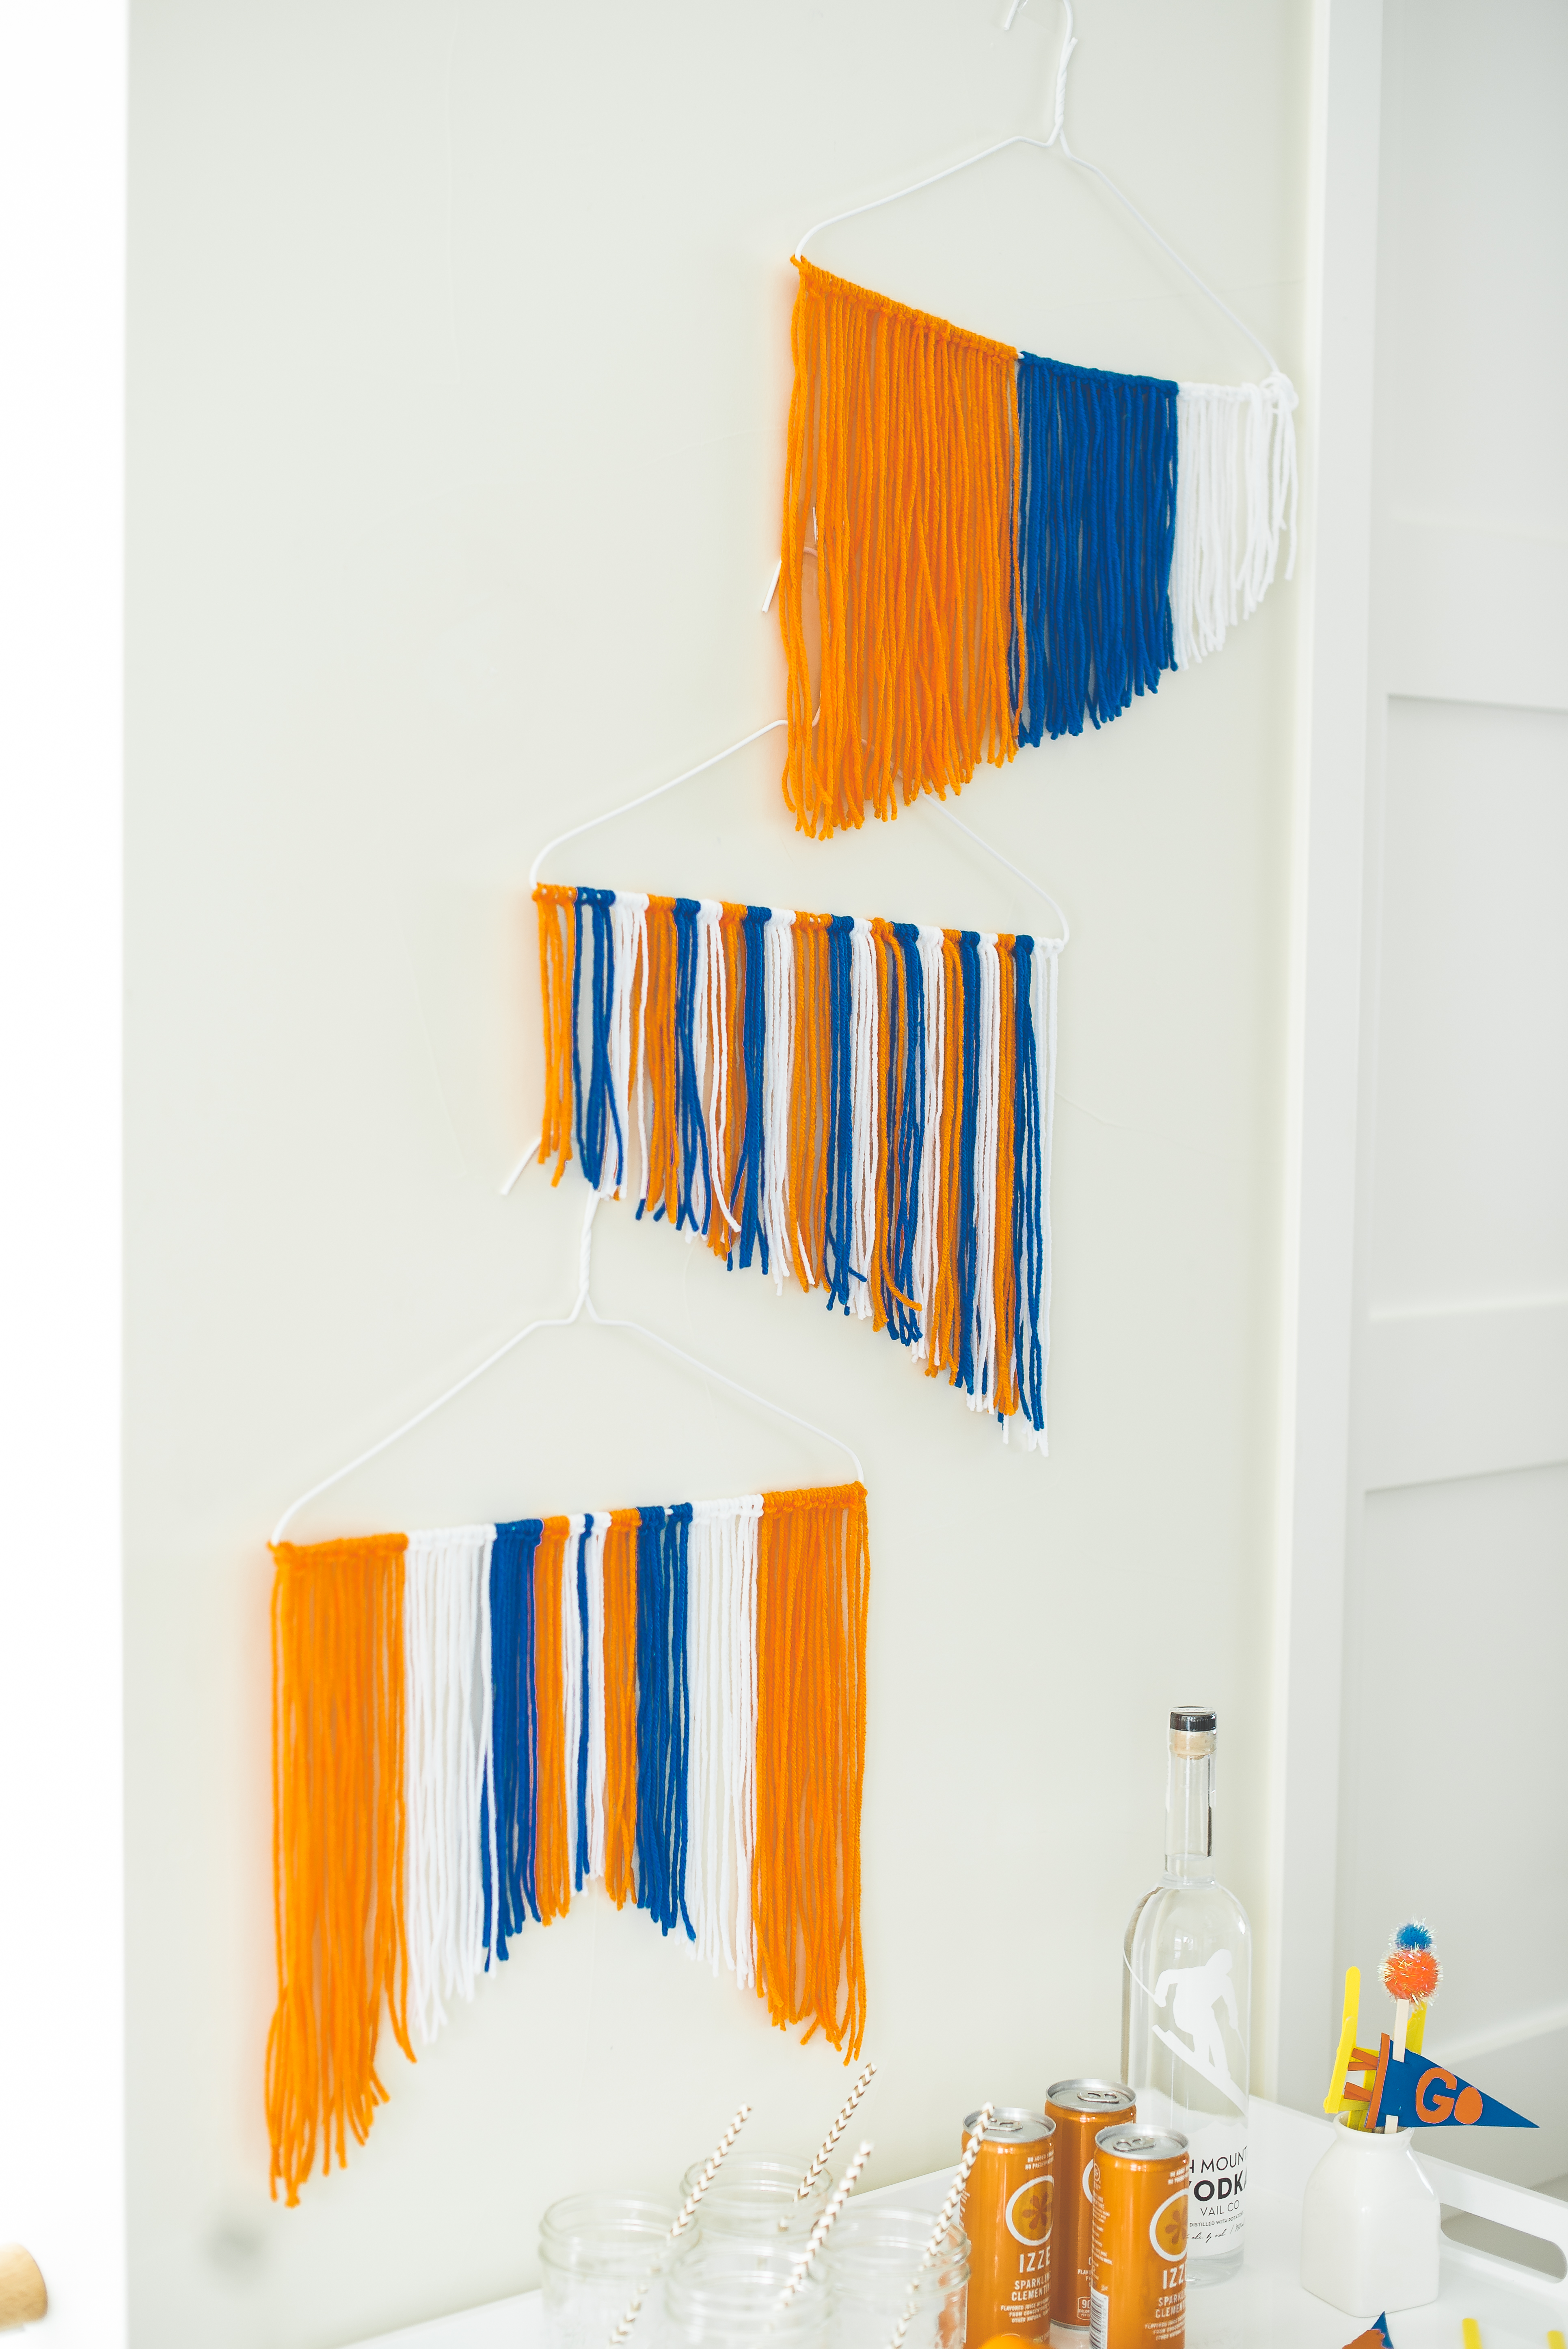
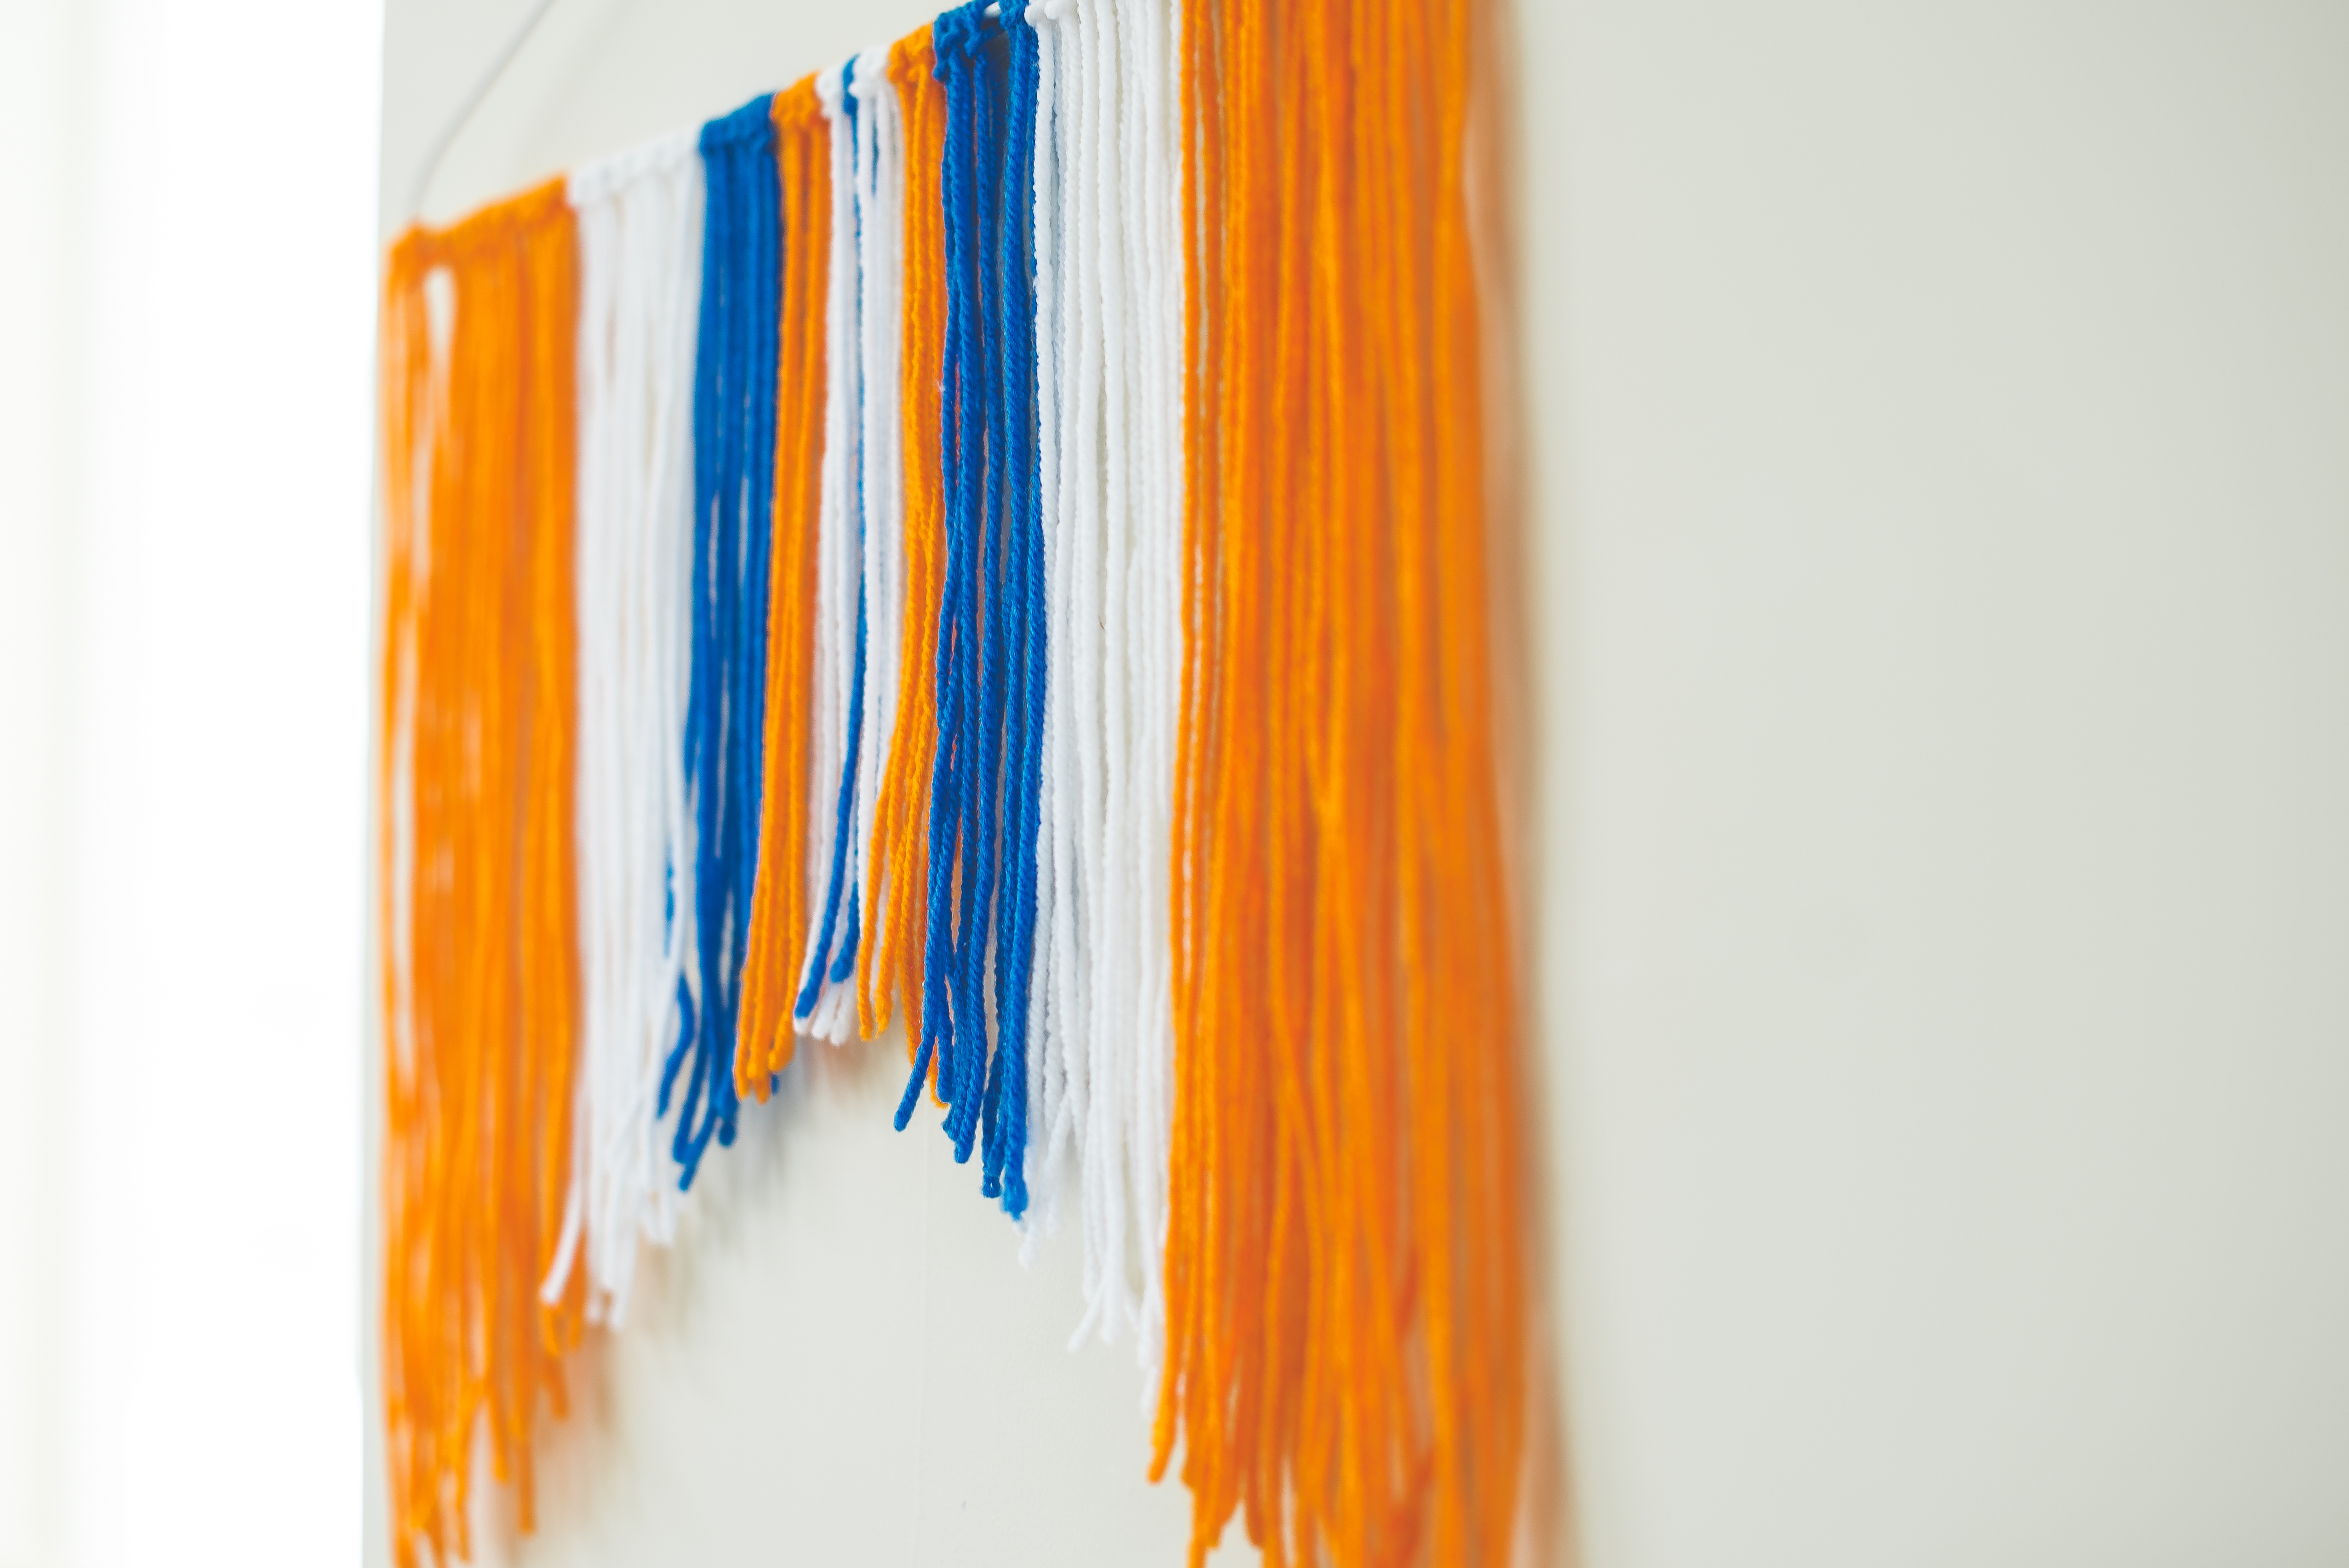
Finally, here’s tutorial #2 from our Super Bowl party – DIY Yarn Wall Hangings.
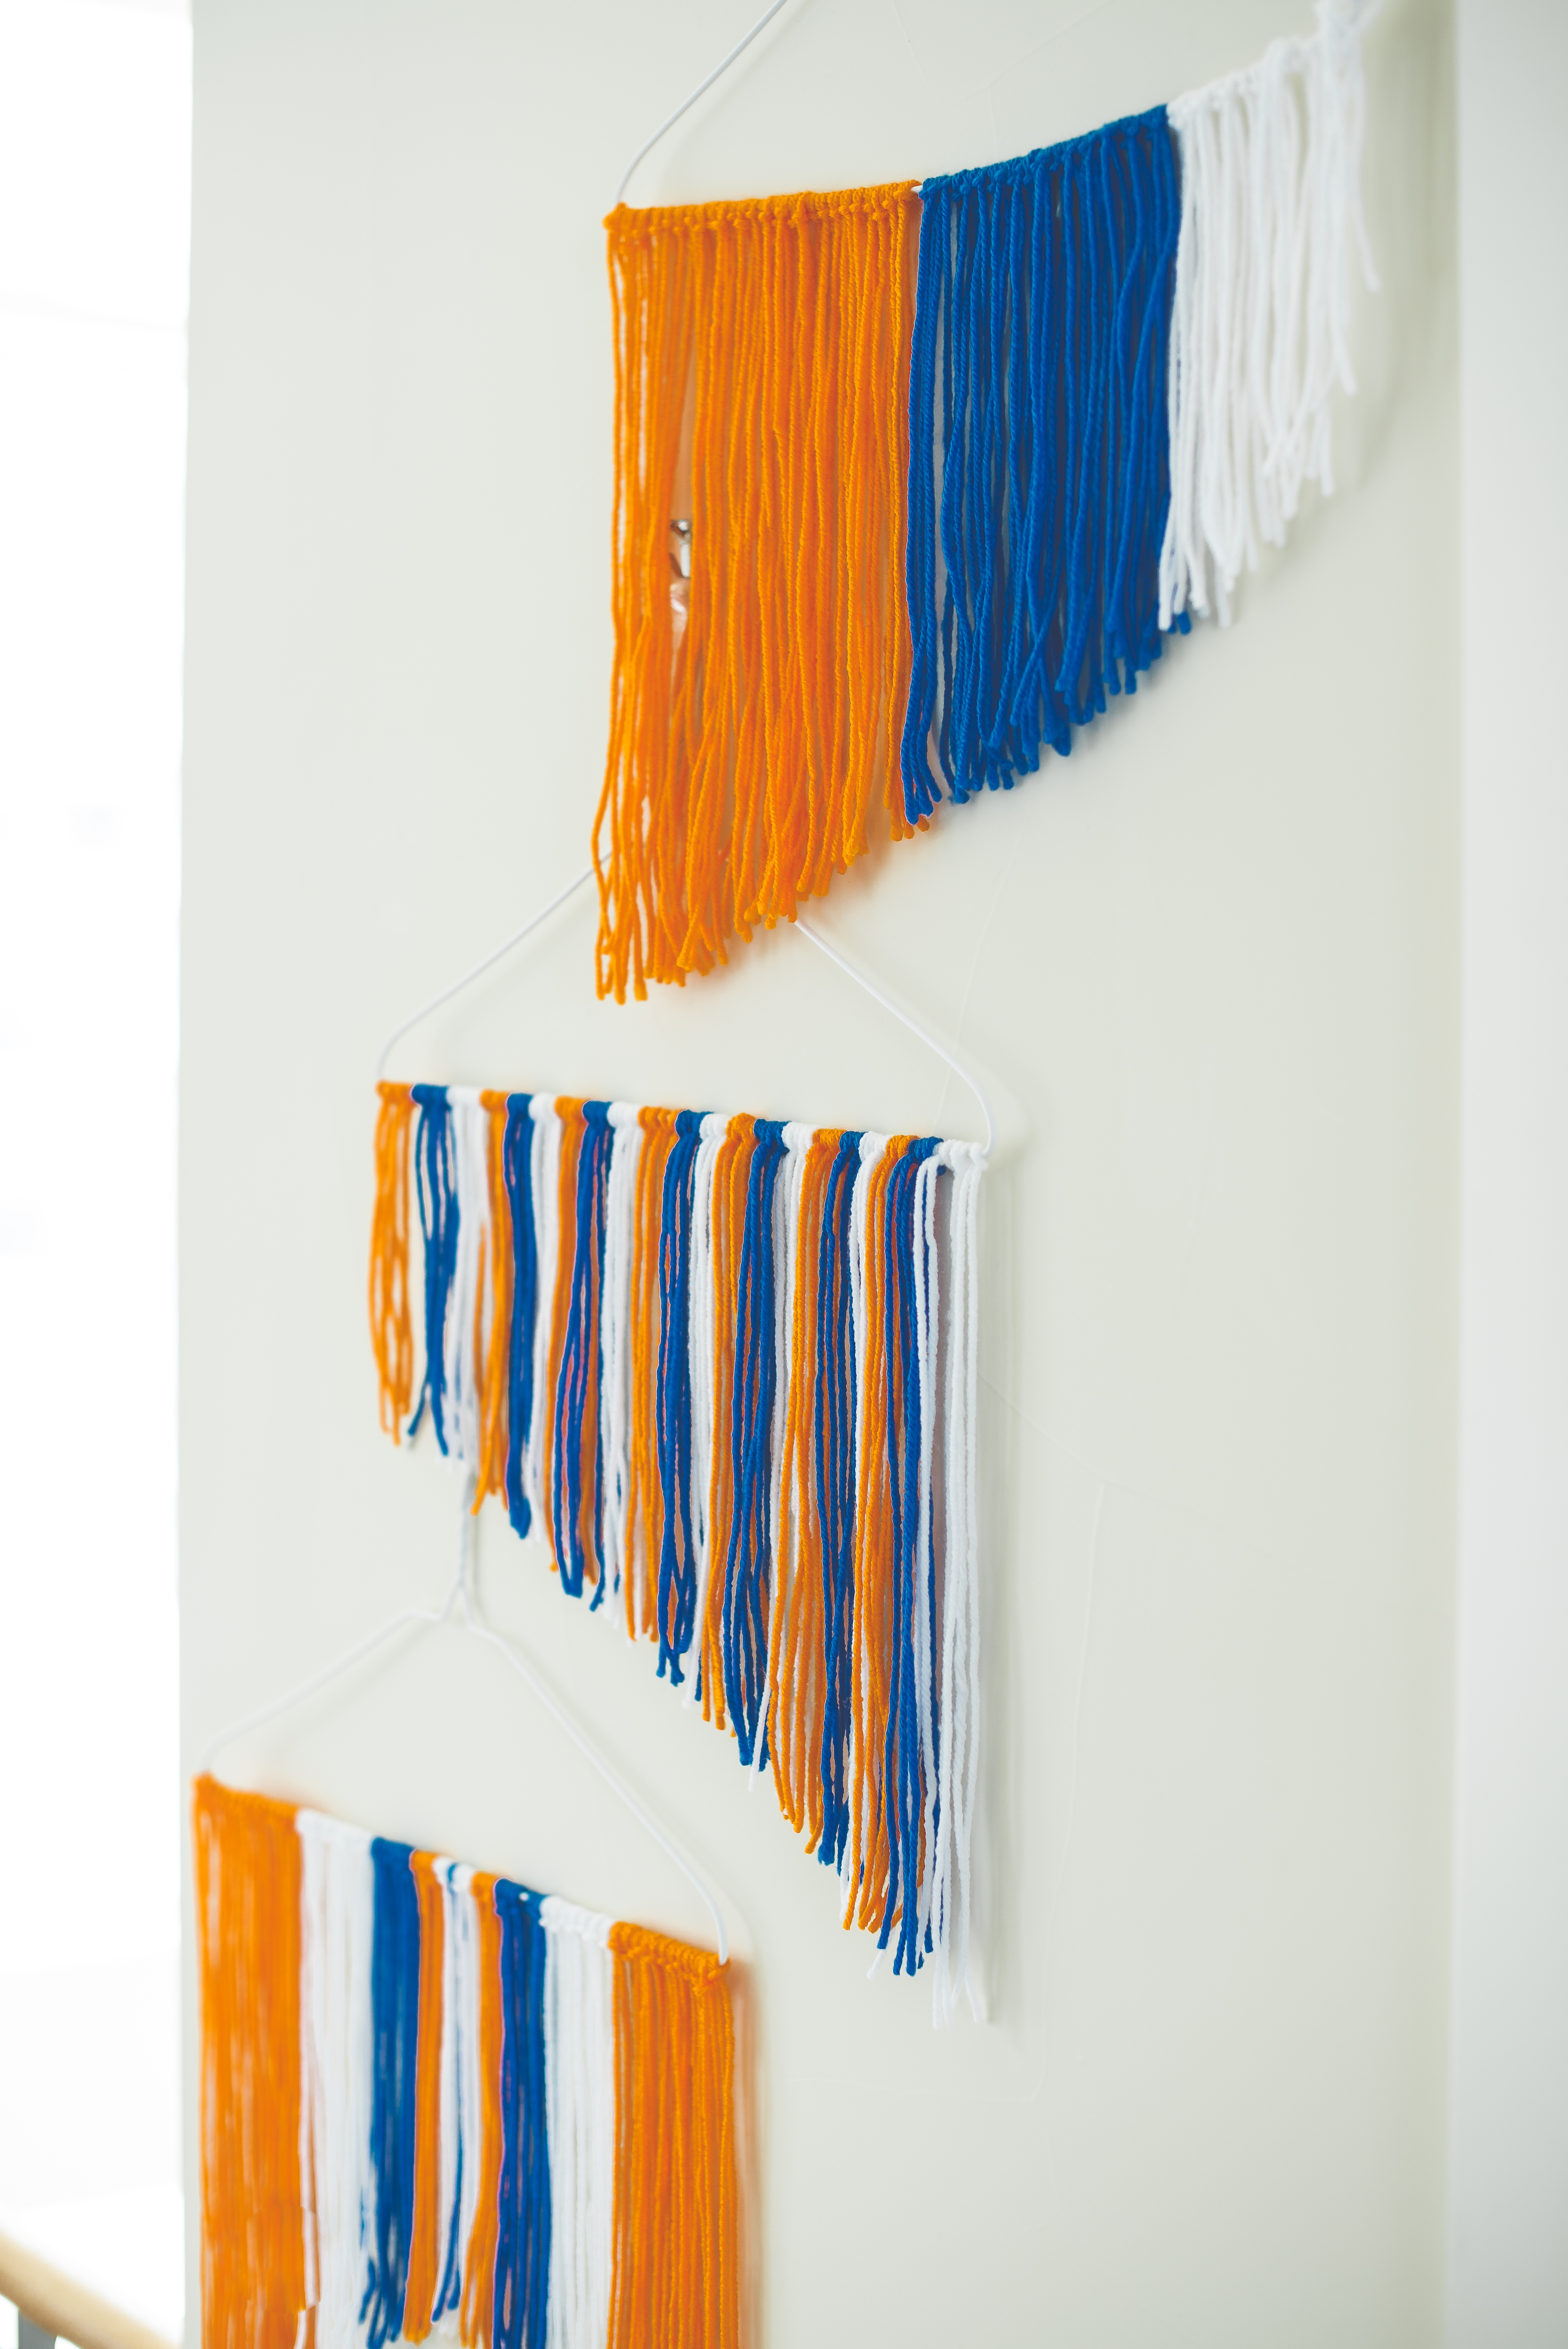
bronco-party-blue-orange-super-bowl-50-football-diy-yarn-wall-hanging

Materials:

  • Yarn
  • Wire hangers
  • Scissors

Directions:

Cut long strands of yarn.

Decide on a color pattern, or see where your creativity takes you as you go.

To tie it onto the hanger, fold the yarn in half, and loop it through. No glue needed. Tighten the knot.

Repeat until the hanger is covered.

Lay the hanger on a smooth surface and straighten all the yarn ends. Cut the ends of the yarn at different angles.

bronco-party-blue-orange-super-bowl-50-football-diy-yarn-wall-hanging

We like all the pretty stuff and looking good, but we get really into the game too! Go Broncos!

Cheers!

ladies-bronco-party-blue-orange-super-bowl-50-football-yarn-wall-hanging

ladies-smiling-game-time-orange-cocktail-fun-party-bronco

VENDOR LOVE
Photographer: Meredith Moran | @meredithmoranphoto
Clothing and Jewelry: Denver Street Boutique @denverstreetboutique
Cocktail: 10th Mountain Whiskey & Spirit | @10thmtnwhiskey
Event Stylist: J. Sorelle | @jsorelle3 and The Every Hostess | @theeveryhostess
Models: Jodi, the beautiful brunette of J. Sorelle | @jsorelle3 and Kaitlin, the bombshell blonde of The Every Hostess |  @theeveryhostess
Bar CartWest Elm
DIY coaster and yarn wall hangings: J. Sorelle

DIY Witch and Mummy Halloween Nail Polish

mummy-witch-halloween-nail-polish-diy-holiday-gift

We typically opt for a cute and fun Halloween, instead of a scary and creepy one. We’ve never loved haunted houses or frightening people. We like costumes and carving pumpkins, apple cider and trick or treating with our large Italian family.

Since we were babies our mom and aunt made our ‘themed’ Halloween costumes, and every year we celebrate together. Following the annual chaos of hello hugs, oooh’s and ahhhs over costumes and hundreds of flashing camera lights, the men grab a cigar and take the kids trick or treating. The women stay inside where its warm to chat, eat chili and hot dogs and drink our wine. It’s a special tradition, and we are grateful to share it with our own kiddos.

Being into the cute part of Halloween, this DIY is so us!

These DIY witch and mummy Halloween nail polish bottles would make for a great, non-candy Halloween party favor or a unique Halloween gift.

Witch color are you going to pick for this year’s Halloween nails? We’re going with Essie Bahama Mama.

If your rainbow-loving self is admiring the DIY spider web in the background, you can see how we did it here.

halloween-nail-polish-favor-witch-broom-mummy-spider-web-rainbow-hat-white-party-diy

You’ll Need:

  • Nail Polish
  • Paper, Astrobrights
  • White rafia paper ribbon
  • Googly eyes
  • Hot Glue
  • Nail File
  • Rafia
  • Twine

How To:

For the mummy, glue two eyes on the nail polish bottle. Dab a small amount of hot glue on the top of the bottle, then add white rafia ribbon, and start to wrap. You can do one continuous wrap, or cut, add a dab of glue and continue to wrap. When the entire bottle is covered, dab another small amount of hot glue, so the mummy’s wrap stays in place.

mummy-nail-polish-diy-halloween-favor-gift-ribbon-white-googly-eyes

mummy-nail-polish-diy-halloween-favor-gift-ribbon-white-googly-eyes

For the witch, make a small witches hat with a free mini-hat template online {or free-hand} and glue it to a black, doughnut-cut circle. Slide it over the nail polish handle. For the witches broom, place a handful of rafia around one end of the nail file, and tie twine around it to keep it in place. Use a tiny dab of hot glue to keep the twine in place.

witch-nail-polish-diy-halloween-gift-black-hat-orange-nail-file-broom-favor


witch-nail-polish-diy-halloween-gift-black-hat-orange-nail-file-broom-favor


witch-nail-polish-diy-halloween-gift-black-hat-orange-nail-file-broom-favor

DIY Watercolor Mug and Planter

dig-water color-planeter-succulent-pink-turquoise-mug-white-gold-

 This photo hooked me.

The idea was brilliant. The cost was minimal.  The ingredients were already in a drawer upstairs. The impact was bold. Within 10 minutes of seeing the photos, Jessica and her daughter were dipping mugs in their favorite nail polish colors.

Instead of using it as a mug, Gabriella opted for a succulent planter. And, with that, she is the proud 4-year-old owner of this adorable, trendy succulent planter!

succulent-pink-aqua-planter-mug-water color-nail polish

Warning: this looks easy, and it is; however the nail polish is totally fickle and it took us several tries to get it right {we dipped dispensable products just to see how it worked}. And, the nail polish hardens almost immediately, so you have to drop and dip – quick, quick, quick!

You’ll Need:

  • White ceramic mug. You can find them for $1 at Wal-mart
  • Deep container you want to throw away or use for paint only
  • Nail Polish
  • Warm Water
  • Gold Leaf Paint
  • Pink Aquarium rocks
  • Succulent
  • Dirt and Rocks

How to Make It:

  • Fill the bowl with warm water.
  • Add a drop of nail polish to the water, and it should spread.  You can use a toothpick to help create a ‘swirl’ your looking for. For us, sometimes the nail polish spread like it was supposed to, and other times, the drop sank to the bottom of the bowl. It’s hit or miss.
  • If you want to use an additional color, drain the water, and repeat the steps.
  • If you mess up, or there’s s spot you don’t like, just use a cotton swab or pad soaked with Nail Polish remover to remove the nail polish from the mug.
  • Pat dry with a paper towel and let dry for 2 hours.
  • If you want a gold handle, add painter’s tape on the mug around the handle, and paint the handle gold with Gold Leaf Paint.

To make the mug a planter, add dirt and rocks to the cup, insert the succulent and top it off with pink rocks.

succulent-planter-mug-pink-aqua-rocks-gold-water color

pink-aqua-white-mug-rocks-succulent-planter-gold-water color

{photos via j. sorelle}

15 tips for a egg-tacular easter

Here’s some tips and ideas to make your Easter celebration memorable, beautiful and fun.

1. How Does She has some great non-candy Easter egg fillers the kids are sure to love, without missing the candy too much.

2. Kick up your hard-boiled egg up a cute notch with these adorable chick eggs on HGTV.

3. Give the most adorable favors we’ve ever seen with these ‘grown up’ easter baskets featured at Elizabeth Anne Designs.

4. At the end of the Easter egg hunt, have an egg popsicle treat ready for the kids to devour after all their hard hunting. Full tutorial found at Kailo Chic.

5. These would make adorable and healthy place cards for the kids, or a cute snack to bring to the kid’s school this week. Pottery Barn Kids has a full recipe and tutorial here.

6. Wants and Wishes created a fresh carrot centerpiece, and we couldn’t think of a better holiday for this look 

7. Don’t forget to decorate the outside of your house when your PEEPS arrive for the Easter celebration. Fill an up cycled window box with your favorite flowers. For a tutorial on how to create a beautiful window box, visit Hostess with the Mostess here.

8. Go one step further with your outdoor decor with a GORGEOUS wreath like this made at Laughing with Angels.

9. Find spring floral and brightly colored fabric and cut into triangles to make a spring bunting banner to add inside the house, or outside in the yard.

10. Everyone is talking about the color mint for this spring. So light, airy and refreshing. Add Essie’s Mint Candy Apple {available at Nordstrom} to the tips of your fingers for this Sunday’s celebration. If you really want to be trendy, make it a diagonal stripe with the other half of your nail being a nude color.

11. Make a refreshing spring cocktail your guests will love like this Ginger Goddess, made with SKYY Infusions Ginger Vodka, Kiwi Juice, Pear and Champagne

12. Set your table pretty in pink with a large vase of pink tulips in the center on top of a white table linen and crisp white, modern plates.

13. Think outside the egg when decorating this year’s batch and create Subway Art eggs like Lil Luna did. So creative! Full tutorial here.

14. Add a vintage touch to your table setting – we love all things vintage, so whether is an old birdcage, burlap bags, old wood boxes, antique vases, etc. –  make it happen. Our Vintage Home set a beautiful, simple table with a vintage vibe. Burlap bags found here.

15. I’m a DIY addict, so at least one thing on Sunday has to be DIY. I made Easter eggs with flower petals – and it was SO easy and I think they turned out pretty cute.

You Need:
Hydrangea {or flower with many petals}
Styrofoam easter egg {I found some at Hobby Lobby}
Push pins with a color ball at the end {in my case, I like yellow}

How To:
Pull petals off the flower and the hard small piece of plastic binding it together
Grab a pin, find a spot on the egg and push the pin in.
Continue until the egg is fully covered.


{images via HGTV, Elizabeth Anne Designs, Kailo Chic, Pottery Barn Kids, Wants and WishesBar None DrinksEpicurious, NordstromHostess with the Mostess, Laughing with Angels, spring banner: One Wed, Lil Luna, Our Vintage Home, Tutto Bella}