Celebrate Mom This Mother’s Day With A Sweet DIY Paper Cake

diy-paper-cakes-boy-mom-paper-flowers-rainbow-cake

Being a mom is one of the hardest, and most rewarding jobs in the world. Between the three of us, we have 8 children, ranging from 9-years-old to 2-years-old. Nothing could have prepared us for the ups and downs of motherhood (and all the priceless memories in between), but one thing’s for sure – we had the best mom growing up. She was the greatest example for us to learn what it means to be a mother, and how impactful a mother’s love can be. Our mom, without a doubt, takes the cake as the best mom (and now Nani to 8 grandkids) ever!

This year, we’re treating our mom to a sweet slice of cake, a beautiful DIY layered cake. This cake won’t cause any cavities
though, because it’s inedible. It’s made of paper, and decorated with the best, most colorful paper, ASTROBRIGHTS®  Papers.

We like to do most everything as a family, so we didn’t just stop at just one cake. Our mom gets the grand, three-layer cake, and we made three additional “baby cakes” to celebrate our own motherhood. Just like our personalities, they are all vibrant, but different and one-of-a-kind. All the how-to details for the 3-tier cake is available at Astrobrights.com. It’s worth checking out!

We hope you COLORIZE your Mother’s Day as you celebrate your own Mom, you, or any special Mother’s in your life, this year.

boy-mom-black-and-white-paper-cake-mama-bear-rainbow-cake

Materials:

  • Astrobrights Papers, see colors below
  • Scissors
  • Paper mache boxes (found here or here)
  • Glue dots, mini and regular
  • Glue stick
  • Ruler
  • Pencil
  • Hot glue gun and hot glue

Directions:

Step 1: Determine the colors of the cakes.  For the three-tier cake, we used Rocket Red™, Gamma Green™, Solar White (found in the Spectrum Pack) and Terra Green™ cardstock. You can use the text weight instead of the cardstock weight, but we found that the cardstock weight was more durable when opening and closing the box. For the middle layer, we printed a free watercolor printable on the Solar White paper. To get the size you need, re-size as needed in Microsoft Word.

For the black and white baby cake, we used Eclipse Black™ and Solar White. For the confetti and rainbow baby cake, we used Plasma Pink™, Pulsar Pink™, Solar Yellow™, Cosmic Orange™, Blast-Off Blue™, Lunar Blue™Stardust™ White, Terrestrial Teal™, and Terra Green™. For the mama bear cake, we used Fireball Fuchsia™ for the melted frosting on top, and we painted Stardust™ White with gold leaf paper for the base of the cake. Follow directions on the gold leaf packaging to add this fun touch of glam to any paper.

watercolor-flowers-paper

gold-leaf-paper

Step 2: Measure the size of the box, as well as the lid.

mache-boxes

mache-box-ruler

Step 3: Cut the paper according to box measurements. Important note: add 1-2 cm. to the lid width measurements, because you will want it a bit higher than the actual lid to cover the edges of the lid.

lid-scalloped-white-edge

Step 4: Add glue dots to the edges and corners of the paper, and begin to wrap the box with paper. It’s best to leave the lid trim for last, so you can make sure the entire rim of the box is covered.

glue-dots-paper-crafts

gold-on-brown-paper-mache-box

pink-melted-frosting-paper

brown-paper-mache-box-with-pink-paper-around-it

pink-lid-glue-dots

paper-cake-pink-

Step 5: Cut any embellishments, or designs you choose to add. Our cakes are pretty and somewhat simple, which best suits us. The embellishments worth noting are the DIY paper flowers, the Boy Mom topper (and the classic white “pleats” on the cake), the mama bear and rainbow.

To make the flowers, first print flower petals from a template you can find online. Trace onto Rocket Red paper, and then cut. We used a Poppy flower template through our Silhouette Cameo software. But, most petals you find online will work. Next, cut a small triangle on the bottom, center of the petal. This is where you need your hot glue gun. Press hot glue on one side, and gently place the bottom side of the other piece of the petal on top. Continue to do this until you have four petals. Now, just glue each petal on top of each other. Once you have the petals, begin to create the center. We free-handed one small circle in Terra Green, one mini circle in Gamma Green and then leaves in both greens. For extra texture, cut slits in the larger Terra Green circle. Glue that textured circle in the middle of the flower, and then glue the mini Gamma Green circle in the center. Finally, glue the leaves on the bottom of the flower. You can place these all over the cake, or use a couple – it’s up to you!

coral-paper-flower-petals

paper-flower-petal-and-hot-glue-gun

coral-paper-flower-petal

gamma-green-paper-circles-leaves

paper-flowers-and-green-leaves

paper-flowers-coral-green-craft-paper-cake-details

paper-flowers

To make the bear, trace and cut the image of a bear onto card stock paper. For the words, you can use an electronic cutting machine to cut the words Mama Bear inside the bear. If you don’t have a cutting machine, you can use an X-acto knife to cut the words, or use a Sharpie to write them.

mama-bear-paper-cake-topper-pink-

To create the rainbow, free hand one small arch (the last layer of the rainbow) with a pencil on the bottom of Astrobrights cardstock paper, and then cut five additional arches, each other larger in size than the one before it. Glue each layer on top of each other, beginning with the largest. Next, free hand cut clouds, and glue them to the end of each rainbow.

confetti-diy-paper-cake

rainbow-paper-craft-project-diy-paper-cake-topper

rainbow-made-from-pink-orange-green-and-blue-paper-diy-paper-cake-topper

confetti-diy-paper-cake-with-rainbow-topper

To stand the bear and the rainbow on the cake, use small wooden toothpicks (with square ends, not pointed) to create mini DIY easels. Dab hot glue on the ends of the wooden toothpicks to keep them in place on top of the cake. You will need 2 toothpicks per “cake topper.”

Finally, to make the black and white cake, cut small pieces of Solar White paper (2 inches wide by the length of the mache box), and glue one end of them on the box one by one (sliding each one under the one before it) until the entire box is covered. Because we only glued one end of the white paper on the cake, it left the other end open, which created a  beautiful pleat effect. As for the Boy Mom words, we used an electronic cutting machine to cut the words (you could easily cut the letters with stencils, or use sticker letters) and glued the back of the letters to two black and white straws. We punctured two small holes in the top of the mache box to stick the straws inside. Voila!

black-white-pleat-box-memories-box-diy-paper-cake

black-paper-boy-mom-black-white-striped-straws

boy-mom-black-white-cake

diy-paper-cakes-boy-mom-paper-flowers-rainbow-cake

diy-colorful-paper-cakes-mothers-day-gift-wrap-mama-bear-rainbow-cake-topper

three-tier-paper-cake-on-a-cake-stand

Step 6: Fill with gifts, and give to Mom (or yourself).

box-filled-with-gifts

kids-kissing-mom

family-with-diy-paper-cakes

Our family of cakes will make for one sweet Mother’s Day. Happy Mother’s Day to all you amazing, hard-working moms out there!

This post is in partnership with Astrobrights. We were crafting with and coloring on Astrobrights paper long before this post. It’s always been a fave product of ours. Thank you for supporting the brands that support j. sorelle. Astrobrights was one of the first, so we are very grateful. 

Affiliate Disclosure: This post contains affiliate links, which means j. sorelle receives a small commission from the sale of certain items; however, the price is the same for you, whether it’s an affiliate link or not. 

Light, Love & Paper at a Zen-Worthy Ladies Night

zen-ladies-night-with-diy-paper-art-lotus-flowers

Life is beautiful. We are truly blessed in this life. But, just like everyone, our stress levels rise, the to-do lists get longer, worries can be all-consuming and we are over-committed. To stay grounded (and sane), we have to find ways to bring peace into our lives. We often take refuge in family and friends who lift us up. We take breaks. We let in some of the love we deserve, but often neglect to receive. We have a cocktail. We have meltdowns. We put on yoga pants and watch the same movies we’ve seen a hundred times before. We pray. We take deep breaths. We party. We try to live with intention and grateful hearts.

A good reminder of our intentions, and the positive energy we need on a daily basis are the Mala beads we wear on our wrists. The string of beads used in prayer and meditation were first introduced to us several years ago after a stop in Tibet Imports in Denver, CO. A sweet woman, Sarita, gave us a Vedic Astrology reading, and we bought our first Mala prayer beads.

After receiving many compliments on our bracelets, we wanted to share that beauty and healing with others. What better way to celebrate all that good energy and fabulous piece of jewelry than with family? Not just any family – 16 strong women from our large Italian family. So, together at Jenna’s beautiful newly renovated home, we made Mala bracelets, listened to individual Vedic Astrology readings with Sarita and Suderson, sang, ate and drank our way into the night.

holla-for-some-mala-sign-and-mala-beads

Our goal was to make the space safe, pretty and full of love and light. It was a good vibes only zone. ASTROBRIGHTS® Papers helped us brighten the evening with all the colors of the rainbow, just like the seven Chakras, which are energy centers of the body known in Indian religions, often associated with vibrant colors.

mala-bead-making-party

Here’s fun ways on how we got our Mala on. We highly recommend it for your next girls night!

DIY Lotus Flower Art
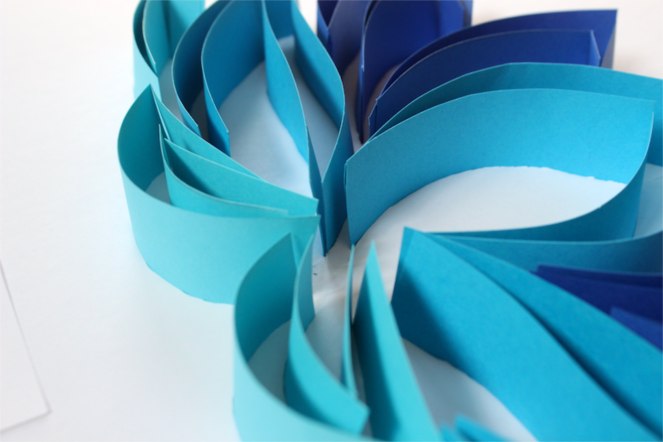
We can’t believe this unique piece of art is made with paper. These DIY lotus flowers are dimensional, bright and one-of-a-kind. Lotus flower are known to grow from the bottom of streams and muddy ponds, and rise above the water and bloom. We chose this symbol to hang at our party because of it’s symbolic nature of spiritual growth and the ability to rise above obstacles.

red-orange-yellow-lotus-flower

Materials:

Directions:

Step 1: Print a photo of the lotus flower, tape it to the foam core, and use an X-acto knife to cut around all the edges of the flower. Be sure to only cut half-way through the foam core, not entirely through it.

black-printed-lotus-flower

white-foam-core-with-slits

Step 2: Next, cut 1-inch thick strips of paper. We used Sunburst Yellow™Cosmic Orange™., Rocket Red™, Blast-Off Blue™Celestial Blue®Lunar Blue™Terra Green™ and Martian Green™ for our lotus flowers.

strips-of-green-paper

Step 3: Insert the paper strips into the tiny slits you made in the foam core. You will have to cut the paper to fit each slit. We inserted the paper in the slit, and then cut it at the end of the slit. We did not cut and measure each one individually before inserting it. Once we put paper in all the slits, we cut paper with a scallop effect, and glued it around the edges for a lovely frame.

green-paper-lotus-flower

blue-lotus-flower-made-with-paper

red-orange-yellow-diy-lotus-flower

IMG_1277

For the framed word art, we cut powerful words, glued them to foam core and framed them the same way as the lotus flower. These are all beautiful (and totally affordable) pieces of art that you can do for any party (or just everyday décor).

diy-lotus-flower-art-on-doors

Bar Sign & Wall Decor
We’ve seen the Namaste play on words, such as Namast’ay in bed and Namast’ay a while, so we made our own sign with letters. The words read Namast’ay & Drink. It was placed strategically above the “bar.” This is as easy as printing and cutting letters. You can string the letters on twine, or hang them like we did with wall putty.

namastay-and-drink

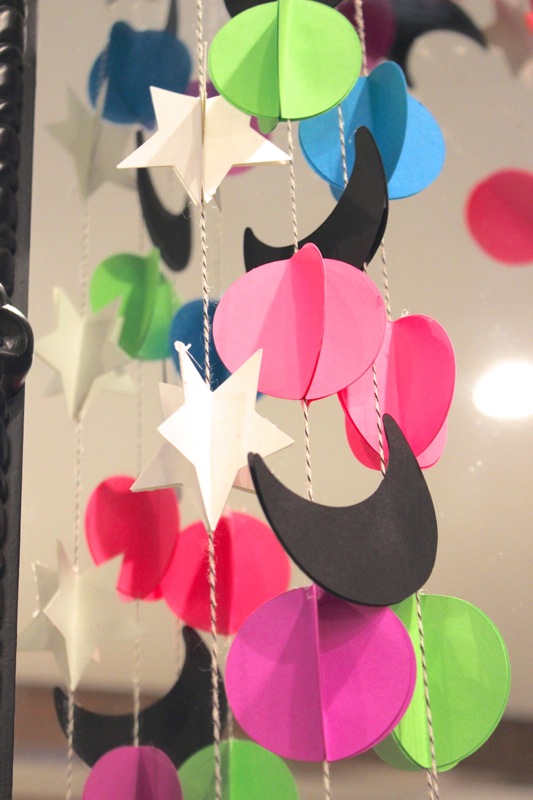
Vedic Astrology is rooted in a birth chart, the planets, stars and their patterns. We made a string of 3-D stars, circles and moons to hang at the party. We used a variety of colors on this banner, including Eclipse Black™, Pulsar Pink™, Sunburst Yellow™, Fireball Fuchsia™, Celestial Blue®, Martian Green™, Stardust White™ and Outrageous Orchid™. To make these shapes, cut circles and stars, fold them in half and glue them along a piece of twine, also gluing all the sides of the shapes together. For each 3D shape, you will need four parts, or shapes. For example, you will need 4 circles to make one 3D circle or ball.

diy-hanging-paper-banner-circles-and-stars-shapes

paper-moon-circles-and-stars

Elephants are a sacred symbol in Buddhist and Hindu religions, so we knew we wanted to incorporate them somehow. We traced and cut an elephant shape, and then used our Silhouette electronic cutting machine to cut intricate designs on another piece of color paper. We glued them together, and hung them from a long piece of embroidery string. If you don’t have a Silhouette, you can draw designs on the elephant, or even find a photo online with designs already on the elephant. The colors we used for the elephant are Pulsar Pink™, Terrestrial Teal™, Outrageous Orchid™, Fireball Fuchsia™ and Blast-Off Blue™.

bright-and-colorful-paper-elephants

DIY Lanterns
Jenna has a stunning chandelier hanging from her ceiling, so we couldn’t compete with that. But, we tried to add a an element from Sarita’s shop to help her feel right at home. That element was DIY Tibetan lanterns. We made DIY paper lanterns with traditional Buddhist symbols printed on them, including the Om symbol and the Hamsa Hand. Although they are traditionally handmade from lokta paper or cotton, the Astrobrights worked great!

blue-om-paper-chandelier

Materials:

Directions:

Step 1: Find images of traditional Buddhism or Hindu symbols online. Copy and paste into Microsoft Word.

Step 2: Resize image in Word, and then print in the center of four pieces of paper.

Step 3: Fold the bottom ½ inch and the side 1 inch. You want the fold to be on the backside of the image.

folded-blue-paper

Step 4: Use a needle to prick holes every inch from the top to the bottom on the side of each paper through the fold. Repeat on all the sides of each sheet of paper (not the top and bottom edges).

Step 5: Tie a know at the end of a piece of string, and insert it from the back of one piece of paper, through the fold to the front, and then into one hold on another piece of paper. Essentially, you are “sewing” the sides of the lantern together. A cross-pattern worked best for us, but you can do whatever is easiest here. They just have to be attached to one another. We have NO sewing skills whatever, it’s just a pattern of going in through one hole and then up through another.

diy-yellow-tibetan-lantern

Step 6: Once all the sides are sewn together, add 4 equal pieces of string to the top of each lantern (either glue the string or attach it to the existing string) to hang it from the ceiling. For extra flair, add little tassels to the bottom of each corner of the lantern. Command hooks worked great to hang the lanterns. For this DIY, we used Sunburst Yellow™, Terra Green™  and Celestial Blue®.

diy-blue-and-green-paper-tibetan-lanters

yellow-paper-lantern-namast'ay-and-drink-paper-letters

As we face our busy days, our malas will serve as a reminder to bring a little love and light to everything we do. And, we will certainly remember this special night with family where we shared our stories, and laughed our way through bead making.

blue-mala-beads

blue-prayer-mala-beads

girl-holding-a-glass-of-wine-at-a-party-namastay-and-drink

sisters-wearing-mala-bead-bracelets

mala-beads-and-womens-hands

This post is in partnership with Astrobrights Papers. We were crafting with Astrobrights Papers paper long before this post. It’s always been a fave product of ours. Thank you for supporting the brands that support j. sorelle. Astrobrights was one of the first, so we are very grateful.

Affiliate Disclosure: This post contains affiliate links, which means j. sorelle receives a small commission from the sale of certain items; however, the price is the same for you, whether it’s an affiliate link or not. 


DIY Advent Calendar

diy-advent-calendar-red-green-christmas-girl-ladder-holiday

The thought of the upcoming holidays brings us a sense of panic with all there is to do, but also great joy. It’s our favorite time of year, so bring on the cheer. We’ve been known to not put up our Advent calendar until mid-December, which may or may not defeat the purpose, so this post is our attempt to have our DIY Advent calendar up by December 1. Other than our usual tardiness, the other con to our past Advent calendar was the size…how are we supposed to fit one thing larger than a candy cane in each tiny opening? This year, we went long and tall, and got creative with ice cream pint containers!

diy-advent-calendar-red-green-christmas-girl-ladder-holiday

May we just say that had we known blogging would have been in our future, we would have an all-white wall with light floors. Since that’s not feasible with any of our homes, and we needed a well-lit area to show you our Advent Calendar, a ‘rustic Colorado ‘ rock wall was our second best option. Our 5-year-old model had a ‘make-it-work’ moment, which she didn’t seem to mind.

diy-advent-calendar-red-green-christmas-girl-ladder-holiday

diy-advent-calendar-red-green-christmas-girl-ladder-holiday

You’ll Need:

Directions:

Make or print number labels. You can use a Silhouette like we did, or buy number stickers. For number 25, we used a red star ornament since that’s the magical day. Glue the labels on the container lids.

diy-advent-calendar-red-green-christmas-girl-ladder-holiday

Drill the pint containers to the long piece of wood {totally doable, even with do drill experience}, and then fill the pint containers with goodies.

diy-advent-calendar-red-green-christmas-holiday-bear-toys

Place lids on the pint containers.

diy-advent-calendar-red-green-christmas-antler-holiday

Set up the colorful Advent calendar. You can make it a horizontal Advent calendar, or a vertical one like we did. Because ours is vertical and tall, we couldn’t resist a set up with a ladder – it makes for a fun adventure everyday for the kids and with a good lean, no nails or holes in the wall.

diy-advent-calendar-red-green-christmas-girl-ladder-holiday

diy-advent-calendar-red-green-christmas-girl-ladder-holiday

Someone special wants it to be Christmas now.

diy-advent-calendar-red-green-christmas-girl-ladder-holiday

We teamed up with Sillhouette America to give away 1 Silhouette CAMEO on Instagram. Nov. 25 the giveaway ends, and all you have to do is follow us on Instagram and tag 3 friends. Go here now.

#colorize #silhouetterocks #adventcalendar

DIY Witch and Mummy Halloween Nail Polish

mummy-witch-halloween-nail-polish-diy-holiday-gift

We typically opt for a cute and fun Halloween, instead of a scary and creepy one. We’ve never loved haunted houses or frightening people. We like costumes and carving pumpkins, apple cider and trick or treating with our large Italian family.

Since we were babies our mom and aunt made our ‘themed’ Halloween costumes, and every year we celebrate together. Following the annual chaos of hello hugs, oooh’s and ahhhs over costumes and hundreds of flashing camera lights, the men grab a cigar and take the kids trick or treating. The women stay inside where its warm to chat, eat chili and hot dogs and drink our wine. It’s a special tradition, and we are grateful to share it with our own kiddos.

Being into the cute part of Halloween, this DIY is so us!

These DIY witch and mummy Halloween nail polish bottles would make for a great, non-candy Halloween party favor or a unique Halloween gift.

Witch color are you going to pick for this year’s Halloween nails? We’re going with Essie Bahama Mama.

If your rainbow-loving self is admiring the DIY spider web in the background, you can see how we did it here.

halloween-nail-polish-favor-witch-broom-mummy-spider-web-rainbow-hat-white-party-diy

You’ll Need:

  • Nail Polish
  • Paper, Astrobrights
  • White rafia paper ribbon
  • Googly eyes
  • Hot Glue
  • Nail File
  • Rafia
  • Twine

How To:

For the mummy, glue two eyes on the nail polish bottle. Dab a small amount of hot glue on the top of the bottle, then add white rafia ribbon, and start to wrap. You can do one continuous wrap, or cut, add a dab of glue and continue to wrap. When the entire bottle is covered, dab another small amount of hot glue, so the mummy’s wrap stays in place.

mummy-nail-polish-diy-halloween-favor-gift-ribbon-white-googly-eyes

mummy-nail-polish-diy-halloween-favor-gift-ribbon-white-googly-eyes

For the witch, make a small witches hat with a free mini-hat template online {or free-hand} and glue it to a black, doughnut-cut circle. Slide it over the nail polish handle. For the witches broom, place a handful of rafia around one end of the nail file, and tie twine around it to keep it in place. Use a tiny dab of hot glue to keep the twine in place.

witch-nail-polish-diy-halloween-gift-black-hat-orange-nail-file-broom-favor


witch-nail-polish-diy-halloween-gift-black-hat-orange-nail-file-broom-favor


witch-nail-polish-diy-halloween-gift-black-hat-orange-nail-file-broom-favor

DIY Paper Stars and Fans to Decorate for the 4th of July

july-4th-red-white-blue-kid-family-picnic-astrobrights-paper-hanging-stars-diy

We had a blast at our #Colorize picnic with ASTROBRIGHTS® Papers, and really want you to have some red, white and blue fun under a willow tree, too, so here’s a couple DIY tutorials from the July 4th picnic. They are big impact, little effort, which means you have to do it.

Thanks to our friend and photographer, Meredith Moran Photography, for playing with us, and capturing great moments.

july-4th-red-white-blue-kid-family-picnic-astrobrights-paper-hanging-stars-diy

DIY 3D Paper Stars

Materials Needed:

Directions:

  1. Cut out 4 stars the same size.
  2. Fold each star in half.
  3. Add glue dots or dabs of glue to one folded side on the top, middle and bottom.
  4. Stack another folded star on top, and press to secure.
  5. Repeat step 4 until all stars form one, large 3D star.
  6. Punch a small hole on top of the star.
  7. Push red and white striped twine through the hole and make a hoop, then hang.

july-4th-red-white-blue-kid-family-picnic-astrobrights-paper-hanging-stars-diy

july-4th-red-white-blue-kid-family-picnic-astrobrights-paper-hanging-stars-diy

DIY Paper Fan

Materials Needed:

  • Double-sided tape
  • Hot glue gun
  • Paper
  • Cut out shape of U.S.A

Directions:

paper-fan-tutorial-red-white-blue-diy

  1. Cut out all your paper squares. For the large fan, we used 6, 8×8 inch paper squares. For the smaller ones, we cut 4, 6×6 and 3, 4×4 squares. Fold the paper like a paper fan.
  2. Use double-sided tape to tape the edges of the fans together.
  3. Once all the squares are glued you will have a long stretch of ‘fanned’ or accordion paper.
  4. Glue the first and last piece of the paper together so it forms a circle.
  5. Press the circle down so it creates a fan. Add a large dab of hot glue to the middle of the fan, and press down for several minutes until it dries. Make sure the glue touches all parts of the paper.
  6. Use your Silhouette or print and hand-cut a cut out of the U.S.A. Use your hot glue gun to glue the U.S.A. outline in the middle of the fan.

july-4th-red-white-blue-kid-family-picnic-astrobrights-paper-fans-diy

july-4th-red-white-blue-kid-family-picnic-astrobrights-paper-fans-diy

Instagram media links to follow from this post:
@jsorelle3
@astrobrights
@meredithmoranphoto