
Santa has brand new bag.
This Pottery Barn {one of our favorite store’s} hack can be made for under $10.
Find the file by Fleur de Lis, a paperie, here for just $5. Read the full tutorial on Momtastic.
Merry Christmas.
life according to three j. sisters - weddings, parties, lifestyle.
Santa has brand new bag.
This Pottery Barn {one of our favorite store’s} hack can be made for under $10.
Find the file by Fleur de Lis, a paperie, here for just $5. Read the full tutorial on Momtastic.
Merry Christmas.
‘Twas the week before Christmas, and all through blogging land,
bloggers were hustling with super glue in their hand.
Ornaments were hung on the tree with care,
but one was missing from bloggers who hope to put one of their own there.
We knew in a moment, it must be #swapthatdiy time,
For those who read our first one, it was a sublime.
Lifestyle, DIY, food and fashion – not one of them the same,
A Joyful Riot, Pretty Life Girls, DIY Candy, Cut, Cut, Craft!, A Bubbly Life, The Bold Adobe, The Sweetest Occasion, Tell Love and Party and One Little Minute Blog – we called them each by name!
Happy ornament making to all, and to all a good night.
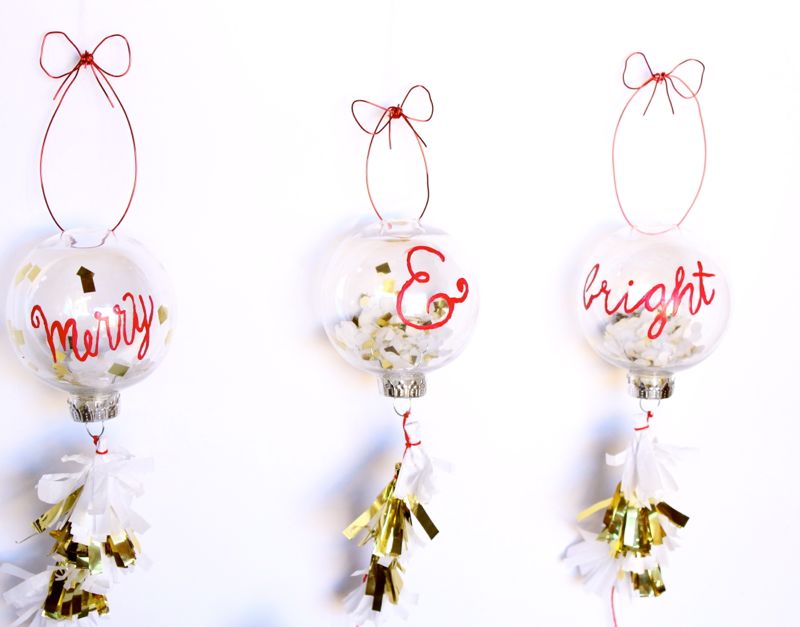
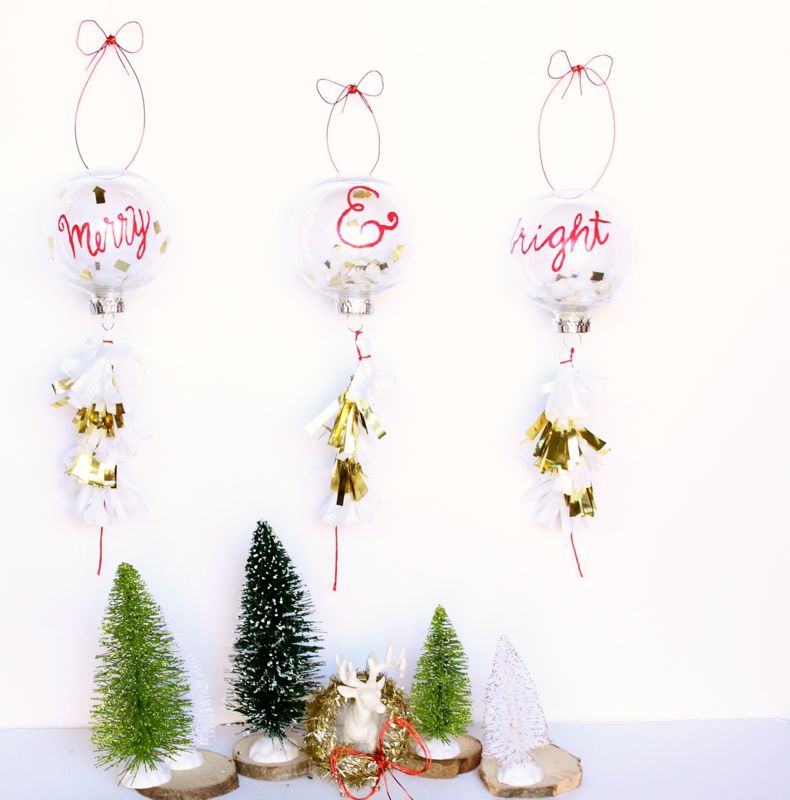
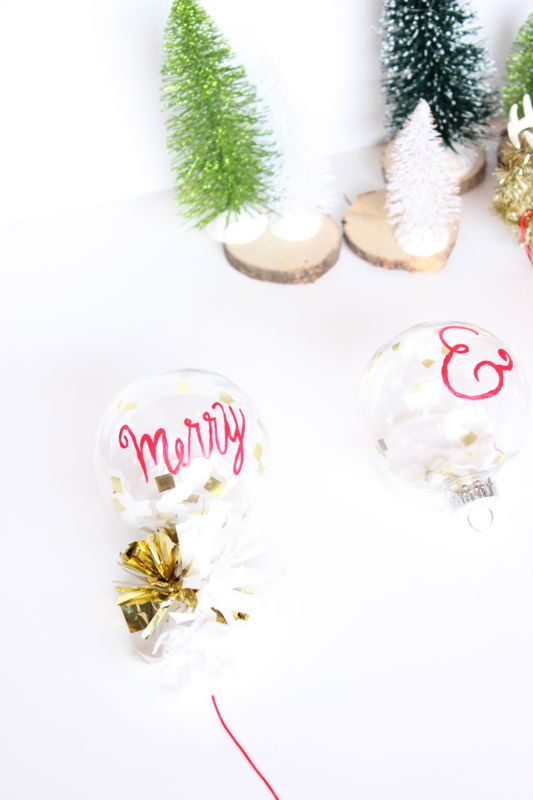
It’s our 2nd official DIY swap, and it’s a good one. We made Merry & Bright ornaments to brighten up the sisters of A Joyful Riot holidays. We couldn’t do a Merry without a Bright, so we sent all three. Our ornaments were inspired by big, 36” balloons by Big Ass Balloons, so the ornaments are meant to be 36” balloons with the string of tassels.
Merry Christmas, Malissa and Machelle, and everyone who participated.
Materials:
Directions:
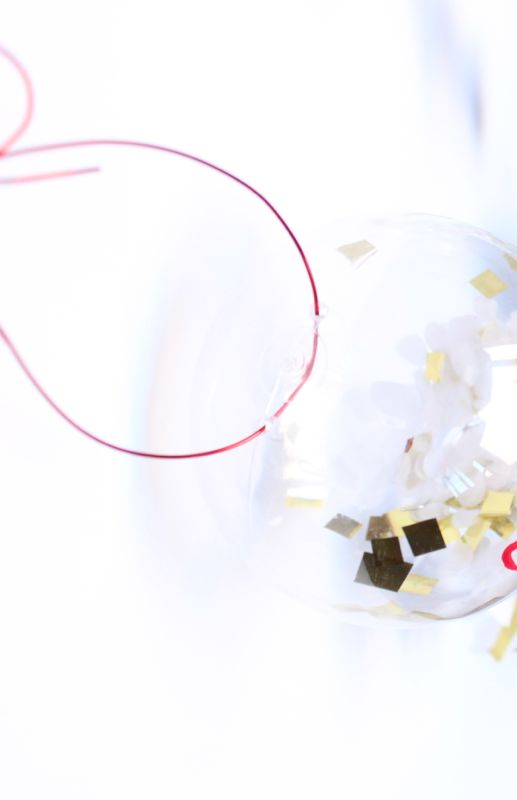
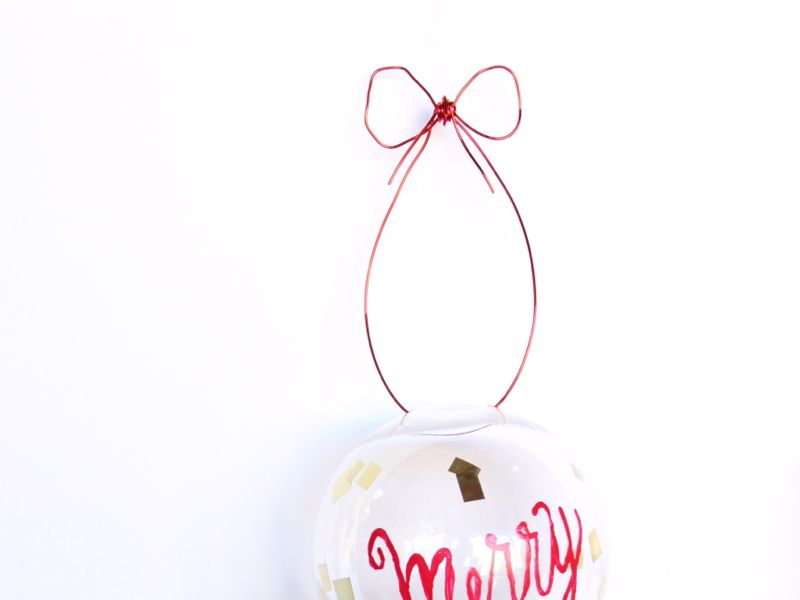
Drill two small holes on the top of the ornament, one of each side of the top of the ornament.
Trace or free-hand the word Merry & Bright on the ornaments, then paint the words with a small paintbrush and red paint.
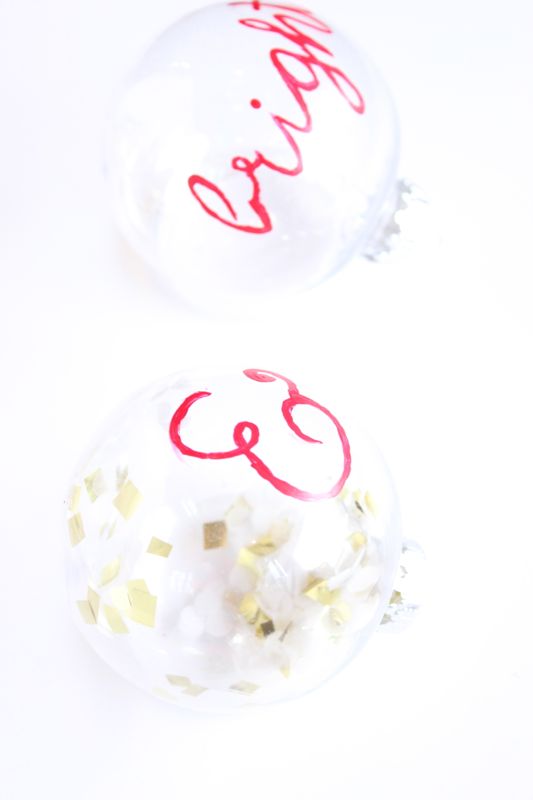
Fill the ornaments with confetti {we cut small squares of the gold mylar and hole-punched tissue paper for white confetti}. There is a natural static that occurs, so some of the confetti will stick to the sides of the ornament.
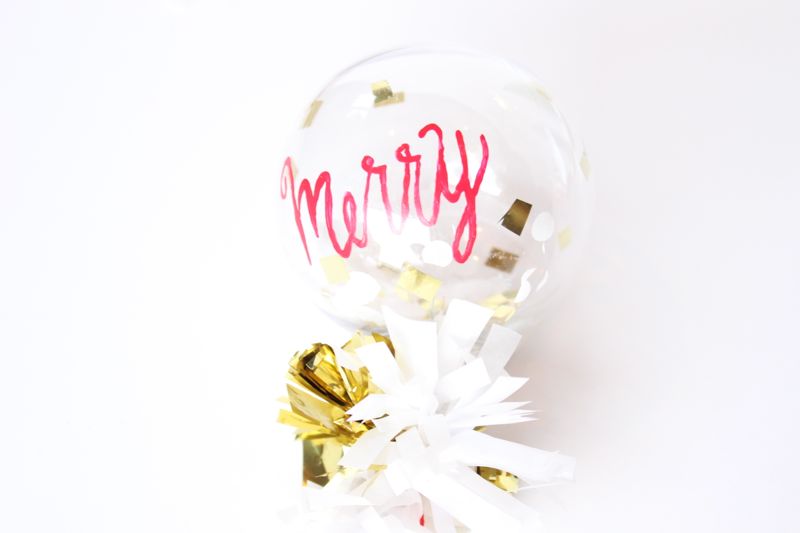
Cut a piece of string about 1 foot long for the tassel string. We made little tassels from the white tissue paper and gold mylar. We tied each mini tassel to the string with a knot, one above the other. Once all the tassels were in a row, we dabbed a bit of super glue on top each one, to keep them in a straight line.

Cut a 4-inch piece of the red wire and string it through the two holes on top of the ornament. To add a touch of cuteness, make a bow out of the red wire, and wrap additional wire around center of the bow to keep it in place.

We just realized we never shared one of our first and favorite photo shoots on the blog. It’s a favorite because we were able to work with our friend and photographer, Meredith Moran Photography, and because amongst all the pretty red and white details, our children were running around in the background at our parents house. It was a lot of chaos, but also a lot of laughter, and if you can laugh in the midst of the chaos, that can be a good thing.
We hope you make the DIY peppermint tray this Christmas season and find the time experience pure joy, just like the marquee lights by Saddleshoe Designs reminds us to do.
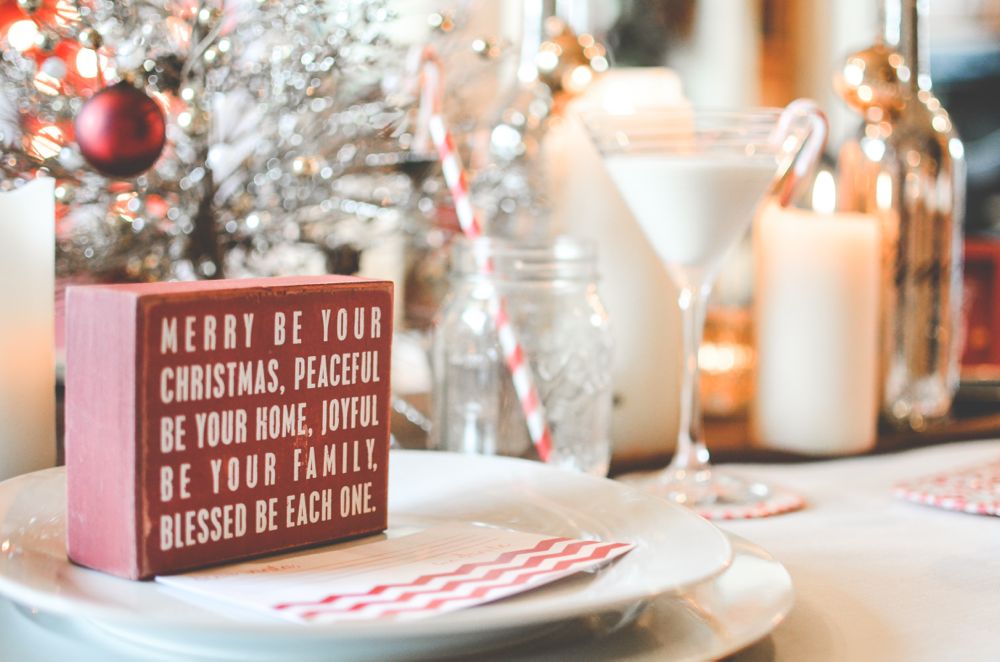
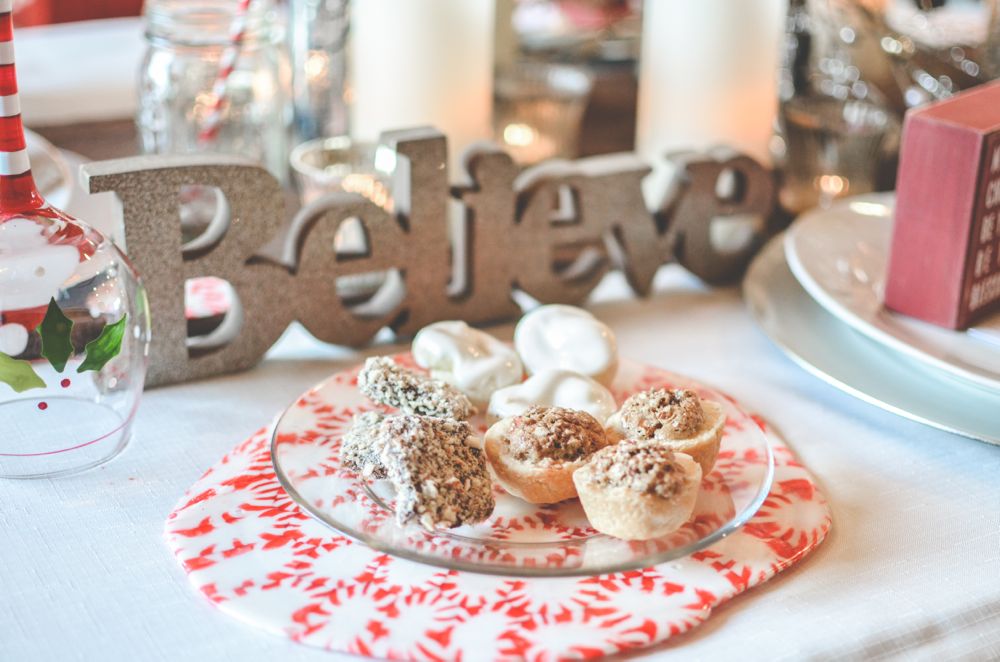


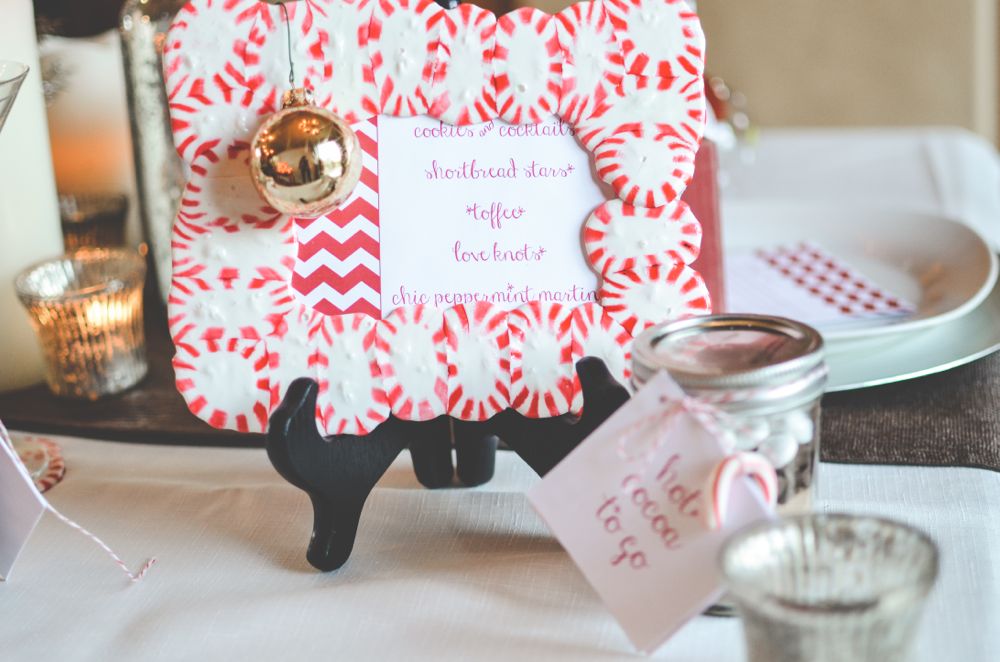


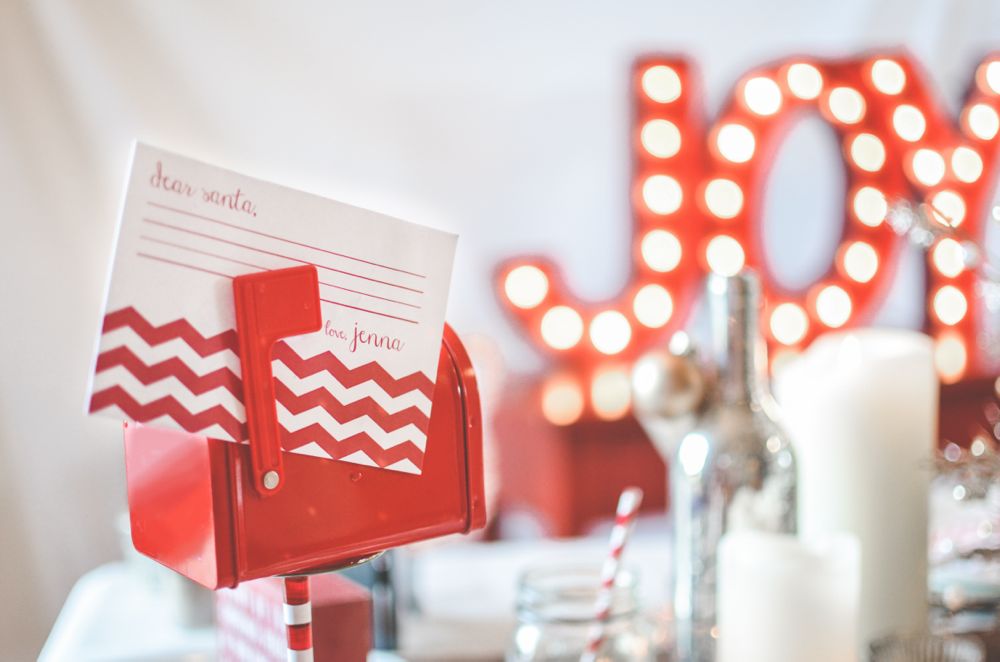

Vendor Love:
Photography: Meredith Moran Photography | Marquee Lights: Saddleshoe Signs | Tabletop Accessories and Stationery: Fleur de Lis, a paperie

Unless your like our grandma who use to carefully unwrap each and every gift to save the wrapping paper, why spend the time to beautifully wrap a gift when it’s ripped off in less than a second and then thrown in the trash? We’re not exactly sure, but we will say that it’s fun to make pretty things, and just like an invite or an outfit, it’s a reflection of your style and an opporunity to get creative, which we just can’t resist.
This Christmas, we made hand-drawn and traced Christmas DIY wrapping paper, colored with the kids help, and topped with colorful mini honeycomb balls. It’s easy and fun, plus everything is cuter with a mini honeycomb ball.

Honeycomb Ball Gift Toppers
You’ll Need:
Directions:
Brainstorm images you want to draw or trace. We went with some of our favorite images we associate with Christmas – an elf hat, a silhouette of a reindeer with a Rudolph nose, the North Pole pole and the droopy Charlie Brown tree. For the Rudolph we cut it from a photo online.


Wrap gifts with white paper. If you are going to trace the images on the wrapping paper, simply print the images from the internet, and half wrap your gift, leaving the sides open to insert the paper under the wrapping paper and on top of the gift. Trace the image, then remove from the gift and completely wrap the gift.
Color the images.

Use double-sided tape on the back of the mini-honeycomb balls, open them half way, and place on the wrapping paper.

Add a name tag and place under the tree.
Wishing you happy wrapping times this holiday season.
Happy Thanksgiving. May your heart be filled with gratitude today.

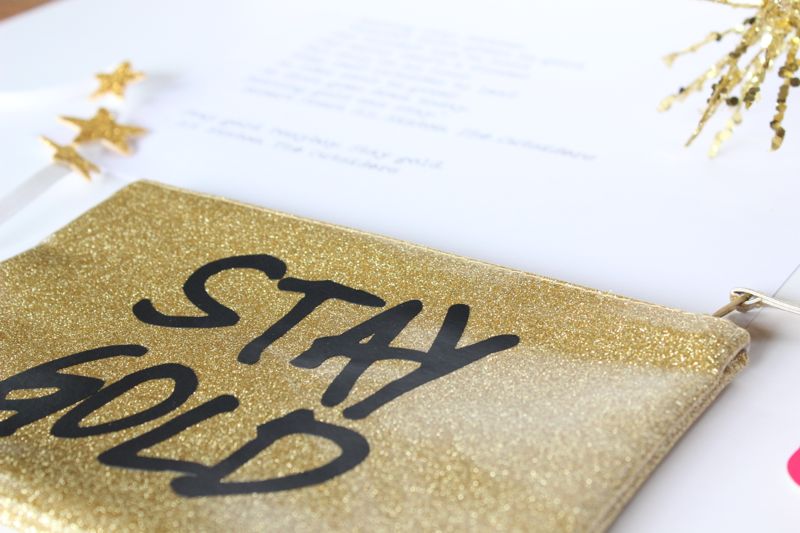
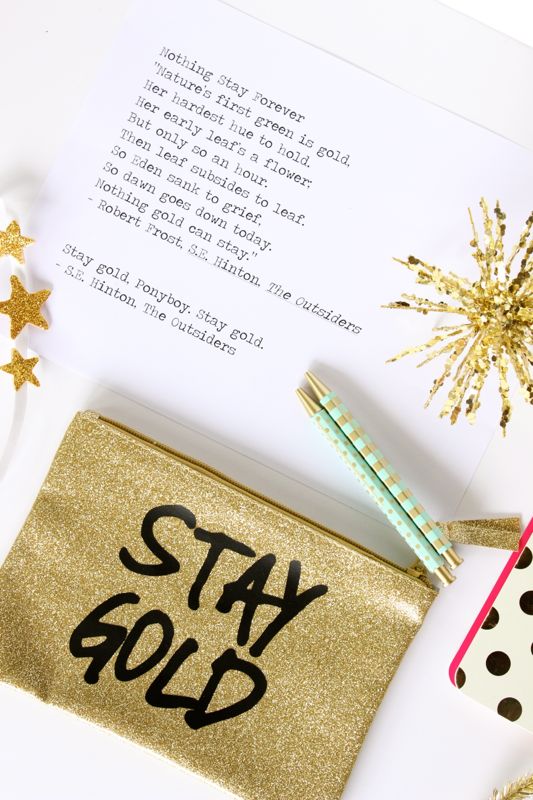
It’s that holiday time of year when gold is everywhere, so start throwing gold sparkles on everything. It’s also that time of year when Silhouette America has an amazing BLACK FRIDAY sale. We couldn’t have made this DIY Stay Gold pencil pouch {nor could we have made other amazing things this year like this, this or this} if it weren’t for our Silhouette cutting tool from Silhouette America.

Shop the Black Friday sale today through Dec. 4, 2015. The amazing machine bundles are as low as $99.00 including Silhouette Mint for $99.99, Portrait and Mint for $189.99, CAMEO for $199.99 and CAMEO and Portrait for $289.99. Plus, almost everything in the Silhouette America store is up to 40% off. Use code SORELLE when you check out. For 20% off Silhouette Design Store subscription, enter BLACK at checkout. Oh my goodness, free shipping available to the contiguous United States, too.
Once you receive your amazing electronic cutting tool that will change your life for the better, make this DIY pencil pouch.
When we spotted this gold pencil pouch during back to school shopping in August, we knew it would come in handy some day.

The reference of “Stay Gold” comes from the book, The Outsiders. The quote in the book stems from the famous poem by Robert Frost.
Nothing Gold Can Stay
Nature’s first green is gold,
Her hardest hue to hold.
Her early leaf’s a flower,
But only so an hour.
Then leaf subsides to leaf,
So Eden sank to grief.
So Dawn goes down to day,
Nothing gold can stay.
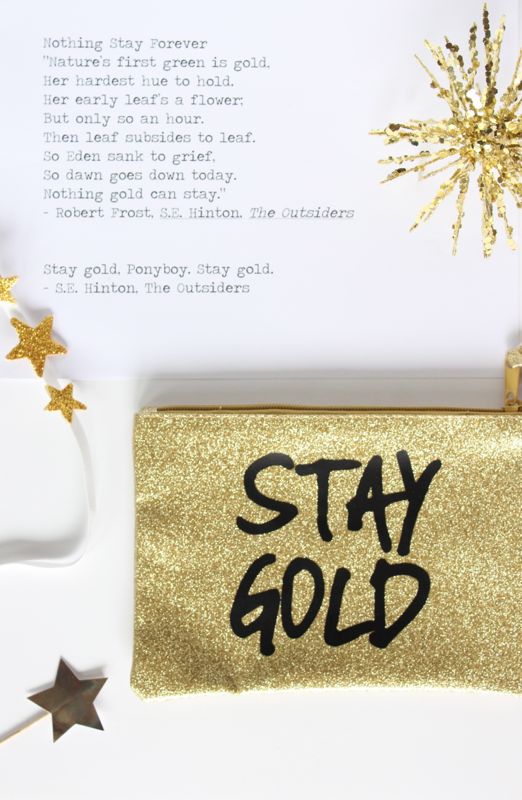
This quote is powerful in our own lives. Our hope is that our children can remain young and innocent forever. As we age, our view of the world ‘hardens’ and we forget to play, imagine, and believe in the goodness in ourselves and people around us. We must always remember and teach our children to Stay Gold – stay good, and stay true!
DIY Stay Gold Pencil Pouch
Silhouette Vinyl
Gold Pencil Pouch, Target
Frog’s Tape
Credit Card or straight-edge
Directions:
Create a stay gold design on Silhouette software.
Print the vinyl according to package directions.
Remove the vinyl backing, and lay front side-down onto rows of Frog’s Tape {you can also use transfer paper, which we didn’t have handy}.
Use a credit card to make sure all bubbles are out, then pull the vinyl paper up. Your words should be face-down on the tape.
Pick up the tape, and place carefully on your pencil pouch. Your words should be legible now, right-side-up. Use a credit card to get out all the bubbles.
Carefully pull up each piece of tape. The vinyl should stay in place on the pencil pouch, and you’re done.
Now, eat some turkey and pie. Hug family and friends. Rest. Sleep. Wake up. Shop.