We Heart Stripes

pinstripe-diy-off-the-shoulder-summer-top

Jessica got craftsy with an H&M shirt for Momtastic. It must have been luck (or maybe she’s got style), but she transformed a blue and white striped shirt into a DIY off the shoulder top that’s currently hot and in-style.

http://www.momtastic.com/style/682661-diy-off-the-shoulder-top/

We love stripes of all kinds – pinstripes, seersucker, wide and thin. We’re in love with the classic stripes that scream summer, sophistication and class. If you’re not into DIYs, or don’t want to tackle this one (you can totally do it because it’s no-sew), we get it. We’ve got you covered with some fabulous finds below.

[show_boutique_widget id=”603590″]


A Colorful Summer Party with Sunglasses and Ice Cream

summer-vibes-girl-with-sun-sunglasses-colorful-rainbow-of-sunglasses

Summer vibes are strong in our houses right now, and it feels so good! It’s so close we can practically taste and smell all the wonderful things about summer – watermelon, cocktails on the porch, pool days and fun in the sun. The 2016/2017 school year is almost over, so we’re celebrating all the vibrant shades of summer. Nothing is brighter than ASTROBRIGHTS® Papers. Nothing is cooler than a stylish pair of sunglasses. And, nothing is sweeter than ice cream cones. All together they make one heck of a School’s Out For Summer party.

The most amazing thing about this party is that paper is the main component for all the décor. In fact, not just the décor is made of paper, the activities are primarily paper, too. Everything else – the bubbles, chalk, juice, music, candy and ice cream (the real deal, non-paper version) is just an added (but not necessary) bonus, and most can be found around the house.

It’s time to COLORIZE the start of summer, ya’ll. Here’s how to kick it off bright!

DIY Sunglasses Piñata

diy-sunglasses-pinata-black-and-bright-coral-gigantic-sunglasses

Parties are just more fun with a piñata. If we had nothing but a piñata at our kid’s birthday, they would be thrilled and not notice anything else was missing. But, they can be expensive, and if you do things last-minute like us (actually, just Jessica and Jodi procrastinate, not Jenna), it costs too much to overnight ship a piñata. Luckily, we had cardboard, duct tape and ASTROBRIGHTS paper on hand to help me make the coolest piñata around town – a pair of sunglasses.

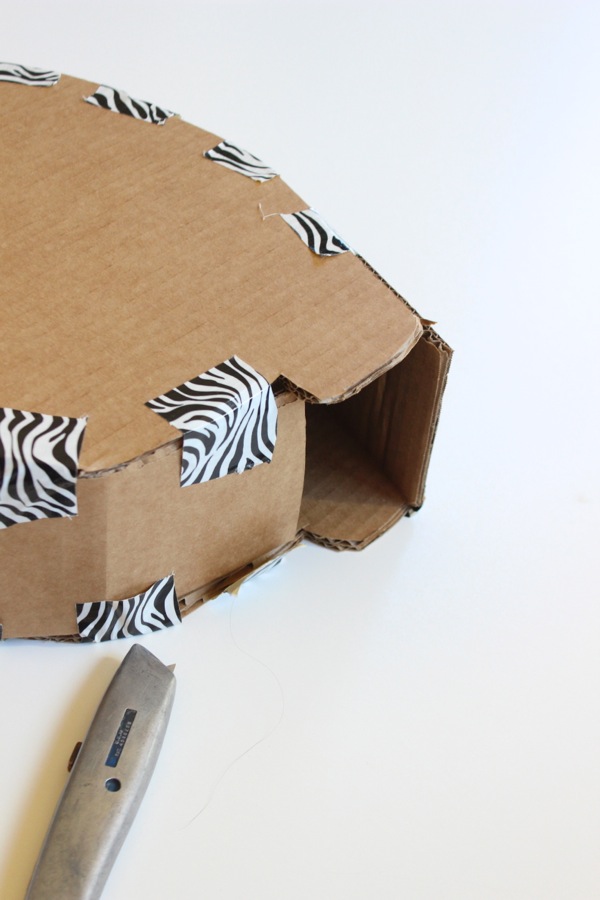
First, draw the shape of the glasses on cardboard. We used an 8×10 cut out of each lens and drew a larger tracing around it. Once everything is drawn, use an X-acto knife to cut the cardboard glasses shape. You will need a front and back, so once one pair of glasses is done, trace it on another piece of cardboard and cut it to create a second pair. Next, cut 3-inch wide strips of cardboard for the sides. Carefully bend the strips to fit the curves of the glasses.  Use small strips of duct tape (or masking tape) to secure the strip in between both pieces of cardboard glasses. We only had zebra print duct tape in our crafting bin, but we suggest using clear tape, or brown masking tape for this step. Before the entire thing is bordered, leave a small opening large enough to fit your hand in it. Drill (or punch with scissors) two small holes on top of the piñata. Insert the rope into one hole and use your hand to pull it along the inside so it can go up and out the other hole. Also, at this time, stuff the piñata with small toys and candy. Once it’s filled and the rope is attached for hanging, close up the last part of the piñata with a strip of the 3-inch cardboard and duct tape it.

IMG_9856

cardboard-sunglasses-cut-out-with-zebra-duct-tape

Once all the edges are securely taped, begin to cut 1.5-inch to 2 inch wide strips of paper. Use scissors to fringe the strips. Start to glue (Elmer’s Glue works here) each strip on the cardboard glasses. One crucial tip is to begin at the bottom and work your way up.

diy-sunglasses-pinata-black-and-bright-coral-gigantic-sunglasses

Once the entire thing has strips of fringe, cut out two large (8×10 size each) lenses for the glasses. Add glue to the back of them, and add them to the sunglasses frame.

We used Rocket Red™ colored paper, not card stock weight, for fringe around the piñata and Eclipse Black™ for the shades. How cool are those shades? Plus, it was pure entertainment for the kids as they hit it to find the goodies inside.

diy-sunglasses-pinata-black-and-bright-coral-gigantic-sunglasses-boy-hitting-pinata

diy-sunglasses-pinata-black-and-bright-coral-gigantic-sunglasses-girl-hitting-pinata

diy-sunglasses-pinata-black-and-bright-coral-gigantic-sunglasses

DIY Summer Vibes & Rays of Sunshine

summer-vibes-paper-backdrop-colorful-sunnglasses-arched-like-a-rainbow

We don’t know about you, but we can’t get through summer without our most favorite accessory, sunglasses. Thus, those little round (or square, oval, butterfly, oblong or aviator) must-have frames were the source of inspiration for our main backdrop, the rainbow of sunglasses.

The first step is to cut out colorful frames for all the glasses. You can use an electronic cutting machine like Silhouette America Cameo to cut the glasses, or trace and cut one you find online. We used Terrestrial Teal™, Outrageous Orchid™, Sunburst Yellow™, Rocket Red™ and Martian Green™. Add Eclipse Black™ lenses behind each frame. For the rays of sunshine radiating from the sunglasses, cut 3.5 inch strips of paper. Add them to a wall, and you’ve got yourself a pretty rainbow of sunglasses. To save the wall from any paint removal, use 3M Removable Putty. It worked great.

summer-vibes-paper-backdrop-colorful-sunnglasses-arched-like-a-rainbow-kids-playing-and-crafting-on-a-white-picnic-bench

summer-vibes-paper-backdrop-colorful-sunnglasses-arched-like-a-rainbow-kids-playing-and-crafting-on-a-white-picnic-bench

summer-vibes-paper-backdrop-colorful-sunnglasses-arched-like-a-rainbow-kids-playing-and-crafting-on-a-white-picnic-bench-and-blowing-bubbles

girl-wearing-black-paper-sunglasses

colorful-summer-vibes-paper-wall-decor-and-a-giant-pair-of-green-paper-sunglasses

summer-fun-bubbles-chalk-glasses-for-kids

DIY Mini Ice Cream Parlor

ice-cream-as-tall-as-me-diy-paper-ice-cream-awning

Ice cream on a hot summer day is just pure joy. Our goal was to re-create that feeling of an ice cream parlor and happiness on a summer day with an ice cream activity for the kids. We all know how quickly our children grow. We mark their height at the beginning of the school year, or when they are young, but we don’t do it at the beginning and end of the summer. We’ve never marked their height with ice cream before. Why not start now? It was a huge success – like creamy, vanilla ice cream combined with gooey, chocolaty brownies, drizzled with caramel and topped with a cherry success. Yes, it was that good, and fun!

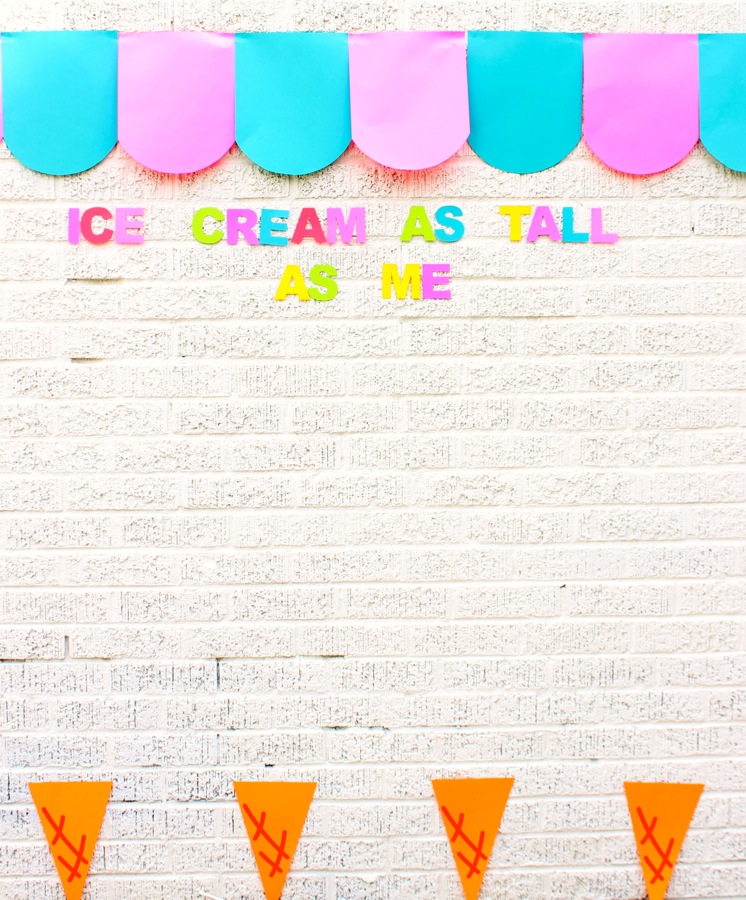
To make the DIY paper ice cream awning, use scissors to round one side of the paper. Line them up along the wall, and use 3M Putty to hang them along the top, straight-edge part. For the awning, we used Pulsar Pink™ and Celestial Blue® colored paper.

ice-cream-as-tall-as-me-diy-paper-ice-cream-awning

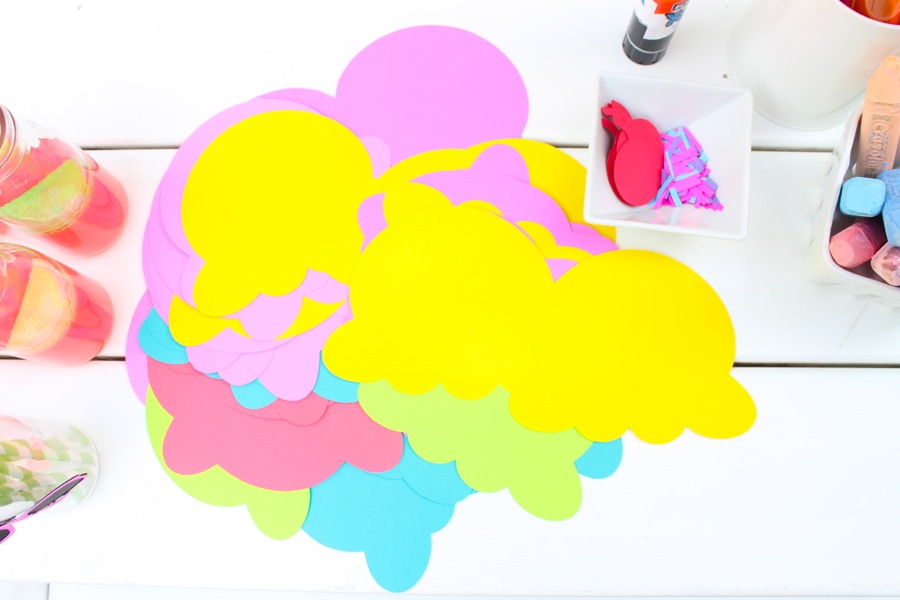
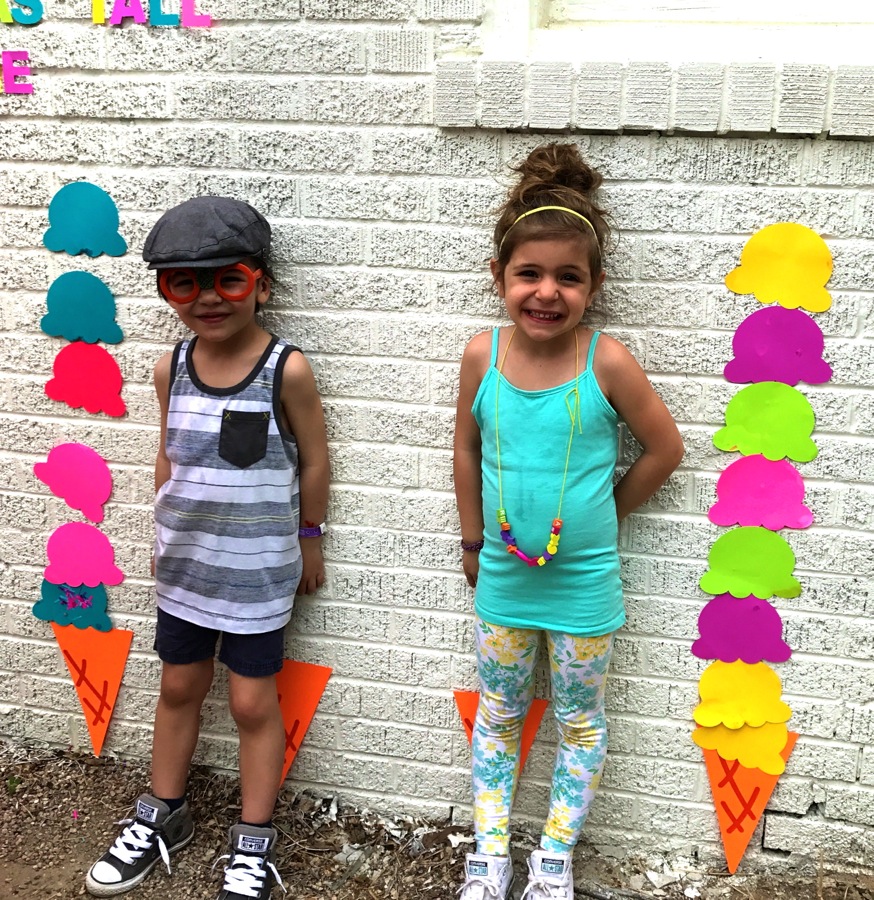
Trace and cut letters for the phrase, “Ice Cream As Tall As Me,” and add it to the wall under the awning. If you have a Silhouette electronic cutting machine, that will save you time, but it’s not a deal breaker for this project. Next, cut out triangles in the shape of ice cream cones. Tape the cones to the bottom of the wall. Cut out ice cream scoops 6 inches tall, which will help you give a “more accurate” estimate of each child’s height. Next, cut out sprinkles and cherries, so the kids can decorate their ice cream scoops with sprinkles, and finish their tall ice cream with a cherry on top. This was our kid’s favorite part.

paper-ice-cream-scoops-and-colorful-paper-sunglasses

paper-ice-cream-scoops-and-colorful-paper-sunglasses

paper-ice-cream-scoops-and-colorful-paper-sunglasses

paper-ice-cream-scoops-and-colorful-paper-sunglasses

One by one the kids ran over to their cone and stacked their ice cream. If only they could actually order an ice cream this tall. One can dream, right?

kids-taping-ice-cream-scoops-on-a-wall

boy-standing-in-front-of-paper-ice-cream-awning-and-ice-cream-scoops-as-tall-as-him

ice-cream-as-tall-as-me-stacked-colorful-ice-cream

baby-boy-standing-next-to-ice-cream-scoops-and-holding-bubbles

We enjoyed real ice cream shortly after the breaking of the piñata, and it was oh so yummy. The countdown is on – 17 more days of school, and then school’s out for summer! You can bet we will have our shades on!

baby-boy-with-sunglasses-on-his-back-and-a-newsboy-hat

This post is in partnership with ASTROBRIGHTS. We were crafting with and coloring on ASTROBRIGHTS paper long before this post. It’s always been a fave product of ours. Thank you for supporting the brands that support j. sorelle. ASTROBRIGHTS was one of the first, so we are very grateful.

Affiliate Disclosure: This post contains affiliate links, which means j. sorelle receives a small commission from the sale of certain items; however, the price is the same for you, whether it’s an affiliate link or not. 

DIY Earrings As Sweet As A Pineapple

IMG_9806

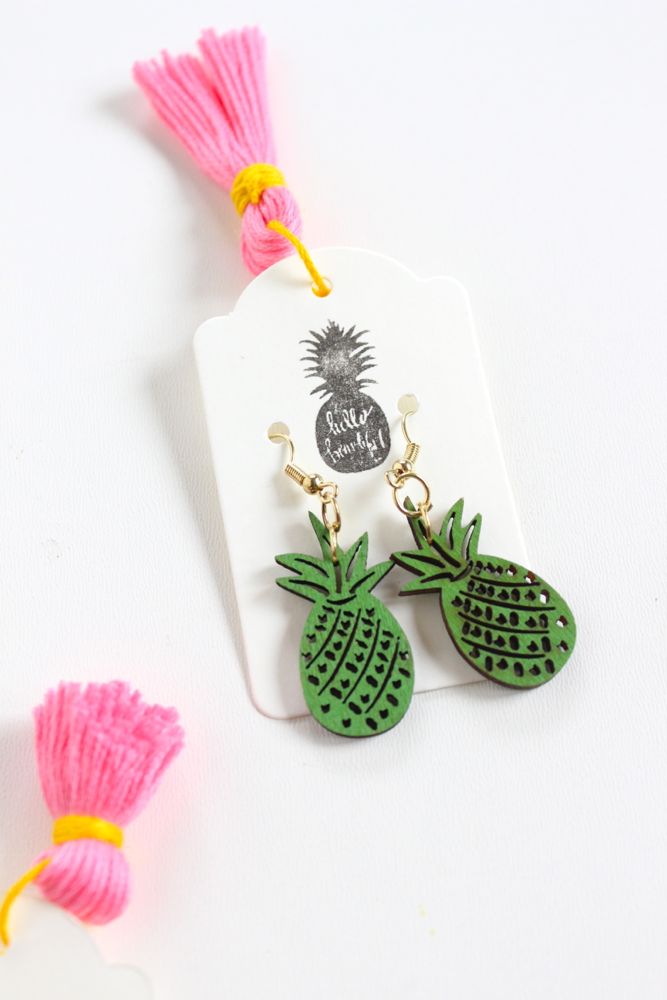
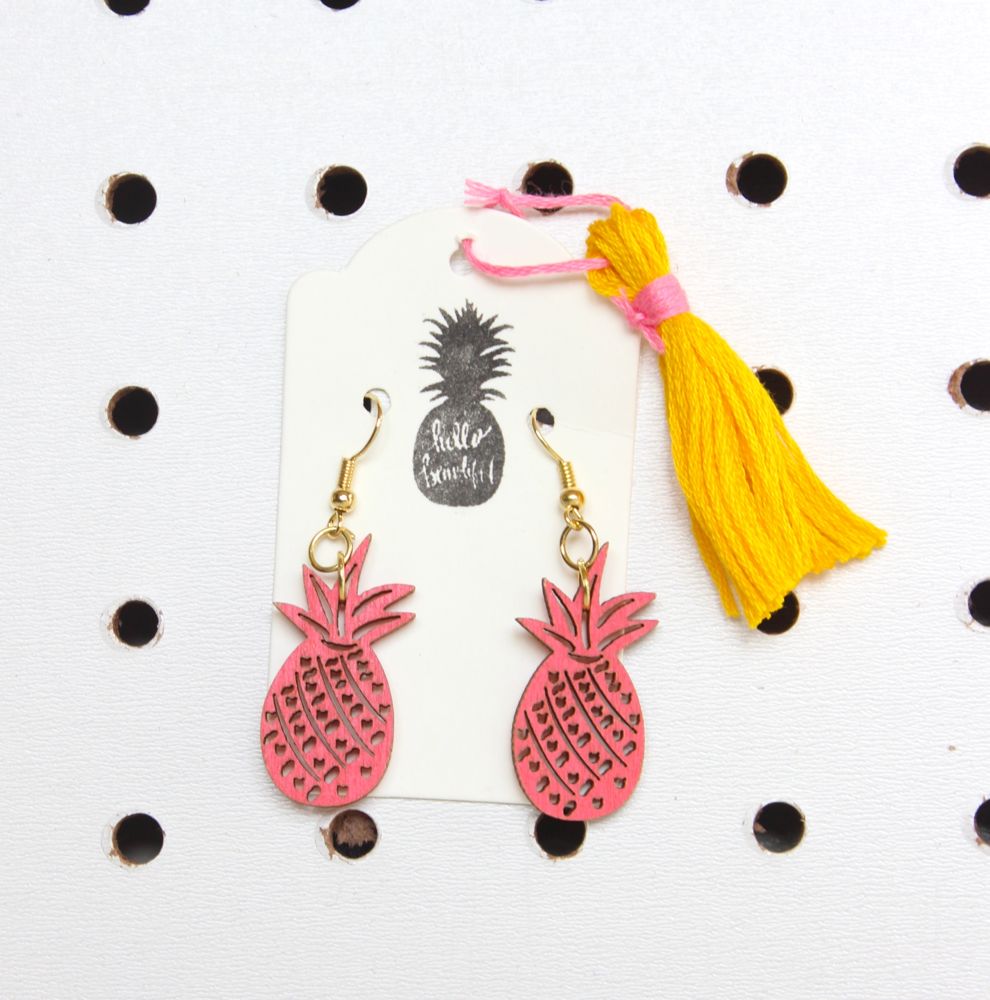
We find inspiration for our blog from everything around us – magazines, colorful patterns, Pinterest, blogs, people, nature and fashion. Sometimes an idea for a future project and party comes to us late at night when we can’t sleep. Other times, we are brainstorming out loud. The idea for these adorable DIY pineapple earrings came to us while perusing the aisles of Pier 1 Imports (one of our fave home stores). We stood in front of a tropical themed tablescape looking at tiny pineapple table confetti. Instead of seeing it for what it was, we saw the tiny fruit die-cuts as DIY earrings. We call it our confetti hack.

We love pineapples, we crave piña coladas on the beach (our favorite vacation drink growing up was virgin piña colada’s and strawberry daiquiri’s) and we love a good DIY. So, this was a really fun pineapple project to work on.

These DIY earrings would make for lovely gifts for girlfriends and mom (Mother’s Day is coming up, y’all).

So bring me two piña coladas (or pineapples)
One for each ear. 

diy-pineapple-earrings-pink-yellow-tassels

Materials:

Directions:

Use the pliers to open two earring jump rings. One will go in the middle largest opening in the top of the pineapple, and the other will attach to the first ring and the earring wire hoops. Use the pliers to close the rings. The pineapples are thin, so be gentle with them.

jewelry-pliers-green-pineapple-gold-plated-earring-supplies

diy-pineapple-earrings-pink-yellow-green

diy-pineapple-earrings-yellow-tassel

If you want to present them in a cute way, use a small hole punch to punch two holes in a card stock tag. Insert the earrings through the holes and add the safety backs. A tassel makes everything cuter, so we attached a colorful tassel. Finally, add a custom touch with a hello beautiful pineapple stamp. We made the stamp with our Silhouette Mint, which is so easy and fun to use. We can a little stamp happy each time we use it.

card-stock-with-black-pineapple-stamp-and-yellow-tassel

diy-pineapple-earrings-pink-yellow-tassels-green-pineapple

diy-pineapple-earrings-pink-yellow-tassels

diy-pineapple-earrings-pink-yellow-tassels

When you make/wear the earrings, carry these pineapple vibes…

be like a pineapple
stand tall,
wear a crown,
& be sweet on the inside


SHOP THE POST
[show_shopthepost_widget id=”2651776″]
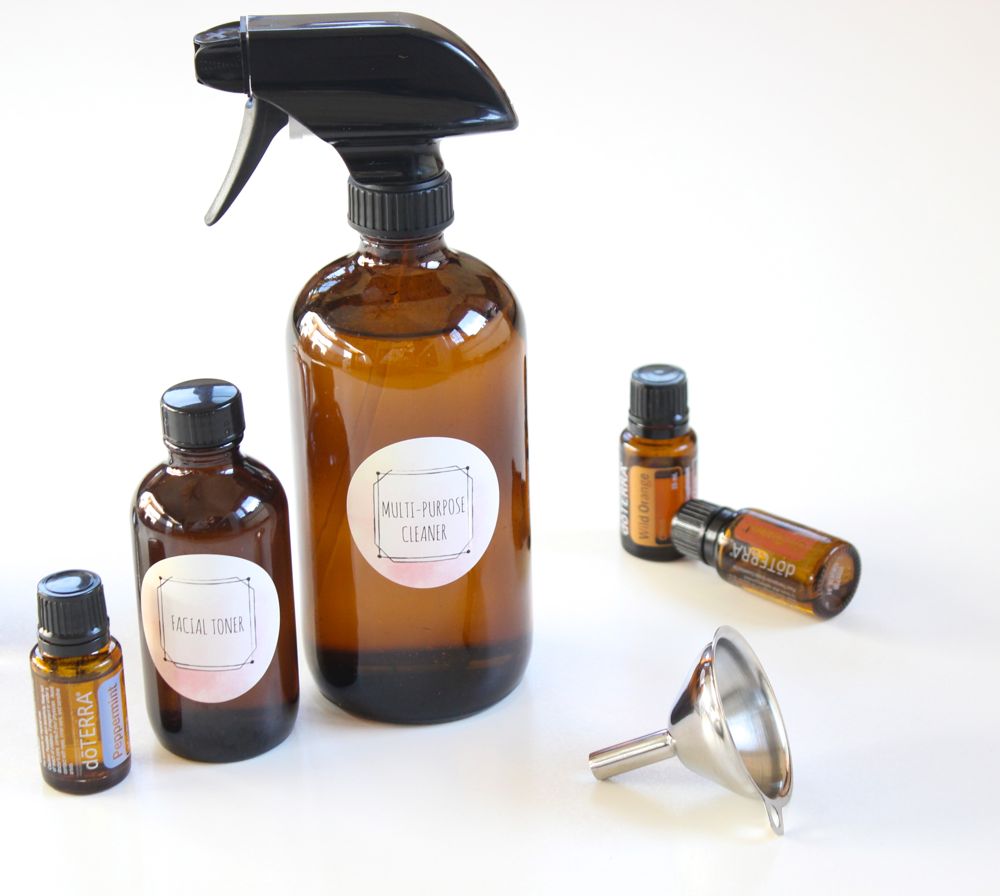
Homemade Cleaner with Essential Oils

homemade-cleaners-made-with-essential-oils

We were raised in a home with a more homeopathic approach to healing when we were sick, and it’s something that we (especially since becoming moms) have become increasingly grateful for. We have some knowledge (there’s still so much more to learn) about natural ways of healing the body. A recent switch has been swapping out cleaners with harsh ingredients and toxic chemicals for healthier, natural ones that clean just as good, and are much healthier for our bodies. We love Norwex (thanks to Jodi), and homemade products with doTERRA essential oils.

First, Jessica tackled homemade lip balm (omg, it’s a favorite around here). Second, she made a multi-purpose cleaner. Third we were gifted a homemade facial toner. We can’t take credit for the amazing recipe for the toner, but Cara shared it. Yay…and it’s all perfect timing for spring cleaning!

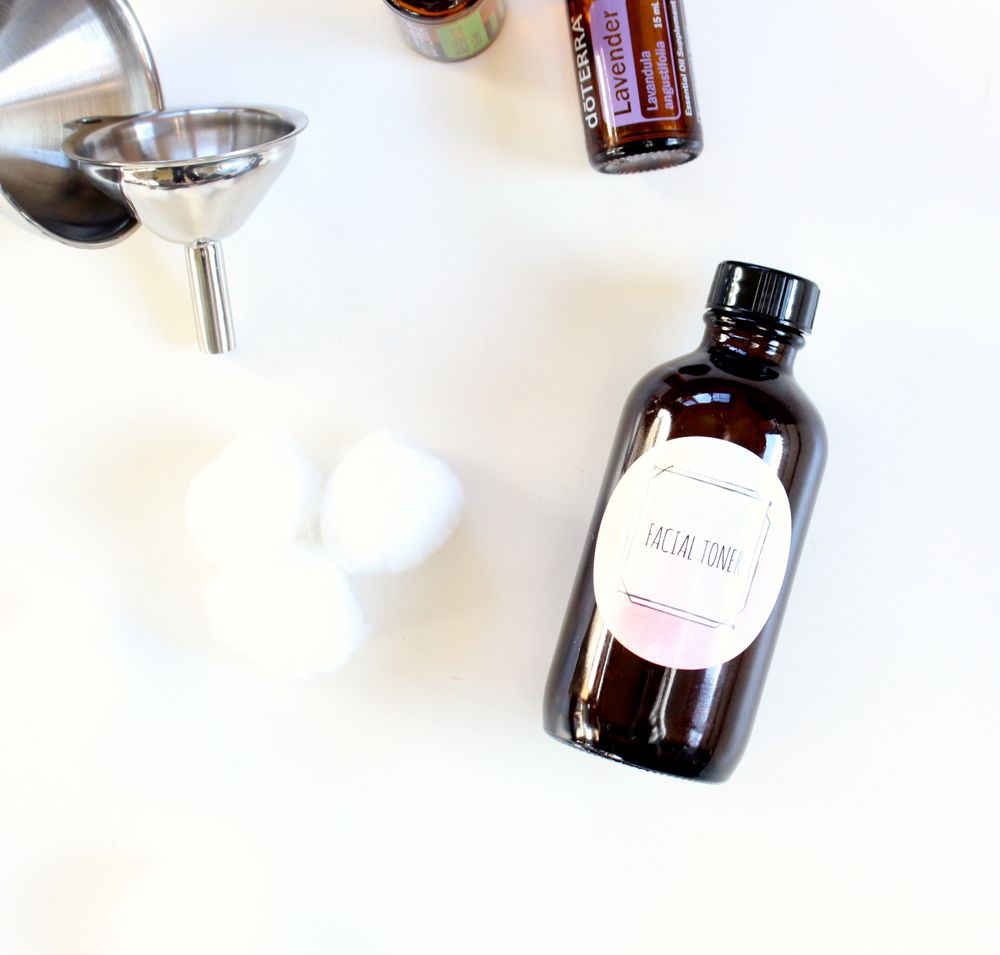
homemade-facial-toner-with-essential-oils

Facial Toner
recipe from Jessica’s awesome neighbor Cara

Materials:

Directions:

Pour the ingredients into the amber glass jar (this is important – do not use plastic, and make sure the glass is tinted). Use a funnel for a spill-free experience. Store in a shaded spot.

Now onto an amazing homemade multi-purpose cleaner…

homemade-multi-purpose-cleaner-with-essential-oil

Multi-Purpose Cleaner
adapted from doTERRA
Materials:

Directions:

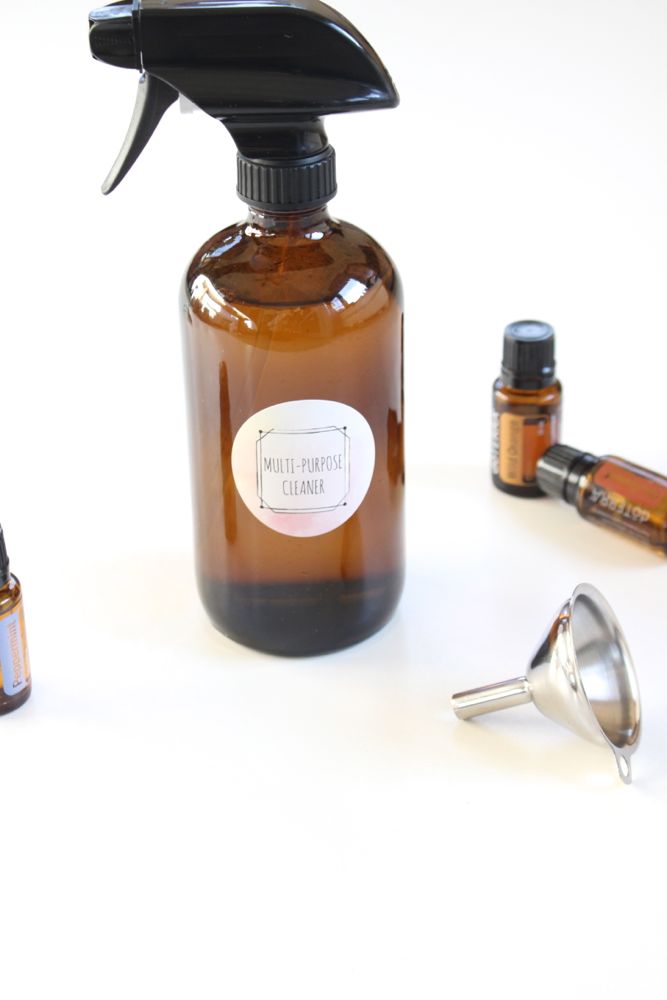
Pour the ingredients into the amber glass jar (this is important – do not use plastic, and make sure the glass is tinted). Use a funnel for a spill-free experience. Store in a shaded spot, and shake before using.

If you’re interested in buying or selling doTERRA essential oils or Norwex, email Jessica and Jodi at hello@jsorelle.com with questions on how to order or how to sell them.

Labels were made with Avery.

Note: Skin irritations can occur with essential oils. Avoid contact with eyes. Ask a doctor about the ingredients in the toner, especially if you have sensitive skin. We love these products, but we are by no means a professional, and these were not endorsed by the FDA. We are simply bloggers who share products we love, and things we love to make. 

[show_shopthepost_widget id=”2651725″]
DIY Pineapple Fingerprint Easter Eggs

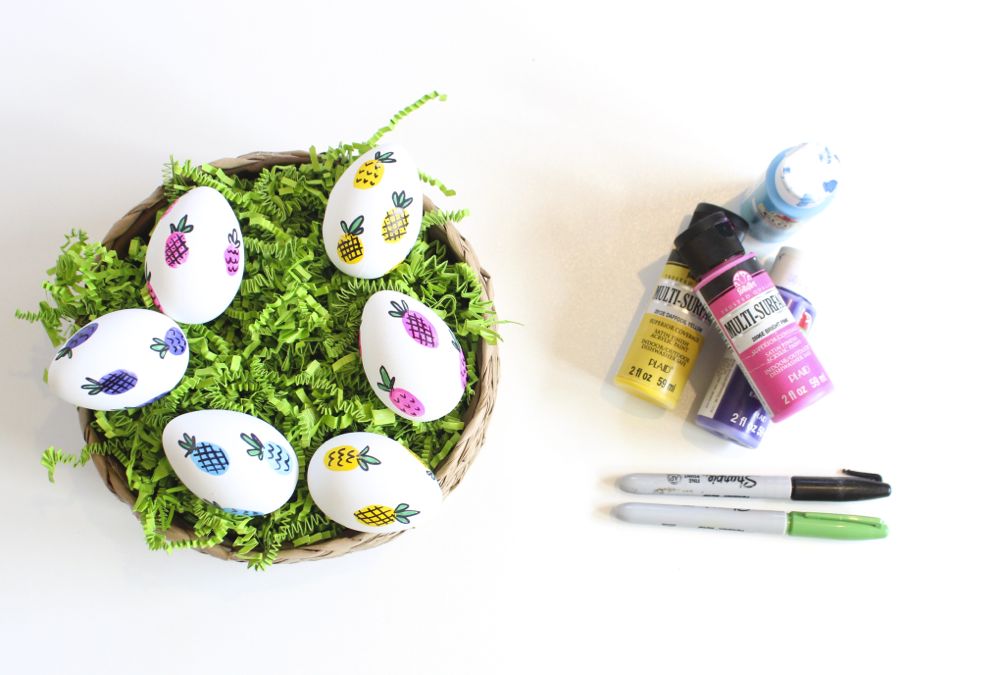
easter-eggs-in-a-basket-with-colorful-pineapples-and-green-grass

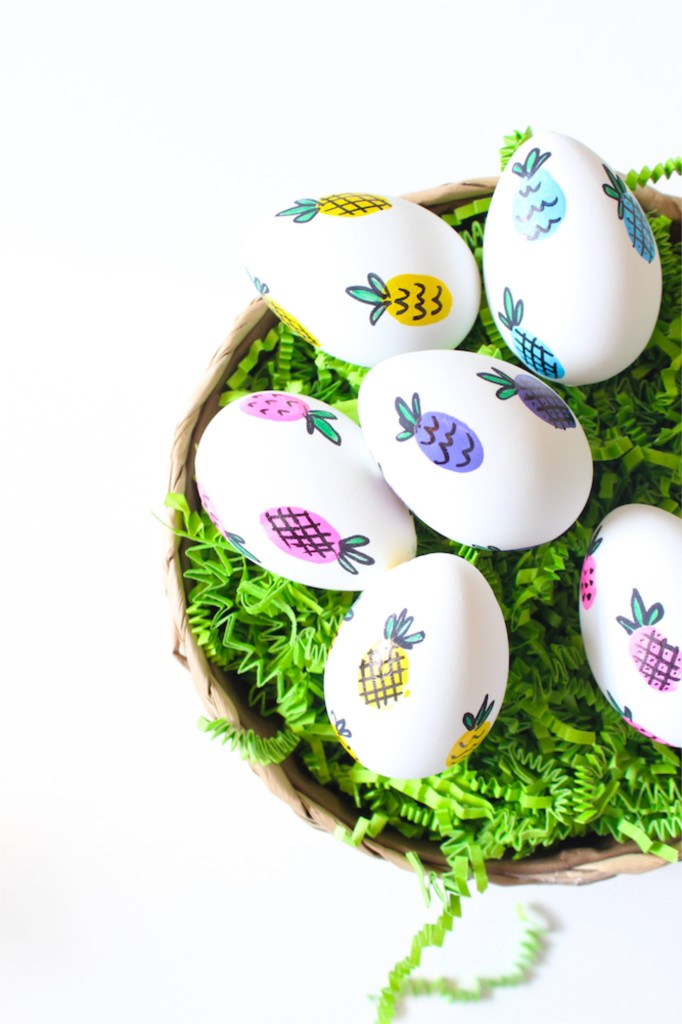
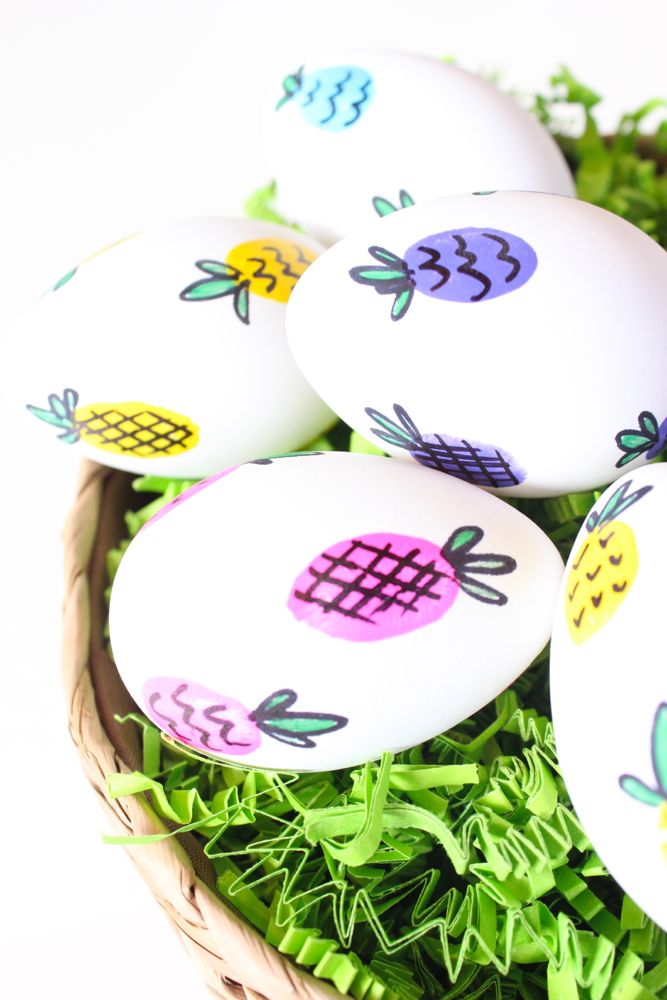
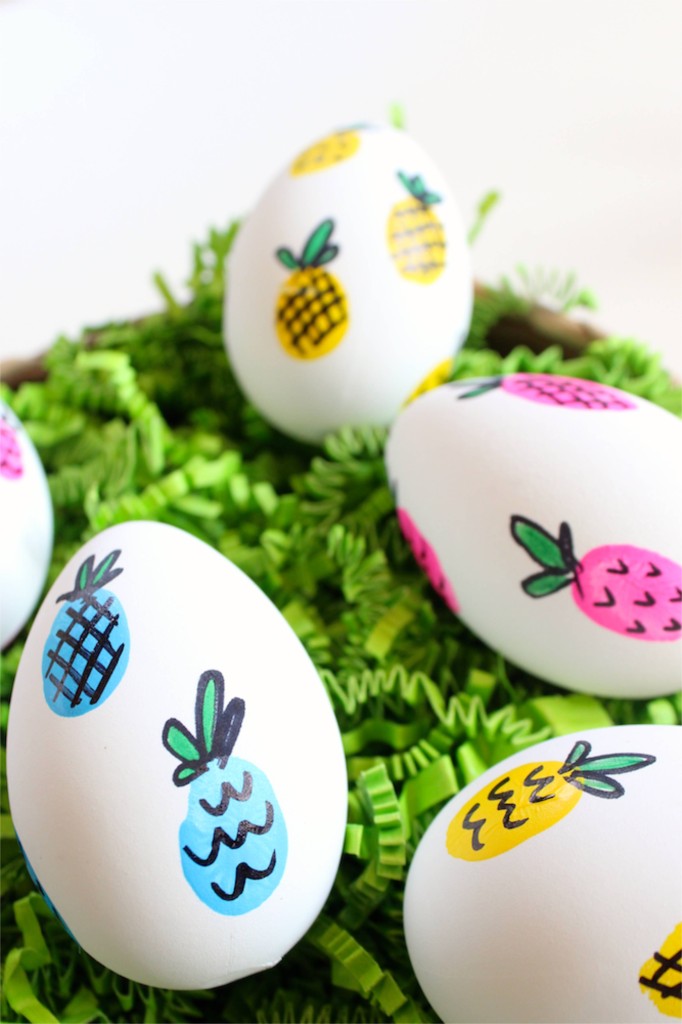
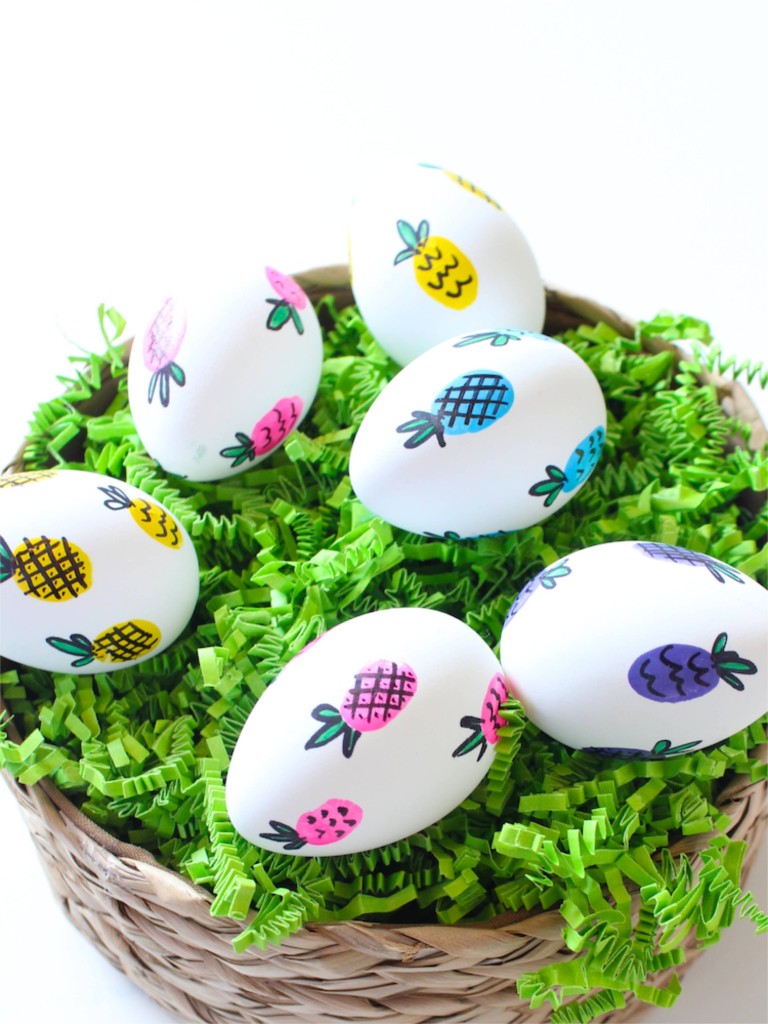
We’ve feeling the Easter vibes today with a recent DIY Easter egg craft. These cuties were inspired by a pattern we saw in Target’s Bullseye’s Playground. You will literally make your mark with these eggs because the adorable pineapples on the eggs are made with fingerprints. Yes, adult or child fingerprints are all you need to make these colorful eggs. They are easy and quick, adorable, family-friendly and cute as can be.

easter-eggs-in-a-basket-with-colorful-pineapples-and-green-grass

Materials:

  • Acrylic paint, Michaels
  • Sharpie marker, black and green
  • Eggs, we prefer the faux eggs that can be used year after year, but real, hard-boiled ones work too

Directions:

Step 1: Dab your (or your kids) pointer finger in paint, and then press firmly on the egg. Your fingerprints will make the perfect shaped pineapple.

easter-eggs-in-a-basket-with-colorful-pineapples-and-green-grass

Step 2: Repeat step 1 until the eggs is covered in fingerprints. Let dry.

easter-eggs-in-a-basket-with-colorful-pineapples-and-green-grass

Step 3: With a Sharpie, add black lines on the pineapples – diagonals, waves and small v’s all work for pineapples marks. Don’t forget to draw the top of the pineapple. Fill in the leaves with a green Sharpie.

easter-eggs-in-a-basket-with-colorful-pineapples-and-green-grass

All this pineapple talk has us in the mood for a cocktail. Who’s ready for a pina colada?

easter-eggs-in-a-basket-with-colorful-pineapples-and-green-grass