DIY Glitter Menu

sequin menu

I am just in love with this menu Jenna from Fleur de Lis made for our recent Bachelorette Bash for Kimi. All photos of the party {thanks to the talented photographer and bridesmaid Amy Forness Photo} to come. Wouldn’t eating be more fun and just overall fabulous if we all had sequins menus like this for every meal?

Jenna printed the menus, then I used Elmer’s Craft Glue to glue sequins to each menu…sequins starting heavy in the corner, then scattered. If you need a menu like this in the future, e-mail us at hello@jsorelle.com. We can do it for you.

diy sequin menu

DIY sequin menu

DIY sequin menu

DIY glitter menu

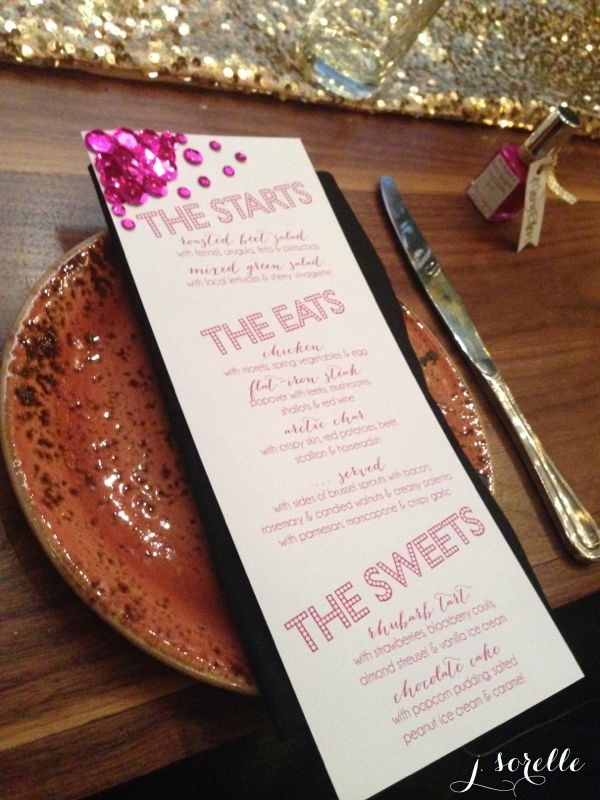
{top and bottom images via Amy Forness Photo, and images in the middle from my cell phone}

DIY Cosmetic Bag Party Favor

DIY cosmetic bag

How do you leave a little sparkle?

Maybe its your personality? Smile? Random, simple acts of kindness? A charming accent? Whatever it is, find it and do it because I love people who enter a room and own it, and leave me with a good feeling, or a memory when they walk out the door. I’m talking about the people I don’t forget, and leave a trace of their optimism behind with me. I have friends like this, who are special and simply amazing, and I believe they “leave a little sparkle wherever they go.” So, for a recent Bachelorette celebration for one of my bestie’s, I made cosmetic bags with this quote to go along with our Sparkle theme for the weekend. More photos of that extravaganza to come, but for now, a DIY.

You’ll Need
$3 cosmetic bags from Target {in the travel cosmetics section}
Chacopaper from Michaels
A printed quote
pen
Krylon Gold Leaf Pen from Michaels

DIY cosmetic bag

How To
Use Microsoft Word to create your quote in a favorite font.
Print your quote on a regular piece of printer paper.
Cut the quote and a piece of the Chacopaper the same size as the quote.
Layer the paper, bottom-up, starting with the ‘chalky side’ face down on the cosmetic bag {you can feel the ‘chalky’ side}, your quote and then top it off with the ‘tracing’ paper.
DIY cosmetic bag party favor
Use a black pen to firmly {without tearing} trace the quote on the tracing paper.
Once finished {or you can even get a sneak peek to see if its working if you can lift the edge without moving the paper} lift the 3 sheets of paper from your cosmetic bag and you will see a traced image of your quote. I used the white Chacopaper, so it appeared white like the photo below.
Use the Gold Leaf pen to carefully trace your ‘image’
Voila.
DIY cosmetic bag party favor

DIY cosmetic bag party favor{images via j. sorelle}

DIY Homemade Lavender Body Butter Recipe and Planter Gift for Teacher

thank you for helping me grow teacher gift

I’ve been loving lavender lately. Can’t seem to get enough, so it was my inspiration for the kids teachers, ‘end-of-year, thank you for everything’ gift. This week the kids happily handed their teachers a lavender plant with its roots planted in a DIY decorated terra-cotta pot with the phrase, ‘thank you for helping me grow,’ along with homemade lavender body butter. Teachers need to relax, so hopefully lavender body butter in a mason jar {who doesn’t love a Mason jar} they can rub on their hands at feet at the end of a long day does the trick.

For the Lavender Plant
You’ll Need

terra-cotta pot
Sharpie oil-based paint markers from Home Depot
lavender plant
dirt

How To
Find a free printable or ‘art’ inspiration for your quote. I used this as an inspiration from Somewhat Simple.
Free hand your art on the terra-cotta pot or you can cut shapes and trace {you can lightly use a pencil or chalk first, and then trace with the Sharpie markers, which I loved}.
I re-traced the words and shapes 2-3 times so the Sharpie colors were darker/brighter…just wait until the first coat dries, which is about 15 minutes or less.
Have your child sign his/her name in the back of the pot.
Then, plant the lavender plant.

DIY teacher gift

DIY teacher gift

DIY teacher gift

DIY teacher gift

For the Body Butter
You’ll Need
mason jar with a wide lid
1/2 cup shea butter, raw and organic {from Amazon}
1/2 cocoa butter, raw and organic from Amazon}
1/2 cup olive oil, organic
1/2 cup coconut oil, organic and unprocessed
40 drops lavender essential oil {doTERRA brand} or whatever combination of oils you enjoy

How To
Add the oil ingredients into a double broiler, or add a glass bowl onto a pot with boiling water in it.
Mix with a whisk until completely melted.
Remove the bowl from the pan, remove whisk and let cool for a couple of minutes, then place in the refrigerator until it is chilled {hard on top}, which took 1.5-2 hours.
Remove from the refrigerator and begin to blend with a hand mixer for a whipped texture. Add your essential oils. Whip until you have a nice texture and then place in mason jars.

note: I am not a body butter expert, but I read that the butter can lose its whipped texture and harden slightly, but it’s still good. And, it will last for several months. It will likely melt in hot temps above 70, so keep it around room temperature. I’m only a week into trying it and I think its lovely. I use coconut oil daily as a lotion, so I’m use to the oil texture on my body, but your dry skin will thank you.

steps to homemade body butter

homemade body butter

homemade body butter

DIY lavender teacher gifts

{images via j. sorelle}

DIY Succulent Planter to Celebrate Happy May Day

diy succulent_mayday_jsorelle On May 1, countries around the world celebrate a traditional springtime festival called May Day. In honor of May Day, and blooming buds and bright colors, I created a DIY Succulent gift to hang from my neighbor’s front door. I bought one for myself. I’m hoping I can keep it alive – I don’t have the best track record with indoor plants.

You’ll Need:
a small can {I used an old corn can}
a piece of fabric
modge podge
a drill
rope or twine

How To:
Remove the wrapper from the can.
Cut a small piece of fabric you can add to the can, leaving some space on the bottom for cutting with a sharp razor.
Apply Modge Podge all around the can.
Add the fabric to the can.
Once dry, use a sharp razor to carefully cut the extra fabric on the bottom of the can.
Apply Modge Podge to the entire outside of the can on top of the fabric to seal it.
Use a drill to drill two holes on the sides of the can for the rope, and one hole on the bottom for adequate drainage.
Add twine or rope into the holes and tie a knot on the inside so it stays in place.
Add porous soil and the succulent.

celebrated in many countries as a traditional springtime festival

celebrated in many countries as a traditional springtime festival

diy succulent_mayday_jsorelle

diy succulent_mayday_jsorelle

celebrated in many countries as a traditional springtime festival

celebrated in many countries as a traditional springtime festival

celebrated in many countries as a traditional springtime festival

celebrated in many countries as a traditional springtime festival

{images via j. sorelle}

tgif link love

Have yourself a lovely Spring, Easter weekend…

1. Do yourself a favor, and listen to some John Legend this weekend. I have always liked John Legend. But after an intimate concert my hubby and I went to last week {yes, date night}, I’m obsessed! His voice was flawless, his humor was sincere and funny and his honesty in sharing his story made him even more personable and lovable. I would share our video we took of his famous “All of Me” but you would hear my hubby and I in the background singing…and that may ruin it for you. So, this weekend, listen to  ‘You and I’ {1st video below…song starts at 0:50}, ‘Good Morning,’ ‘Tonight {Best You Ever Had}’, ‘All of Me’ and one of my faves, ‘Stay with You.’

2. Jenna daydreams of devouring this daily, and now that she’s no longer preggo, she can! Cheers to Moscato Jello Parfaits.

3. This birthday cake you can send in the mail is better than a chocolate cake!!

4. Make this French Toast for brunch this weekend…SO incredibly delicious.

5. This video and story couldn’t be any sweeter, more beautiful, heartbreaking or inspiring.

 {video via YouTube}