DIY pearl necklace

We love the look of a chunky pearl necklace, but we don’t always love the price tag associated with it. Erica at P.S. I Made This put together a step-by-step tutorial on how to make one yourself. You can find relatively inexpensive pearl necklaces, and I love the idea of using an antique brooch for a little sparkle.

Inspiration Board

DIY Version


For the how-to video, visit fashionista.com.

 {images via P.S. I Made This}

adorable diy cake stands

When I first saw these DIY cake stands, I just knew I had to make them. There was a warning from the creative inventor, Jennie from A Well Crafted Party, that whoever tries to make one will be addicted and just have to make more. She was right. I admit, I’m addicted. Now you can be too. Thanks, Jennie.

DIY Cake Stand Tutorial, featured at Bump Smitten.

Materials:
1 plate— 4-inch plates make great cupcake stands
1 candle stick, goblet or sundae glass
Epoxy
1 heavy book
1 can of spray paint
1 can of acrylic sealant {I skipped this step due to time}

Instructions:
1. Spray paint your candle stick, goblet or sundae cup the color you wish the base of your cake stand to be.
2. Find your plate—any plate will work {square or round} but I recommend using one that has the color or image you would like as this will not be painted to keep the cake stand food friendly.
3. Affix the plate to a candle stick, goblet or sundae cup {the larger the base, the more sturdy the cake stand} using a glue made for ceramics and glass.
4. Place a heavy book on top of the stand and let the epoxy set according to directions. After the epoxy has set you should be able to pick up the stand with no movement from the candlestick or plate.
5. Before use, wash the top of the plate with dish soap and water. The stand is not dishwasher safe but is food-friendly as long as food is not touching the painted surfaces.

Read more detailed instructions from the original tutorial on Bump Smitten here.

P.S. I’ve used these stands for cupcakes, food displays and votives. Let your creativity fly.

{images via Bump Smitten}

stars and stripes detail

I love the look of the vintage American-inspired picnic table above. I’m a sucker for all things worn and antique-looking, so I want to take a seat on that picnic bench right now, and then bring it home with me. Authentic. Simple. Love it.

Below are some ideas to add that extra special detail of red, white and blue to your party.  

Sparkler Favors, Twig and Thistle

Download the free printable for the sparklers here.

Download the Light It Up matchbox cover and straw tag here.

Pinwheel Bouquet, Good Housekeeping

DIY Vase with Patriotic Ribbon, Good Housekeeping

 I love all-white flowers, especially hydrangea. This standard glass vase gets a stars and stripes facelift with simple ribbon…a diy project that will be sure to get noticed. Just measure the vase’s circumference, then cut lengths of patriotic ribbon to size. Attach with double-sided tape to cover the vase.

Patriotic Table Runner, Good Housekeeping

This crepe paper runner {aka streamers} can be made in minutes. Cover a table with a white paper tablecloth. Cut lengths of blue and red crepe paper to the lengths of the cloth. Weave the colors, as shown. To keep the runner in place, use double-sided tape on the edges.

 Star Medallion, Martha Stewart

Make these fabric medallions and hang from your porch, above your table or as a backdrop to a dessert table. Adorable. For directions, go here.  

Nautical Napkin Rings, Martha Stewart

1. Bind 96 inches of off-white cord at 12-inch intervals with clear adhesive tape. Snip through tape and cord to create 8 lengths. Thread each length through a boat snap {Boat snaps, also known as eye snaps, can be found at boating-supply shops}.
2. Loop cord, aligning ends on a 2-inch piece of 3/4-inch-wide off-white twill tape smeared with white or fabric glue.
3. Pinch sides of cord together to create 2 smaller loops, securing with tape.

Lanterns on a String {Ribbon}, Hostess with the Mostess

Hang lanterns with red, white and blue ribbon and be sure to light a candle inside for a warm glow throughout the evening.

Striped Straws in Mason Jar with Name Tag, Celebrations at Home

Get the DIY name tag printable here.

DIY Fabric Flower, Celebrations at Home

I love this flower idea. It can be added to any basket, box or bucket. It’s that little extra something that makes the presentation special.

You’ll Need
Strips of fabric cut to size with pinking shears
A button
Needle & thread

How To
Begin layering your strips of fabric in criss-cross patterns until you have a full circle.
Then place your button in the center and sew a few stitches through it and the fabric to keep it all together.
Apply the ‘flower’ using glue dots

{images via Country Living, Twig and Thistle, Good Housekeeping, Martha Stewart, Hostess with the Mostess and Celebrations at Home}

DIY photo lantern

photo lantern

One of my fave DIY projects has made an appearance several times on this blog…diy photo lanterns. I’ve made them for a several parties, and people continue to make comments about how much they love them. So, I’m going to keep a good thing going and attempt to share my how-to instructions to make this easy, affordable DIY project that will impress your guests with their personal touch and warm, soft glow…and have you looking like a little Ms. Martha Stewart.

You’ll Need:
black and white vertical photos
vellum paper
lanterns {I bought mine from Pier 1, but have seen adorable lanterns at Pottery Barn Home Décor too}
double-sided tape
scissors
candle {real or fake will work}

How To:
Measure the openings on the lantern where the photos will be placed
Edit black and white photos on a computer program to the exact size of the lantern openings {I just used Microsoft Word to adjust the size accordingly}
Print the photos on vellum paper on a laserjet printer
NOTE: An ink jet printer does not work as well because the ink is too wet once printed on the vellum
If needed, cut the photos and adjust them accordingly
Place a small piece of double-sided tape on the corners of the lantern opening
Place the photo on the glass and press gently on all sides and corners
Put a candle inside the lantern and light it before party guests arrive
voila

photo lantern with candle

{p.s. this makes a great gift for your mother or mother-in-law with photos of the grandkids, or a bride with engagement photos}

photo lantern with candle inside

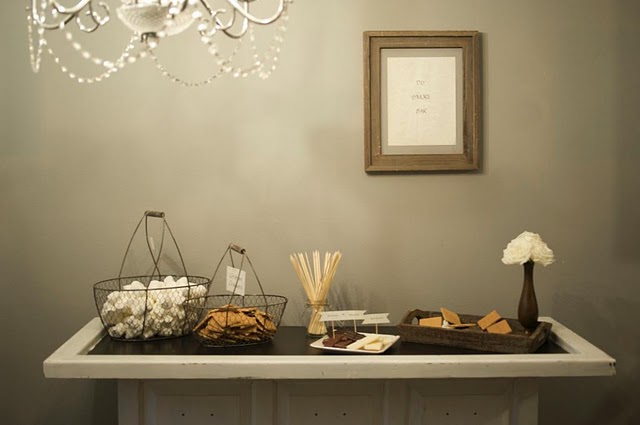
give us some more s’mores, please

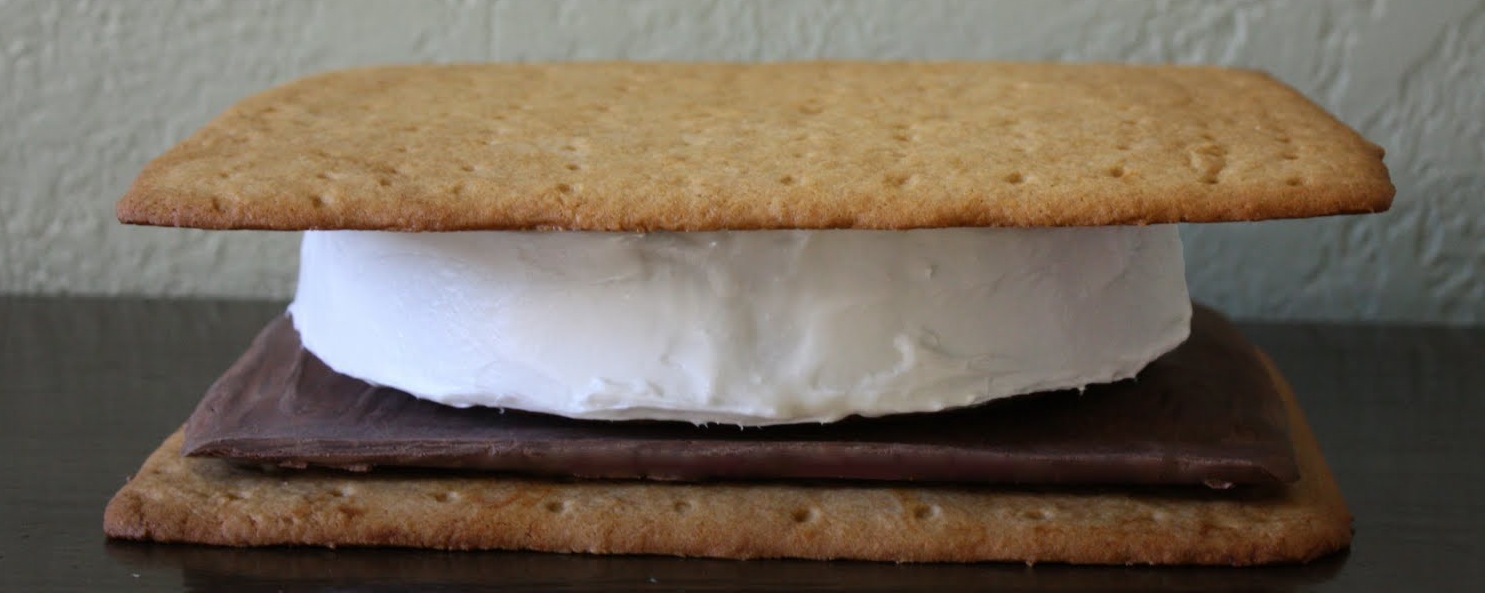
 Toasted, gooey marshmallow goodness combined with rich, decadent chocolate squished between two, crisp honey graham crackers. Yummy. My mouth is watering for a s’more as I type!

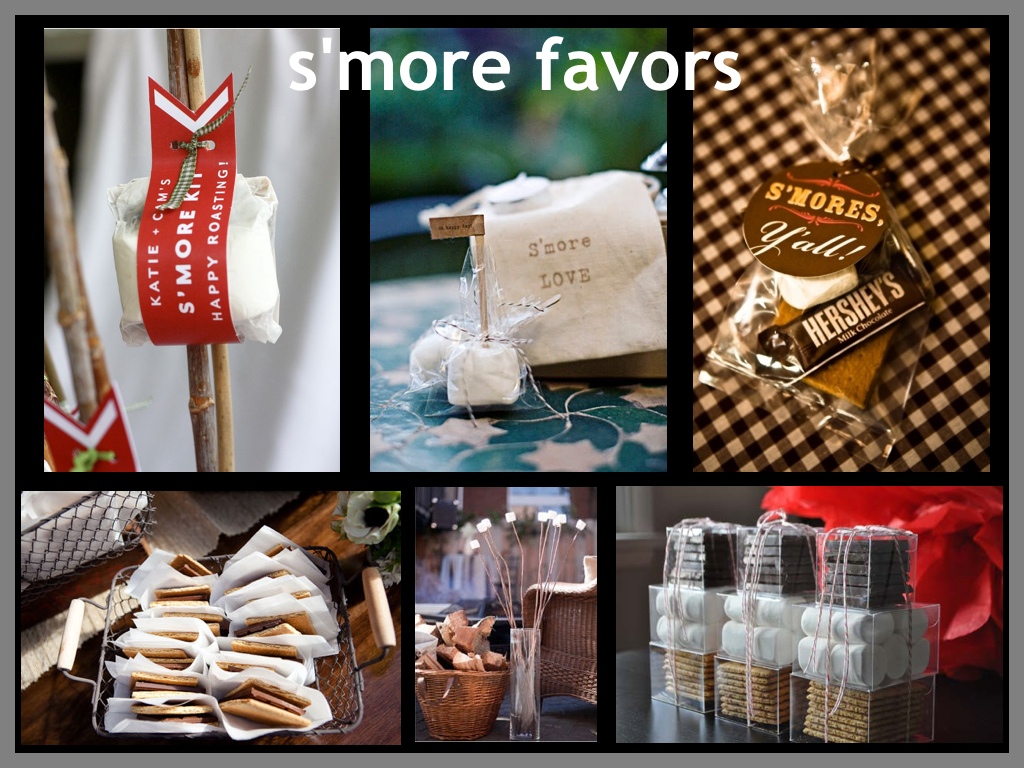
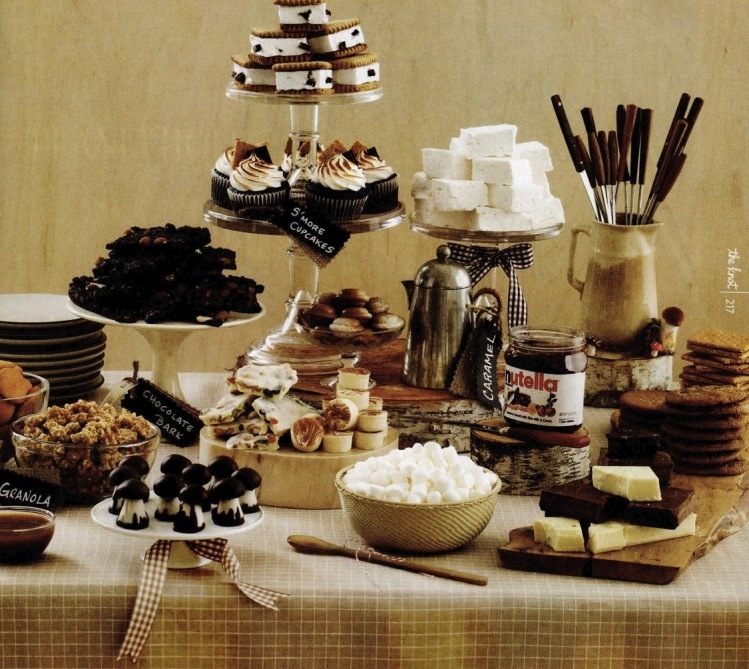
The summer-time favorite  can be prepared and styled so many different ways –  whether your hosting a fancy wedding or a backyard BBQ, you can never go wrong with a s’more. Your guests will be saying, “give us some more s’mores please!”

S’more Favors

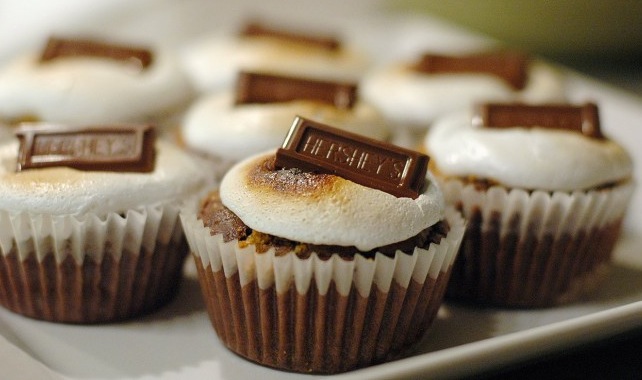
S’more Cupcakes
{recipe by Pizzazzerie}

Ingredients
Crumbs
6 graham cracker boards (oblongs)
2 Tbsp each sugar and melted butter
1/2 cup mini semi-sweet chocolate chips

Cupcakes
2 1/4 cups all-purpose flour
1 1/2 cups sugar
3/4 cup unsweetened cocoa powder
3/4 tsp baking soda
1/4 tsp salt
1 1/4 cups buttermilk
2 large eggs
1/2 cup each canola oil and water
1 Tbsp vanilla extract

Frosting
8 large egg whites
2 cups sugar
1/2 teaspoon cream of tartar
2 teaspoons pure vanilla extract

Directions
Heat oven to 350ºF. Line 24 muffin cups with paper liners.

Crumbs: Process graham crackers in food processor until fine crumbs. Add sugar and butter; pulse until blended. Spoon about 2 tsp into each muffin cup. Top with 1 tsp mini chocolate chips.

Cupcakes: In large bowl, whisk flour, sugar, cocoa, baking soda and salt until blended. In medium bowl, whisk buttermilk, eggs, oil, water and vanilla until blended; whisk into flour mixture until smooth.

Spoon about 1/4 cup batter into each muffin cup. Bake 20 to 25 minutes until wooden pick inserted in center comes out clean. Let cool completely.

Place egg whites, sugar, and cream of tartar in the heat-proof bowl of an electric mixer. Set over a saucepan with simmering water. Whisk constantly until sugar is dissolved and whites are warm to the touch, 3 to 4 minutes.

Transfer bowl to electric mixer fitted with the whisk attachment, and beat, starting on low speed, gradually increasing to high, until stiff, glossy peaks form, 5 to 7 minutes. Add vanilla, and mix until combined. Use immediately.

Top cupcakes with marshmallow frosting and garnish with chocolate bar and extra graham cracker crumbs!

S’more Cake
{by The Birthday Blog}

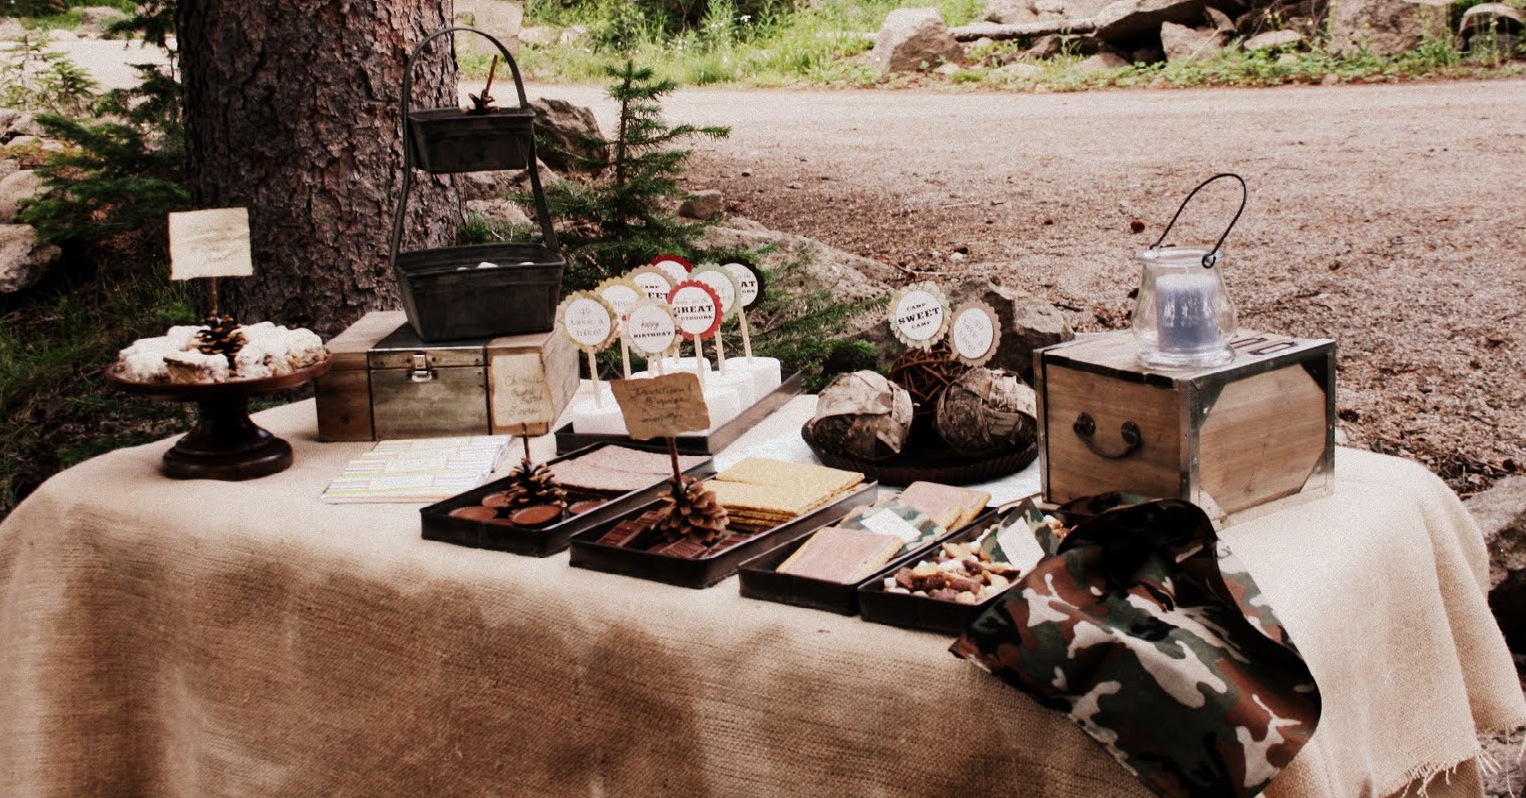
S’more Dessert Bar
{
check out the rest of the adorable camp party with the s’more dessert bar by Moore Minutes}

{Postcards and Pretties dessert buffet}

{Amy Atlas s’more food station}

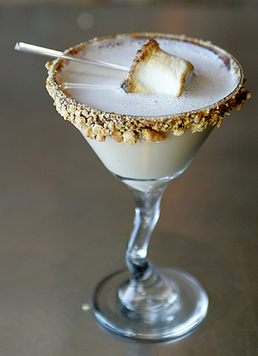
Wash it all down with a
S’more Martini
{recipe by The Daily Find}

 2 Ounces Chocolate Vodka
2 Ounces Bailey’s Irish Cream
2 Ounces Cream de Cacao
2 Ounces Vanilla Vodka
2 Ounces Heavy Cream
Graham Crackers, Crushed
Chocolate Syrup
12 toasted mini marshmallows or 4 large marshmallows

Dip the rim of 4 martini glasses in the chocolate syrup and then into the crushed graham crackers. Chill glasses in the freezer. Pour all the remaining ingredients except the marshmallows into a martini shaker filled with ice and shake until well blended. Skewer your marshmallows on a cocktail stick and place in the chilled glasses. Strain the drinks into the 4 glasses.

{images via: s’more party favors: pinterest, once wed, elizabeth anne designs, pinterest, salt harbor blog. s’more cupcakes: pizzazzerie. s’more cake: the birthday blog. dessert bar: moore minutes, post cards and pretties, amy atlas. martini: the daily find. marshmallows: bakerella