YOLO DIY Cosmetic Bag

yolo-black-white-stripes-glasses-cosmetic-bag-diy-triangles

My sister-in-law and I went shopping, and I tried on a pair of designer jeans on sale for $100 from $200ish. I liked them, but didn’t really NEED them. You know, that age-old teaching we teach our children and tell ourselves – need vs. want. Do I really need this? Or, do I want this? My sister-in-law said, “Just get them. My new motto in life is YOLO.” I did a semi-smile and nod reaction, then asked, “What the heck does YOLO mean?” You may be thinking that I live under a rock, and perhaps I do, but I honestly had no idea what YOLO meant. She shared her hashtag wisdom upon me that day and told me that YOLO stands for…You Only Live Once. #YOLO

What powerful words that we often forget. You Only Live Once. We have one shot at this ONE beautiful, amazing, hard and miraculous life. Why waste it? Make the most of everyday, and live your best life…and life will give it’s best to you. YOLO!

Long story short, I bought the jeans. And, I learned what YOLO stands for.

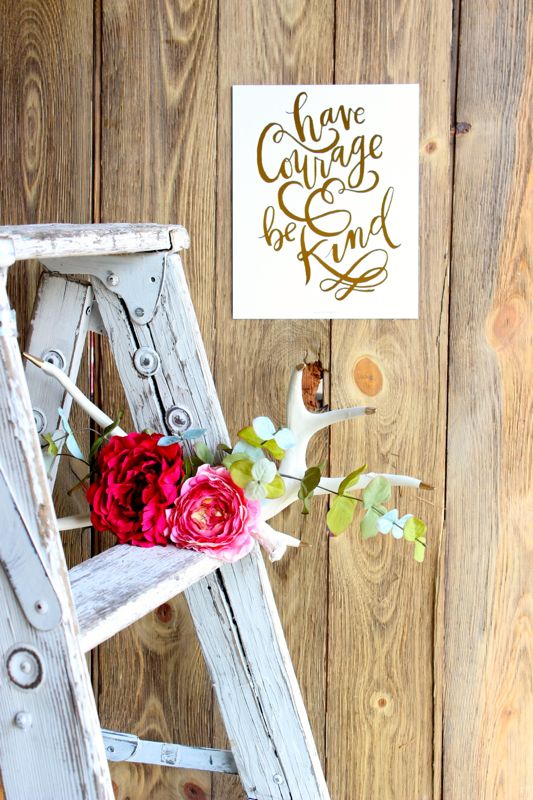
Shortly thereafter my sister-in-law embarked on a new journey in a new city with a new job. She was nervous, but brave. I sent her off with a reminder of what she taught me that day, and some tips to go with it.

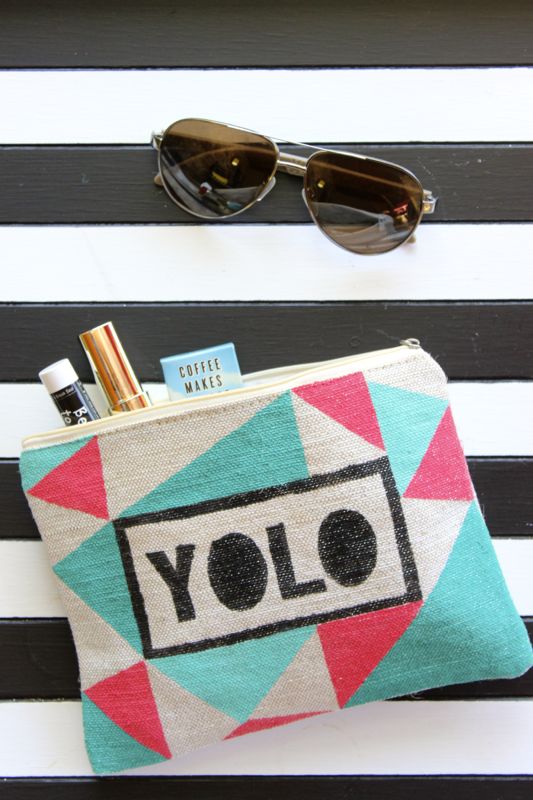
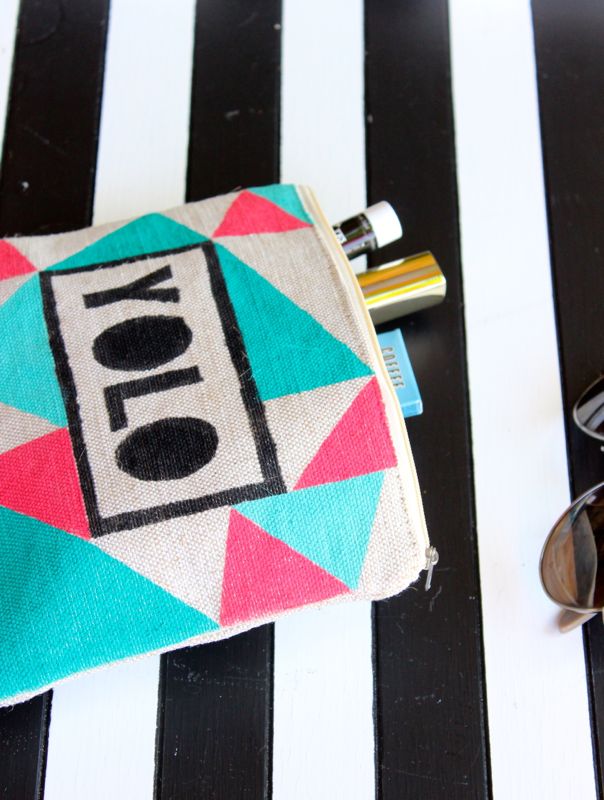
DIY YOLO Cosmetic Bag

You’ll Need:

  • Cosmetic bag {mine was $3 from Target}
  • Acrylic paint
  • Golden GAC 900 Medium, to make regular paint into fabric paint
  • Freezer paper
  • X-acto knife
  • Paintbrush
  • Gifts to go inside. I found most of my gifts {see below} from my favorite small town bookstore, The Bookworm
  • Watercolor paper
  • Watercolor paint
  • Gold sharpie or gold leaf pen

Directions:

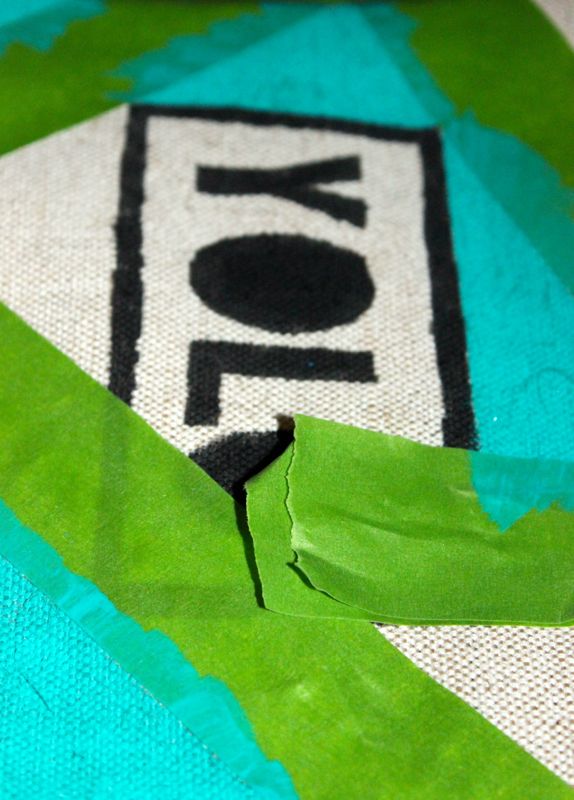
First, I used Microsoft Word to design my YOLO to place in the middle of the bag. Print YOLO on regular computer paper, then trace it onto freezer paper.

YOLO-freezer-paper-washi-tape

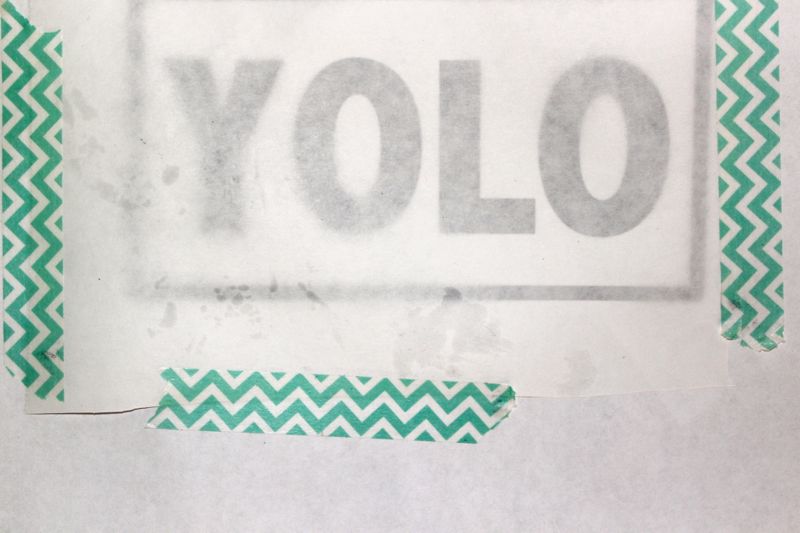
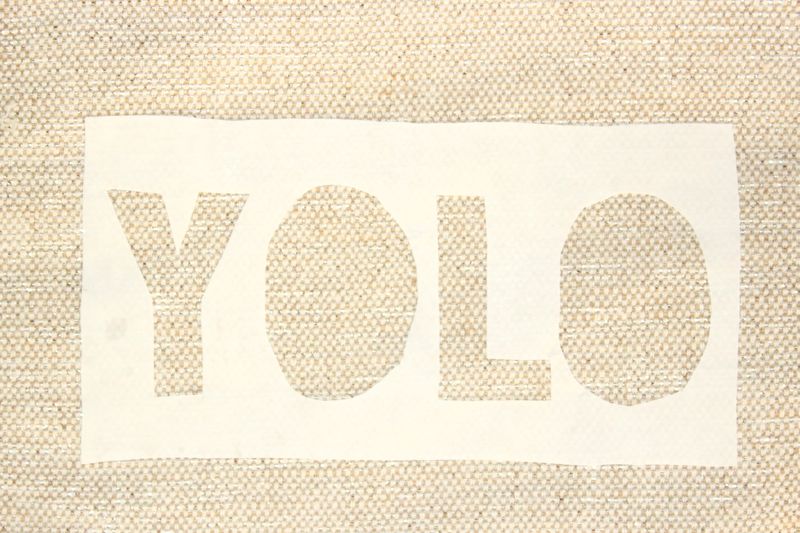
 Use an X-acto knife to cut out the words and a border. Then, iron in onto the costmetic bag.

yolo-freezer-paper-trace-diy

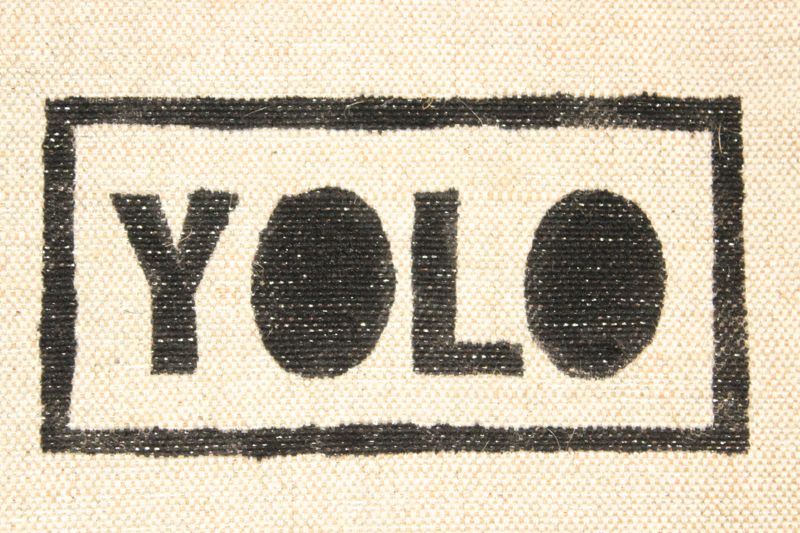
Paint YOLO with black ink.

YOLO-black-diy

Design a pattern around YOLO. I chose to do triangles, so I randomly made a geometric triangle shape print with Frog’s Tape. Then, paint inside the triangles.

yolo-painters-tape-green-diy

yolo-bag-pink-triangles-diy-target

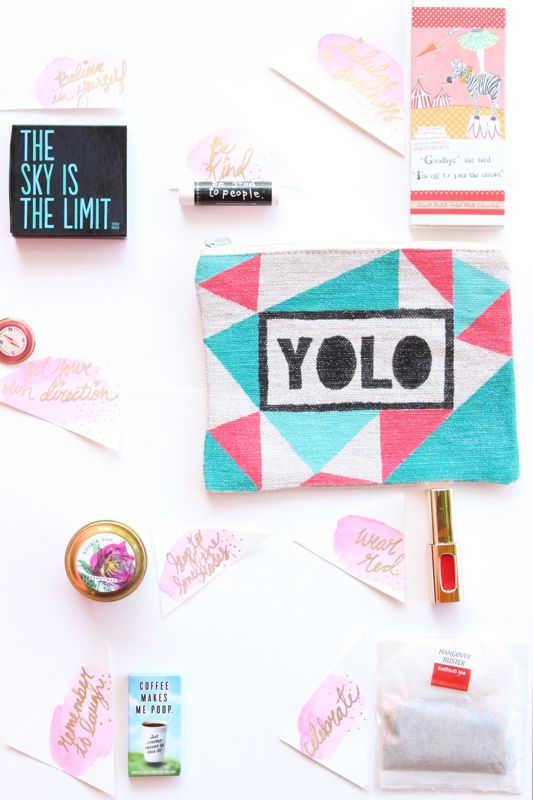
Shop for all your small gifts that go inside the YOLO bag.

yolo-bag-gift-diy-costmetic-bag-candle-lipstick-compass-tea-bag-chocolate

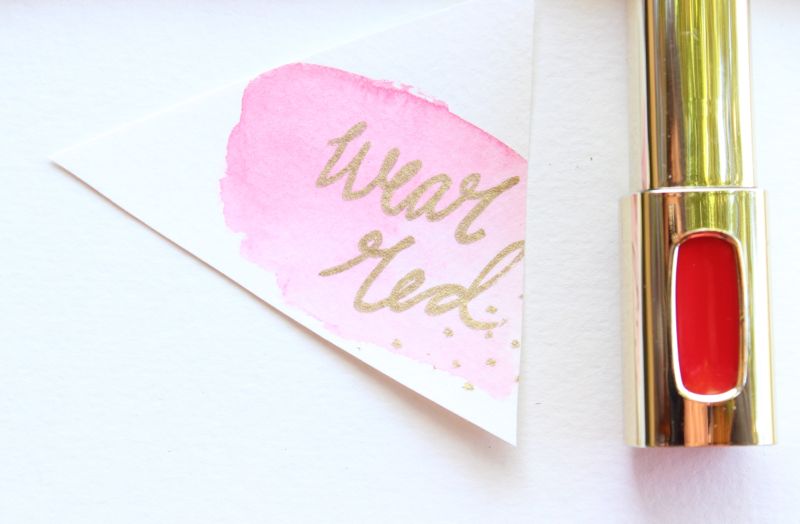
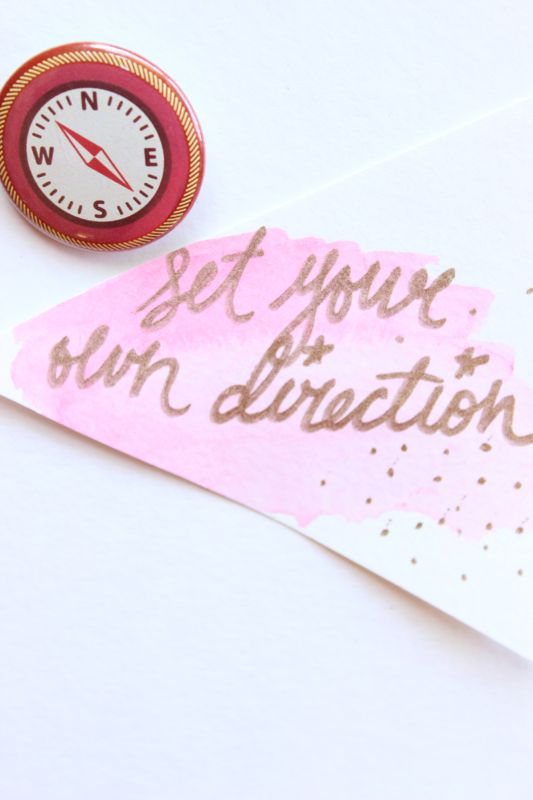
Once your YOLO bag design is complete, start to make the tags to go along with each gift. Cut watercolor paper into triangles. Freehand the words of wisdom for your friend in gold sharpie or gold leaf pen. Then, use soft watercolor over it.
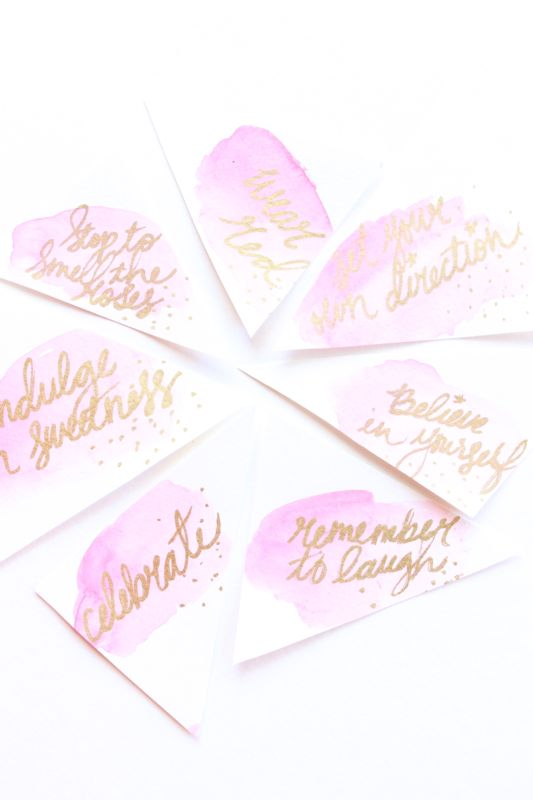
pink-watercolor-tags-gold-diy

My tags read:

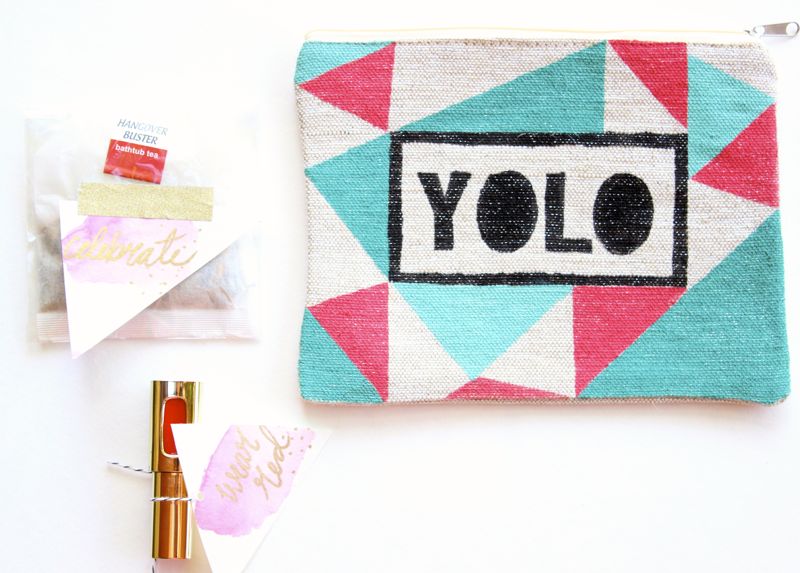
Wear red | red lipstick
Set your own direction | Compass button
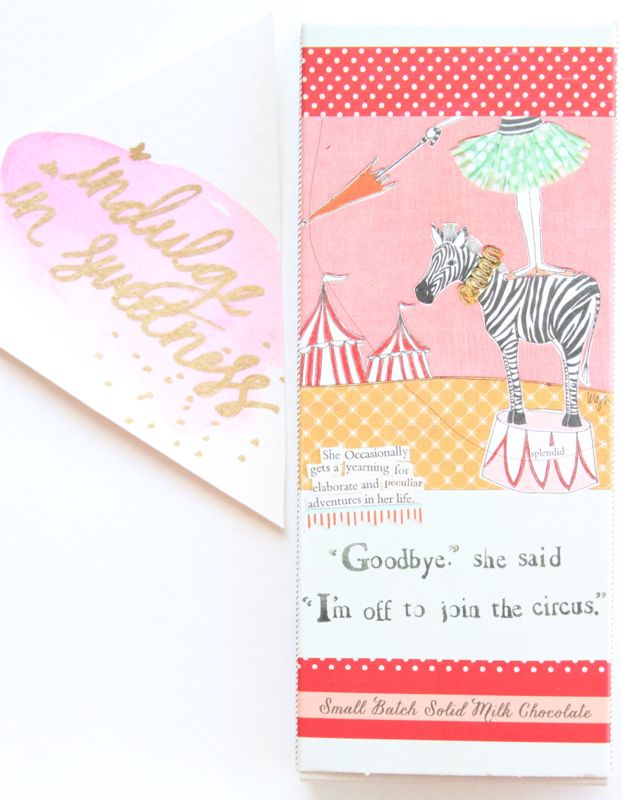
Indulge in sweetness | Curly Girl chocolate bar
Remember to laugh | Blue Q funny chewing gum box
Celebrate | Hyrda Soap Hangover Bath Tea Bag
Stop to smell the roses | Paddywax Rose scented candle
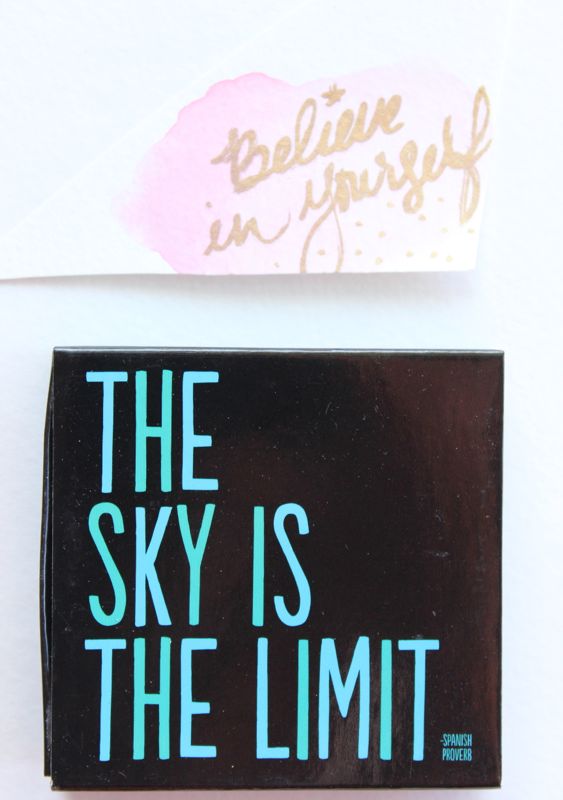
Believe in yourself | Quotables The Sky is the Limit matchbox
Be Kind | Be Good to People chapstick

wear-red-lipstick-pink-watercolor-gold

compass-button-pink-watercolor-tags-gold-diy-gift

curly-girl-chocolate-bar-indulge-in-sweetness-pink-watercolor

remember-to-laugh-coffee-gum-pink-watercolor-diy-gift

stop-to-smell-the-roses-candle-diy-gift-pink-watercolor-tag

believe-in-yourself-pink-watercolor-tag-the-sky-is-the-limit-candle

be-kind-be-good-to-people-chapstick-pink-watercolor-tags-diy-gift

Attach the labels to each item.

YOLO-wear-red-diy-gift-watercolor-pink-tags-bath-tea-bag

YOLO-wear-red-diy-gift-watercolor-pink-tags-bath-tea-bag

Place all the fun items inside the DIY YOLO cosmetic bag and gift.

yolo-black-white-stripes-glasses-cosmetic-bag-diy-triangles

DIY Floral Antlers

diy-antler-display-white-gold-pink-flowers

Let’s talk about potential for just a brief minute. We all have potential for greatness. You may have realized your true potential {good for you}, or maybe you are still trying to figure it out {welcome to the club}.

I hope in this one, precious gift we call life, I can dig deep inside and let my best self shine. How the heck am I going to do it? I’ll start by being a bright light for others, surrounding myself with friends and family who are only going to lift me up, stay really close with the good Man upstairs, and have the courage to live my best life. It’s not going to be easy, but nothing worthwhile ever is. And, this is most definitely worthwhile.

How do you realize your fullest potential?

I know, I know – somewhat deep for a Friday, but as I worked on this trash to treasure project, I thought about the word ‘potential’ and the importance of it in my own life. Before I give up on someone, something, and me, I need to just be in a place of love, and remember the potential that lies within all of us.

These antlers are the trash to treasure project I’m referring to. Originally part of a broken candle centerpiece, and in the trash pile, I knew they had potential. With a little paint and TLC, these antlers are now pretty in pink…and gold.

diy-antler-display-white-gold-pink-flowers


Here’s how I did it.

You’ll Need:

  • Faux antlers
  • Spray paint
  • Gold leaf paint
  • Flowers and greenery {I found mine at Pier1}
  • Hot glue gun

Step 1: Remove old wax, dirt from the antlers.

diy-antler-display-white-gold-pink-flowers

Step 2: Spray paint the antlers heirloom white {paint from Home Depot}.

Step 3: Paint the tips gold.

diy-antler-display-white-gold-pink-flowers

Step 4: Hot glue flowers and greenery in place.

diy-antler-display-white-gold-pink-flowers

Right now, the DIY floral antlers are sitting pretty on Gabriella’s new desk, but they will be put to good use as a DIY floral antlers necklace display, or decor on the wall.

diy-antler-display-white-gold-pink-flowers

diy-antler-display-white-gold-pink-flowers-ladder-have-courage-and-be-kind

Cheers to re-purposing…and, of course living your best life.

Beautiful words of advice by Cinderella so thoughtfully designed by HelloTosha.


DIY Honeycomb Napkins Are All The Buzz

honeycomb-napkins-pink-gold-white-honey-bee-summer-diy


The kids are learning their geometric shapes…and we are painting our favorite geometric shapes. The hexagons on these DIY honeybee napkins are sweeter than tupelo honey!

See the full tutorial on Wayfair. 

Jenna’s got you covered if you need the hexagon invite.

honeycomb-napkins-pink-gold-white-honey-bee-summer-diy


Lashes or Staches Gender Reveal Baby Shower

gender-reveal-baby-shower-staches-lashes-pink-blue-gold-bunny-pregnancy-craving

Jessica couldn’t get enough potato chips, clementine oranges and egg salad with her pregnancies. Jenna loved candy – Twix and frozen Snickers to be exact – while pregnant with her boys. Jodi devoured vanilla ice cream on a nightly basis with both her kiddos.

This Staches and Lashes gender reveal baby shower is so adorable, and has a salty and sweet food spread pregnant women dream of…and a touch of gold sparkle which satisfies, well, everyone!

Momtastic has all the details here!

Thanks to Sylvia at Special Events for sharing all the details, and Lizelle Lotter Photography for sharing the beautiful photos with us.

gender-reveal-baby-shower-staches-lashes-pink-blue-gold-bunny

genderParty-2

DIY Watermelon Corkboard

watermelon-pink-green-DIY-corkboard-pushpins-office-wall-decor-teacher-hostess-gift

We’re loving all our watermelon consumption these warm summer days. The kids are out of school, it’s time to shave our legs again, dust off the grill and eat watermelon. It’s not enough for us to just eat the juicy, pink fruit this summer – we want to hang it up on the wall too!

This DIY watermelon corkboard and pushpins makes for a lovely teacher and hostess gift, and it’s a great pop of color in one’s office space. Wayfair, one of the world’s largest online destination for all-things-home thinks so too, because they shared our tutorial with their readers.