DIY Red, White and Blue Ice Bucket

red-white-blue-ice-bucket-july-4th-wine-cooler

It’s about that time when red, white and blue are just about the only colors on our minds. Yes, one of our favorite holidays, July 4th, is coming up, and this year we’re adding a DIY fruit ice bucket to our party to do’s.

A DIY patriotic ice bucket is the perfect July 4th accessory, and it’s so easy and cheap to do. Guests will love the extra touch of red, white and blue, and they will enjoy their chilled beverage.

red-white-blue-diy-ice-bucket-fruit-diy-july-fourth-wine-cooler

red-white-blue-ice-bucket-july-4th-wine-cooler

Materials:

  • water
  • large bucket, we used a plastic one from Party City
  • small buckets {small enough to fit inside large bucket and large enough to fit a wine bottle or beer can}
  • blueberries, fresh or frozen, at least 2 cups
  • strawberries, fresh or frozen, sliced, 2-3 cups
  • weight, such as a rock
  • wine or beer

Directions:

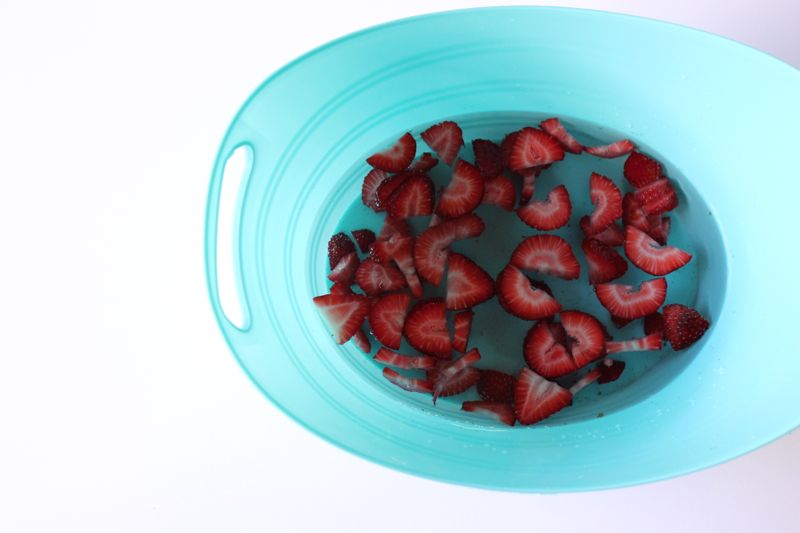
Fill about 1/3 of the large bucket full of water, then drop in all the strawberries. Freeze for at least 5-8 hours.

strawberries-in-a-bucket

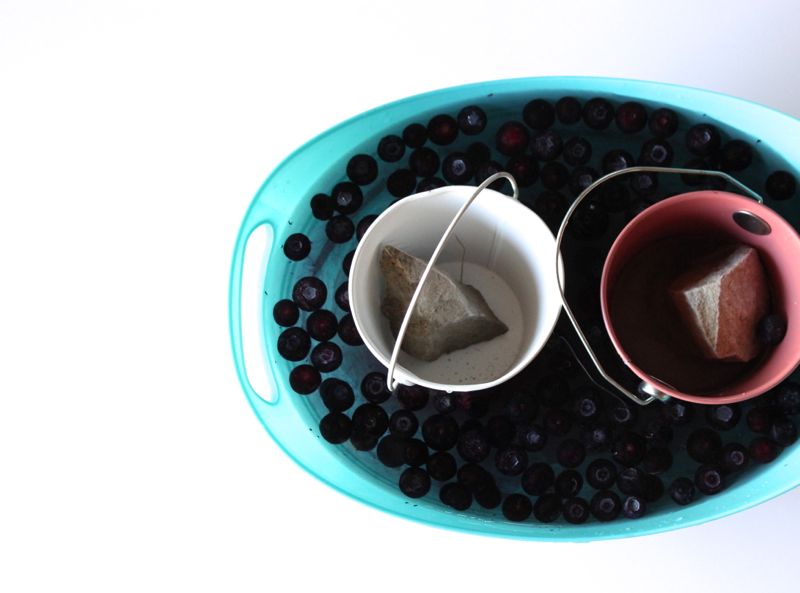
Place 2 small buckets on top of first layer of ice, add weight inside {we used a rock}, and fill another 1/3 of the bucket with water. Do not get water inside the small bucket because it will be more difficult to remove the buckets from the ice. Freeze for about 5-8 hours.

buckets

For the final layer, fill the remaining 1/3 of the container fill of water, and then drop in blueberries. Freeze for 8 hours.

blueberries-in-a-bucket

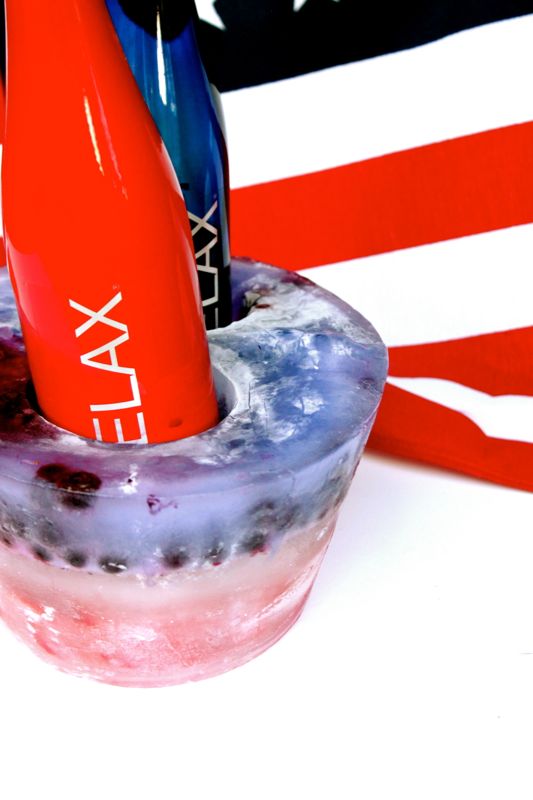
Remove from the freezer. Pour boiling water inside the small buckets and gently twist to remove from the ice. Additionally, run the outside of the large bucket with  hot water from the sink faucet. After about 15 seconds on each side, the ice cooler will be easily removed, and the layers should look like this.

red-white-blue-diy-ice-bucket-july-fourth-party

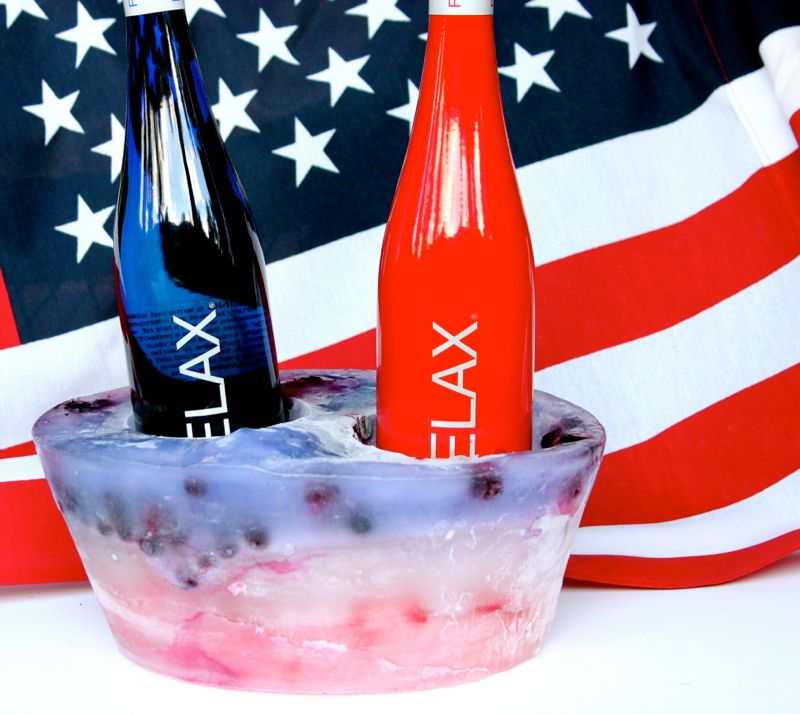
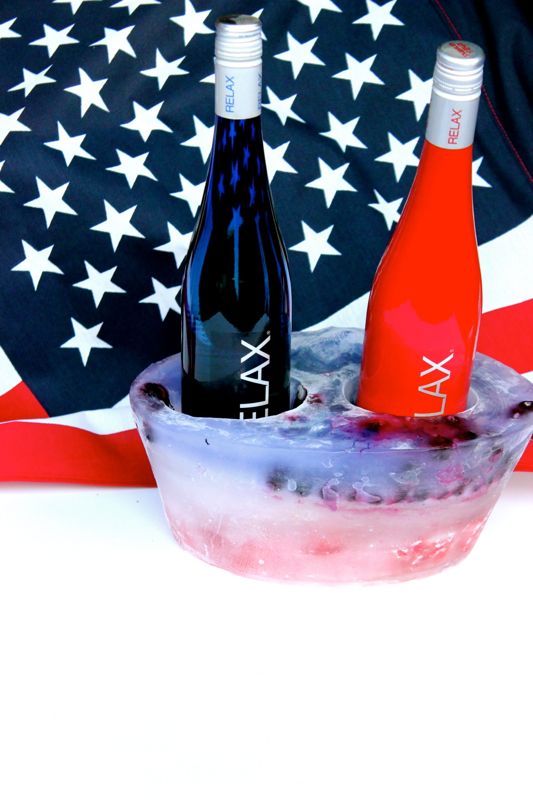
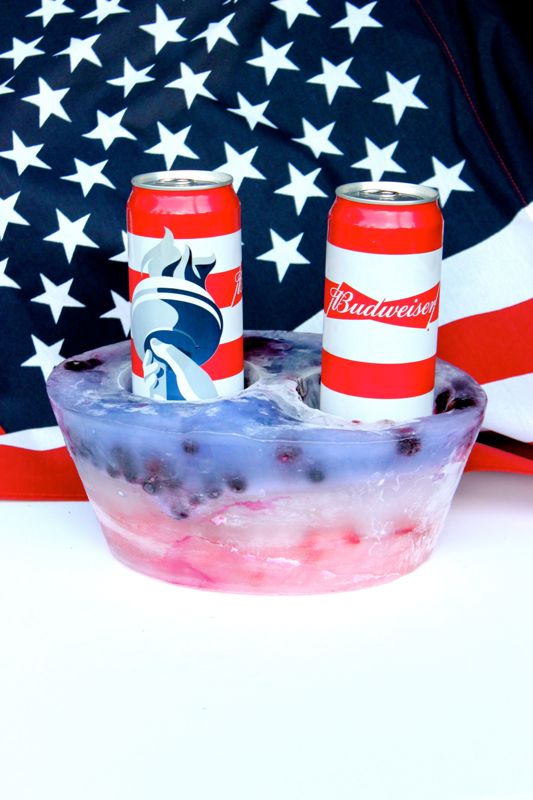
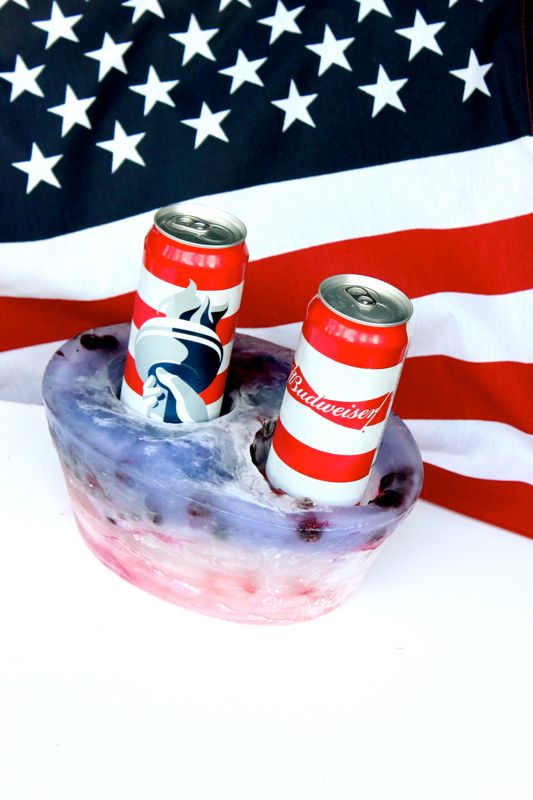
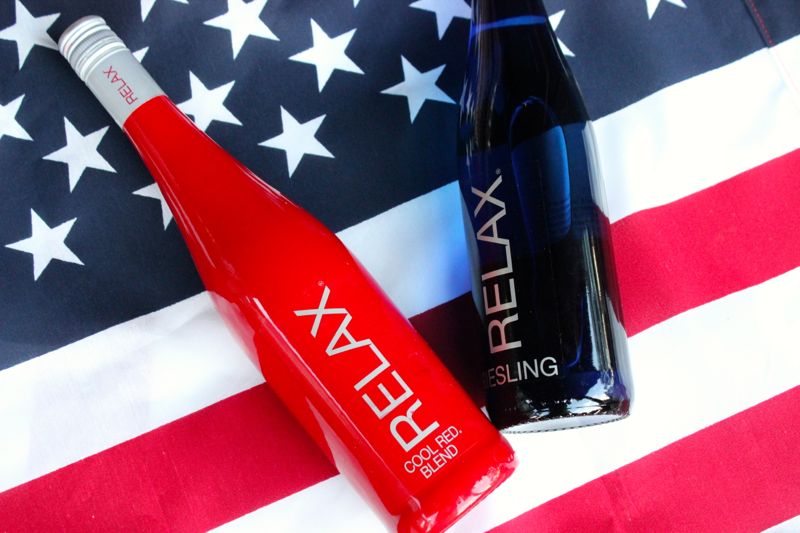
Carefully flip the ice cooler out from the bucket with your hands and set on a tray. Fill the holes with wine or beer. We couldn’t decide because beer, well, it’s all-American and those Budweiser cans are so patriotic and awesome. But, the vino lovers that we are couldn’t resist the taste and look of the red and blue Relax Wine bottles of wine.

budweiser-beer-red-white-blue-ice-bucket-diy-fourth-of-july-beer-cooler


relax-wines-red-white-blue-ice-bucket-wine-cooler

red-white-blue-ice-bucket-budweiser-beer-diy-cooler


relax-wines-red-white-blue

Cheers!

Important Note: We took photos of this DIY ice bucket with wine we had in the liquor cabinet, and after review of photos, while the wine was good, for the ultimate patriotic post, the wine bottle {and beer} needed to be more festive in color. Enter, Relax Wines and Budweiser beer! However, the ice bucket had to be re-frozen during a several hour photo shoot intermission, and a thin ‘film’ of ice formed over every layer, so the color of the DIY ice bucket was dulled, and the lines of the red, white and blue blurred. You win some, you lose some. Either way, we love our bucket, but honestly, it will be more vibrant than our photos if you have the right alcohol the first time around. 

Giraffe Baby Shower

blue-yellow-giraffe-baby-shower-outdoor-party

We made a trip to the zoo last week, and the giraffe’s were a favorite among our kids. The tall beauties have been loved by Jessica’s son for a long time. Thanks to Sylvia Strauss of Special Events and photographer Finishing Touch Roelien Visser, now we know they can be the inspiration behind a pretty baby shower, too.

Sylvia was inspired by the blue and yellow color of the striped flower pots on the table. Of course we love the DIY details, such as the wool letters and the spray painted plastic animals.

blue-yellow-giraffe-baby-shower-outdoor-party


yellow-blue-giraffe-baby-shower

blue-yellow-giraffe-baby-shower-outdoor-party


blue-yellow-giraffe-baby-shower-outdoor-party

blue-yellow-giraffe-baby-shower-outdoor-party

blue-yellow-giraffe-baby-shower-outdoor-party

blue-yellow-giraffe-baby-shower-outdoor-party-cupcake

blue-yellow-giraffe-baby-shower-outdoor-party

blue-yellow-giraffe-baby-shower-outdoor-party

blue-yellow-giraffe-baby-shower-outdoor-party

VENDOR LOVE

Venue: Mountain Breeze Stellenbosch
Cookies: Krummelkuns
Decor & Planning: Special Events
Photographer:  Finishing Touch Roelien Visser


DIY Typography Decanter

booze-cheers-bar-diy-decanter

Nordstrom is one of our favorite places to shop. The shoes, the fashion, the return policy, the cafe – we love all of it! We noticed a fun Booze Decanter and Stopper throughout the holidays, and we never quite stopped thinking about it. Thankfully, we were able to re-create a DIY Booze decanter with our Silhouette cutting machine, and our minds {and bar} are at peace…at least for now.

Materials:

Instructions:

Assemble empty glass bottles you can transform into DIY typography bottles.

empty-glass-bottles

Design your labels with the Silhouette software. Print according to package instructions.

Once the vinyl is cut, remove the excess vinyl around the words, and place Frog’s Tape over the words.

cheers-gold-vinyl

Pull the tape up, and the words should be attached to the tape.

booze-gold-vinyl-green-tape

Press the tape and words onto the bottle, and get all the bubbles out with a straight edge {we used a credit card}.

booze-gold-vinyl-green-tape-decanter

Pull the tape up from the bottle, and the vinyl should stay in place on the bottle. You may have to use one finger to press down on the vinyl if the font is thin and it comes up with the tape, but we didn’t have to on this project.

booze-gold-vinyl-green-tape-decanter

Once all the tape is removed, you should have a new DIY typography decanter. Fill with alcohol and say cheers!

booze-gold-vinyl-green-tape-decanter

For this project, we took it one step further and got a little Typography happy! We couldn’t do just one bottle! This DIY project makes for a really fun addition to any bar, and a great hostess gift.

tasty-cheers-booze-bottle-decanter-bar

booze-gold-vinyl-green-tape-decanter

cheer-blue-bottle-diy-decanter-water-entertaining

tasty-booze-cheers-diy-decanter-bar

Not only did we create several bottles, but we couldn’t have a bottle that holds alcohol without actual alcohol in it. With St. Patrick’s Day several days away, we ventured into making our own Bailey’s Irish Cream. My girlfriend, Kacey, made a delicious batch of our favorite Irish cocktail for a birthday brunch recently, and we couldn’t believe homemade Bailey’s could be so good. We’ve revamped a couple of recipes to make our homemade version, but most are similar.

Homemade Bailey’s Irish Cream
adapted from several recipes

Ingredients:

  • 1 cup + 1 tablespoon Jameson Whiskey
  • 1 pint half and half
  • 1 can Eagle’s Condensed Milk
  • 2 tablespoons chocolate syrup
  • 1 teaspoon Vanilla
  • 1 tsp. instant espresso mixed with 1 tsp. boiling water

Instructions:

Place all ingredients in a blender, and blend. If you don’t blend for 30 seconds or more, we found that our Bailey’s had some chunks from the cream, so continue to blend until smooth.

Keep in a sealed glass jar in the fridge for up to 2 weeks. Give it to a friend as a gift this St. Patrick’s Day, too!

homemade-baileys-irish-cream-tasty-bottle-clover


Personalized Book Giveaway and DIY Kite Easter Eggs

kite-easter-eggs-marker-stripes-bows-diy-

We are flying high with today’s post. Literally, we are as high as a kite in the sky! We love our newest DIY Kite Easter Eggs, and they were inspired by an I See Me! book, My Little Book of Blessings. We have always loved I See Me! products, and they remain one of our favorite newborn gifts. Recently we opened up the blessings book and found the graphics to be magical, and the words to be meaningful. A book that teaches children the golden rule, the importance of friendship and how to lend a helping hand is a book we want on our bookshelves. Plus, every page is customized with a child’s name, and a special note and photo on the front and back pages.

kite-book-i-see-me-books

The page about friendship has kite illustrations, and thus our DIY easter eggs were born. Please keep reading for a tutorial on the eggs, as well as a giveaway for a I See Me! book of your choice, just in time for Easter. The books are amazing, and the gift of reading is priceless.

diy-kite-easter-eggs-marker-coloring-bow-diy

Materials:

Directions:

Draw the kite designs with a pencil. If you mess up, you can erase it. We used free-hand to draw our designs.

pencil-egg-drawings-kite-easter

Outline the egg with a thin black Sharpie marker. Once the design is outlined, erase any pencil marks that remain on the egg.

vinny-diy-easter-eggs-black-lines

Begin to color inside the lines with Sharpie colorful markers. Continue until all kites are brightly colored.

diy-kites-easter-eggs-coloring-markers

diy-kites-easter-eggs-coloring-markers

To begin to make the kite tails, cut strands of embroidery string and cut mini bows from the card stock. You can find a template for mini bows online.

bow-string

Add glue to one side of the bow, and quickly place the string in the middle, and then cover with another bow.

glue-bow-string

string-bow

Once all the bows are in place, dab a tiny amount of glue to the bottom of the kite, and press the end of the string down on the glue.

diy-kite-easter-eggs-rainbow-markers

You’re done!

diy-kite-easter-eggs-rainbow-markers

easter-egg-kite-place-setting

Now, it’s giveaway time. Entry info below. Please make sure to leave your Instagram account name, because we will check the winner’s account. Good luck! The giveaway ends March 10, 2016.

a Rafflecopter giveaway

We received a product from I See Me! in conjunction with this post, but we would love I See Me! even if we didn’t. Thanks for supporting the companies that support our blog.

DIY Photo Easter Eggs with Flower Crown

diy-photo-eggs-flower-crown-ladies-brunch-placecard

We have some egg-tastic Easter eggs coming your way. First up, photo eggs with flower crowns.

If we could wake up every day and wear a flower crown, we would. Ok, Jenna probably wouldn’t unless it was made of black and white anemone’s. But, seriously, how pretty would we feel if we were crowned with such beauty on a daily basis? We would feel like a beautiful princess.

One day, just to be spontaneous and special, we are going to go through our daily, wonderful mom routine {cooking, cleaning, tantrums, laundry, poopy diapers and playdates} with a DIY flower crown on our heads. Who says we can’t walk around in our yoga clothes and feel like a princess for the day?

Since wearing a floral crown everyday is not always feasible, we found an adorable plan b – DIY photo easter eggs with flower crowns. Now we can crown our heads with pretty flowers, and put it on display. This egg project is an easy and fun project to do with kids {or friends}, and it’s a lovely easter egg display. Plus it also makes for beautiful place cards on easter. Everyone just needs to look for their beautiful face at the brunch table. For the men, add a bow tie or newsboy hat!

diy-photo-eggs-flower-crown-ladies-brunch-placecard

Materials:

  • wood or paper mache eggs
  • Mod Podge
  • card stock
  • White tissue paper
  • Frog tape
  • Paintbrush
  • Photos
  • Scissors
  • Fake flowers
  • Floral wire
  • Hot glue gun and hot glue

Directions:

Find photos of your family and friends. Crop and edit them in Microsoft Word. No Photoshop necessary for this. Just crop them into an oval shape, and make sure they fit the size of your eggs.

Tape a piece of tissue paper onto the card stock and print. Then, cut out the photos.

photos-tissue-paper

Paint a small amount of Mod Podge {about the size of the photo} onto the egg. Gently press the photo down on the egg and smooth out as many wrinkles as you can. We don’t need more wrinkles than we already have, right?

After about 5 minutes, paint a small amount of Mod Podge over the photo and surrounding area. Do not swipe the paint brush too many times over the photo, or the ink will smear. Let the egg dry.

To craft the DIY floral crown, cut the small stems from your branch and put together with floral wire wrapped around each stem, and shape into a circle. Make sure the size/shape fits over the top of your egg.

diy-flower-crown-pink-flowers

Dab a tiny dot of glue to the back of the egg, and press the back of the crown down on the glue{so the flowers are in front}. This will keep the crown in place.

flower crown-for-easter-eggs

Display on egg holders, plates or in baskets. FYI – this is the only time you will see a pink flower crown on Jenna, so let’s take it all in.

woman-pink-flower-crown-diy-photo-eggs

diy-photo-eggs-flower-crown-ladies-brunch-placecard

photo-egg-flower-crowns-pink-flowers-easter