DIY Dr. Seuss Easter Eggs

dr seuss-easter-eggs-thing1-thing2-stripes

One Egg
Two Eggs
Red Egg
Striped Egg

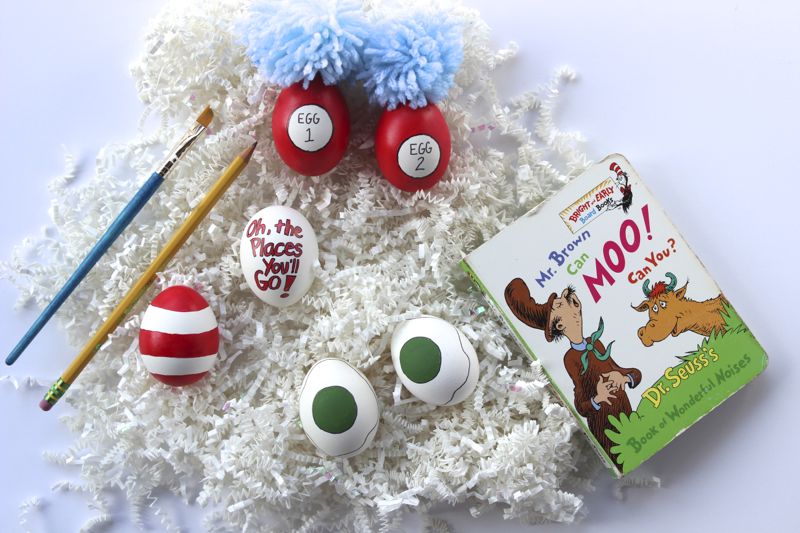
We know it’s not even St. Patrick’s Day yet, so we are trying to not get too ahead of ourselves, but we just can’t contain our excitement with these Dr. Seuss eggs. Plus, it’s totally fitting to end the week of Dr. Seuss’ birthday with DIY Dr. Seuss easter eggs, right?

We chose some of our favorite Dr. Seuss books as inspiration, including Green Eggs and Ham, Oh, the Places You’ll Go and The Cat in the Hat. 

drseuss-easter-egg-oh the places you'll go-stripes-diy-red

dr seuss-easter-eggs-red-blue-thing1-thing2-stripes

You’ll Need

  • Eggs {you can use real, hard-boiled eggs, or if you want them to last forever, buy paper mache eggs}
  • Blue yarn
  • Red and green Acrylic Craft paint
  • Black thin Sharpie and red Sharpie marker

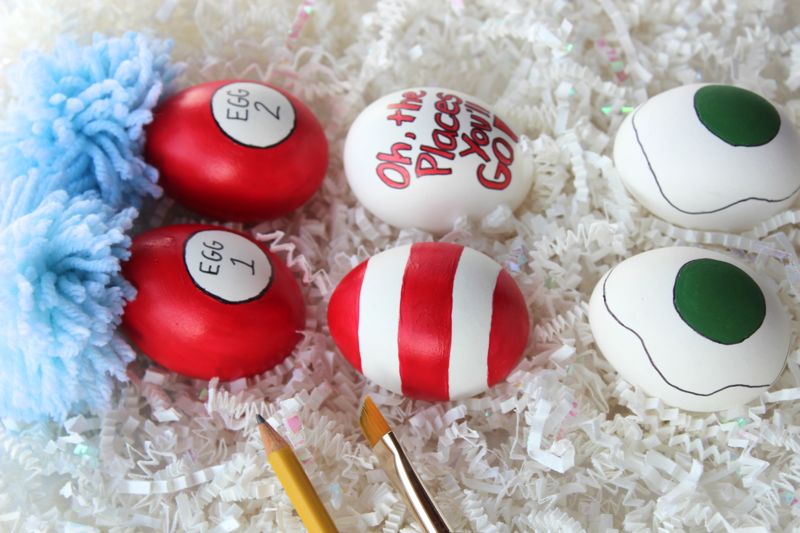
The Cat in the Hat Easter Eggs:

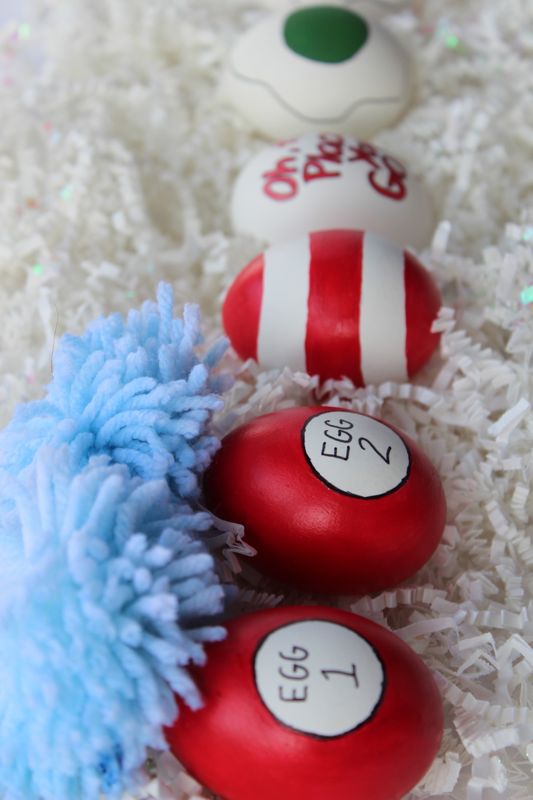
  • Paint red stripes on the ‘hat’ Easter egg.
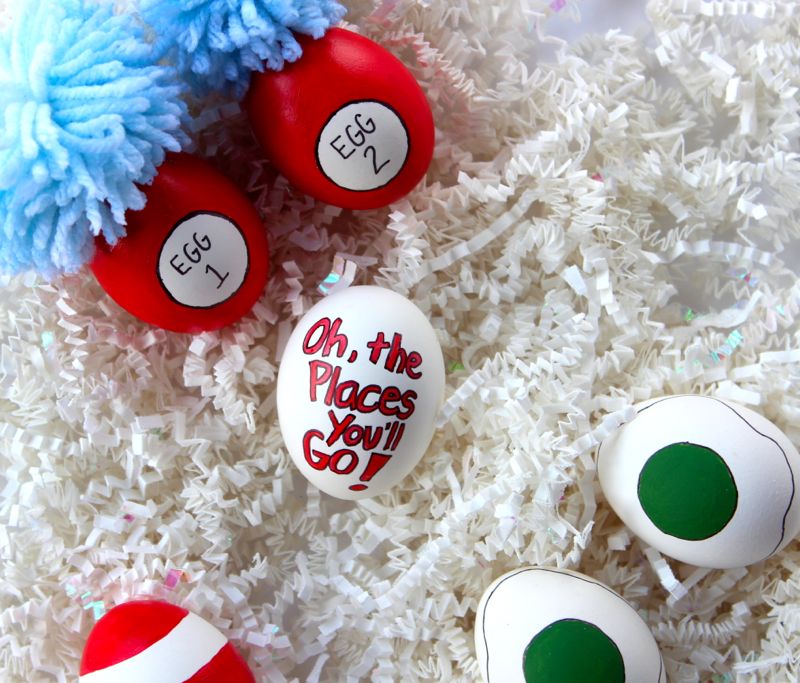
  • For the Thing 1 and Thing 2 Easter eggs, we used a round circle sticker and traced it with a black thin Sharpie marker.
  • Remove the sticker, then write Egg 1 and Egg 2 inside the round circle in each egg.
  • Paint around the circle with red paint.
  • Create blue DIY pom poms and use a hot glue gun to glue it to the top of the eggs.

dr seuss-eggs-easter-thing1-thing2-red-pompom

drseuss-easter-eggs-thing1-thing2-red-stripes-diy-paint

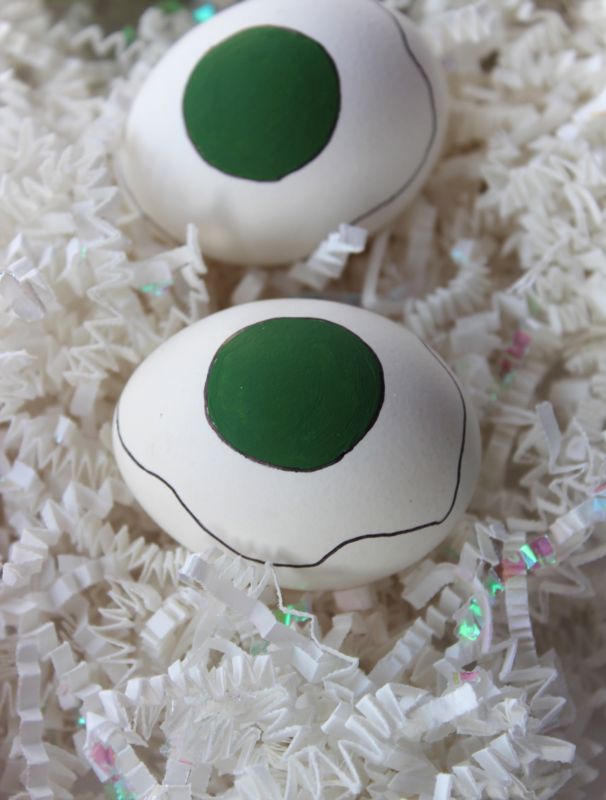
Green Eggs and Ham Easter Eggs:

  • Place and then trace a round sticker on the egg with a pencil.
  • Paint the inside of the circle green.
  • Use a black Sharpie to draw a fried egg outline around the green circle.

easter-eggs-diy-green eggs and ham-drseuss

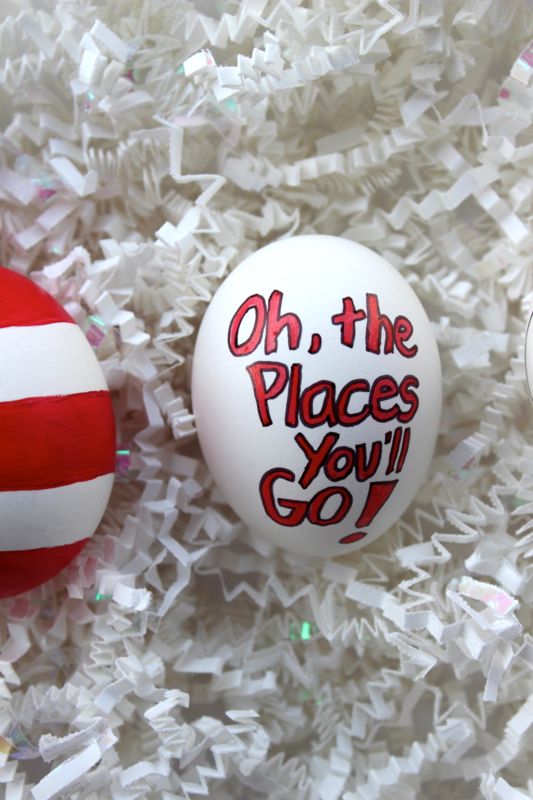
Oh, the Places You’ll Go Easter Eggs:

  • Use a red Sharpie to write the words Oh, the Places You’ll Go on the egg.
  • Trace the red letters with a thin black Sharpie.

oh the places you'll go-drseuss-easter-eggs-diy-kid

drseuss-easter-eggs-diy-stripes-red-paint

Have fun rhyming, reading, painting and creating. Happy Birthday Dr. Seuss.

{images via j. sorelle}

DIY Salt and Pepper Shakers

salt-pepper-kitchen-heart-initials-valentine-kitchen-diy-love-hostess-gift

We just can’t get enough of that crazy little thing called LOVE this Valentine’s Day.

This DIY tutorial brings us back to our teenage, high school days when we wore split heart necklaces. You know, when you wore one half of the necklace that said Best, and your bestie wore the other half that said Friend. Well, we have matured {ever so slightly}, so we revised the split heart trend. This time, we are not wearing it around our necks, we are shaking it in our kitchens.

Shaking it with mini, personalized salt and pepper shakers.

Separately the shakers look like two half hearts with initials…

heart-valentine-diy-gift-love-salt-pepper-hostess

…but together, they make a complete pair.

salt-pepper-shaker-gift-heart-initial-valentine-diy-hostess

This DIY took about 10 minutes, and we’re adding it to our list of favorite hostess gifts, engagement gifts, anniversary gifts, going away and bridal shower gifts.

And, for this Valentine’s Day, let your loved one, or good friend know that you go together like salt & pepper.

DIY Split Heart Salt & Pepper Shakers

You’ll Need:

  • Mini salt and pepper shakers. We found ours at a kitchen store for about $2 each.
  • Silhouette Vinyl {BTW, all heat transfer is 35% off right now with code SORELLE}
  • Silhouette Transfer Paper or lint roller {good alternative}
  • Silhouette electronic cutting machine. If you don’t have one, an alternative is enamel paint to paint on the hearts.
  • Salt
  • Pepper

How To:

  • Design your heart art using the Silhouette Software. I used a free design that had a heart in it, and edited it. Make sure you cut the heart in half {via the software} before you click cut.
  • Place your Vinyl on the cutting mat {black side facing up}, click print and watch the tool work its magic.
  • Peel away the vinyl you’re not using. Place the transfer paper over half the heart and use a straight edge {credit card, etc} across it to make sure the vinyl sticks to the transfer paper.
  • Pull the paper up and half your heart should be stuck to the paper.
  • Place the image on one of the shakers. You will need a credit card or a straight edge to smooth our all bubbles.
  • Peel away the transfer paper slowly and your vinyl should stick to the item.
  • Repeat the steps above to add the other half of the heart to the remaining shaker.
  • Fill the shakers with salt and pepper.

valentine-gift-salt-pepper-diy-shaker-hostess-gift-heart

valentine-diy-salt-pepper-shaker-gift-hostess-initial-heart

{image via j. sorelle}

DIY Valentine for Teachers

valentine-teacher-dig-box-red-socks-heart-slippers

We are letting our teachers know just how warm and fuzzy they make our kids feel with socks this year.

Target was our source for the cute slipper socks adorned with stripes and a heart. We also scored with pillow boxes and sparkly red tape from Target’s $1 and $3 bins.

We used Microsoft Word to create the tag, so you can easily do it too.

valentine-teacher-socks-slippers-stripes-heart-diy-holiday

You’ll score extra points with your child’s teacher, and their toes will be warm and toasty all winter long.

valentine-socks-slippers-kids-stripes-heart-diy

{images via j. sorelle}


DIY Chocolate Valentine’s Gift

candy-valentine-riesen-love

Sometimes when we walk down the candy aisle at the grocery store, we just can’t control ourselves. One of our favorite treats to sneak into the cart is yummy chocolate caramel bites, known as Riesen {pronounced just like the word reason}. Our Nani introduced the candy to us years ago, so as we chew the deliciousness that is Riesen, we lovingly think about her. She also loves Valentine’s Day, which made it the perfect reason to tell her how much we love her, and do it with her favorite candy.

A pillow box is in the mail to our Nani with her favorite candy, and all the Riesens or “Reasons” we love her.

candy-riesen-valentinesday-love

To re-create for someone you love, you’ll need:

  • A pillow box. We bought a pack of 5 from Target
  • A bag of Riesen candy
  • Paper {Astrobrights Paper}
  • Glue stick
  • A Silhouette electronic cutting machine {Sharpie or stickers will work too}
  • A lovely person to send it to

We used our Silhouette to design the wording on the front of the pillow box, as well as the numbers. If you don’t have a Silhouette {you should add it to your want list}, you can also write or print your own design, or buy stickers. We used a glue stick for all the letters and numbers, as well as on the bottom of the candy wrapper to keep them in place on the paper. Finally, write all the reasons why you love the person your sending it to on small pieces of paper.

It’s a simple, cheap way to share love and chocolate. It’s going to make your loved one’s day…and you get to eat chocolate in the process. Win-win.

valentinesday-candy-chocolate-riesen

{photos via j. sorelle}

DIY Pencil + Crayon Cupid Arrow

pencil-arrow-cupid-crayola-crayon-heart-valentines.jpg

Valentine’s Day is still a month away, but we’re in the mood for love. And we’ve been struck by the cutest bow and arrow ever!

If you’re opting for a non-candy Valentine, or want to play cupid on February 14, this is the arrow for you.

crayon-cupid-arrow-crayon-heart-valentine.jpg

Materials Needed

How To Create Our Crayola Love Struck Arrow:

  1. Fill the silicone tray with old or new bits of crayons to the top.
  2. Bake at 250 degrees for 13 minutes. Once the tray cools a bit, place in freezer for 5-10 minutes. The hearts should pop right out.
  3. Use a drill to drill a small hole in the top-middle part of the heart, so the tip of the pencil fits into the heart similar to a pencil sharpener. Don’t drill the hole too big, but if it’s not fitting just right, add some glue to the tip of the pencil and insert.
  4. For the end of the arrow, cut felt and either glue the two pieces together or if you use sticker felt like us, just press the two pieces together, sandwiching the pencil.

If you want to package for classmates or a friend, place the arrow in a thin cellophane bag and seal with washi tape.

crayon-pencil-cupid-arrow-dig-valentine

diy-cupid-arrow-valentines-crayon-pencil-valentine.jpg

{images via j. sorelle}