DIY Oscar Party Drink Stirrer

oscar-party-envelope-gold-champagne-red-white-straws

We’re going to be honest, our record for having actually seen any of the Best Pictures nominated for this year’s Academy Awards is not too good. It’s 0 for 8 to be exact. We are, however, familiar with the nominations for the animated feature film…we’re rooting for How to Train Your Dragon 2!

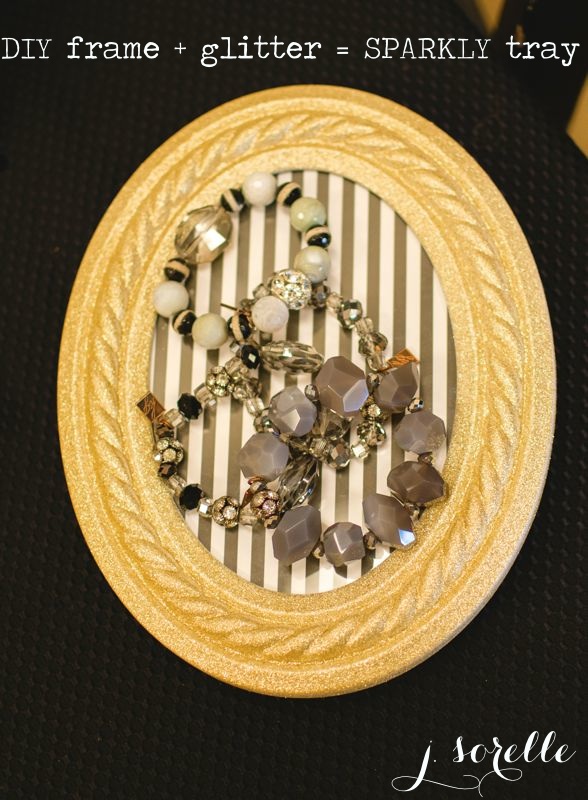
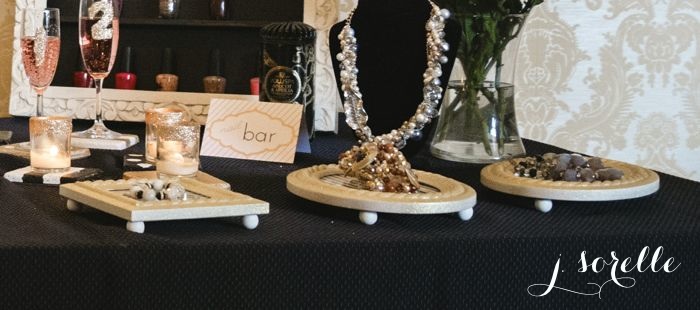
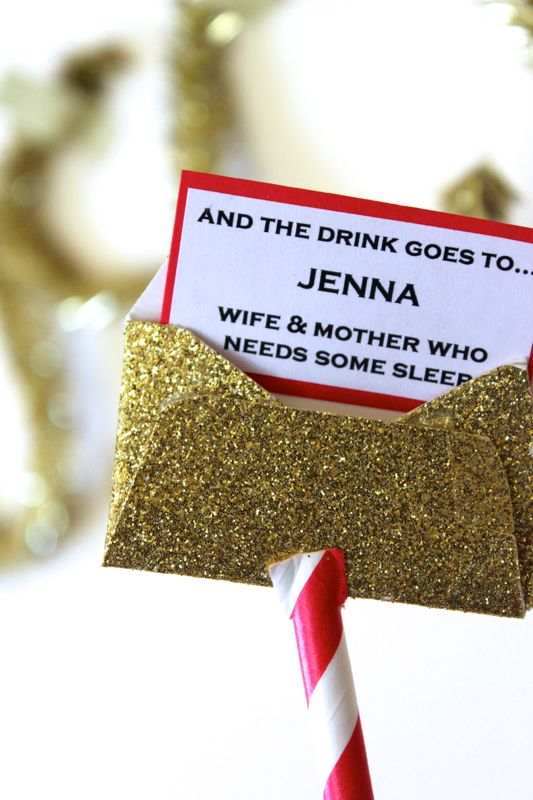
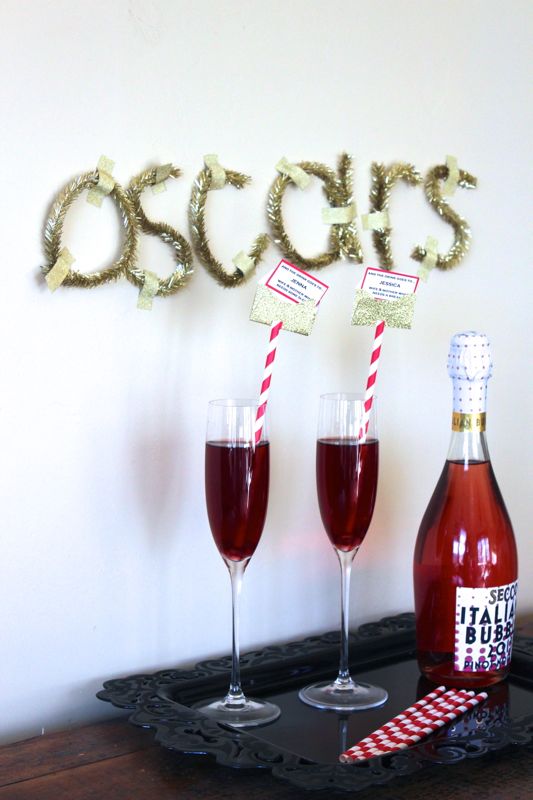
In our sleep-deprived, ‘surrounded by sick kids’ state, a fancy party is not in the cards this year. But, pajamas and a glass of POM champagne or vino sounds fantastic. Our low-key evening does have a DIY, of course. All for good reason – we are going to be the star of our own show. And, you should too. You’re the main character of your life – the leading lady or man. This year, you get your own gold envelope…and a cocktail.

This is such an easy DIY and a fun way to celebrate with girlfriends and sisters. Get creative and funny.

oscar-gold-envelope-champagne-red-white-straw-party

gold-oscar-red-white-envelope-party-straw

gold-oscar-red-white-straw-envelope-party-champagne-cocktail

oscars-champagne-pom-red-white-straw-gold-party-bubbly

How-To:

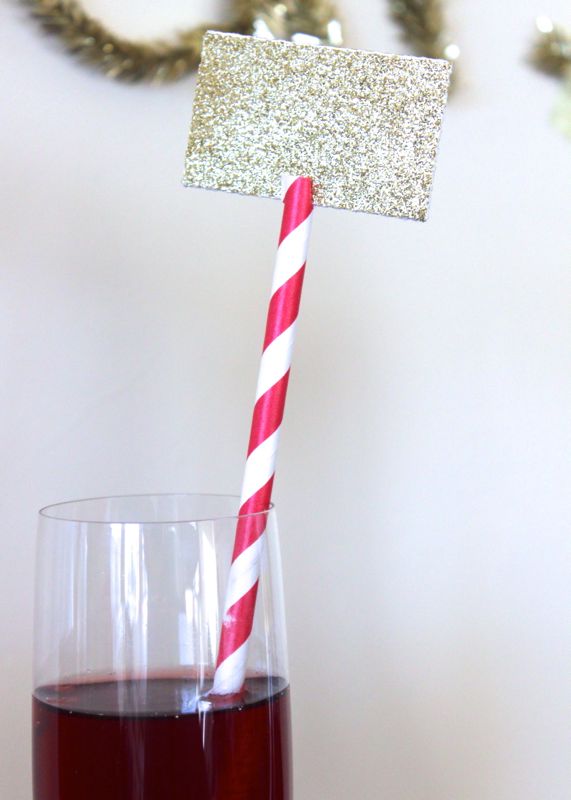
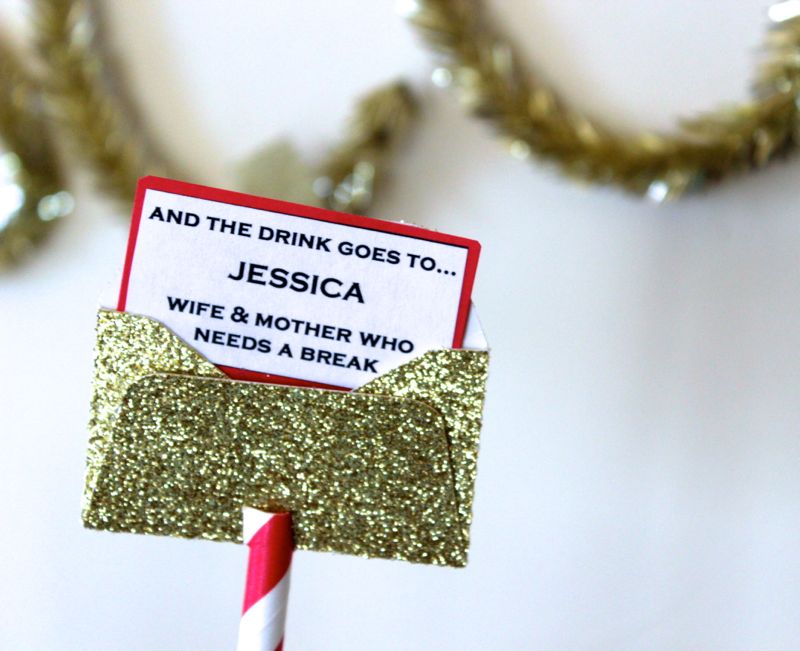
  • Buy or create mini envelopes. We used our Silhouette cutting machine to create gold glitter envelopes.
  • Create and cut mini tags to insert into the envelope. We created ‘drink winner’ tags on Microsoft Word.
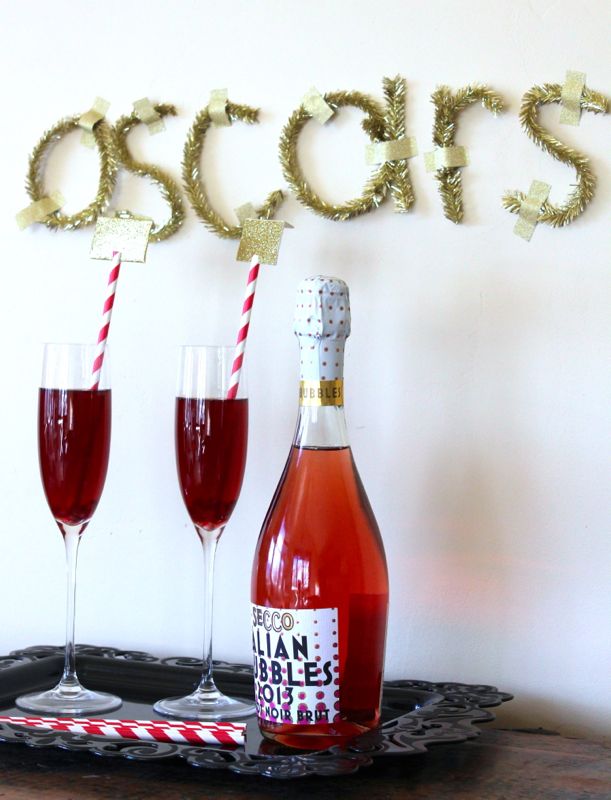
  • Use scissors to cut small slits on the top of cute paper straws, and insert the envelope.

You can prepare a speech if you want to…but the drink, it’s is all yours. Cheers to you!

{images via j. sorelle}

Gold Wedding Inspiration

gold rush_jeffandjewelsphotography

When we saw the Whiskey Barrels from this Gold Rush photo shoot, we fell in love. We are whiskey girls at heart, and we love rustic event decor…but when we saw the insane talent and details behind this shoot by La Boheme Events, we just knew we had to share.

Details behind the shoot told by amazing photographer Jewels, of Jeff and JewelsWhen Bridget from La Boheme Events and I met for the first time, it was obvious that we were meant to be together. Her idea of doing a “GOLD RUSH” themed Styled Shoot made my mind explode! We brainstormed with big eyes, giggles, and a cohesive vision that we knew we just HAD to make happen. Industrial yet rustic, vintage yet glam, and “Colorado”, but unique (“Rustic/Vintage” is all the rage ’round these parts).

We planned for months. Finding the perfect venue proved to be the most challenging aspect, but finally did with 2127 Larimer in Denver. Once we had that, all the other elements just fell into place. Every vendor was fabulous to work with and executed our vision perfectly!

The shoot was not without challenges. The main one being that we had to postpone the “outdoor portrait” part due to the fact that it snowed the entire day…the ENTIRE day. Despite this major obstacle, we were able to do those photos not long after. Another hurdle was over-came when the two models we had lined up decided to bail the night before the shoot. But again, the stars aligned and we were able to get “Jenna” & “Noah”, professionals who had no problem pretending to be Husband & Wife (Hannah Kimball & Caleb Gardner).

As the Photographer, it was important to me that the photos told a story – the story of Jenna & Noah, traveling cross-country by train, “Pikes Peak Or Bust”. Their chapel wedding – intimate and romantic. It was important to us that all of the details were accurate, if not totally authentic, and they HAD to be perfect!

gold rush_jeffandjewels

gold rush_jeffandjewels

gold rush photo shoot_jeffandjewels

gold rush_jeffandjewels

gold rush_jeffandjewels

gold rush_jeffandjewels

gold rush_jeffandjewels

gold rush_jeffandjewels

gold rush_jeffandjewels

gold rush_jeffandjewels

gold rush_jeffandjewels

gold rush_jeffandjewels

gold rush photo shoot_jeffandjewels

gold rush photo shoot_jeffandjewels

gold rush photo shoot_jeffandjewels

gold rush photo shoot_jeffandjewels

gold rush photo shoot_jeffandjewels

gold rush photo shoot_jeffandjewels

gold rush photo shoot_jeffandjewels

gold rush photo shoot_jeffandjewels

gold rush photo shoot_jeffandjewels

gold rush photo shoot_jeffandjewels

DETAILS

We loved the dress, a Waters & Waters, and the fabric made us think of an antique handkerchief. The western style suit complimented it perfectly. The model’s gold jewelry fancied up as only a first-class ladies’ would.

Plum Sage went all out with the flowers including chamomile, lavender, subtle sprays of wheat, deep red roses, and some spray painted thistles! The handle of the bouquet was perfectly wrapped in twine and lace.

The details of the table were just as stunning. A reclaimed wood beam ran the length of the table and held the many vessels that were the centerpiece – gold mercury glass, wooden boxes, and gold and glass candle holders. My favorite part was the rock candy in the champagne!

The Alter was built around draped muslin with dried flower bouquets, a cow skull, wagon wheel, whiskey barrel, and gold bars. The ceremony benches were made by Bridget’s husband (La Boheme Events), just for the shoot (thanks Jason).

Gold mica and gold “nuggets” adorned the aisle.

Thanks to Chairished Vintage Rentals, we had this fantastic wooden arch to hang things from for the Sweets table and Late Night Snack set ups.

Goodies from Leaf & Crumb Bakery included 2 kinds of cake pops: milk chocolate and peanut butter, dipped in chocolate, and vanilla bean and fresh strawberry dipped in white chocolate & gold sugar; mini apple strusel pies; vanilla and rooibos mini scones with vanilla glaze; 2 kinds of french macaroons: traditional with mild chocolate granache and butterscotch with marshmallow buttercream; milk chocolate whiskey mousse with Chantilly cream shooters; chamomile & thyme caramel; a 3 tiered Earl Grey cake with white chocolate Earl Grey swiss buttercream; and a pumpkin chai cake with cinnamon cream cheese filling covered in GOLD!

Relish Catering & Events did such a great job on the food that they had to prep the Late Night Snacks in a different room, so that we wouldn’t eat them all before they were photographed! They made us Mac & Cheese in the cutest little cast iron skillet you’ve ever seen; tomato bisque shooters with a grilled tilagio- prosciutto panini; truffle fries, and delicious kettle corn served in paper bags.

The “General Store” bar backdrop was the combination of a piece made by Bridget’s husband Jason, and an old door set up on some whiskey barrels. Page & Mason Invitations even made the most adorable beer and whiskey bottle labels! We even had Goldschlager shots egging you on with a “Pikes Peak or Bust” mantra.

We are absolutely THRILLED to share GOLD RUSH with you and hope you love it as much as we do…

VENDOR LOVE & DETAILS

Photography: Jeff & Jewels Photography
Photo Shoot Stylist and Planner: La Boheme Events 
Venue: 2127 Larimer
Catering: Relish Catering and Events 
Florist: Plum Sage
Bakery: Leaf and Crumb
Rentals: Colorado Party Rentals
Dress: d’Anelli Bridal
Suit: Alter Occasions
Printed Details: Page & Mason
Vintage Rentals: Chairished Vintage Rentals
Designer: Peggy Cox, cainrocks@msn.com
Hair and Make-up: Jeff & Jewels Photography

{thanks for images Jeff & Jewels Photography}

How to Turn a Frame into a Sparkly Tray

diy frame to tray_jsorelle

I see lots of sparkles around the winter holiday season, but I love sparkles year-round. Bring on the glam! We have a DIY project for you today from our Sparkle from Head to Toe photo shoot {featured on Hostess with the Mostess here…and soon to be featured right here at J. Sorelle}. We took $5 frames, and turned them into trays and party favors. Thanks to Kathryn Giarratano for making our trays shine even more with her gorgeous handmade jewelry.

diy sparkle tray_jsorelle

DIY frame trays

You’ll Need
Frames
Black and white striped paper {or patterned paper}
Paint
Primer
Doll heads – you will need either 3 or 4 per frame, depending on the size of the frame

How To
Remove the glass from the frame.
Spray paint the frame with primer, then your desired color or glitter. For my frames, I used one coat of Krylon White Primer and Krylon Glitter Paint.
If using glitter, cover with glitter sealer.
Paint doll heads white with spray paint or use a brush to paint, which are going to be your tray ‘legs.’
Once dry, use a hot glue gun to glue doll heads to the bottom of the frame.
Use the glass insert from the frame to trace the perimeter of the shape/size onto your patterned paper, and then cut.
Insert the glass, the paper, and then the back of the frame.
Voila, you have yourself a cute little tray for perfume, jewelry or nail polish…and a very cute gift for a girlfriend!

IMG_0464diy sparkle frames_jsorelle

{images via meredith moran photography and j. sorelle}

How to Create a Black, White and Gold Glitter Bar

Here’s one of the details from our Sparkle from Head to Toe photo shoot we told you about Fri {the one featured on Hostess with the Mostess}.

We created the perfect party for women to kick off the holiday season and really SHINE. The sparkle party gave women a chance to gossip with friends over cocktails and cookies, try on and shop for jewelry by local artists, and paint their nails at a OPI nail painting station. Women deserve to Sparkle from Head to Toe…and this party let them do just that!

As you know, every good party needs a bar. With a small space, and a tight budget, we created a DIY bar from a tray. It’s a great accessory for any holiday party, bachelorette party, birthday party, or just a night with the ladies. Here’s how you can do it too.

DIY Black and White Striped Bar Tray

You’ll Need
Tray
Paint
Paint brushes
Painters tape
Wood letter from your local WalMart, Hobby Lobby or Michaels
Gold Glitter Spray Paint

How To
Clean and sand the tray if necessary.
Spray paint the whole tray with white primer.
Once primer is dry, paint entire tray white. Repeat once for two coats.
Add Painter’s Tape where you want stripes. My tray had the perfect lines carved into it, so I just lined the tape up with those.
Paint the non-taped parts black. I used a brush to paint for more control, instead of spray paint. Repeat for a total of 2 coats.
After 24 hours, pull the tape from the tray.
If you have any touch ups to do, use a small brush and paint to fix.
For the letters, it’s best to use the primer to spray paint so you don’t see the wood grain under the glitter.
Once the primer is dry, spray paint with glitter spray paint.
Accessorize the bar with champagne, Izze drinks and fresh fruit.

Labels printed and sparkled by FLEUR DE LIS, custom paperie.

{via Tutto Bella}

ikea hacks

So, they are called Ikea Hacks. When a talented individual sees potential with a low-priced item from Ikea, they purchase, customize with a fabulous embellishment or full transformation with their DIY ideas – and that’s an Ikea Hack. Yes, there is even a site dedicated to Ikea Hacks – Ikea Hackers. Definitely check it out.

When I see some transformations – and I mean these are some transformations – from Ikea furniture, I am amazed, and blown away by people’s talent and creativity. I’m beyond impressed with the projects below that make the price tag for their furniture look high-end and unique.

The Ikea Malm Dresser {there are many variations and sizes} makes for a perfect blank slate and with O’verlays, the creativity is endless. Check out all the O’verlays here.

Ikea Lack Table
Lacquer and Linen made a beautiful transformation. For tutorial, visit here.

Little Green Notebook turned Ikea’s Vika Table into a glamorous white and gold workspace. Tutorial can be found at White and Gold Design.

Centsational Girl always amazes me with her keen eye for home style and she totally impressed me with this upgrade of the Besta, Billy and Brass Bookcases from Ikea.

Ikea Hackers featured the Expedit Bookshelf in a unique and rustic way. Directions here.

House and Home Ikea Tarva Dresser makeover is bright, colorful and we love the ombre effect.

{images via Laquer and Linen, Little Green Notebook, Ikea, Centsational Girl, Ikea Hackers, House and Home and O’verlays}