Batty For These DIY Chocolate Cupcake Toppers

chocolate cupcake toppers - halloween dessert

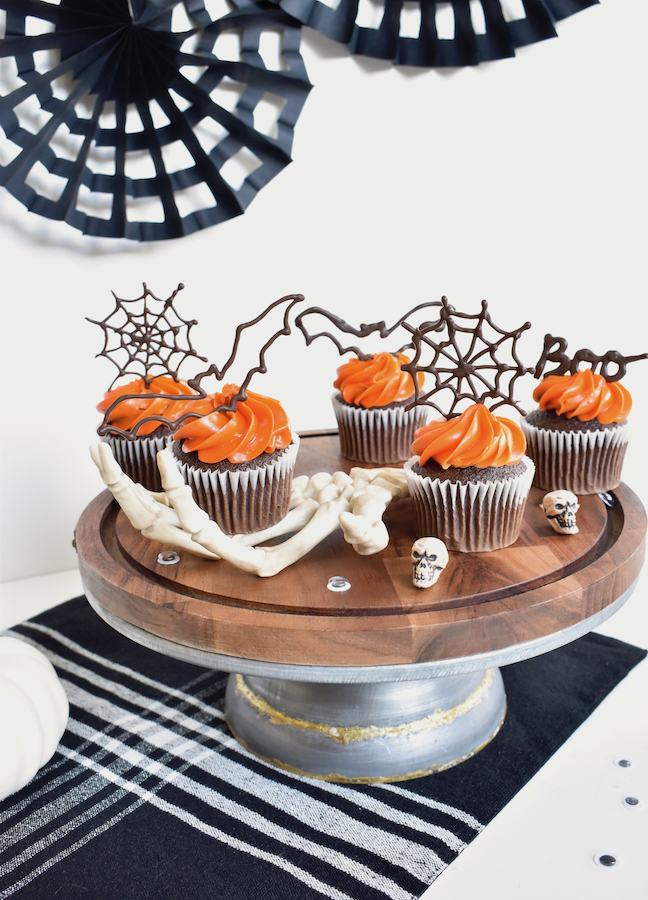
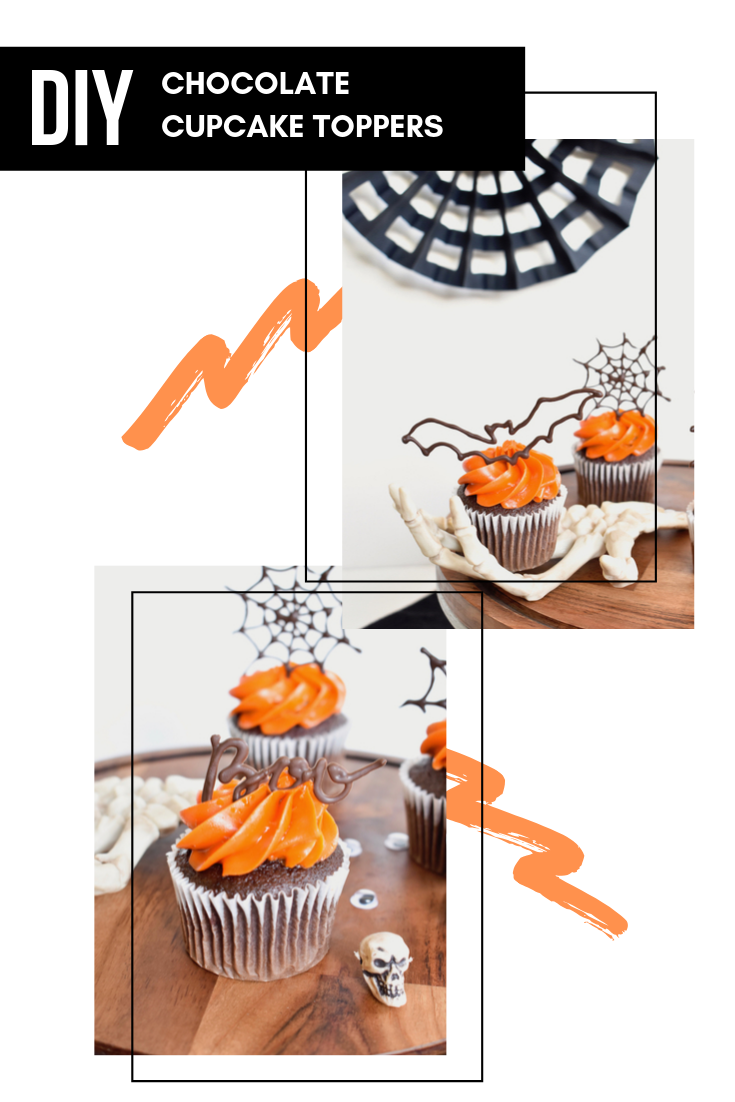
We are not pastry chefs, and don’t have fancy kitchen tools, but we do love when we can make something that looks “professional,” and tastes good. We’re always craving chocolate, so we tried our hand at “drawing” with it! It was fun, and we love how our Halloween cupcakes turned out. The cupcakes are store-bought, so we saved baking time there; but have a homemade touch with the DIY chocolate toppers. #winning

To learn how to make these adorable DIY chocolate toppers for Halloween, or any holiday, see our post on Momtastic.

chocolate cupcake toppers - halloween dessert


DIY Witch and Mummy Halloween Nail Polish

mummy-witch-halloween-nail-polish-diy-holiday-gift

We typically opt for a cute and fun Halloween, instead of a scary and creepy one. We’ve never loved haunted houses or frightening people. We like costumes and carving pumpkins, apple cider and trick or treating with our large Italian family.

Since we were babies our mom and aunt made our ‘themed’ Halloween costumes, and every year we celebrate together. Following the annual chaos of hello hugs, oooh’s and ahhhs over costumes and hundreds of flashing camera lights, the men grab a cigar and take the kids trick or treating. The women stay inside where its warm to chat, eat chili and hot dogs and drink our wine. It’s a special tradition, and we are grateful to share it with our own kiddos.

Being into the cute part of Halloween, this DIY is so us!

These DIY witch and mummy Halloween nail polish bottles would make for a great, non-candy Halloween party favor or a unique Halloween gift.

Witch color are you going to pick for this year’s Halloween nails? We’re going with Essie Bahama Mama.

If your rainbow-loving self is admiring the DIY spider web in the background, you can see how we did it here.

halloween-nail-polish-favor-witch-broom-mummy-spider-web-rainbow-hat-white-party-diy

You’ll Need:

  • Nail Polish
  • Paper, Astrobrights
  • White rafia paper ribbon
  • Googly eyes
  • Hot Glue
  • Nail File
  • Rafia
  • Twine

How To:

For the mummy, glue two eyes on the nail polish bottle. Dab a small amount of hot glue on the top of the bottle, then add white rafia ribbon, and start to wrap. You can do one continuous wrap, or cut, add a dab of glue and continue to wrap. When the entire bottle is covered, dab another small amount of hot glue, so the mummy’s wrap stays in place.

mummy-nail-polish-diy-halloween-favor-gift-ribbon-white-googly-eyes

mummy-nail-polish-diy-halloween-favor-gift-ribbon-white-googly-eyes

For the witch, make a small witches hat with a free mini-hat template online {or free-hand} and glue it to a black, doughnut-cut circle. Slide it over the nail polish handle. For the witches broom, place a handful of rafia around one end of the nail file, and tie twine around it to keep it in place. Use a tiny dab of hot glue to keep the twine in place.

witch-nail-polish-diy-halloween-gift-black-hat-orange-nail-file-broom-favor


witch-nail-polish-diy-halloween-gift-black-hat-orange-nail-file-broom-favor


witch-nail-polish-diy-halloween-gift-black-hat-orange-nail-file-broom-favor

diy halloween

In addition to the DIY hot glue gun spider webs, I wanted to add a little Halloween touch to our table. I like the colors of the original candy corn, but can’t stand the taste, so with a little yarn, paint and some diy tips, this simple Halloween table came to life in an afternoon, without having to eat a single candy corn.

I found the best way to make yarn pom poms was to follow Creature Comforts video tutorial. She explains it so well, and you will be addicted! Very easy and cute! I used yarn to tie them to one another to make a ‘yarn chandelier’.

As far as the BOO treat station, as we call it, I bought wood letters from Hobby Lobby, and wrapped them in yellow, orange and white yarn {inspired by the candy corn}. I didn’t follow a tutorial, just did it as I went along, but My Sister’s Suitcase has a similar approach to the one I took, and they provide a great tutorial. I took a piece of raw wood from the garage, painted it white, and used a circle-shaped brush to add black polka dots to it. Once dry, I used a hot glue gun to glue the letters and candy container in place. It was simple, and the kids love it…as it’s their favorite spot to stop at the end of the day for a treat.

{images via Tutto Bella}

spun in a web of…

glue!

Looking for a super-duper easy and cute Halloween DIY? Look no further. Spin your own spider web’s this Halloween…using a hot glue gun. I used my webs as an accessory for a festive table setting, but these can be hung or displayed in so many ways.

All You Need:
Hot Glue Gun and Glue Sticks
Wax paper
Olive Oil {an oil spray may work too}

How To:
Cut the wax paper into a square, or the shape/size you want your spider web to be.
Spray, paint, or rub the olive oil onto the wax paper with your fingers. I found that the olive oil helped the glue not to stick when I pulled it from the paper.
Use your hot glue gun and design. I free-handed the webs {clearly}, but I suppose you could put a stencil/photo under the wax paper, and follow the lines.
Once your design is finished, gently pull the glue web from the wax paper. If it sticks in a few spots here and there, just gently pull the wax paper from the glue.

More images of my complete Halloween table setting, and other fun DIY projects to come this week.

{image via Tutto Bella}