DIY Pegboard Art

diy-peg-board-art-paint-colors-vanishing-point-quote

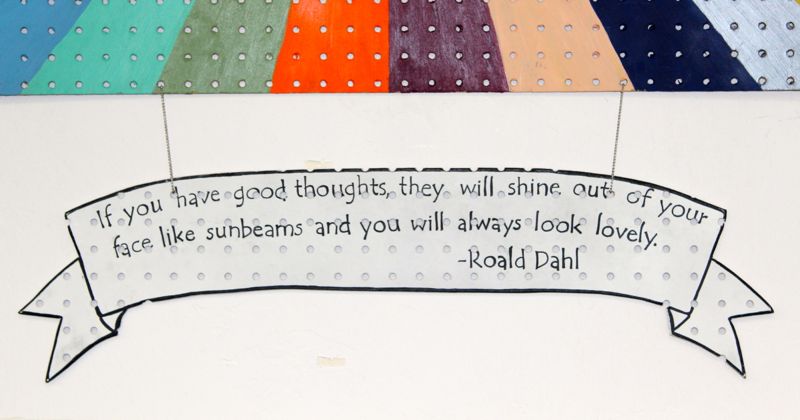
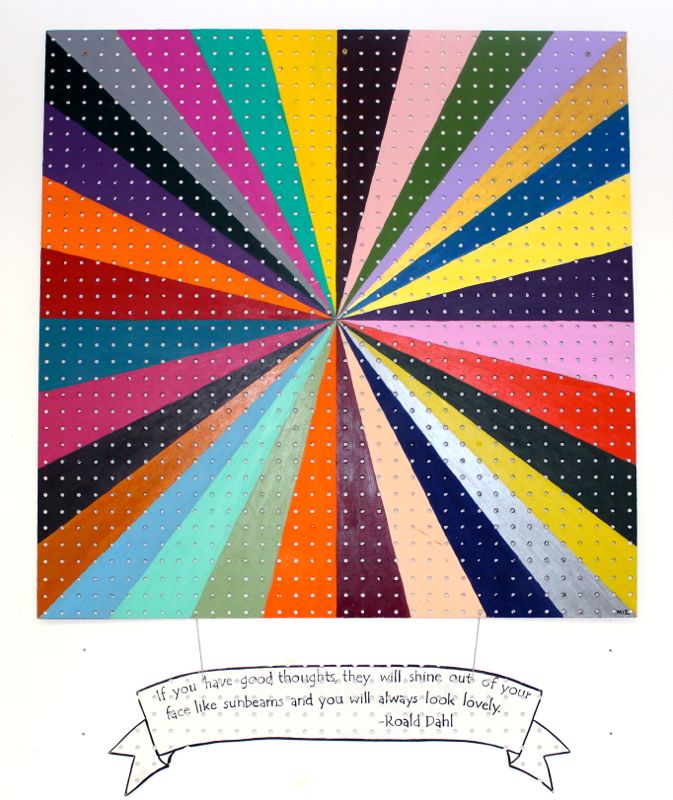
Pegboard is the source of so many amazing art projects and organizational walls. We’ve seen them accessorized with hooks, baskets, jars, letters, ribbon and photos. But one specific pegboard in an art classroom really caught our eye. The colorful, bright DIY pegboard with an inspirational quote was made by one creative and talented art teacher, Sam Mizwicki. The quote by Roald Dahl says, “If you have good thoughts, they will shine out of your face like sunbeams and you will always look lovely.”

Well, this colorful piece of DIY pegboard art radiates like a sunbeam, which gives us good thoughts…and we’re hoping it makes us look lovely.

Sam is sharing all her tips in a how-to tutorial below. Thanks, Sam!

diy-peg-board-art-paint-colors-vanishing-point-quote

Materials:

  • Peg board
  • Pencil
  • Yard stick or ruler
  • Acrylic paint
  • Painter’s tape

Directions:

  • Step 1: Purchase the pegboard in a big sheet from Home Depot. It was quite inexpensive for the size of the piece. You can also find some in white, but I liked the brown look.
  • Step 2: Use a table saw to cut pegboard down to desired size, or ask the nice employees of Home Depot to cut it for you.
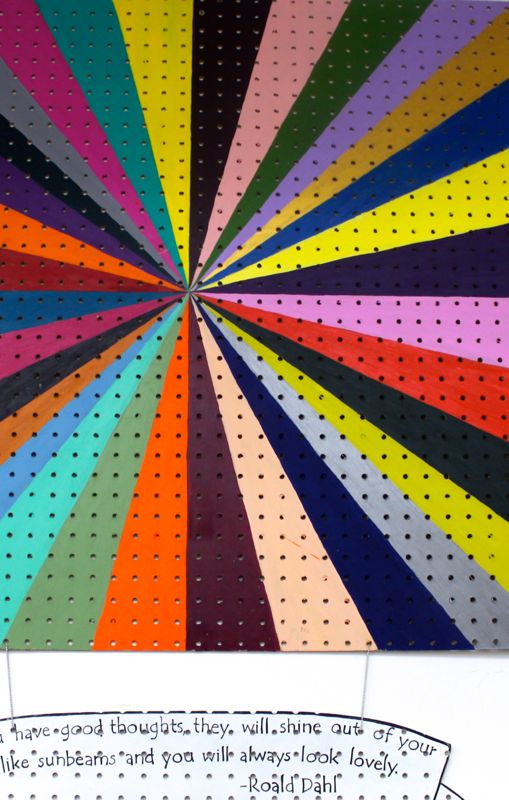
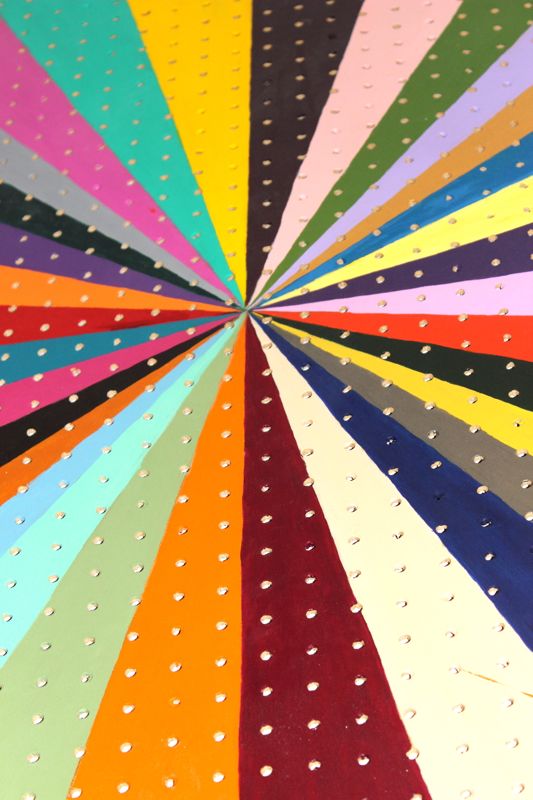
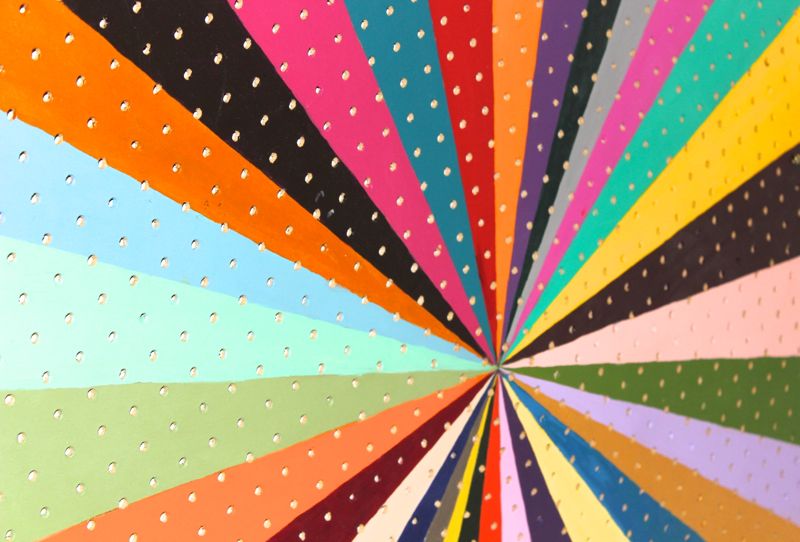
  • Step 3: I used the concept of perspective here, where every line goes back to the vanishing point. Find the center of the pegboard and make a little dot. All lines will end at that point (the vanishing point).
  • Step 4: Start at the perimeter of the pegboard and divide up into sections of whatever size you prefer. You can measure it out to make it exact or just wing-it! I measured mine out to be a bit more precise. I used a pencil to make a little dot to mark each section.
  • Step 5: Use a yard stick or ruler to draw a line from the outer perimeter dot to the inside vanishing point dot. Continue this until you have filled in the whole space. Press lightly with your pencil because it makes it easier to erase.
  • Step 6: Next comes the fun part, painting! I used acrylics. Since I am an Art teacher, I have quite a collection of all different types of acrylics. A more heavy bodied acrylic will need less coats of paint, and can add a bit of texture. You can always water them down a bit. I used different sized brushes to get into the small spaces. Painters tape or masking tape can you keep straight lines, and avoid bleeding into another section. Just be careful when you pull off the tape, because the paint may come with it. If you stick the tape to your pant leg before applying it to the board, it will make it a little less sticky, which may help avoid the dried paint being pulled off.
  • Step 7: Fill in all sections with paint. Get creative with the colors. I used rainbow colors, but you could try different values in the same color family or black and white.

diy-peg-board-art-paint-colors-vanishing-point-quote

  • Step 8: Sketch a paper template of the banner with a quote. Trace your sketch onto the pegboard, and recruit a friend to cut it with a jigsaw. Sharp curves can be tricky with a jigsaw, so keep that in mind when designing the shape of your banner.
  • Step 9: Paint a white acrylic coat on the banner. Gesso will work here too.
  • Step 10: Find a quote that you like, keeping the space of the banner in mind.
  • Step 11: Freehand the letters, or print them out in a Word document to do a transfer. It is often easier to start with the words in the middle and work your way out, so you don’t have too much or not enough space left. To transfer letters, use graphite paper or just a pencil. Run your pencil on the back of the printout. Press hard. Then lay the letters down where you want on the banner. Use a sharp pencil to press hard on the outline of the letters on the front. This will make a transfer of the letters that appear on the banner. It is like making homemade graphite transfer paper. The letters might be faint,  but you can always trace over it.
  • Step 12: Use a paint pen or sharpie to trace over your lettering.
  • Step 13: Hang the banner from the painting. I used a ball chain to hang the banner. You can find this at any craft store for a few dollars.

diy-peg-board-art-paint-colors-vanishing-point-banner-quote

diy-peg-board-art-paint-colors-vanishing-point-quote

DIY Bouquet Wrap for the Hostess

diy-flower-bouquet-wrap-sunflower-art-twine-pink-orange-summer-diy-hostess-gift

Art is therapeutic. Flowers are beautiful. Kids love activities. Combine all three for a DIY hostess gift that is both personal and memorable. Whether the booms are fresh from the garden, or store-bought, they are even prettier when they are wrapped in a custom, DIY flower wrap.

Jessica shared details of her sunny afternoon painting on the porch, and how she created the DIY bouquet wraps with her kids on Momtastic. After you read it, make sure you find time in your day to stop and smell the roses!

diy-hostess-gift-bouquet-flower-wrap-watercolor-art


DIY Thank You Note

thank-you-crossword-puzzle-red-letters-diy-note

Thank you. Grazie. Merci. Danke. Gracias.

No matter how you say it, ‘thank you’ is such a beautiful and powerful word.

Jenna is always early, or on time with her thank you notes. Jodi’s speed runs about average. Jessica is always late. Typical.

thank-you-crossword-puzzle-red-letters-diy-note

Now, you can say thank you with a lot of letters in a DIY word search, and a red Sharpie to help those special words stand out. Here’s how…

You’ll Need:

  • Red Sharpie
  • Blank fold-over note
  • Access to a computer and printer
  • Washi tape

Directions: 

  • Create a table/chart {with invisible lines} on Microsoft Word, and add random letters inside each box. Make sure and add Thank You letters in there somewhere. Click here for our DIY Word Search Thank You file.
  • Print a copy of your word search on regular printer paper.
  • Trace your fold over note on the copy of the word search. This will help you determine the placement of the note on the paper when you need to print the actual note.
  • Tape the fold over note onto a piece of printer paper with your washi tape. Make sure you align it with the lines you traced. Load your tape note into the printer, and print.

thank-you-crossword-puzzle-red-letters-diy-note-washi-tape

  • Remove the tape.
  • Circle the thank you letters with a bright, colored Sharpie.
  • Write your note.

thank-you-crossword-puzzle-red-letters-diy-note

thank-you-crossword-puzzle-red-letters-diy-note


DIY Hanging Wall Art

Words to live by…

do-your-best-diy-hanging-wall-art-back-to-school-ruler-frame-diy-teacher-gift

See all the details on how we made the back to school-inspired DIY hanging wall art on Momtastic.

Thanks Fleur de Lis, a paperie for the adorable printables!

Look…It’s Ice Cream Shaped Like an Avocado for Dessert!

avocado-ice-cream-balloon-dessert-diy-mexican-pistacio-chocolate-bowl

Avocado + ice cream.

It’s not an everyday pairing. At first thought, it sounds creamy, slightly odd and interesting.

Well, after experimenting a bit in the kitchen, we can tell you that the combination of an avocado + ice cream dessert is delicious.

We wish we could take total credit for this idea. However, if there are any Triple D {Diners, Drive-Ins and Dives} fans out there like Jessica’s hubby, you may have seen an episode where a Mexican restaurant made an exact replica of an avocado for dessert; except instead of an avocado, it was homemade avocado ice cream in a chocolate shell, and a homemade caramel and chocolate ball inside. Yum!

We would have attempted actual avocado ice cream, but we went with something easier to make {just buy and scoop}, and sweeter {not as healthy}. Plus, the gelato had the word Sicilian in it, and being of Sicilian heritage, it was a no-brainer.

At your next party, surprise guests with an avocado dessert…or at least Avocado shaped ice cream for dessert. It will be a hit!

avocado-ice-cream-balloon-dessert-diy-mexican-pistacio-chocolate-bowl

You’ll Need:

Directions:

Make the Chocolate Avocado Shell

  • Step 1: Melt the chocolate wafers. We melted it via microwave in 30-second intervals until it was melted. Stir until smooth.
  • Step 2: Blow up a balloon about the size of an avocado.

avocado-ice-cream-balloon-dessert-diy-mexican-pistacio-chocolate-bowl

  • Step 3: Prepare a baking sheet with wax paper or parchment paper.
  • Step 4: Make sure the chocolate is slightly cool.
  • Step 5: Gently dip the balloon in the chocolate, coating the bottom half of the balloon.

avocado-ice-cream-balloon-dessert-diy-mexican-pistacio-chocolate-bowl

  • Step 6: Place on the baking sheet. Repeat for as many bowls as you want to make. Place the baking sheet in the refrigerator for about 10 minutes.

avocado-ice-cream-balloon-dessert-diy-mexican-pistacio-chocolate-bowl

  • Step 7: To release the air from the balloon, pinch the balloon and use a tack or knife to puncture a small hole.

avocado-ice-cream-balloon-dessert-diy-mexican-pistacio-chocolate-bowl

  • Step 8: Release the air gradually. If the air is released too fast, the bowl will be more likely to break.
  • Step 9: Carefully peel the deflated balloons from the bowl, trying not to press down or squeezing the bowl.

avocado-ice-cream-balloon-dessert-diy-mexican-pistacio-chocolate-bowl

avocado-ice-cream-balloon-dessert-diy-mexican-pistacio-chocolate-bowl

Add Ice Cream to the Shell

  • Step 1: Remove the ice cream from the freezer, and let it thaw slightly so it’s easier to mold without breaking the shell.
  • Step 2: Gently add spoonful’s of ice cream into the chocolate ‘avocado shell’ until it’s full.
  • Step 3: Press a Lindt chocolate truffle into the ice cream so it looks just like the nut inside an avocado.

avocado-ice-cream-balloon-dessert-diy-mexican-pistacio-chocolate-bowl

  • Step 4: Place the sweet DIY ice cream avocados into the freezer until you are ready to serve.

avocado-ice-cream-balloon-dessert-diy-mexican-pistacio-chocolate-bowl

avocado-ice-cream-balloon-dessert-diy-mexican-pistacio-chocolate-bowl