DIY Brushstroke File Folder

diy-brushstroke-paint-gold-file-folder-search-for-your-awesome-black-metallic

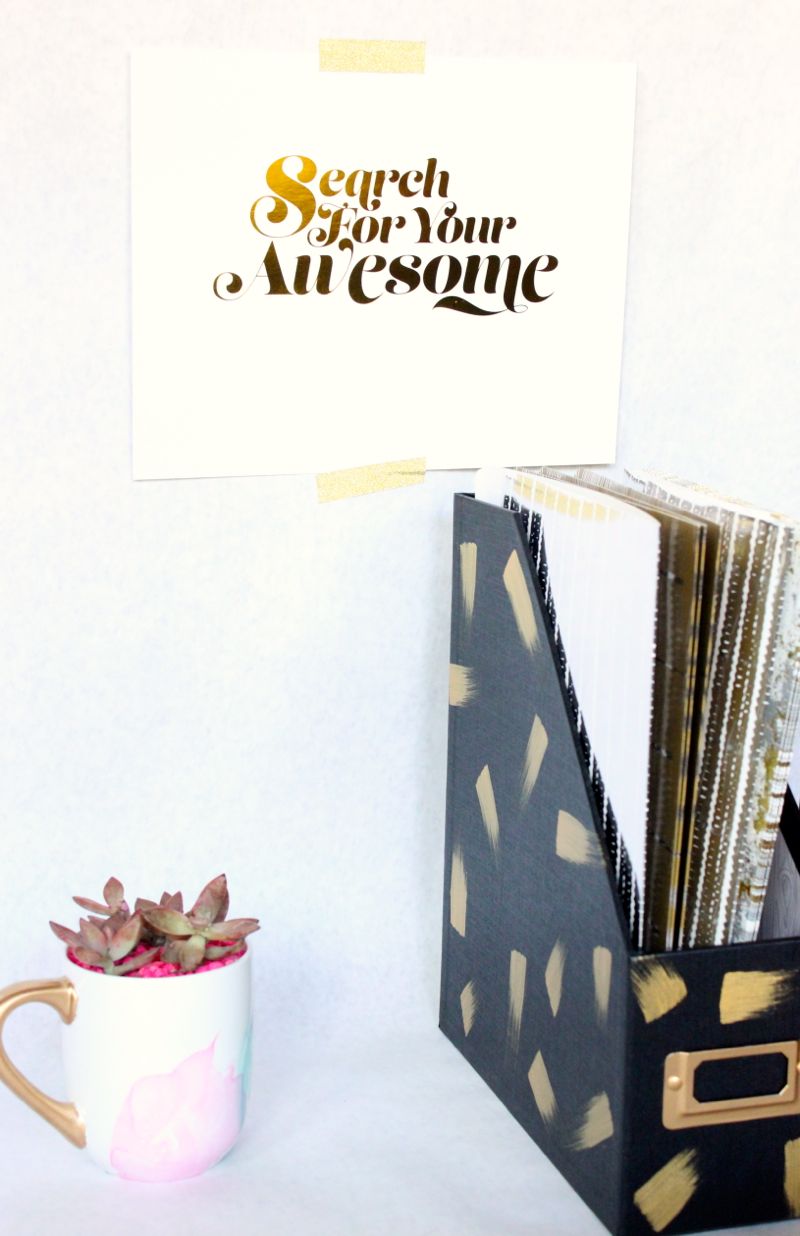
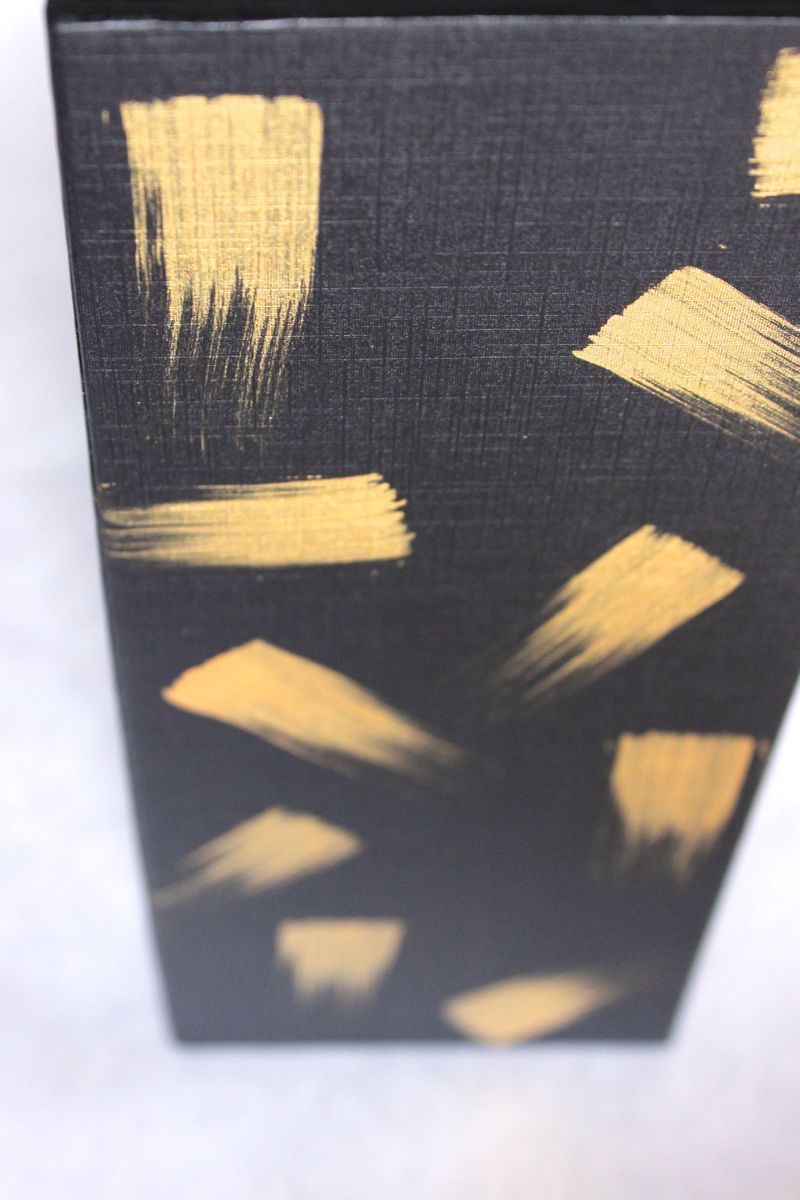
We’re still crushing on gold over here. We just can’t get enough of the shimmery, metallic metal.

We also are trying to master the art of brushstrokes. After dabbing into the paint this weekend, we’ve come to the conclusion that brushstrokes are so versatile and subjective, anyone can do it. You can do this particular project in under 5 minutes.

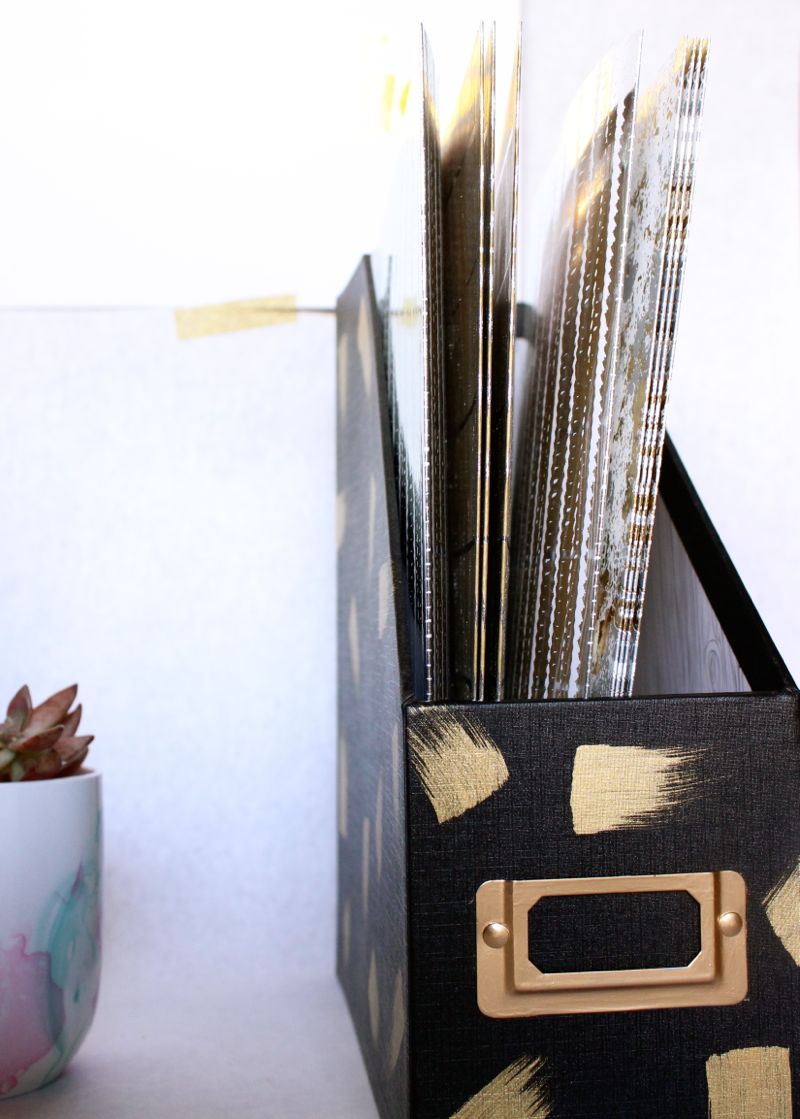
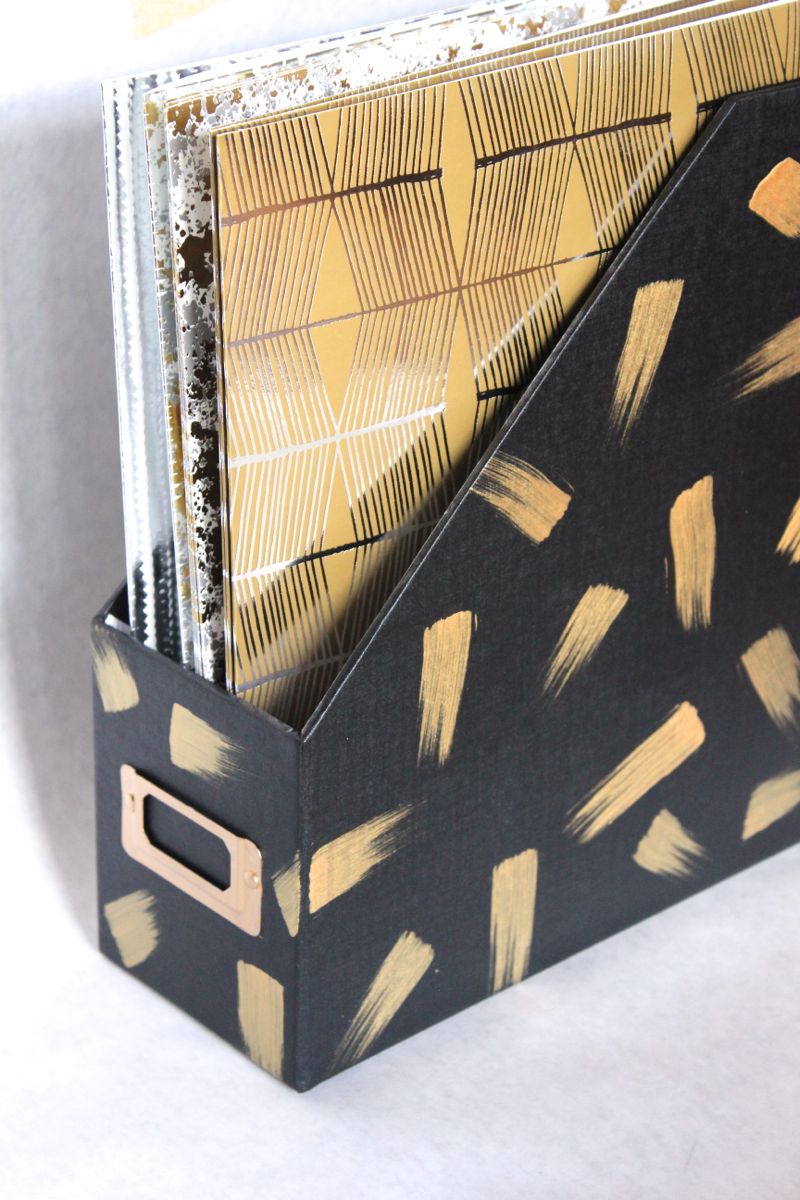
Our new DIY brushstroke file folder keeps us organized {ok, Jenna doesn’t need it because she’s uber organized, and maybe not Jessica because we’re not sure the word organization is in her vocabulary}, and it’s a piece of art all-in-one. We are no van Gogh, but now we have a fashionable desk accessory, and for us, that’s enough.

diy-brushstroke-paint-gold-file-folder-search-for-your-awesome-black-metallic

Materials:

  • Metallic gold paint
  • Flat paintbrush
  • File folder

Directions:

  • Dip your brush lightly in the metallic paint and gently stroke the file folder, applying heavy to light pressure.
  • Add brushstrokes in every direction on the file folder.
  • Let dry.

diy-brushstroke-paint-gold-file-folder-search-for-your-awesome-black-metallic

diy-brushstroke-paint-gold-file-folder-search-for-your-awesome-black-metallic


diy-brushstroke-paint-gold-file-folder-search-for-your-awesome-black-metallic

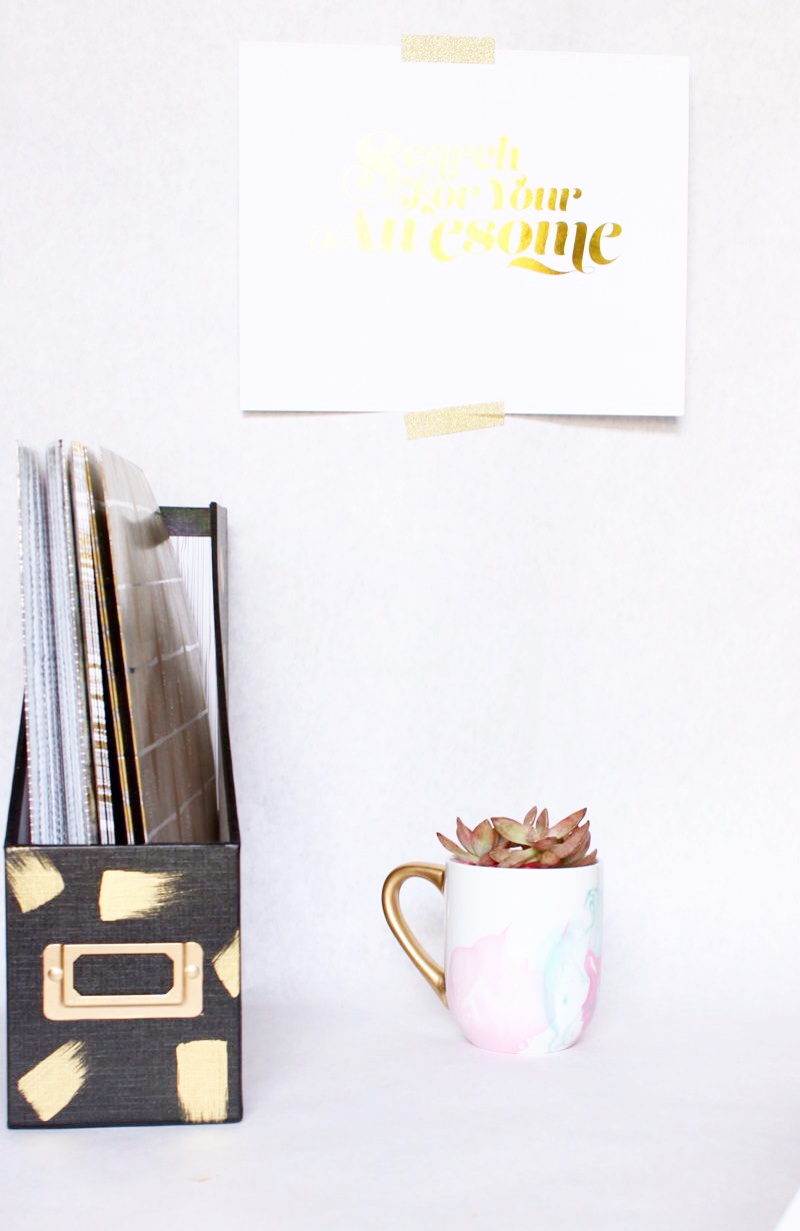
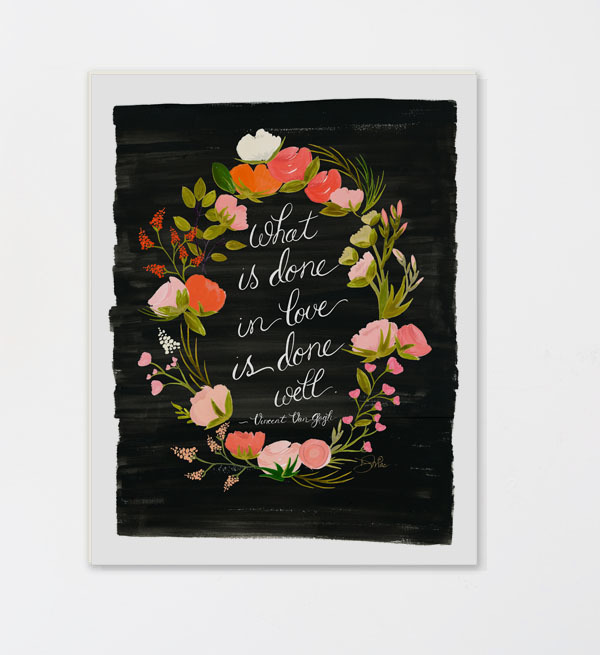
search for your awesome art print via hello tosha, courtesy of bing and the alison show

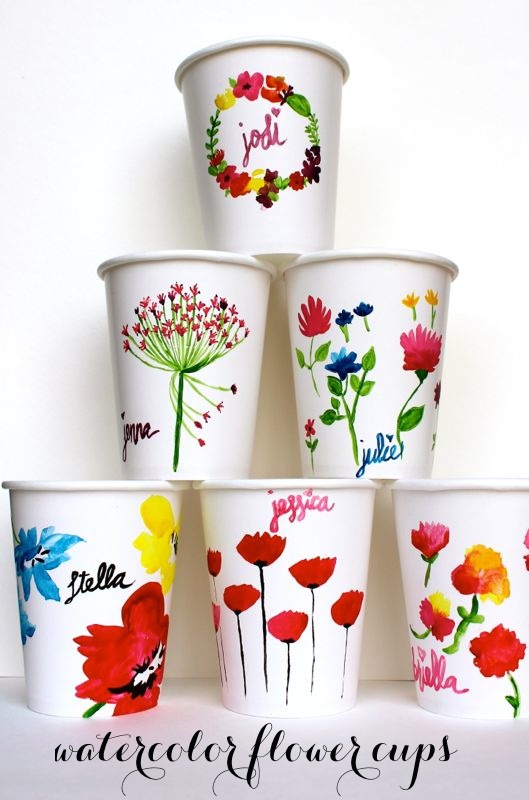
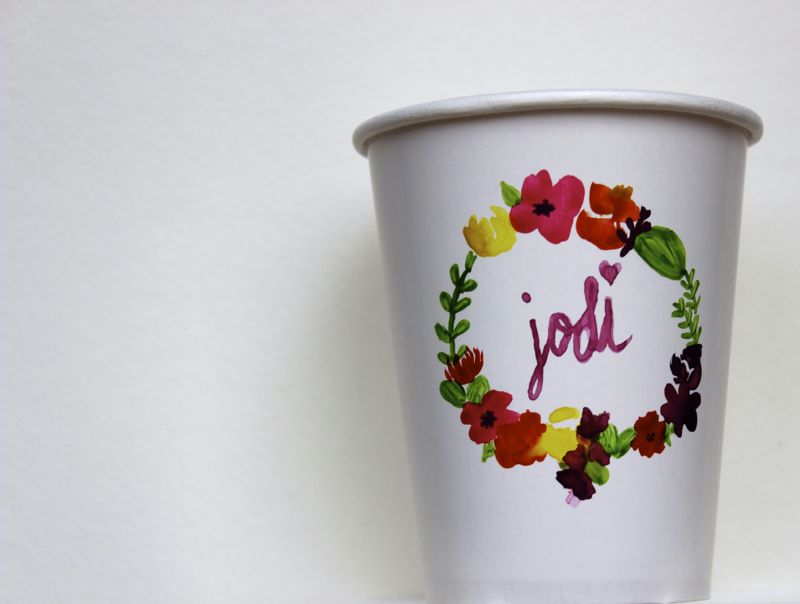
{photography via j. sorelle}

DIY Citrus Fruit Pushpins

lemon-lime-push-pin-summer-diy-cork-paint

In the summer we plan to take our Friday nights with a lick of salt, a slice of lime and a shot of tequila. The thought makes our lips pucker with excitement.

So, why not take our cork boards with a hint of color, a slice of lime and a cute photo?

Our classic black and white pushpins recently got a makeover into DIY lemon and lime pushpins. The mini slices add cheer to our workspace, and keep us dreaming of our favorite Rio Grande margaritas.

lemon-lime-push-pin-summer-diy-cork-paint

Materials Needed:

  • Mini Cork Door Discs {with adhesive backing} from Home Depot. You can also use flat white pushpins {non-cork}. 
  • Acrylic paint {white, lime green, yellow}
  • Pushpins
  • Pencil
  • Sealer, such as Shellac

Directions:

  • Paint the mini cork discs white.
  • When the white paint dries, use a pencil to freehand mini triangles in a circle around the center of the disc.
  • Paint the outer ring green/yellow, then paint the triangles green/yellow.
  • Once the paint dries, spray paint with a sealer, like Shellac.
  • Stick to the pushpins. The adhesive on the back should be sufficient, but if not, a hot glue gun with work.

lemon-lime-push-pin-summer-diy-cork-paint

lemon-lime-push-pin-summer-diy-cork-paint


lemon-lime-push-pin-summer-diy-cork-paint

{photos via j. sorelle}

10 Creative Ways to Decorate the Wall with Flowers

Spring is nature’s way of saying, let’s party!
~ Robin Williams

We couldn’t agree more, Robin. Nature is alive again. The warmth of the sun, and buds in the trees is rejuvenating for the soul. We’re so happy Spring is here – seriously, we would hug it if we could.

Naturally, we’ve got flowers on our mind…and hopefully on our walls soon with all these amazing floral wall decoration ideas.

10 Creative Ways to Decorate the Wall with Flowers

1. Antler and Flower Wall Art: We’re still obsessed with all the deer heads popping up on walls, so the combo of deer heads, bright colors and fresh floral has us swooning. {via Wedding Chicks}

dessert table-deer-head-floral-wreath-flower-pink-turquoise-spring-party

2. Paper Flower Wall: We heard Oh Joy! speak at Alt, and immediately loved her. She was a wonderful speaker, and she is insanely talented. Look at that DIY paper wall art. {via Oh Joy!}

diy-paper-flower-wall-oh-joy-cascading-flower-display-spring-party

3. Girl’s Room Decor: We are smitten with the paper flowers, teepee and gold pouf in this room! One lucky little lady calls this place home, and she’s most definitely a chic princess. {via honey & fitz}

girls-pink-bedroom-etsy-teepee-paper-flowers-gold-pouf-tassle-spring-home-decor

4. Floral Monogram: With a little Modge Podge and a gorgeous floral print, you can create a pretty floral monogram. This would look great on the wall, and it would make a fabulous gift. {via Homey Oh My}

Floral-Fabric-Monogram-spring-wall-decor-

5. DIY Fresh Flower Wall: Buy some fresh stems from your local florist and hang the stems with washi tape. You can do this on a small-scale, or a large one. And, if you want it to last longer, buy fake stems. {via Green Wedding Shoes}

DIY-Fresh-Flower-wall-washi-tape-spring

6. Party Backdrop: A Snow & Graham print is lovely and a wall to match is even more lovely. {via Snow & Graham}

snow-and-graham-shower-floral-wall-art-diy-spring-dessert-backdrop


7. Pom Flower Wall: Lia Griffith impresses again with this Mother’s Day Brunch pom flower wall. {via Martha Stewart}

mothers-day-dessert-table-pom-flowers-pink-spring-wall-art


8. DIY Giant Floral Typography Wall Art: We need to make this with a J! It’s so beautiful. {via Paper & Stitch}

flower-typography-wall-art-white-wall

9. Art Print: We love so many of The First Snow’s prints, so it was hard to pick just one. They are so pretty and unique. Plus, she’s in CO and we have major hometown pride!

van_gogh-floral-art-print-quote-wall-decor-


10. DIY Framed Wallpaper Art: Make panels of art with rolls of wallpaper. It’s a DIY, which we always love, it’s affordable and looks fabulous! {via Hunted Interior}

LauraAshley-diy-wallpaper-panel-art-floral-decor-spring-wall

Bloom into Spring with DIY Watercolor Flower Cups + Giveaway

watercolor-flower-cups-diy-poppy-spring-placecards-easter-brunch

Clearly, Jessica is in the mood for paper cups and watercolor this spring. Jenna was described as the ‘flower child’ growing up, but it seems Jessica’s inner flower child is coming out now. First came the bunnies, and then came the flowers.

Our Nani, fabulous as ever at age 79, is a proper lady that loves to entertain and host. She’s good at it, too. Amazingly, she has more energy then we do. Just like mother’s do, she will still walk up to us at a party {even in our 20’s and 30’s}and remind us to say hi to Mr. and Mrs. so and so, and congratulate them on their recent successes. We never understood it until we became mothers. Being the hostess with the mostess that she is, the thought of using plastic and paper glassware and flatware at a party is unbearable. It must always be china or glassware.

But, these DIY watercolor flower cups got the seal of approval from good ‘ole Nani P. They are paper, but they look lovely, and they don’t look cheap. You can fill them with water, juice or a fave cocktail, or fill them with a favor. They make for a great place card, too, with custom names painted on them. Use them for Easter, a spring brunch, bridal shower or baby shower.

floral-wreath-diy-watercolor-cup-easter-brunch-table-setting-placecard-flowers-watercolor


If you like them, and think they would be a great fit for your next event, follow us on instagram, then tag a friend in comments under the photo of these cups. Those who follow and tag will be entered to win a set of 30 of these watercolor cups for FREE – you can choose to receive a variety, or pick your faves. We are not professional artists, and what you see is what you get. But, for free, they are darn adorable. Giveaway starts March 25 and ends March 31, 2015. Giveaway is not sponsored by Instagram. Names are NOT included on cups for giveaway. Good luck.

Questions? Email us at hello@jsorelle.com.

watercolor-spring-cups-poppy-flowers-easter-brunch-table-setting-place-cards-diy-paint

To make them, you’ll need:

  • Paper Cups {$1 for a pack of 10}
  • Watercolor paints
  • Brush
  • Water

The amazing one step tutorial is…explore floral inspiration in your head, online or on a print, experiment with watercolor paint.

diy-paper-cups-flower-wreath-spring-brunch-table-setting-watercolor-art-bridal-shower-favors

{images via j. sorelle}

Easter Watercolor Bunny Tail Cups

watercolor-bunny-tail-easter-cups-pink-blue-green-cotton-diy

One of our favorite Easter memories from childhood is the year the Easter bunny brought us chicks. Yes, real live chicks. And, they were green and pink. Sounds totally inhumane, and honestly we have no idea how they did it, or whether it was permanent or not. But, all we know is that the Easter bunny brought us colorful chicks, and we got to feed, pet and care for them for a whole week before we had to bring them back home to a local farm.

Besides our brief stint with chicks, the only real pet we had throughout our childhood was a rabbit. Sweet Thumper.

Painting these DIY bunny tail paper cups brought back memories of our pet rabbit, and the fun memories chasing him all over the yard.

These would make for a cheap and easy addition to your Easter table setting, or a lovely gift filled with candy or small gifts…so let’s hop to it.

pink-bunny-watercolor-easter-cups-cotton-ball-diy-rabbit-easter

You’ll Need:

  • paper cups {.97 cents for 10}
  • watercolor paints {quality brand like Windsor and Newton, brush and cup of water}
  • cotton balls
  • hot glue gun

How To:

  • Print and cut an outline of a rabbit you find online.
  • Place the rabbit on the cup and lightly trace around it with a pencil.
  • Dip your brush into watercolor paint, and a touch of water and paint within and just on the pencil outline {so you don’t see it} of the rabbit.
  • Let dry.
  • Glue the cotton ball on the tail of the bunny.

blue-green-easter-bunny-diy-cups-watercolor-kid

Hoppy Easter!

{images via j. sorelle}