{wedding diy} cruiser bike escort card

INphotography-cruiser bike escort card table

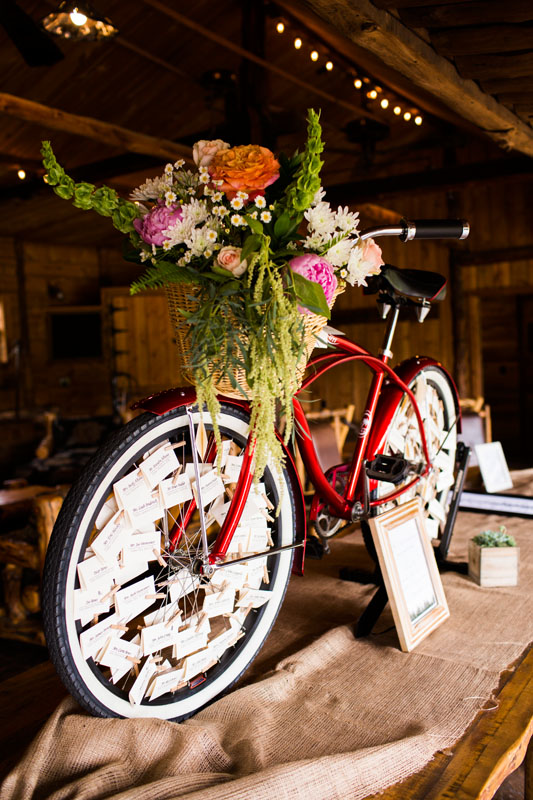
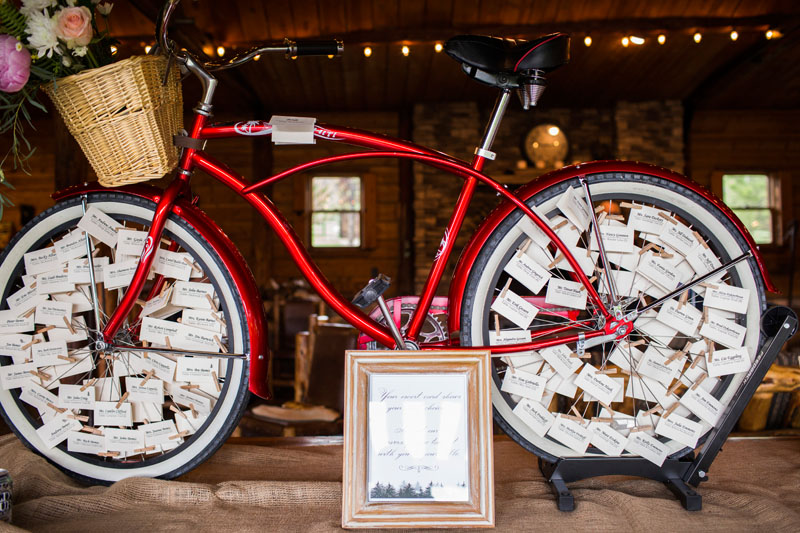
Yesterday you saw Sara and Jed’s gorgeous wedding, and if your like us, your heart swooned with the red cruiser bike escort card table. Today Sara is sharing her tips on how to re-create for your own wedding or party.

In Sara’s words…Jed and I together own seven bikes (I know, a bit excessive!). Two of them are cruiser bikes..mine of course being the pretty red one we used. 🙂  For someone who likes the place card idea, but doesn’t own a cruiser bike, I’d recommend that they ask around among their friends to see if they could borrow one or perhaps try calling a bike shop as there are some that will rent them (a tandem bike would also be cute).  had purchased a wicker basket for my cruiser bike a long time ago and thought that would be a great option for a floral display, so I dropped the basket off to my florist, Bella Lu Floral, a few weeks before the wedding and she put together something pretty!  Adding some greenery or additional flowers around the base of the bike would also be nice, we just opted against that.

INphotography-cruiser bike escort card table

How To

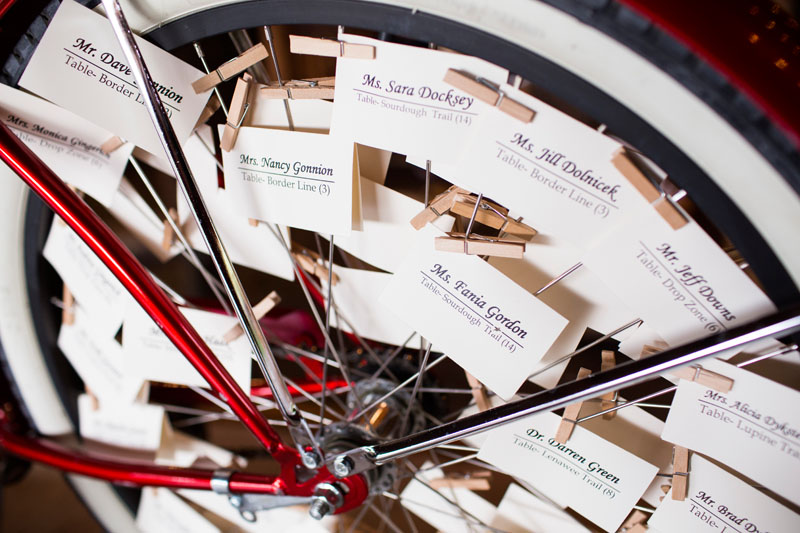
  • Give the bike a good wash, design and print all the place cards and start clothes pinning.  
  • Clothes pin sized 1 7/8″ worked best with paper thickness and spoke size.  
  • Also, depending upon how many place cards you have, you’ll need to be mindful of their size as well.  We had 110 place cards which were 3.5″ X 4 1/4″ and this was about the max of how many we could fit on two wheels without it looking stuffed. 
  • Divide the place cards evenly in to four groups to how many to affix to both sides of the front and back wheels. 
  • We decided to run things alphabetically by last name with A starting in the 12pm position on the front wheel and then spiraling inward (clockwise) as we went down the alphabet.  Grouping by table didn’t seem like it would work very well for something like this.

Other Important Tips

  • Do the arranging prior to the wedding.  Don’t leave this for the day of as it takes a little bit of work to make everything fit and look pretty.
  • Once done, you’ll need to find a way to keep things stuck in place so place cards don’t fall off or move during transport to your venue.  Our day of planner suggested Saran wrap and it worked out perfectly!  So after we were done, each wheel was heavily wrapped!
  • Find a nice friend with a large SUV to fit the bike in the back of their car and drive it to your wedding venue!
  • After cocktail hour was over, asked your planner to move the bike over to the dinner/dancing space. It made for a fun decor item and the beautiful flower arrangement that could still be enjoyed!

INphotography_cruiser bike diy

Thanks to IN Photography for the beautiful photos!
Fall in a Basket Ideas

fall in a basket_silhouette letters_jsorelle

When a Silhouette America Portrait electronic cutting machine arrived at our door step, we literally leaped with joy! We know, who seriously reacts in such a way when an electronic cutting machine arrives? US! And, for good reason – the Silhouette is amazing. It takes our projects to a whole new level of creativity and endless possibility, and it’s a major time saver since it so perfectly cuts everything for us! It’s been a dream come true for us. Honestly, it was on Jessica’s Christmas list – and she will argue it was a NEED, but it was a WANT, a desperate want.

We have found it to be very user-friendly, and we love it. We don’t know what we ever did without it. We’ve made thank you cards, and some other fun projects we will reveal soon, but with the changing colors and the crisp air, a Fall in a Basket seemed appropriate…and too cute not to do.

fall in a basket_silhouette_jsorelle

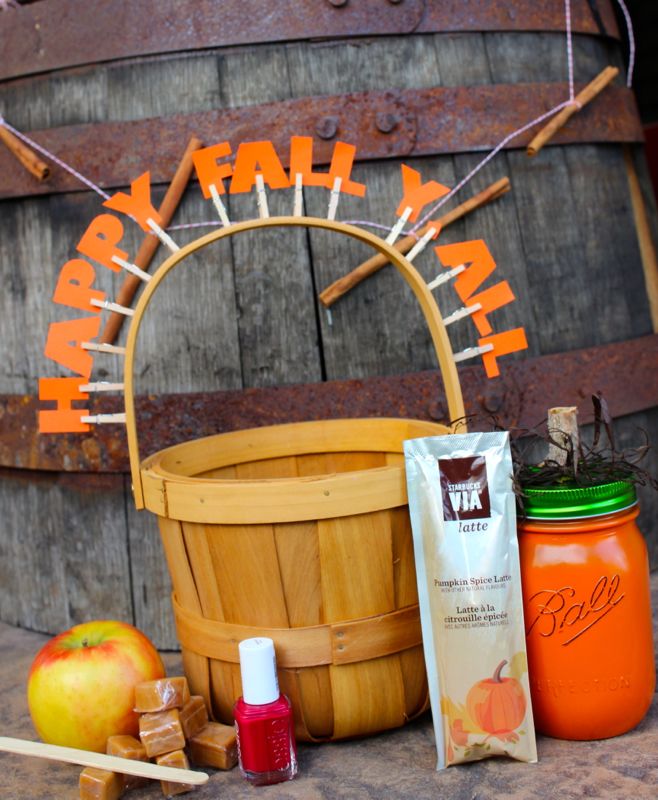
Fall in A Basket Ingredients
A fall-inspired basket
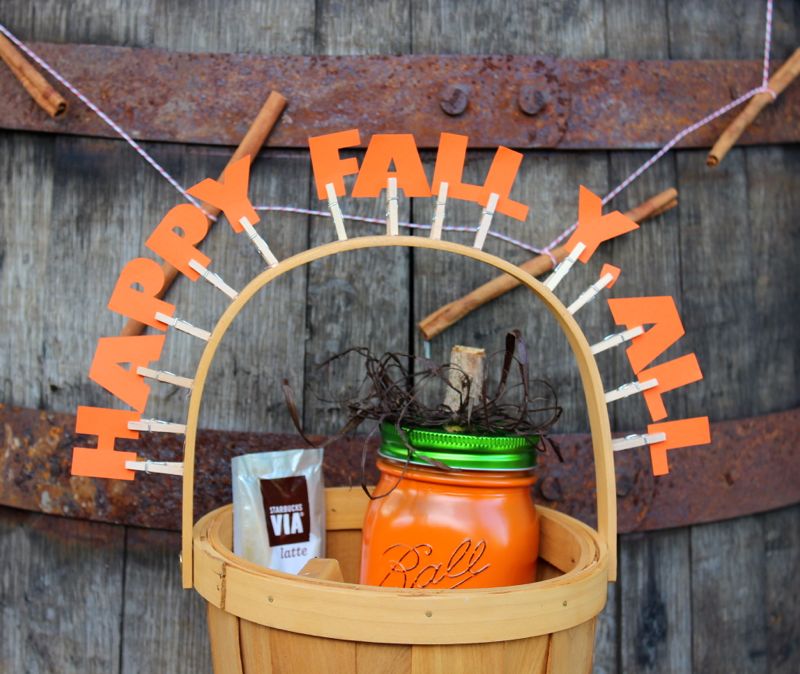
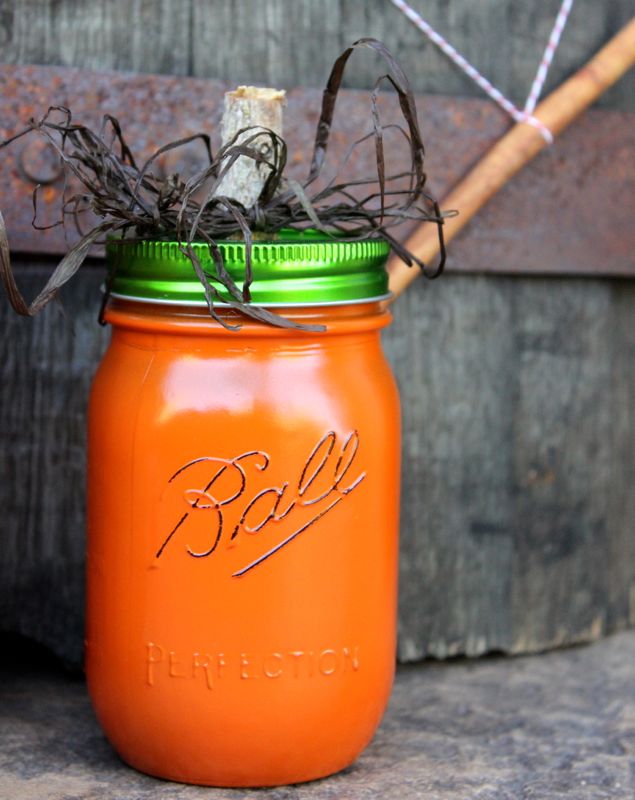
Pumpkin Mason Jar {spray paint a vintage green mason jar orange, buy green lids designed for mason jars, find a small branch, cut and glue, then add a raffia ribbon}
Starbucks Via Pumpkin Spice Latte individual packet
Essie “she’s pampered” nail polish
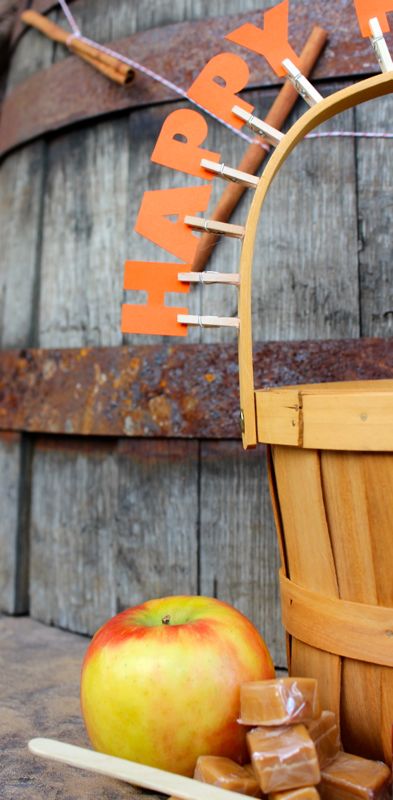
Apple, caramel and a stick – the essentials to make a delicious caramel apple
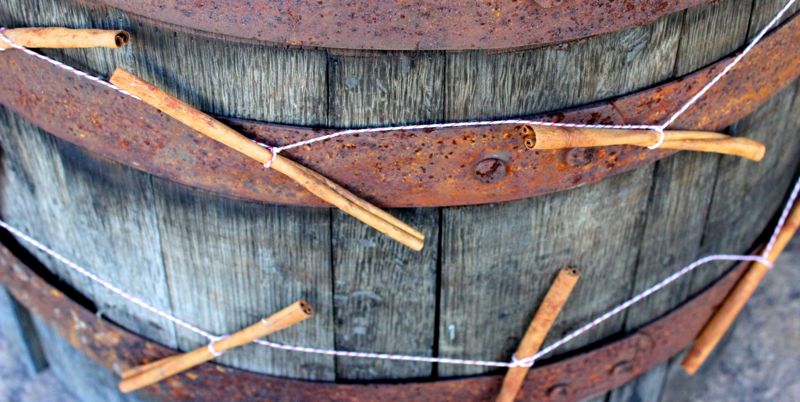
A cinnamon stick garland {tie cinnamon sticks to twine to create the cutest garland ever}

And, of course, buy or use your Silhouette to print letters, “Happy Fall Y’all,” then use a hot glue gun to glue tiny clothes pins and the letters to the basket handle.

fall in a basket_silhouette_jsorelle

fall in a basket_silhouette_jsorelle

fallin a basket_silhouette_jsorellefall in a basket_silhouette_jsorelle

Happy Fall Y’all!

j. sorelle received products for this post from Silhouette, however we love would Silhouette even if they didn’t send us product, and all opinions are ours, we promise. View all of Silhouette’s amazing products here

{images via j. sorelle}

emily + randy

We love pretty weddings. And, we really love pretty weddings with a DIY touch. Emily and Randy’s wedding had it all – a pretty bride and handsome groom, a lovely setting, creative DIY’s, a yummy dessert table, a gorgeous ceremony backdrop and an amazing photographer to capture it all, Connie Dai Photography.

Today, Emily, the bride {and now happy newlywed} shares her tips for how she added personal DIY touches to her wedding day, and why you should try it too.

In Emily’s words…I definitely recommend DIYing as much as you can. It adds such a personal touch to your big day, and including those items as decorations in your home after the wedding are awesome reminders of the day. Honestly, putting on some tunes and creating beautiful things is great therapy during an often stressful time!

After you read about the easy DIY’s, please visit Connie Dai Photography to see more gorgeous photos for this beautiful couple’s special day. You won’t regret it – they are stunning. And it’s not just us that thinks so – Style Me Pretty thought so too.

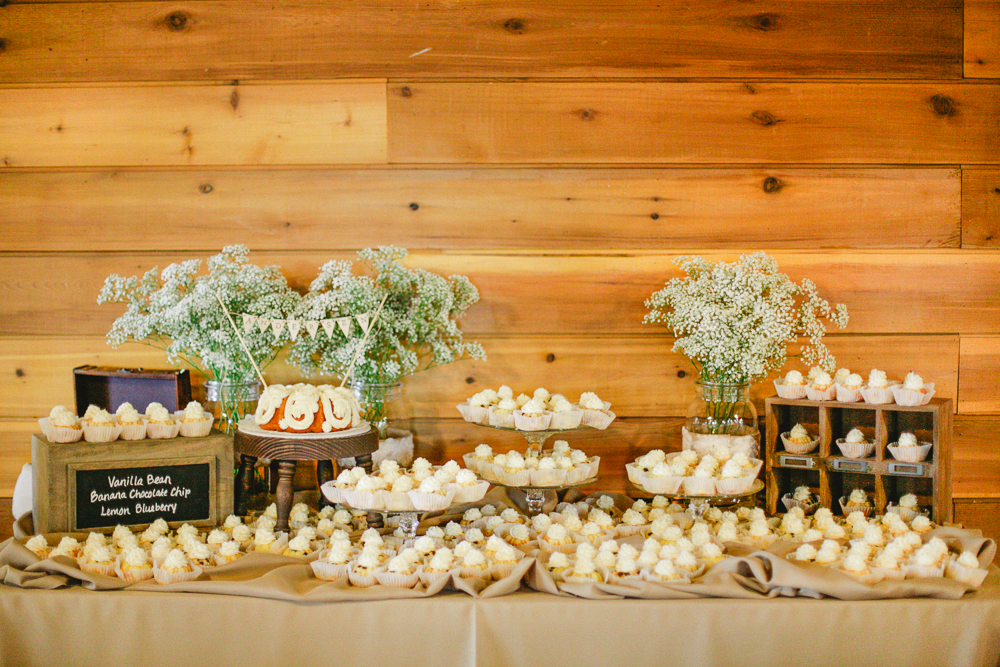
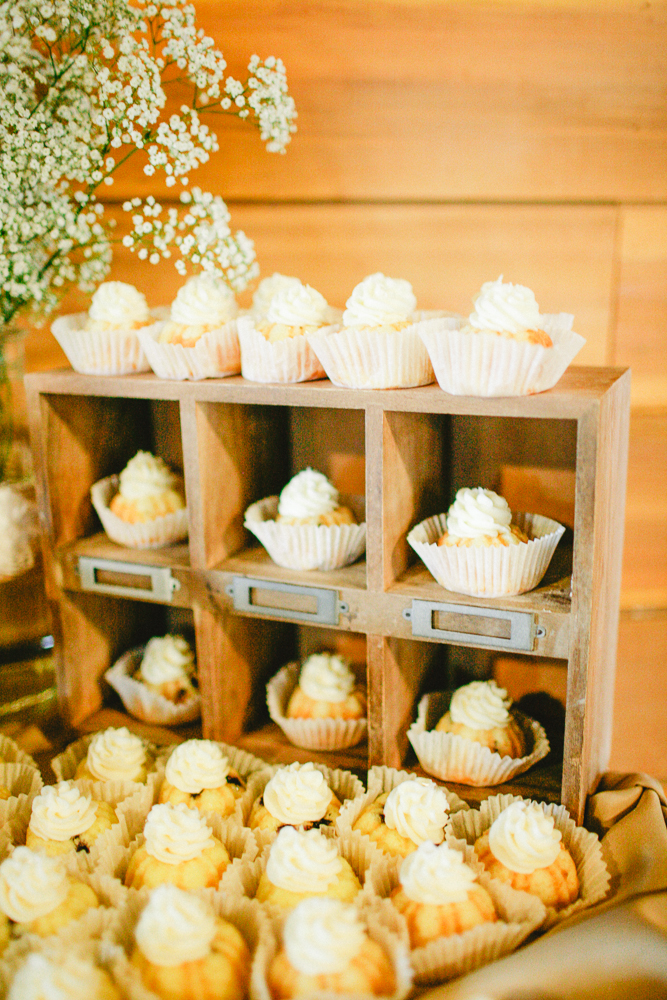
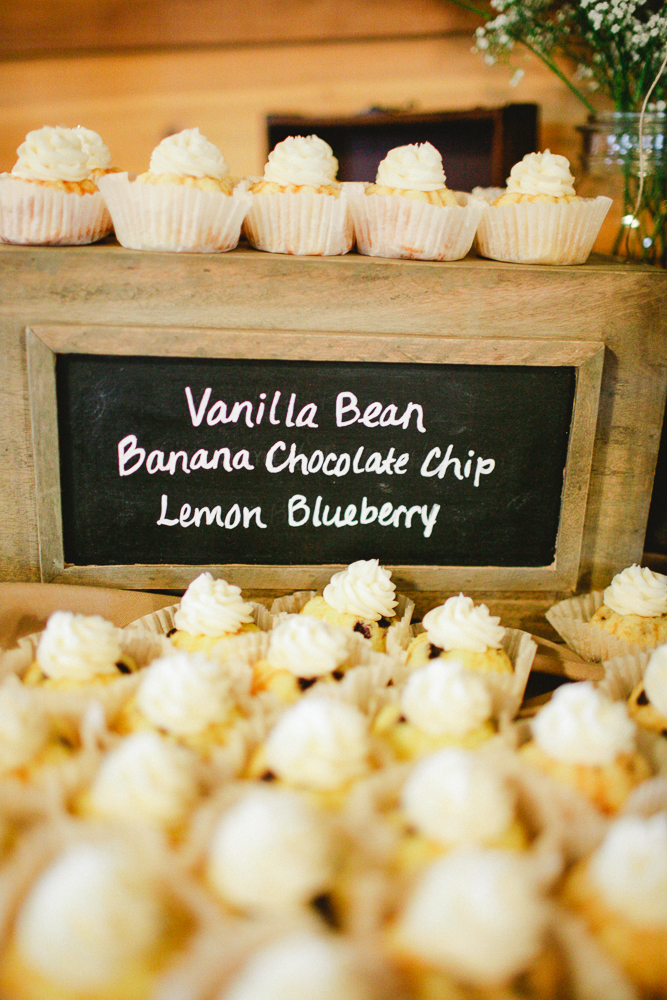
DESSERT TABLE
Emily_Randy_Chatfield_Botanic_Gardens_Web_369

Glass Cake Stands
Find glass plates and glass candlesticks from a dollar store and E-6000 glue from a craft store such as Hobby Lobby or Michaels.
Glue a candlestick to the center of the bottom of a plate.
Let dry.
Leave as a single plate for small cakes, or add a couple of layers for a unique cupcake stand.

The other cake table pieces, the green box chalkboard and the compartment stand, were both from World Market.
Emily_Randy_Chatfield_Botanic_Gardens_Web_372

Emily_Randy_Chatfield_Botanic_Gardens_Web_371

Chatfield_Botanic_Gardens_Web_370

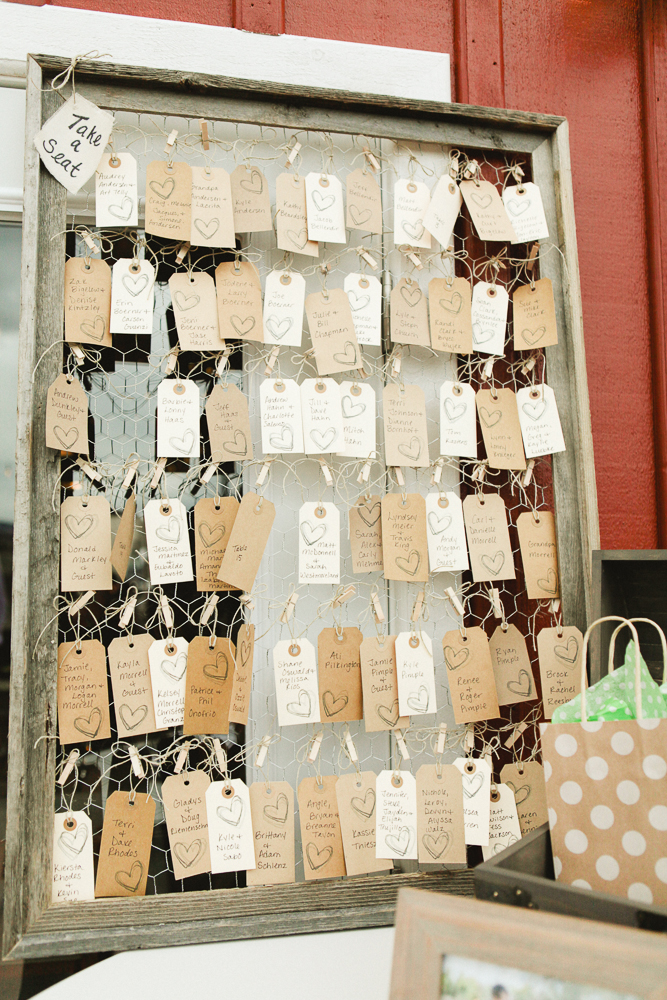
ESCORT CARD FRAME
Emily_Randy_Chatfield_Botanic_Gardens

Find an empty frame (Hobby Lobby had a perfect wooden frame to go well with our details)
Buy chicken wire at a home-improvement store {hopefully your handy husband has a staple gun. If not, buy one or thumb tacks or something similar should work}!
Stretch chicken wire over the back of the frame and staple periodically around the frame.
Trim excess chicken-wire with wire cutters and bend any sharp edges.

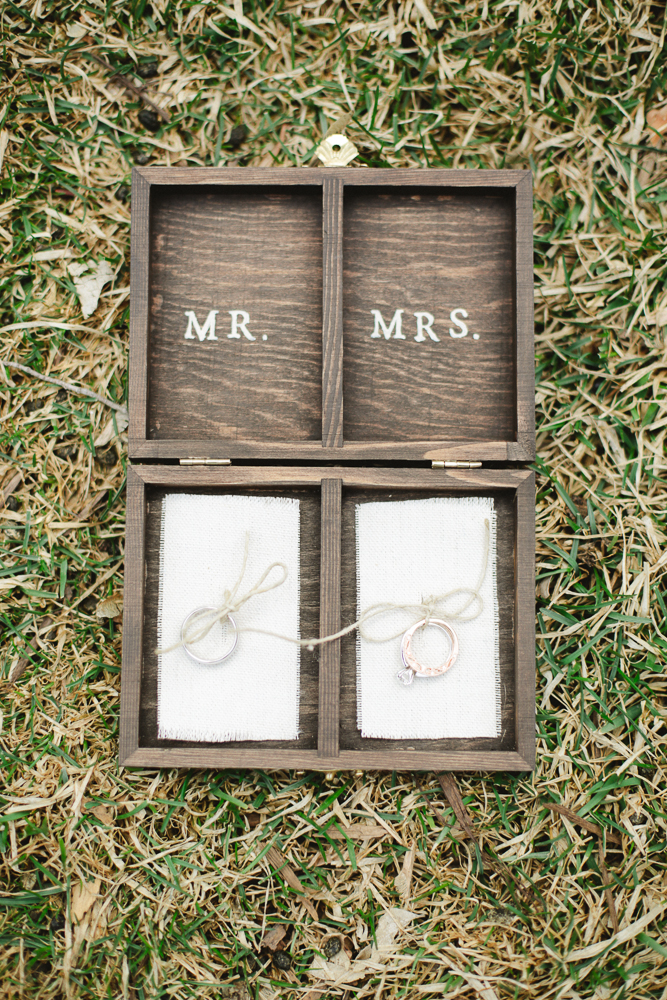
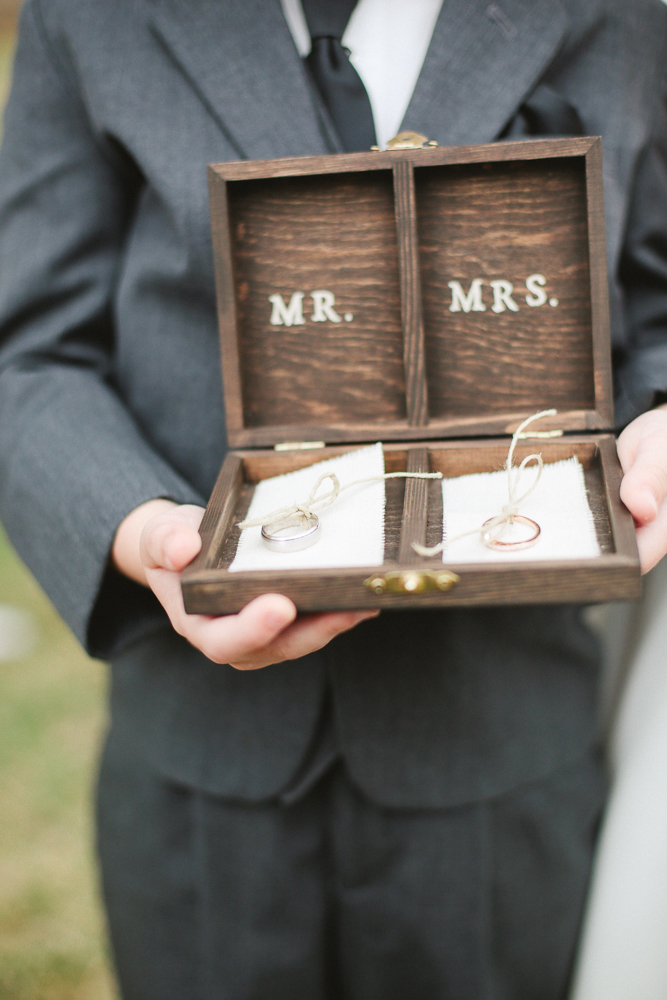
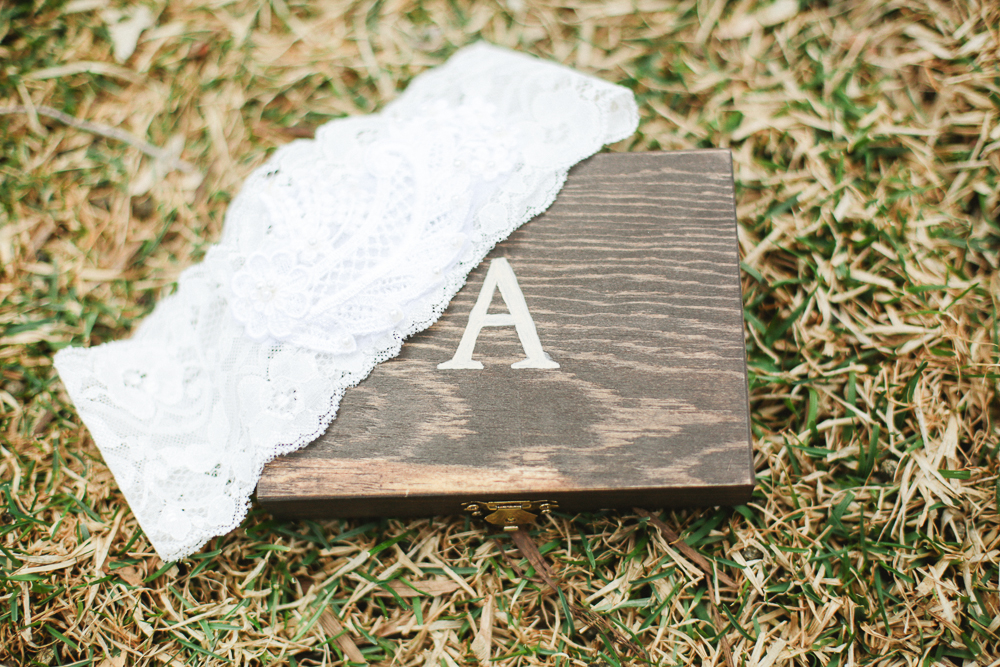
WOODEN RING BOX
Emily_Randy_Chatfield_Botanic_Gardens_Conniedaiphotography

Check the wooden crafts aisle at Hobby Lobby or Michaels for inspiration for easy decoration projects.
Find a small box to hold rings.
Stain the pre-made wooden crafts. I bought one brown stain and one grey stain. For some projects I used only one color, and for others, I mixed the two colors together for variety and a nice rustic color.
Paint on your new initial by hand or with a stencil in a contrasting color of paint.
Voilà! Cheap, simple, and fun wedding projects!

Emily_Randy_Chatfield_Botanic_Gardens_


Emily_Randy_Chatfield_Botanic_Gardens_Web_007

Thanks Emily and Randy. And, thank you Connie Dai Photography.

{images via Connie Dai Photography}

Bear Party Activities and Crafts for Kids

Before the bears go back into hibernation, let’s celebrate and learn about the furry, cuddly and powerful nature of bears.

Disneynature Bears takes us on a journey where a mother bear raises her young cubs in the big and beautiful world of Alaska. And, just like humans, she does her best to guide, protect and teach her young so they can one day survive on their own.

With the recent DVD release of Disneynature Bears, here’s 10 great ways to immerse yourself and your children into the wonderful world of BEARS this fall.

beary good day_jsorelle

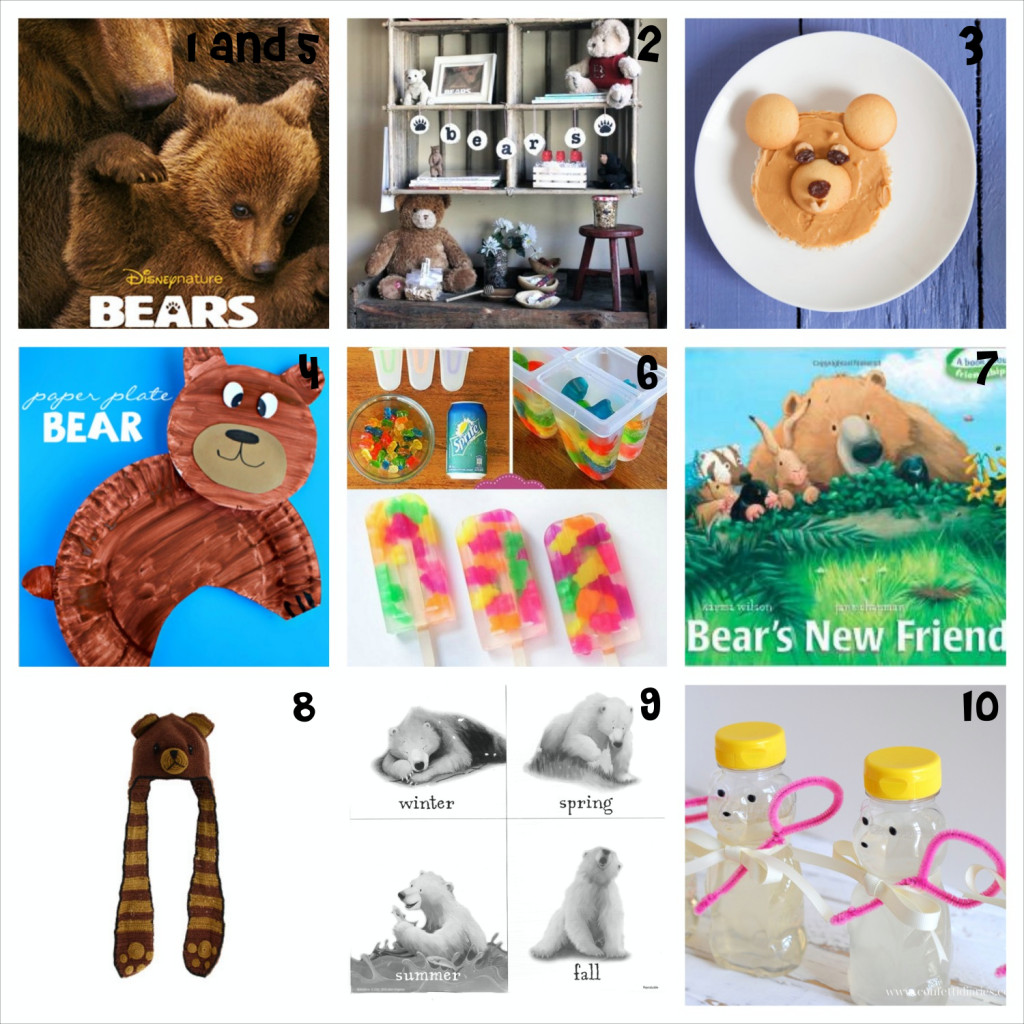
1. Rent or buy, Disneynature’s Bears on DVD now.

2. Throw a mini Bears Party for your home movie feature, followed by a Bears Scavenger Hunt {free printable here} like we did.

3. Serve delicious and nutritious bear-inspired snacks for your hungry cubs that highlights magazine shared.

4. Crafty Morning shows us how to make adorable paper bear plates with these instructions.

5. Did you know a bear’s sense of smell is 2,100 times stronger than that of a human? You can learn many more facts about bears by downloading free activity pages from Disneynature Bears.

6. What kid wouldn’t want to end the day with a treat – gummy bear popsicles? Yes, please. Foodbeast invented the yummy and colorful idea.

7. Read any and all of the creative and sweet Bear Books by Karma Wilson such as Bear’s New Friend. This book series is a household favorite around here.

8. Make sure your little ones stays warm as the weather starts to turn cold with this Bear Scarf Hat.

9. Karma Wilson’s charmed bear character needs some help dressing for the seasons. Print the sheet for a fun activity for your kids.

10. Katarina’s Paperie keeps the day bubbly with DIY honey bear bottle bubbles.

{images via Highlights, DisneyCrafty Morning, Foodbeast, Amazon, Zappos, Karma Wilson and Katarina’s Paperie}

Back to School Ideas

noteworthy year_jsorelle

It’s time for back to school. No more lazy mornings and pool days basking in the sun…until June rolls around next year. I know, so sad. Jessica’s oldest son starts Kindergarten this year, which is also a sad reality of ‘letting go’ just a little, adjusting to a new norm of waking up early and getting out the door in a semi-organized fashion everyday and the realization that no matter what we do, they still grow up.

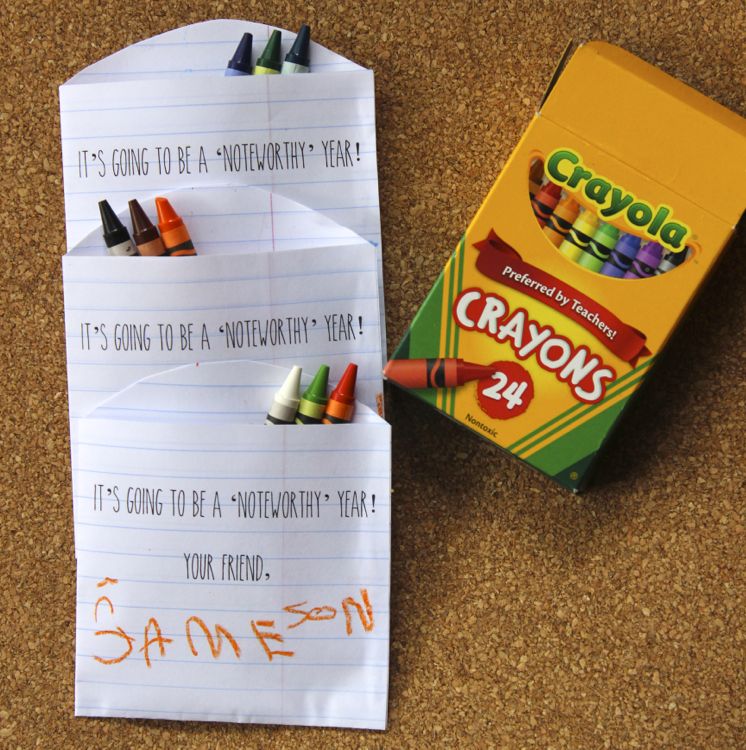
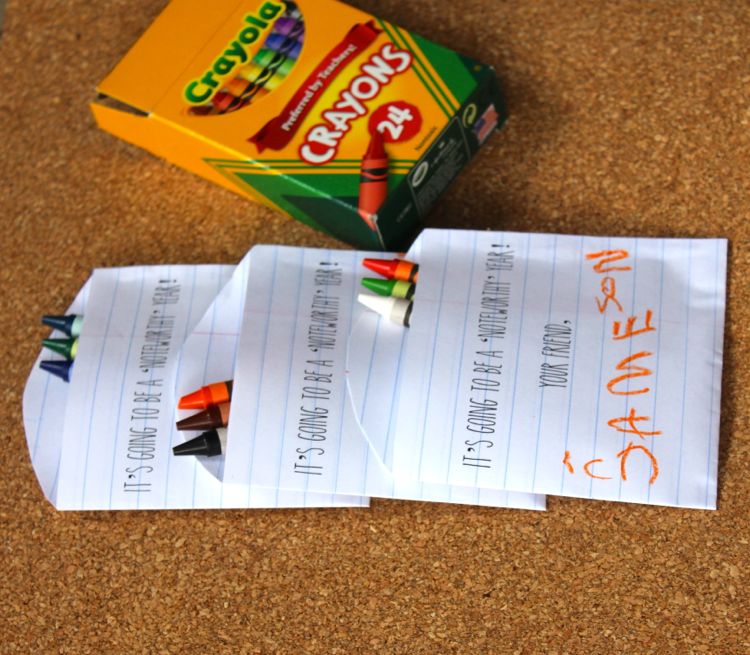
To make the first day of school even more fun for the kiddos this year, we made easy, DIY favors for the kids and teachers…and it was a great activity for our kids to practice writing their names.

noteworthy year_jsorelle

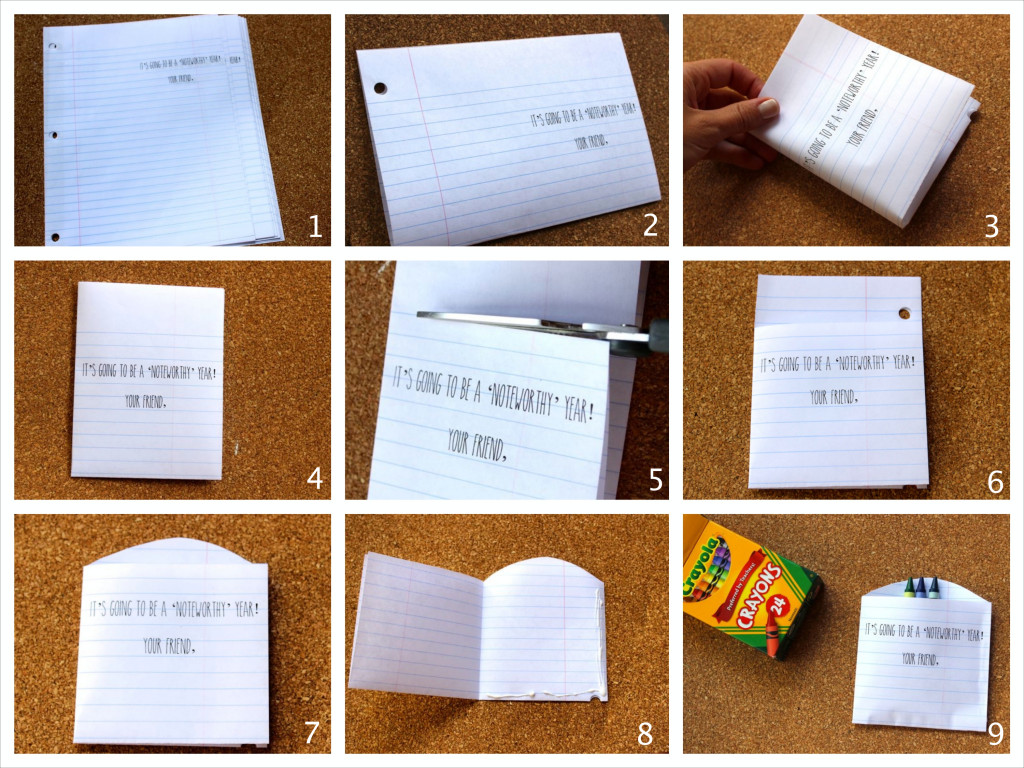
All you need is college ruled paper, a printer, Elmer’s Glue and Crayola crayons.

Follow the photos above if you’re a visual person, and read the instructions below if you need it in words:
1. Use Microsoft Word to print your personal note on the top-right side of the paper. We typed, “It’s going to be a noteworthy year. your friend,”
2. Fold the paper in half with text visible on top.
3. Fold the paper in half again.
4. It should look like this.
5. Cut the top two layers on the top blue line.
6. It should look like this.
7. Cut a curved arch on the back two sheets of paper.
8. Use Elmer’s Glue to glue the edges together. You will have extra edges on the back flap and front flap, so add a little glue there too.
9. Add Crayola Crayons and sign name.

noteworthy year_jsorelle

{images via j. sorelle}