Bloom into Spring with DIY Watercolor Flower Cups + Giveaway

watercolor-flower-cups-diy-poppy-spring-placecards-easter-brunch

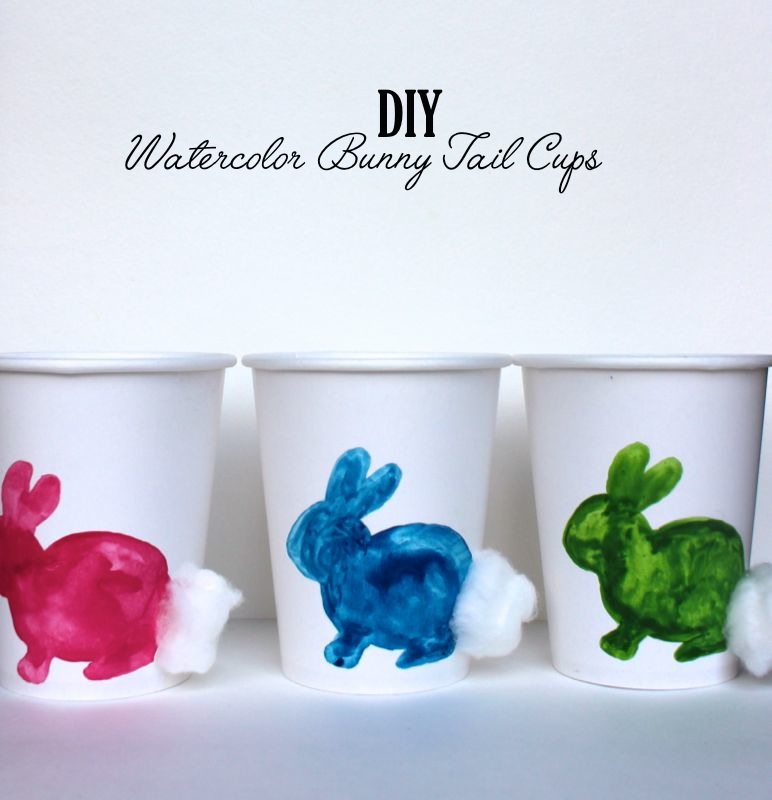
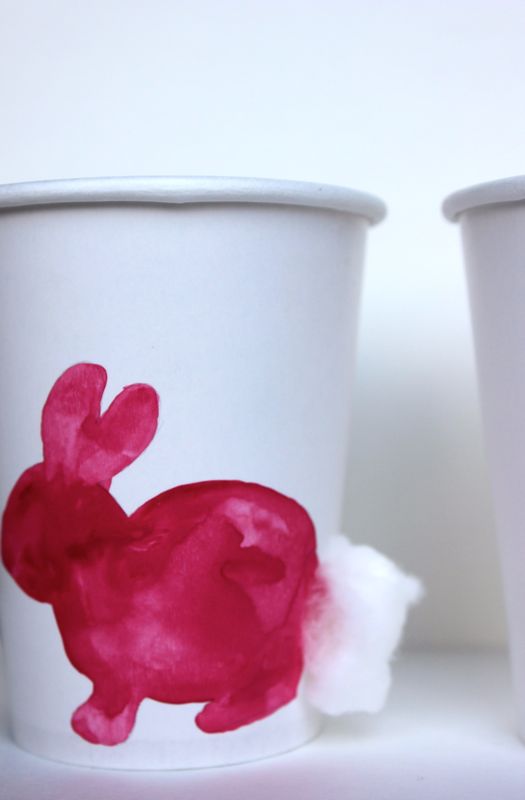
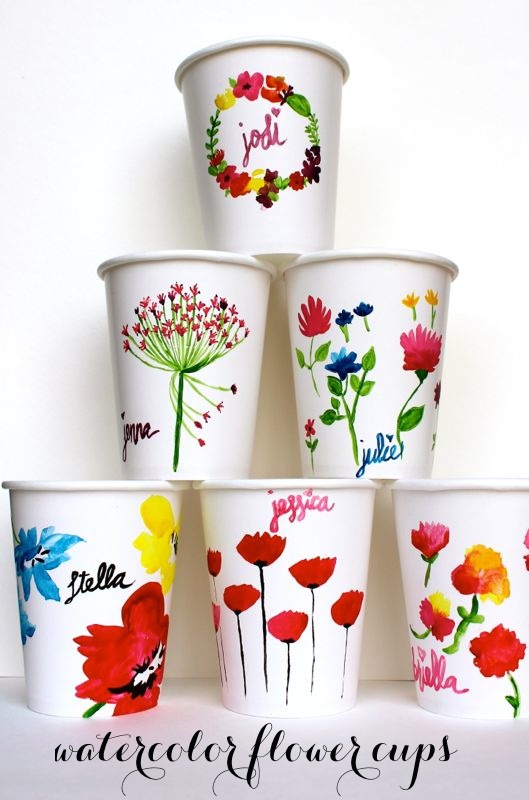
Clearly, Jessica is in the mood for paper cups and watercolor this spring. Jenna was described as the ‘flower child’ growing up, but it seems Jessica’s inner flower child is coming out now. First came the bunnies, and then came the flowers.

Our Nani, fabulous as ever at age 79, is a proper lady that loves to entertain and host. She’s good at it, too. Amazingly, she has more energy then we do. Just like mother’s do, she will still walk up to us at a party {even in our 20’s and 30’s}and remind us to say hi to Mr. and Mrs. so and so, and congratulate them on their recent successes. We never understood it until we became mothers. Being the hostess with the mostess that she is, the thought of using plastic and paper glassware and flatware at a party is unbearable. It must always be china or glassware.

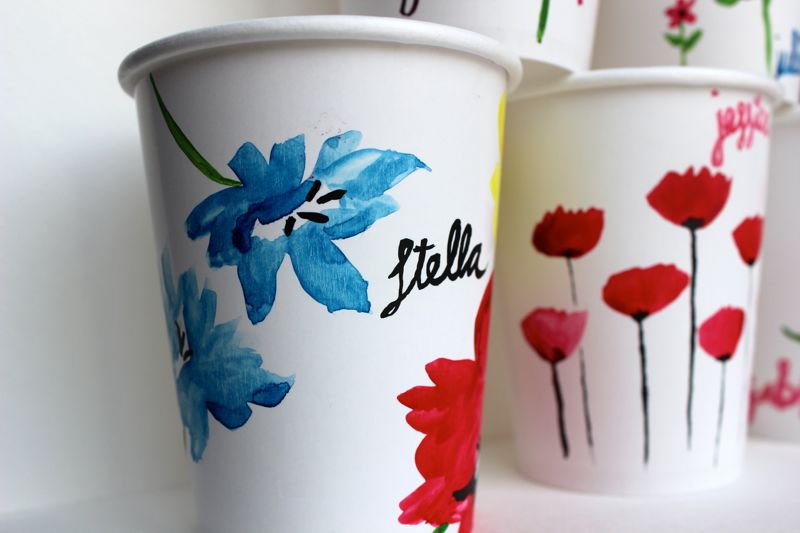
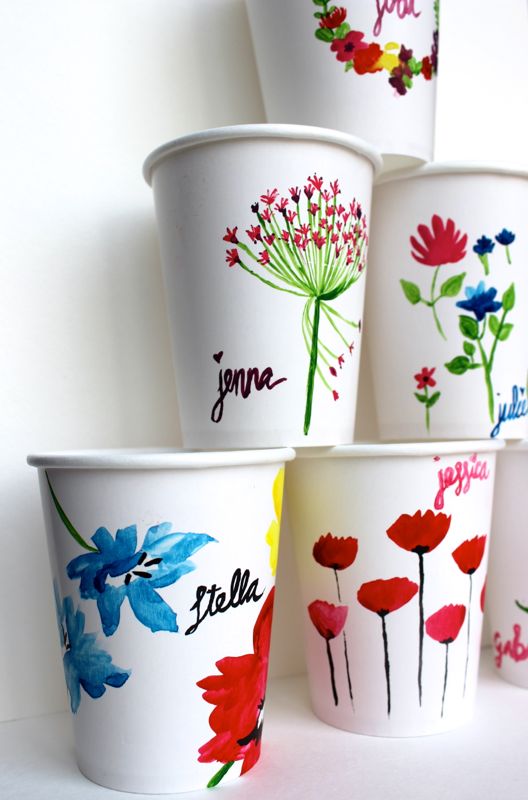
But, these DIY watercolor flower cups got the seal of approval from good ‘ole Nani P. They are paper, but they look lovely, and they don’t look cheap. You can fill them with water, juice or a fave cocktail, or fill them with a favor. They make for a great place card, too, with custom names painted on them. Use them for Easter, a spring brunch, bridal shower or baby shower.

floral-wreath-diy-watercolor-cup-easter-brunch-table-setting-placecard-flowers-watercolor


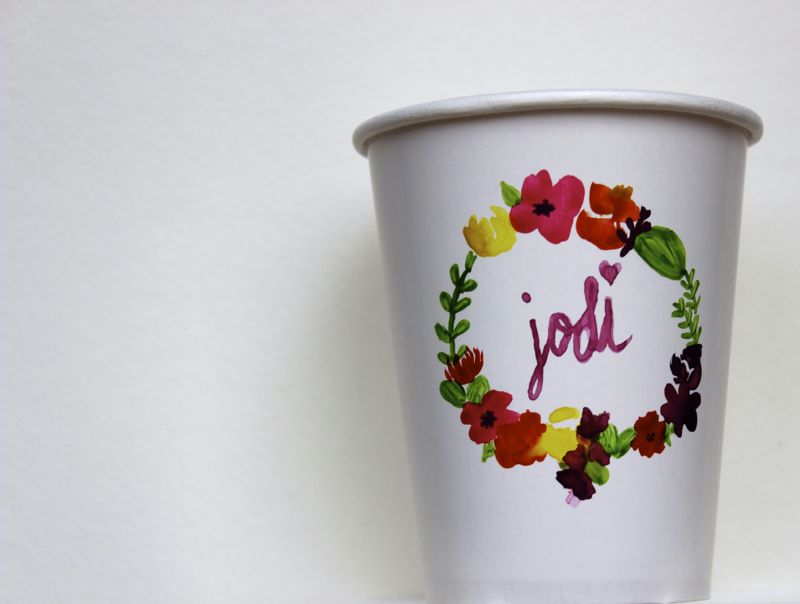
If you like them, and think they would be a great fit for your next event, follow us on instagram, then tag a friend in comments under the photo of these cups. Those who follow and tag will be entered to win a set of 30 of these watercolor cups for FREE – you can choose to receive a variety, or pick your faves. We are not professional artists, and what you see is what you get. But, for free, they are darn adorable. Giveaway starts March 25 and ends March 31, 2015. Giveaway is not sponsored by Instagram. Names are NOT included on cups for giveaway. Good luck.

Questions? Email us at hello@jsorelle.com.

watercolor-spring-cups-poppy-flowers-easter-brunch-table-setting-place-cards-diy-paint

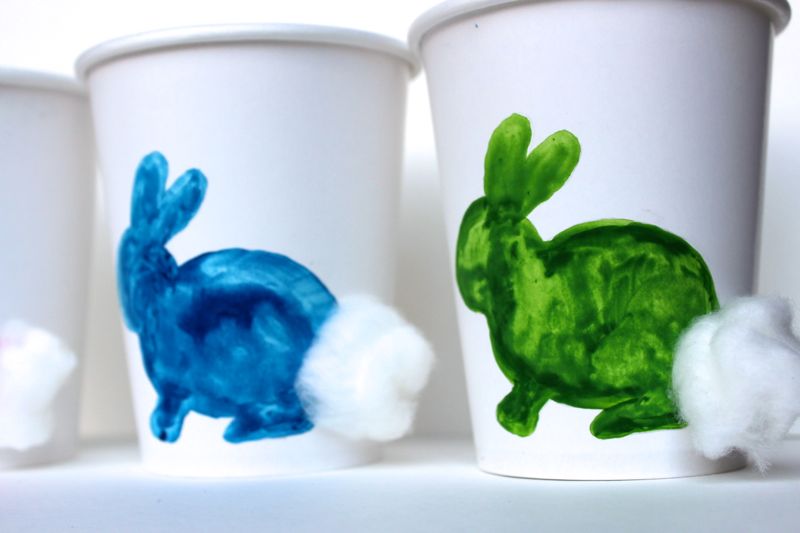
To make them, you’ll need:

  • Paper Cups {$1 for a pack of 10}
  • Watercolor paints
  • Brush
  • Water

The amazing one step tutorial is…explore floral inspiration in your head, online or on a print, experiment with watercolor paint.

diy-paper-cups-flower-wreath-spring-brunch-table-setting-watercolor-art-bridal-shower-favors

{images via j. sorelle}

Easter Watercolor Bunny Tail Cups

watercolor-bunny-tail-easter-cups-pink-blue-green-cotton-diy

One of our favorite Easter memories from childhood is the year the Easter bunny brought us chicks. Yes, real live chicks. And, they were green and pink. Sounds totally inhumane, and honestly we have no idea how they did it, or whether it was permanent or not. But, all we know is that the Easter bunny brought us colorful chicks, and we got to feed, pet and care for them for a whole week before we had to bring them back home to a local farm.

Besides our brief stint with chicks, the only real pet we had throughout our childhood was a rabbit. Sweet Thumper.

Painting these DIY bunny tail paper cups brought back memories of our pet rabbit, and the fun memories chasing him all over the yard.

These would make for a cheap and easy addition to your Easter table setting, or a lovely gift filled with candy or small gifts…so let’s hop to it.

pink-bunny-watercolor-easter-cups-cotton-ball-diy-rabbit-easter

You’ll Need:

  • paper cups {.97 cents for 10}
  • watercolor paints {quality brand like Windsor and Newton, brush and cup of water}
  • cotton balls
  • hot glue gun

How To:

  • Print and cut an outline of a rabbit you find online.
  • Place the rabbit on the cup and lightly trace around it with a pencil.
  • Dip your brush into watercolor paint, and a touch of water and paint within and just on the pencil outline {so you don’t see it} of the rabbit.
  • Let dry.
  • Glue the cotton ball on the tail of the bunny.

blue-green-easter-bunny-diy-cups-watercolor-kid

Hoppy Easter!

{images via j. sorelle}

DIY Best.Day.Ever. Confetti Banner

best day ever banner-confetti-table runner-diy-red-blue-yellow-green-dots

We consider our weddings and the birth of our children to be among our Best.Day{s}.Ever.

What was your Best.Day.Ever?

Some days will always be more special than others, and some days will be trivial, but what if we tried to make every day the Best.Day.Ever? What a wonderful world that would be! We never know what day will be our last, but we know for sure that each and every moment is truly a blessing, so every day we’re alive should be considered the Best.Day.Ever.

We created a large DIY Confetti Best.Day.Ever. sign that would make…

  • the best DIY party backdrop ever
  • the best DIY table-cloth ever
  • the best DIY birthday banner ever

You can make the DIY confetti sign for under $20, and its a fun activity to do with the kids.

You’ll Need:

How To:

  • Tape Kraft paper to the wall behind the paper tablecloth. If you choose to do a plastic tablecloth, you may not need the ‘backing,’ but if you choose to use a paper tablecloth that’s soft like linen, the markers will bleed through.
  • Tape the table-cloth to the wall using painter’s tape.
  • Use stencils or a Silhouette cutting machine to cut large Best.Day.Ever. letters.
  • Use painter’s tape to tape the letters in place on the table-cloth. You will need to roll the tape to make it double-sided.
  • Start with one color and get ‘dot happy.’ Dot the markers all over the sides and corners of the letters and all over the table-cloth in a random fashion.
  • Repeat with all the marker colors.
  • Remove the letters from the table-cloth.

best-day-ever-diy-banner-confetti-rainbow-polka dot

best-day-ever-banner-table cloth-rainbow-confetti-diy

best day ever-diy-banner-confetti-rainbow-tablecloth

confetti-rainbow-banner-dig-best-day-ever-table cloth-polka dot

diy-party-backdrop-confetti-banner-rainbow-polka-dot-best-day-ever

best-day-ever-diy-birthday-banner-confetti-party-rainbow-tablecloth

Make today the Best.Day.Ever.

{images via j. sorelle}

DIY Beach Ball Easter Eggs

easter eggs-diy-beach-ball-red-yellow-blue

It’s spring break week, so we’re dreaming of spring and the beach…and the sand between our toes. Since snow is still in our forecast, we settled for DIY beach ball Easter eggs. Next year, our goal is to play with the real thing.

beach balls-diy-easter-eggs-red-yellow-blue

You’ll Need:

  • Eggs {real white eggs or plastic fake eggs from Hobby Lobby or Amazon}
  • Red, yellow and blue acrylic paint
  • Paintbrush
  • Pencil

How To:

  • If you’re using real eggs, boil them and let cool.
  • Use a pencil to draw semi-curved lines that resemble a beach ball.
  • Paint the ‘lines’ red, yellow and blue.

beach ball-easter-eggs-diy-red-yellow-blue-sand

beach ball-easter-eggs-diy-red-yellow-blue

dig-beach balls-easter-eggs-red-yellow-blue

{photos via j. sorelle}

DIY Watercolor Mug and Planter

dig-water color-planeter-succulent-pink-turquoise-mug-white-gold-

 This photo hooked me.

The idea was brilliant. The cost was minimal.  The ingredients were already in a drawer upstairs. The impact was bold. Within 10 minutes of seeing the photos, Jessica and her daughter were dipping mugs in their favorite nail polish colors.

Instead of using it as a mug, Gabriella opted for a succulent planter. And, with that, she is the proud 4-year-old owner of this adorable, trendy succulent planter!

succulent-pink-aqua-planter-mug-water color-nail polish

Warning: this looks easy, and it is; however the nail polish is totally fickle and it took us several tries to get it right {we dipped dispensable products just to see how it worked}. And, the nail polish hardens almost immediately, so you have to drop and dip – quick, quick, quick!

You’ll Need:

  • White ceramic mug. You can find them for $1 at Wal-mart
  • Deep container you want to throw away or use for paint only
  • Nail Polish
  • Warm Water
  • Gold Leaf Paint
  • Pink Aquarium rocks
  • Succulent
  • Dirt and Rocks

How to Make It:

  • Fill the bowl with warm water.
  • Add a drop of nail polish to the water, and it should spread.  You can use a toothpick to help create a ‘swirl’ your looking for. For us, sometimes the nail polish spread like it was supposed to, and other times, the drop sank to the bottom of the bowl. It’s hit or miss.
  • If you want to use an additional color, drain the water, and repeat the steps.
  • If you mess up, or there’s s spot you don’t like, just use a cotton swab or pad soaked with Nail Polish remover to remove the nail polish from the mug.
  • Pat dry with a paper towel and let dry for 2 hours.
  • If you want a gold handle, add painter’s tape on the mug around the handle, and paint the handle gold with Gold Leaf Paint.

To make the mug a planter, add dirt and rocks to the cup, insert the succulent and top it off with pink rocks.

succulent-planter-mug-pink-aqua-rocks-gold-water color

pink-aqua-white-mug-rocks-succulent-planter-gold-water color

{photos via j. sorelle}