I been waitin’ all day for Sunday night
The tough get rough in a primetime fight
The last one standin’ gets to turn out the lights
‘Cause I been waitin’ all day for Sunday night
Yea, yea, yeah
Recognize that song {and the foxy lady that sings it} on NBC primetime Sunday night? Well, if your husband/boyfriend/dad/brother/son/friend is like ours, it’s more like, been waiting all day for Thursday, Saturday, Sunday and Monday because we’re pretty certain between college and the NFL, there are big, must-see games every one of those nights!
Yes, it’s that football time of year. Whether you like it or not, it’s here. Might as well make something cute to go along with it!
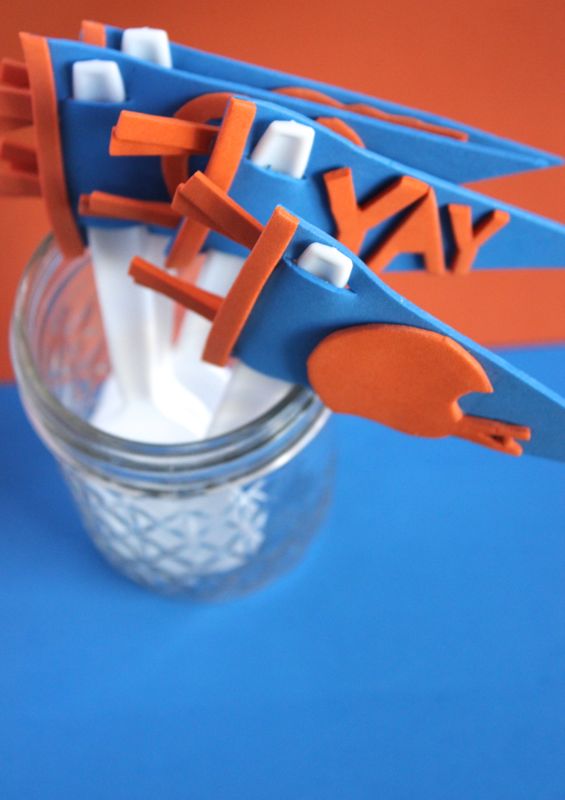
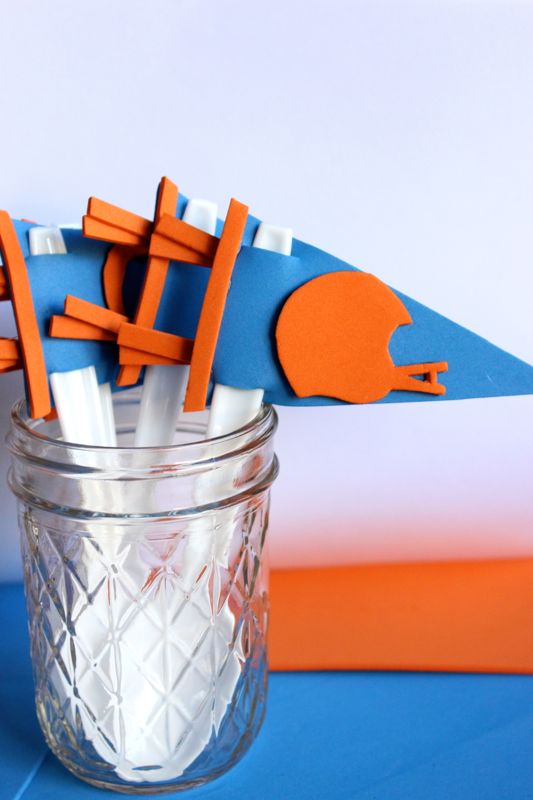
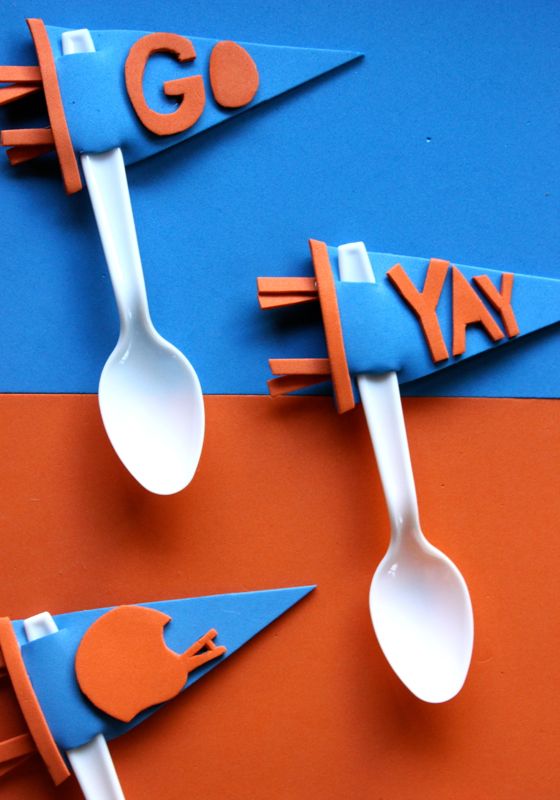
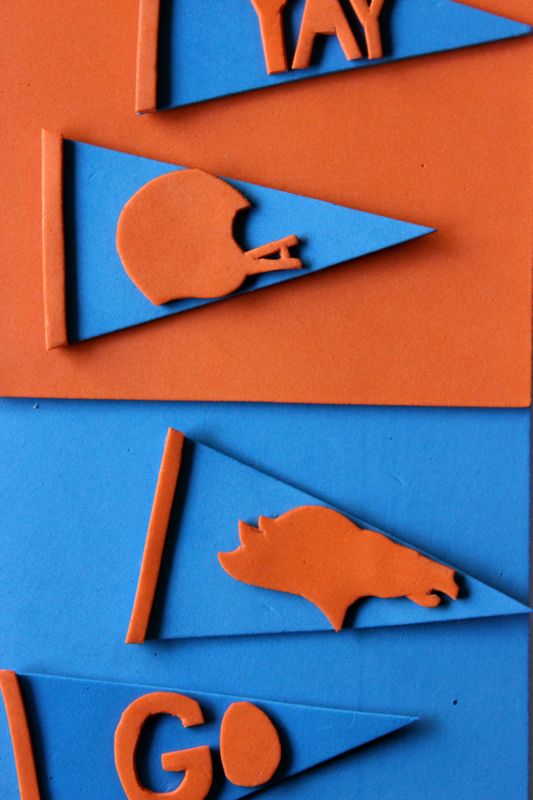
We made DIY mini pennants that can be used as a DIY pennant drink stirrer, or DIY mini pennant utensils for pre-game tailgate madness or a fun football party.
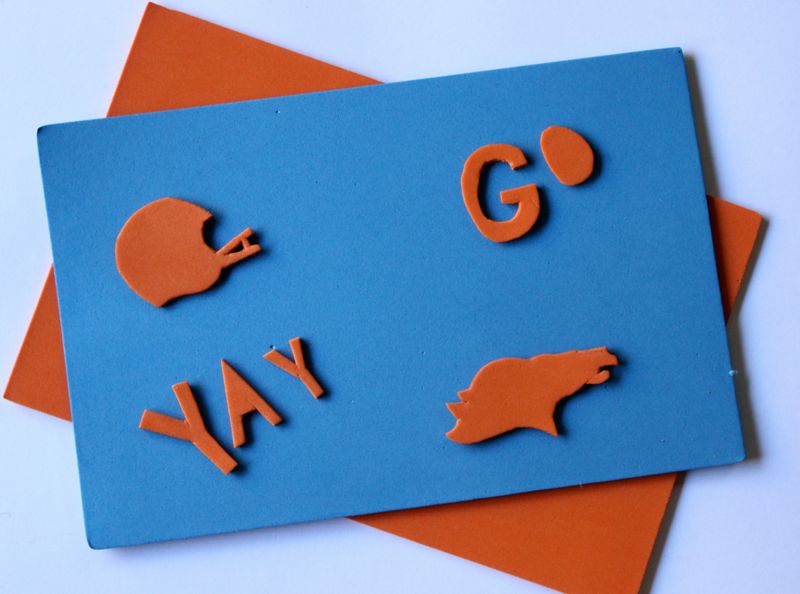
Can you guess what team we’re rooting for? CO born and raised, baby!
DIY Mini Football Pennant
You’ll Need:
- Colorful craft foam sheets
- Pencil
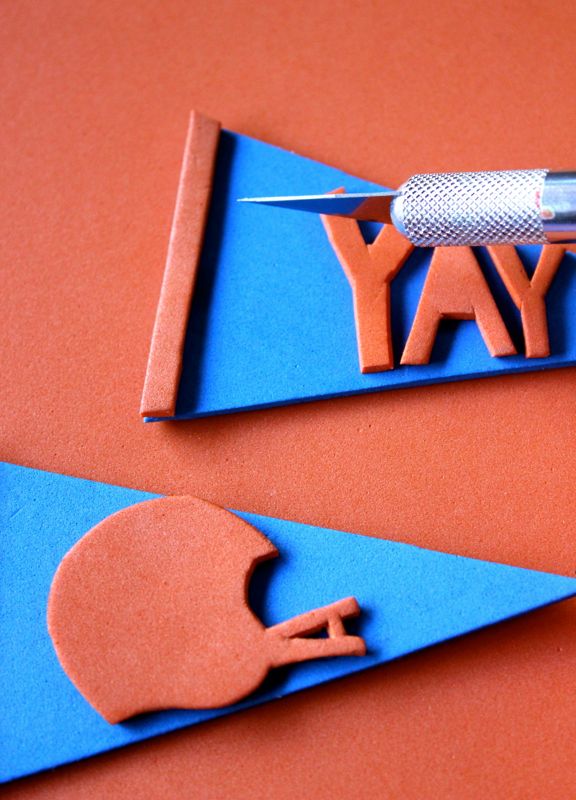
- X-acto knife
- Hot glue gun
- Plastic forks or spoons
Directions:
- Step 1: Hand draw or trace your designs with a pencil onto the craft foam sheets. We created a pennant shape in Microsoft word, and found the Bronco logo, as well as the helmet online. For all the letters, they were hand drawn.
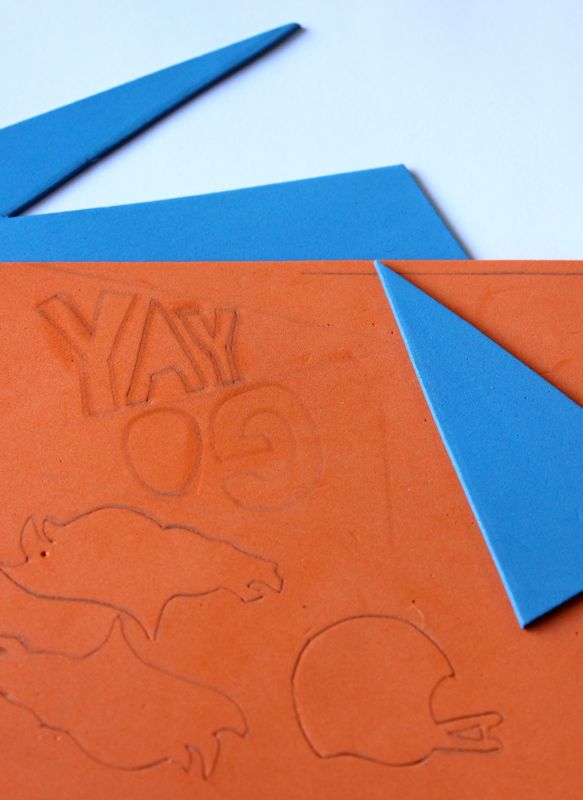
- Step 2: Cut out your shapes.
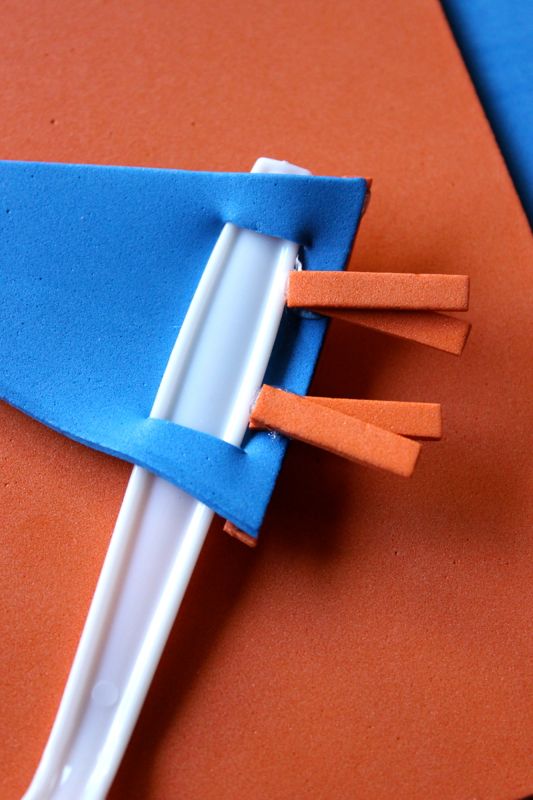
- Step 3: Glue the letters or shapes onto the pennants. Remember to leave a small space on the left side of the pennant for a small slip to insert a fork, spoon or stick.
- Step 4: Use an X-acto knife to cut a slit at the top and bottom of the pennant, on the left side of the letters/shapes.
- Step 5: Insert a spoon, fork or stick into the slits.

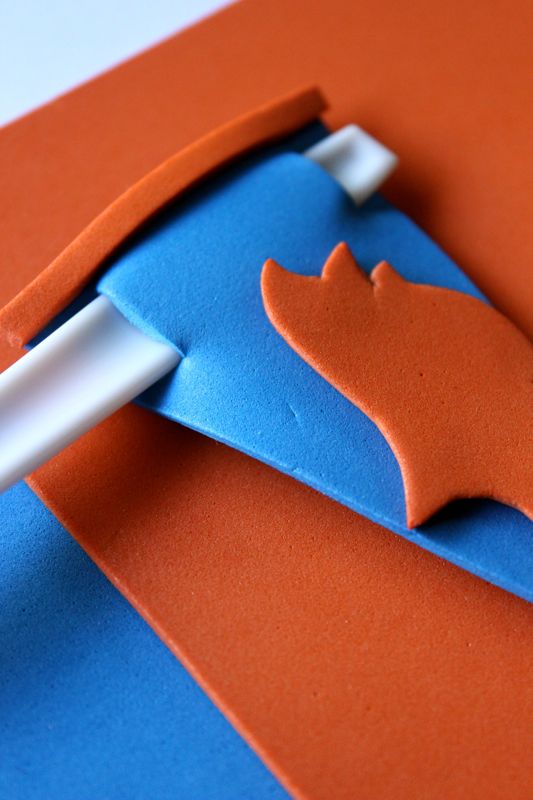
- Step 6: Glue the little tags/strips on the back of the flag, next to the back of the spoon.
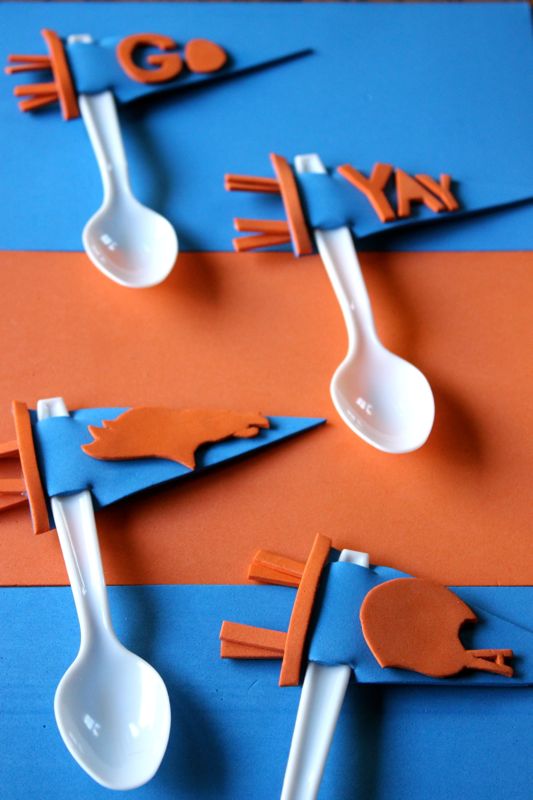
- Step 7: Place in a mason jar because you’re done, and everyone has the cutest DIY pennant utensil ever!