Joyful Holiday Photo Shoot

peppermint-diy-tray-red-white-joy-holiday-party-christmas-table-silver-tree

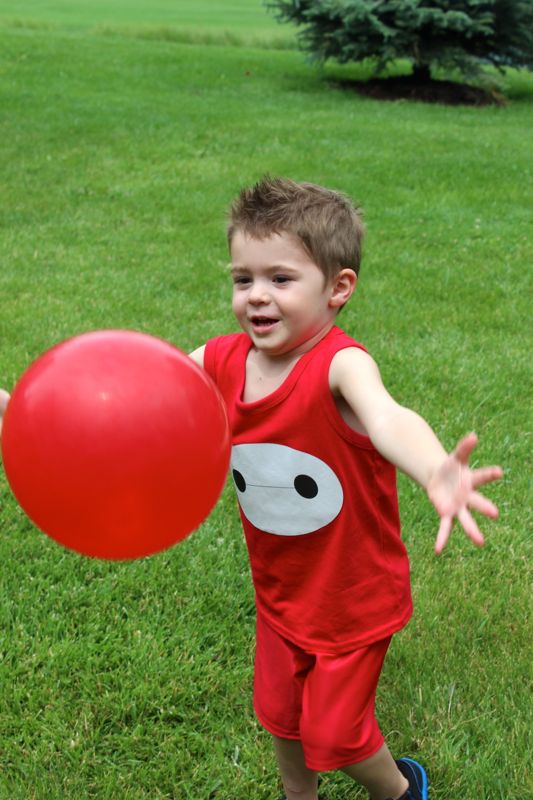
We just realized we never shared one of our first and favorite photo shoots on the blog. It’s a favorite because we were able to work with our friend and photographer, Meredith Moran Photography, and because amongst all the pretty red and white details, our children were running around in the background at our parents house. It was a lot of chaos, but also a lot of laughter, and if you can laugh in the midst of the chaos, that can be a good thing.

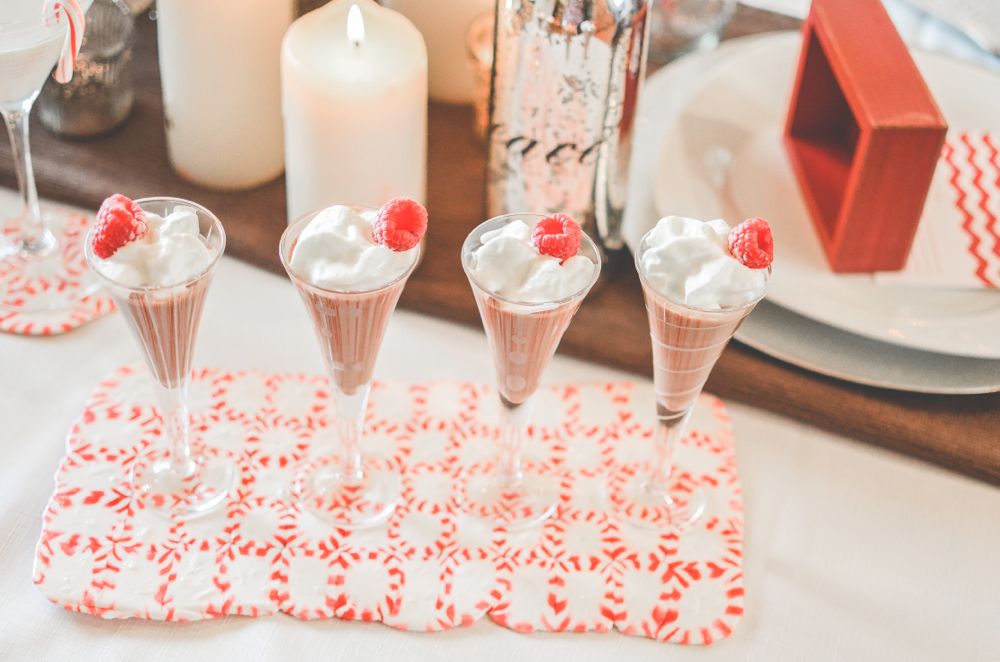
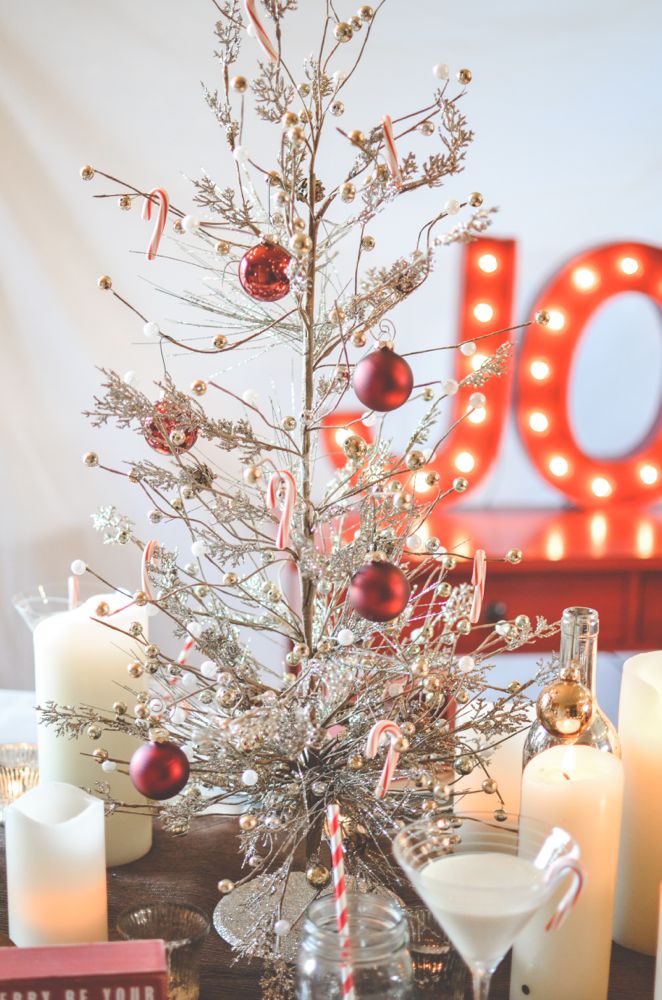
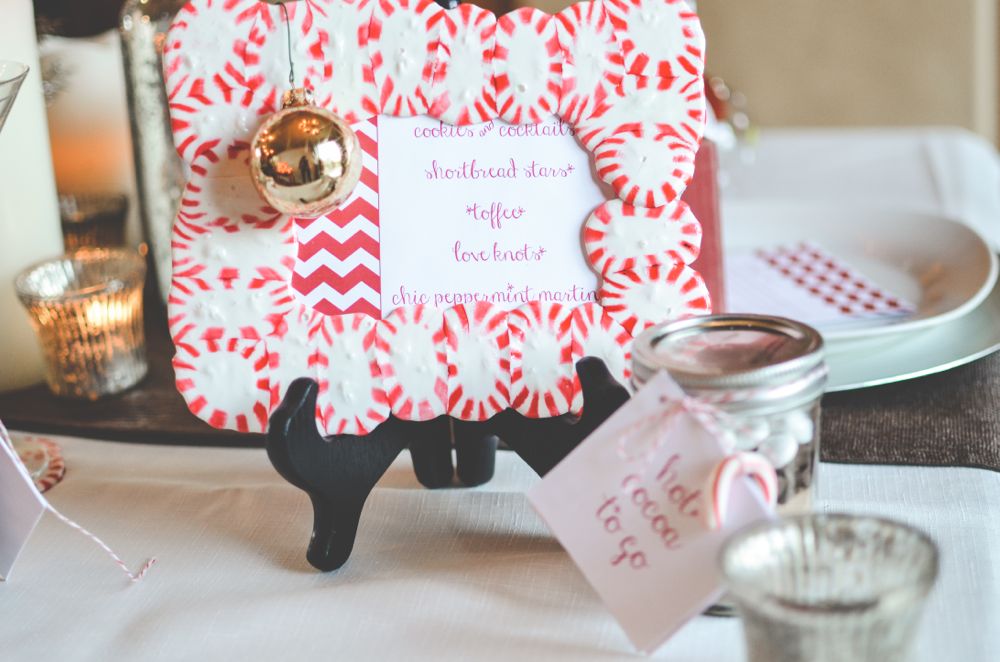
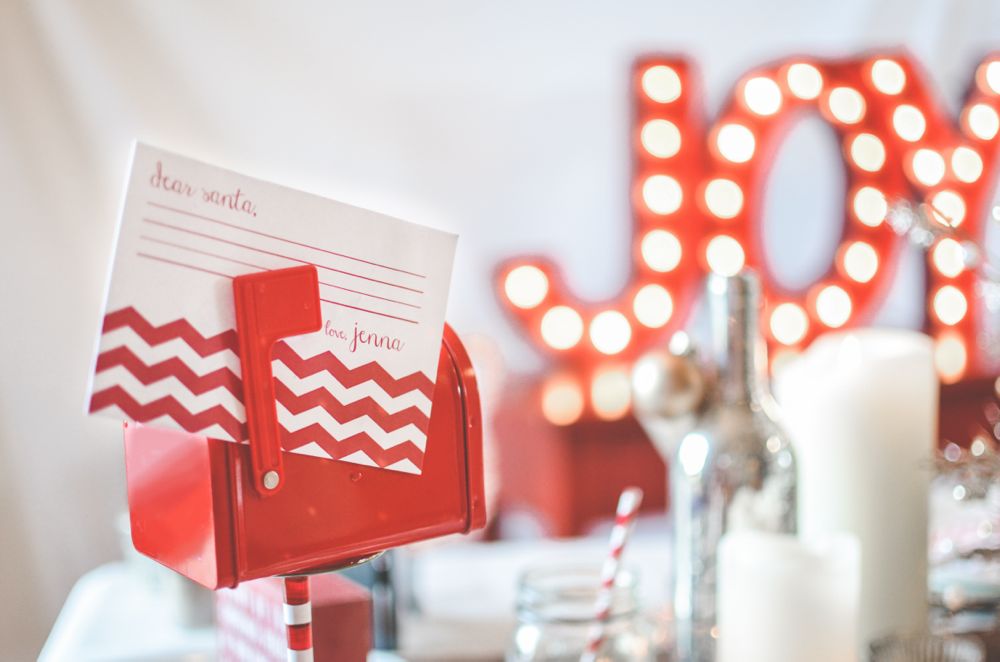
We hope you make the DIY peppermint tray this Christmas season and find the time experience pure joy, just like the marquee lights by Saddleshoe Designs reminds us to do.

peppermint-diy-tray-red-white-joy-holiday-party-christmas-table-silver-tree

peppermint-diy-tray-red-white-joy-holiday-party-christmas-table-silver-tree

peppermint-diy-tray-red-white-joy-holiday-party-christmas-table-silver-tree

peppermint-diy-tray-red-white-joy-holiday-party-christmas-table-silver-tree

peppermint-diy-tray-red-white-joy-holiday-party-christmas-table-silver-tree

peppermint-diy-tray-red-white-joy-holiday-party-christmas-table-silver-tree

peppermint-diy-tray-red-white-joy-holiday-party-christmas-table-silver-tree

peppermint-diy-tray-red-white-joy-holiday-party-christmas-table-silver-tree

hot-cocoa-to-go-mason-jar-candy-cane

peppermint-diy-tray-red-white-joy-holiday-party-christmas-table-silver-tree

peppermint-diy-tray-red-white-joy-holiday-party-christmas-table-silver-tree

joy-marquee-light-red-white-christmas-party

Vendor Love:
Photography: Meredith Moran Photography | Marquee Lights: Saddleshoe Signs | Tabletop Accessories and Stationery: Fleur de Lis, a paperie 

DIY Woodland Winter Cake Topper

chocolate-cake-wood-slice-rabbit-tree-white-joy-sign-diy-cake-topper

We are experiencing a love affair with bottle brush trees and wood slices this winter. And, as usual, crushing on white and gold, too. Our kids think Christmas is tomorrow with all the holiday blog projects lying around the house – it’s a tease for them, and almost an overwhelming reminder of the upcoming holidays for us. At least they get to enjoy some of the benefits of shooting a DIY winter cake topper – shoot the cake, and eat it too.

chocolate-cake-wood-slice-rabbit-tree-white-joy-sign-diy-cake-topper

If you’re celebrating a winter birthday, or want to impress guests this holiday season with an adorable DIY winter cake or pie topper, just go out and chop a tree {you can buy them already cut from Michael’s if a lumberjack isn’t in your repertoire}, bust out the gold leaf paint, and glue.

Materials You’ll Need:
Wood slices
Cake pop sticks
Mini woodland animal figures – deer, rabbit, bear, squirrel
Thin popsicle sticks
Mini banner flags
Gold leaf paint
Hot glue gun

Directions:

Dab the ends of the  bottle brush tree with gold leaf paint. You can’t mess this up – just dab here, and there and everywhere.

Write a word, name or phrase on the paper banner.

Use a hot glue gun to glue the tree, animal and popsicle stick with paper banner on the wood slice. I cut the popsicle stick in half to make it shorter.

white-tree-rabbit-joy-sign-gold

Glue ‘legs’ on the bottom-side of the wood slice with the cake pop sticks that will stick into the cupcake, cake or pie.

rabbit-wood-slice-diy-cake-topper-tree-joy

chocolate-cake-wood-slice-rabbit-tree-white-joy-sign-diy-cake-topper


DIY Witch and Mummy Halloween Nail Polish

mummy-witch-halloween-nail-polish-diy-holiday-gift

We typically opt for a cute and fun Halloween, instead of a scary and creepy one. We’ve never loved haunted houses or frightening people. We like costumes and carving pumpkins, apple cider and trick or treating with our large Italian family.

Since we were babies our mom and aunt made our ‘themed’ Halloween costumes, and every year we celebrate together. Following the annual chaos of hello hugs, oooh’s and ahhhs over costumes and hundreds of flashing camera lights, the men grab a cigar and take the kids trick or treating. The women stay inside where its warm to chat, eat chili and hot dogs and drink our wine. It’s a special tradition, and we are grateful to share it with our own kiddos.

Being into the cute part of Halloween, this DIY is so us!

These DIY witch and mummy Halloween nail polish bottles would make for a great, non-candy Halloween party favor or a unique Halloween gift.

Witch color are you going to pick for this year’s Halloween nails? We’re going with Essie Bahama Mama.

If your rainbow-loving self is admiring the DIY spider web in the background, you can see how we did it here.

halloween-nail-polish-favor-witch-broom-mummy-spider-web-rainbow-hat-white-party-diy

You’ll Need:

  • Nail Polish
  • Paper, Astrobrights
  • White rafia paper ribbon
  • Googly eyes
  • Hot Glue
  • Nail File
  • Rafia
  • Twine

How To:

For the mummy, glue two eyes on the nail polish bottle. Dab a small amount of hot glue on the top of the bottle, then add white rafia ribbon, and start to wrap. You can do one continuous wrap, or cut, add a dab of glue and continue to wrap. When the entire bottle is covered, dab another small amount of hot glue, so the mummy’s wrap stays in place.

mummy-nail-polish-diy-halloween-favor-gift-ribbon-white-googly-eyes

mummy-nail-polish-diy-halloween-favor-gift-ribbon-white-googly-eyes

For the witch, make a small witches hat with a free mini-hat template online {or free-hand} and glue it to a black, doughnut-cut circle. Slide it over the nail polish handle. For the witches broom, place a handful of rafia around one end of the nail file, and tie twine around it to keep it in place. Use a tiny dab of hot glue to keep the twine in place.

witch-nail-polish-diy-halloween-gift-black-hat-orange-nail-file-broom-favor


witch-nail-polish-diy-halloween-gift-black-hat-orange-nail-file-broom-favor


witch-nail-polish-diy-halloween-gift-black-hat-orange-nail-file-broom-favor

DIY No-Sew Mini Football Pennant

blue-orange-bronco-football-pennant-diy-drink-stirrer-yay-go-helmet-banner-utensil

I been waitin’ all day for Sunday night

The tough get rough in a primetime fight

The last one standin’ gets to turn out the lights

‘Cause I been waitin’ all day for Sunday night

Yea, yea, yeah

Recognize that song {and the foxy lady that sings it} on NBC primetime Sunday night? Well, if your husband/boyfriend/dad/brother/son/friend is like ours, it’s more like, been waiting all day for Thursday, Saturday, Sunday and Monday because we’re pretty certain between college and the NFL, there are big, must-see games every one of those nights!

Yes, it’s that football time of year. Whether you like it or not, it’s here. Might as well make something cute to go along with it!

We made DIY mini pennants that can be used as a DIY pennant drink stirrer, or DIY mini pennant utensils for pre-game tailgate madness or a fun football party.

Can you guess what team we’re rooting for? CO born and raised, baby!

DIY Mini Football Pennant

blue-orange-bronco-football-pennant-diy-drink-stirrer-yay-go-helmet-banner-utensil

You’ll Need:

  • Colorful craft foam sheets
  • Pencil
  • X-acto knife
  • Hot glue gun
  • Plastic forks or spoons

Directions:

  • Step 1: Hand draw or trace your designs with a pencil onto the craft foam sheets. We created a pennant shape in Microsoft word, and found the Bronco logo, as well as the helmet online. For all the letters, they were hand drawn.

blue-orange-bronco-football-pennant-diy-drink-stirrer-yay-go-helmet-banner-utensil

  • Step 2: Cut out your shapes.

blue-orange-bronco-football-pennant-diy-drink-stirrer-yay-go-helmet-banner-utensil

  • Step 3: Glue the letters or shapes onto the pennants. Remember to leave a small space on the left side of the pennant for a small slip to insert a fork, spoon or stick.

blue-orange-bronco-football-pennant-diy-drink-stirrer-yay-go-helmet-banner-utensil

  • Step 4: Use an X-acto knife to cut a slit at the top and bottom of the pennant, on the left side of the letters/shapes.

blue-orange-bronco-football-pennant-diy-drink-stirrer-yay-go-helmet-banner-utensil

  • Step 5: Insert a spoon, fork or stick into the slits.

blue-orange-bronco-football-pennant-diy-drink-stirrer-yay-go-helmet-banner-utensil


blue-orange-bronco-football-pennant-diy-drink-stirrer-yay-go-helmet-banner-utensil

  • Step 6: Glue the little tags/strips on the back of the flag, next to the back of the spoon.

blue-orange-bronco-football-pennant-diy-drink-stirrer-yay-go-helmet-banner-utensil

blue-orange-bronco-football-pennant-diy-drink-stirrer-yay-go-helmet-banner-utensil

  •  Step 7: Place in a mason jar because you’re done, and everyone has the cutest DIY pennant utensil ever!

blue-orange-bronco-football-pennant-diy-drink-stirrer-yay-go-helmet-banner-utensil


Big Hero 6 Party

baymax-shirt-big-hero-6-party-balloons

Just in case it wasn’t obvious to you, the 3 kiddos above are superheroes. They are smaller in size than their favorite Big Hero 6 characters – Wasabi, Baymax and Honey Lemon – and they don’t have the ability to fly on an armed marshmallow man, but they are brave, kind, smart and amazing kids who possess their own superhero powers.

We celebrated the superhero in them, and all their friends at a Big Hero 6 party this summer. After all, it is one of our favorite animated movies. Even Jessica’s girly, sparkle-loving, princess-adoring daughter loves the kids superhero action film.

So, we invited family and close friends to join us for outside, yard games and a special drive-in movie showing for a Big Hero celebration.

It’s all in the details, so here they are…

DIY Honey Lemon-ade Stand

While Gabriella was all-in for a Big Hero 6 theme, something had to be pink and colorful, and well, girly. She wanted to dress like the scientist character, Honey Lemon and host her own Honey Lemon-ade Stand. Jessica created her stand with a DIY balloon arch made with a Balloon Time helium tank above her new, red Wayfair table adorned with ribbon.

balloon-arch-diy-lemonade-stand-honey-lemon-big-hero-6-party-ribbon

IMG_9821

Drive-In Movie with DIY Cardboard Box Cars

The DIY cardboard box cars were the hit of the party. Each kid had his/her own car at the Big Hero 6 drive-in, along with a ledge to hold their popcorn and candy. Since the party was in the daylight, we opted for a drive-in movie theatre in the garage. There was a bonus we hadn’t even considered – while the kids were at the DIY drive-in movie, the adults enjoyed some kid-free time upstairs.

The cardboard cars were made with cardboard boxes, duct and packaging tape, white paper plates {wheels}, black paper {wheels and grill}, green paper {license plates} and red paper {break lights}.

diy-drive-in-movie-theatre-big-hero-6-movie-showing-cardboard-car

drive-in-movie-big-hero-6-cardboard-box-car

drive-in-movie-cardboard-car-big-hero-6-kid-party-diy

drive-in-movie-big-hero-6-cardboard-box-car

drive-in-movie-cardboard-car-big-hero-6-kid-party-diy

No drive-in movie is complete without a concession stand. We transformed packaging styrofoam into a backdrop with colorful wrapping paper and photos of the Big Hero 6 characters.

big-hero-6-party-backdrop-colorful-wrapping-paper-baymax-drive-in-concessions

big-hero-6-party-backdrop-colorful-wrapping-paper-baymax

baymax-big-hero-6-water-bottles

Yard Games

Before the kids sat to watch a movie, they played various yard games to release their boundless energy.

big-hero-6-party-diy-sign-yard-games

We transformed our favorite Bucket Ball game into Baymax Bucket Ball. The game was played with the same rules, but players tried to shoot the ball into Baymax buckets filled with water, instead of plain, white buckets. To make the Baymax buckets, we simply cut circles from black card stock, and taped them with a large piece of clear packaging tape. The tape also made the eyes waterproof.

big-hero-6-baymax-bucket-ball-kids-party

Another fun game was Go Go Tomago Disc Toss. We bought hoola hoops, and hung them with rope in-between large trees. Players tried to score points by throwing the ‘Go Go frisbee’ into the hoola hoops.

hoola-hoop-frisbee-toss-kids-game-big-hero-6-party

hoola-hoop-frisbee-toss-kids-game-big-hero-6-party

It’s not a party until you break open a piñata. Jessica bought a soccer ball piñata, and retrofitted it with red, fringe tissue paper and black eyes to make it a Baymax head.

baymax-big-hero-6-diy-pinata-kids-birthday-party

Favors/Details

Kids went home with white pint containers with DIY baymax shirts inside, balloons and their cardboard cars.

balloons-big-hero-6-party

baymax-shirt-red-balloon

Jessica’s hubby carved a DIY microbot for authentic Big Hero 6 decor. He made it from packaging styrofoam and the kids helped us by painting it black.

big-hero-6-party-microbot-diy-

Red lollipops were also a detail in the movie we re-created with wrapping paper sticks {spray painted white} and red plates glued to the top.

big-hero-6-party-baymax-diy-red-lollipop-balloons

Invitations were custom-made by Jenna, of course. We went with a modern, clean approach and added a playful Baymax balloon. You can buy the invites here.

big-hero-6-party-baymax-invitation-kids-birthday-cityscape-invite-fleurdelisapaperie-etsy

IMG_1813

VENDOR LOVE
Invites: Fleur de Lis, a paperie
Balloon arch: Balloon Time Helium Tank