Rainy Day in a Box

rainbow-rainy-day-in-a-box-kids

Kids, just like adults, have good days and bad. At our house, we call the bad days rainy days because they are the days when you have to open the umbrella, and wait for the storm to pass. Rainy days happen, we talk about it, and then we try to turn it into something positive.

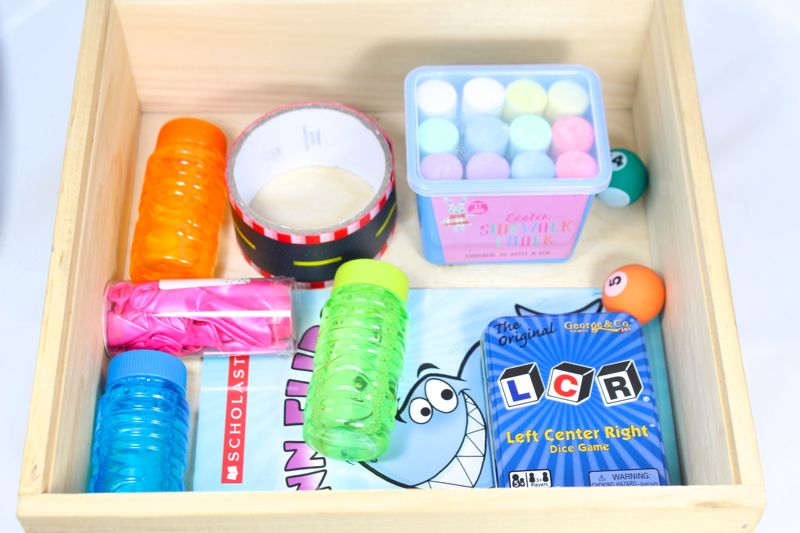
While talking to my cousin, Mary, she told us about a tradition one of her friends started with her kids. We wish we thought of this because we loved it so much. We made our own version of Rainy Day in a Box. It’s a DIY box we made, and filled with trinkets and goodies to lift our kids spirits on days when they need an extra bit of love and distraction.

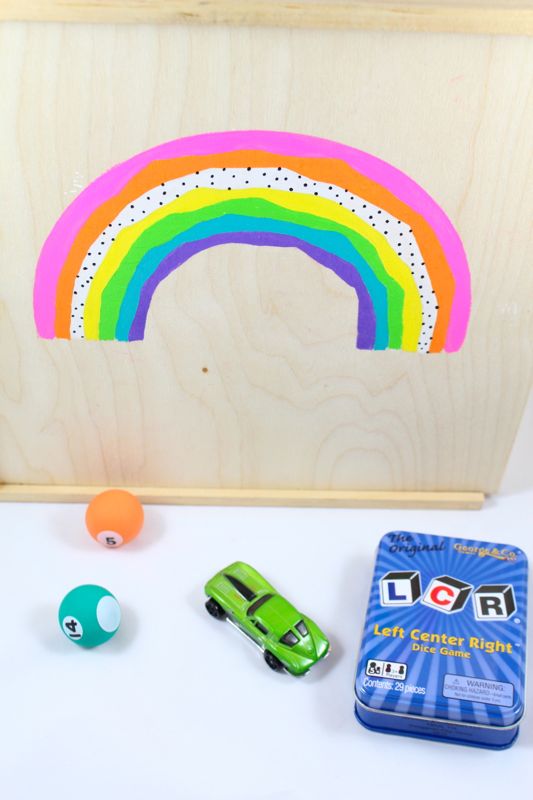
Our kids know it’s not an everyday treat, but on those rough days, they can reach their hands in the box for a special treat. We find that it has become a good opportunity to talk to our children about those tough days, and find simple ways to make them smile.

rainy-day-in-a-box-for-kids-toys-rainbow

Materials:

  • Wood box
  • Small gifts that will make your kids smile
  • Acrylic paint, Plaid Crafts

Directions:

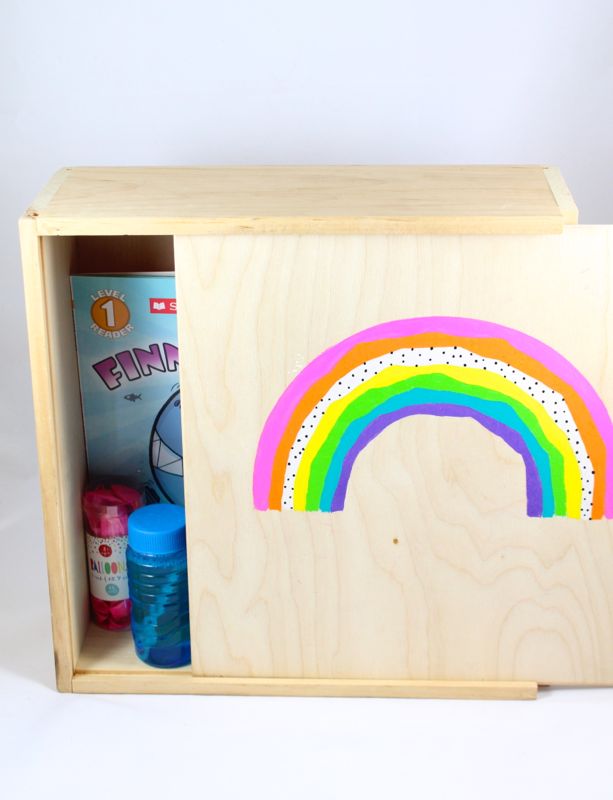
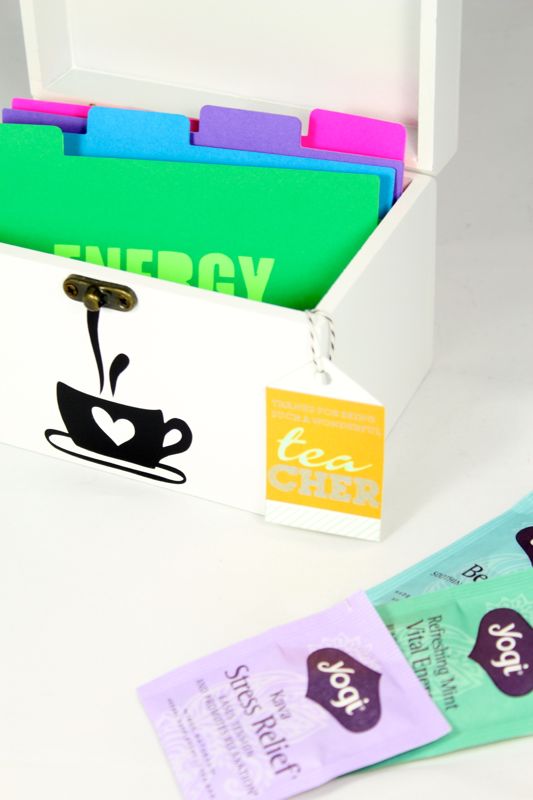
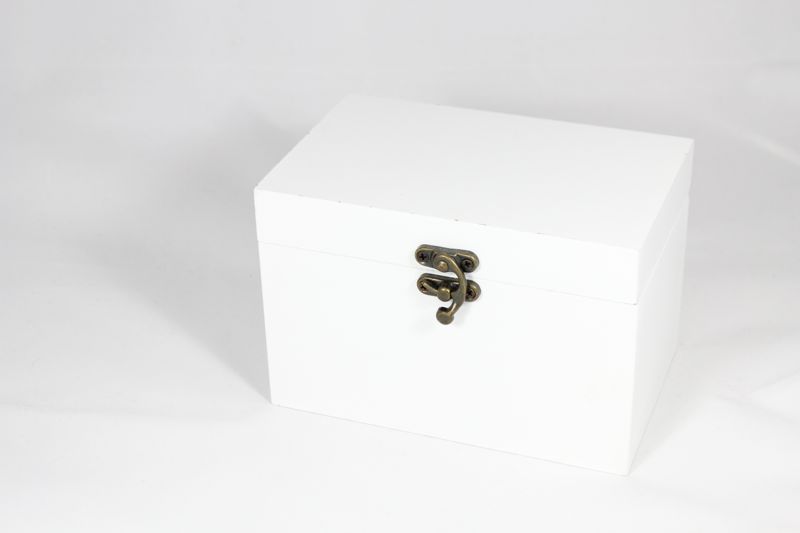
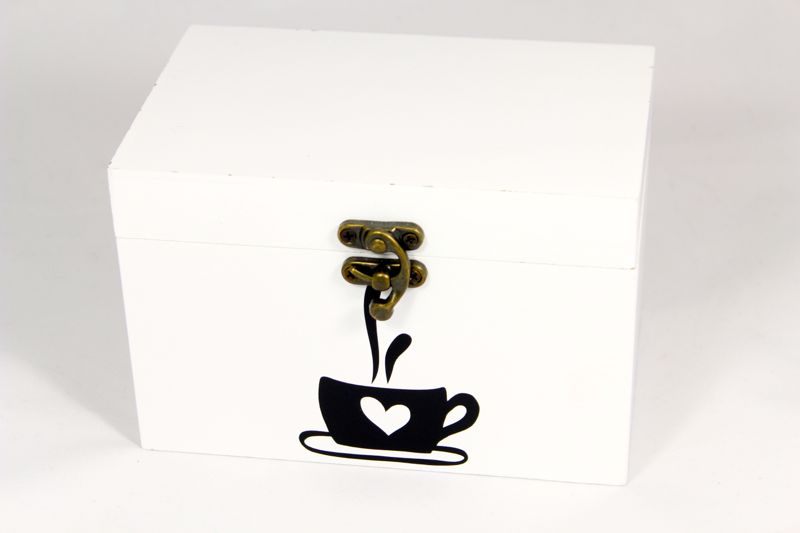
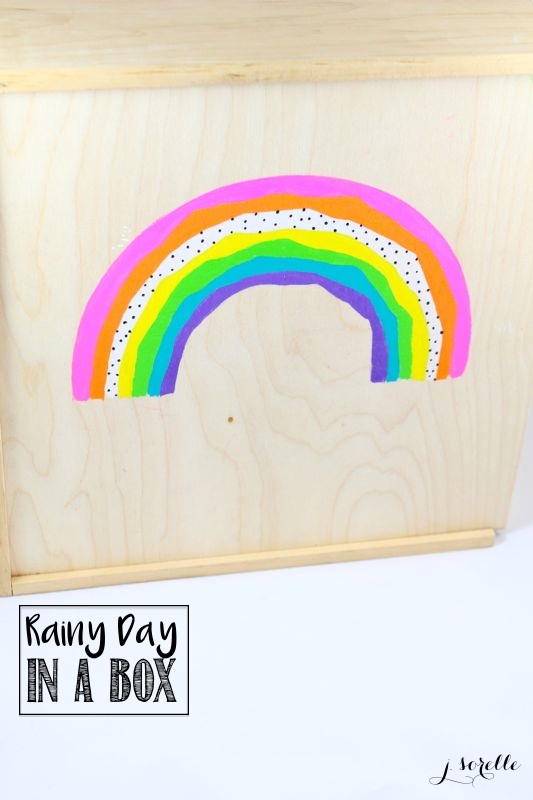
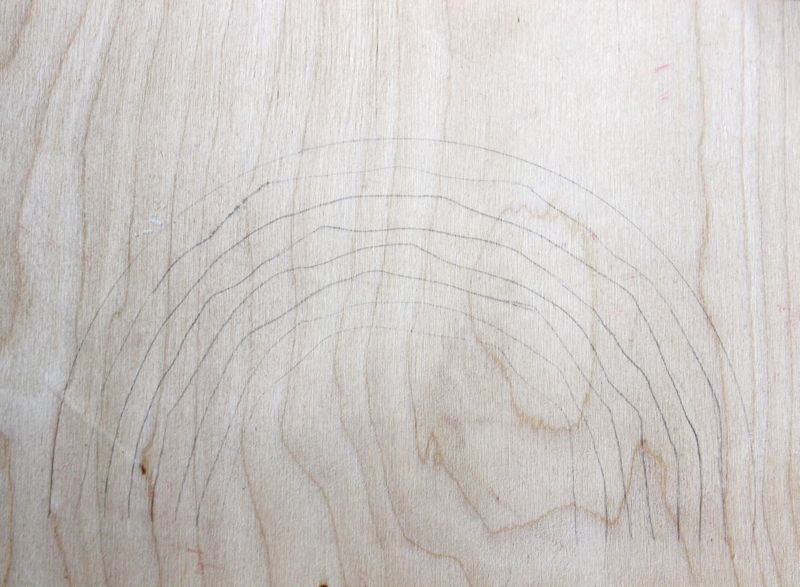
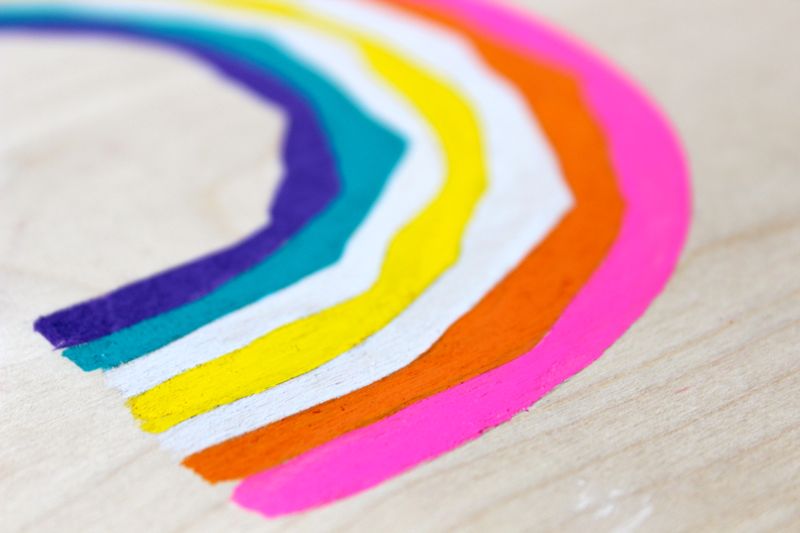
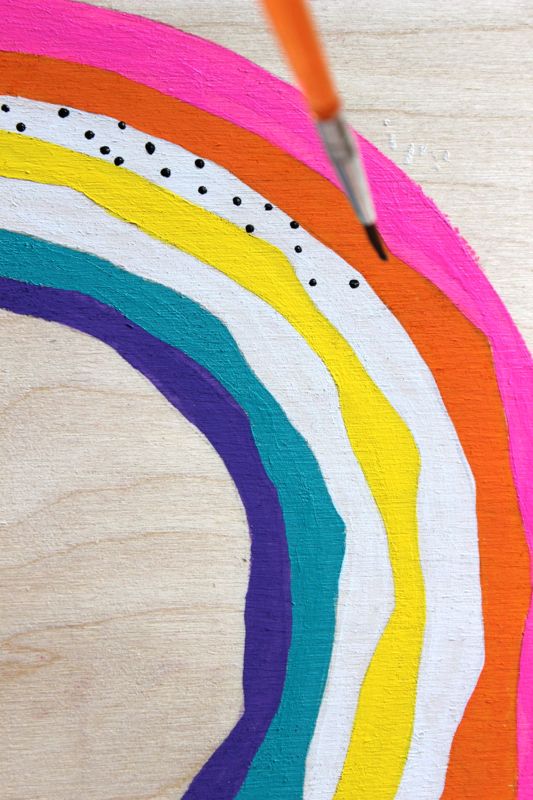
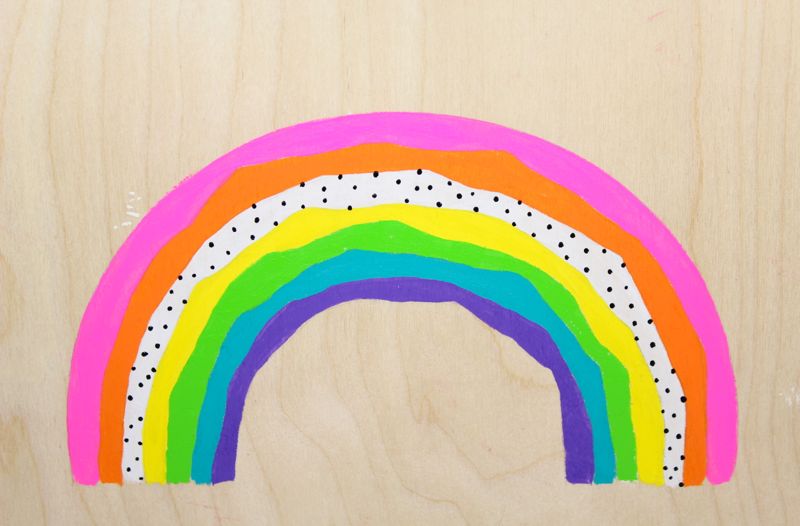
Use a pencil to draw your design on the box. We traced 1/2 a bowl for the top arch, and then free-handed the rest. As you can see, it is somewhat wavy, and that’s the look we were going for. We used a PIEBOX. It’s sturdy, pretty enough to be on a shelf and large.

wood-pencil-rainbow

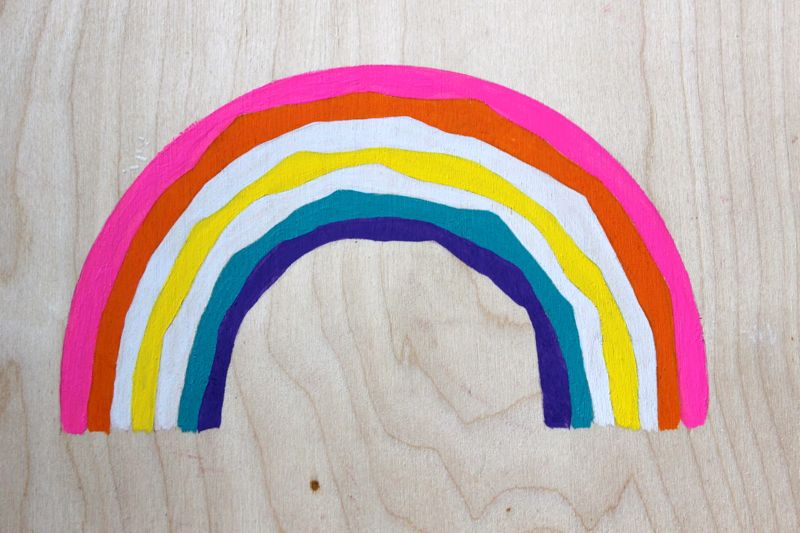
Paint the design. We choose to paint a rainbow because rainbows represent the hope after a storm, and rainbows make us happy.

rainbow-pink-orange-yellow-white

rainbow-pink-orange-yellow-white-blue-purple

paint-rainbow-colors

rainbow-pink-orange-yellow-green-blaick-polka-dots

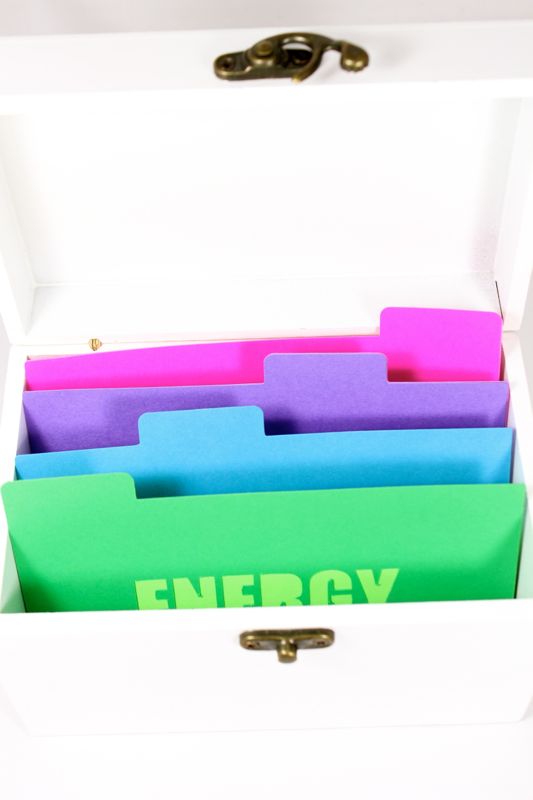
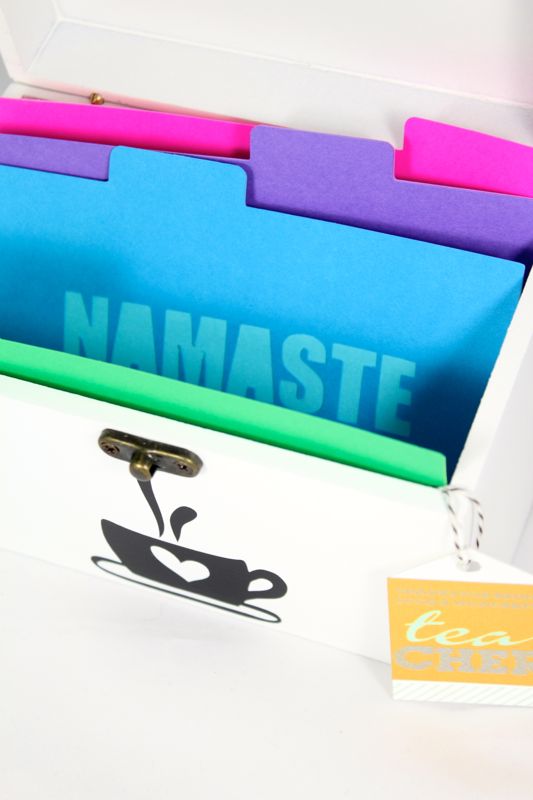
Fill the box with goodies that will cheer up your son and daughter.

kids-toys-box-bubbles

rainbow-kids-gifts-rainy-day-in-a-box-bubbles

DIY Typography Decanter

booze-cheers-bar-diy-decanter

Nordstrom is one of our favorite places to shop. The shoes, the fashion, the return policy, the cafe – we love all of it! We noticed a fun Booze Decanter and Stopper throughout the holidays, and we never quite stopped thinking about it. Thankfully, we were able to re-create a DIY Booze decanter with our Silhouette cutting machine, and our minds {and bar} are at peace…at least for now.

Materials:

Instructions:

Assemble empty glass bottles you can transform into DIY typography bottles.

empty-glass-bottles

Design your labels with the Silhouette software. Print according to package instructions.

Once the vinyl is cut, remove the excess vinyl around the words, and place Frog’s Tape over the words.

cheers-gold-vinyl

Pull the tape up, and the words should be attached to the tape.

booze-gold-vinyl-green-tape

Press the tape and words onto the bottle, and get all the bubbles out with a straight edge {we used a credit card}.

booze-gold-vinyl-green-tape-decanter

Pull the tape up from the bottle, and the vinyl should stay in place on the bottle. You may have to use one finger to press down on the vinyl if the font is thin and it comes up with the tape, but we didn’t have to on this project.

booze-gold-vinyl-green-tape-decanter

Once all the tape is removed, you should have a new DIY typography decanter. Fill with alcohol and say cheers!

booze-gold-vinyl-green-tape-decanter

For this project, we took it one step further and got a little Typography happy! We couldn’t do just one bottle! This DIY project makes for a really fun addition to any bar, and a great hostess gift.

tasty-cheers-booze-bottle-decanter-bar

booze-gold-vinyl-green-tape-decanter

cheer-blue-bottle-diy-decanter-water-entertaining

tasty-booze-cheers-diy-decanter-bar

Not only did we create several bottles, but we couldn’t have a bottle that holds alcohol without actual alcohol in it. With St. Patrick’s Day several days away, we ventured into making our own Bailey’s Irish Cream. My girlfriend, Kacey, made a delicious batch of our favorite Irish cocktail for a birthday brunch recently, and we couldn’t believe homemade Bailey’s could be so good. We’ve revamped a couple of recipes to make our homemade version, but most are similar.

Homemade Bailey’s Irish Cream
adapted from several recipes

Ingredients:

  • 1 cup + 1 tablespoon Jameson Whiskey
  • 1 pint half and half
  • 1 can Eagle’s Condensed Milk
  • 2 tablespoons chocolate syrup
  • 1 teaspoon Vanilla
  • 1 tsp. instant espresso mixed with 1 tsp. boiling water

Instructions:

Place all ingredients in a blender, and blend. If you don’t blend for 30 seconds or more, we found that our Bailey’s had some chunks from the cream, so continue to blend until smooth.

Keep in a sealed glass jar in the fridge for up to 2 weeks. Give it to a friend as a gift this St. Patrick’s Day, too!

homemade-baileys-irish-cream-tasty-bottle-clover


DIY Marbled Coasters & DIY Yarn Wall Hanging

bronco-party-blue-orange-super-bowl-50-football-yarn-wall-hanging

We are still dreaming orange and blue from our Super Bowl 50 Broncos party yesterday. If you haven’t seen it, take the time. It’s got it all – fashion, pretty girls {Jodi and Kaitlin from The Every Hostess}, a bar cart with really good Vodka and a special cocktail recipe.

bronco-party-blue-orange-super-bowl-50-football-yarn-wall-hanging

As promised here’s DIY #1 from the shoot yesterday, DIY Bronco Marbled Coasters.

Keep reading for the second tutorial – DIY Yarn Wall Hangings.

DIY-marbled-coasters-blue-orange-nail-polish-bronco-party-for-the-ladies

Materials:

  • 4X4 white tile, The Home Depot
  • Nail polish
  • Disposable Container
  • Warm water
  • Toothpick
  • Disposable Gloves
  • Felt pads

Directions

Fill a throw-away container with really warm water.

Drop 4-8 drops of nail polish into the water. We chose to do one color for each coaster.

Swirl the polish in a swift manner with the toothpick. Quickly, dip the entire coaster into the water with your gloves on. Once the coaster dips under the water, it will ‘collect’ all the polish.

Pull the coaster up out of the water. The nail polish will be swirled on top. Let them air-dry.

Once dry, add felt pads to the bottom.

Add them to your serving tray or bar cart.

oranges-party-serving-tray-broncos-diy-marbled-coasters

Love the pop of color from the coasters. They make for a lovely hostess gift, too.

bronco-party-blue-orange-super-bowl-50-football-marbled-coasters

Finally, here’s tutorial #2 from our Super Bowl party – DIY Yarn Wall Hangings.

bronco-party-blue-orange-super-bowl-50-football-diy-yarn-wall-hanging

Materials:

  • Yarn
  • Wire hangers
  • Scissors

Directions:

Cut long strands of yarn.

Decide on a color pattern, or see where your creativity takes you as you go.

To tie it onto the hanger, fold the yarn in half, and loop it through. No glue needed. Tighten the knot.

Repeat until the hanger is covered.

Lay the hanger on a smooth surface and straighten all the yarn ends. Cut the ends of the yarn at different angles.

bronco-party-blue-orange-super-bowl-50-football-diy-yarn-wall-hanging

We like all the pretty stuff and looking good, but we get really into the game too! Go Broncos!

Cheers!

ladies-bronco-party-blue-orange-super-bowl-50-football-yarn-wall-hanging

ladies-smiling-game-time-orange-cocktail-fun-party-bronco

VENDOR LOVE
Photographer: Meredith Moran | @meredithmoranphoto
Clothing and Jewelry: Denver Street Boutique @denverstreetboutique
Cocktail: 10th Mountain Whiskey & Spirit | @10thmtnwhiskey
Event Stylist: J. Sorelle | @jsorelle3 and The Every Hostess | @theeveryhostess
Models: Jodi, the beautiful brunette of J. Sorelle | @jsorelle3 and Kaitlin, the bombshell blonde of The Every Hostess |  @theeveryhostess
Bar CartWest Elm
DIY coaster and yarn wall hangings: J. Sorelle

Coloring Outside the Lines

color-outside-the-lines-diy-coffee-mug-marbled-cup-pink-rainbow

We are big fans of Sex and the City. We remember so many lines and favorites scenes from the sexual and charming sitcom. One in particular made us laugh, and inspired today’s DIY project.

In the first Sex and the City movie, while at lunch, the ladies were talking about sex, as a result of Miranda’s dry spell with Steve. Charlotte’s daughter was at lunch, so the ladies had to use code for the word sex. Remember this scene?

It went a little something like this…

Miranda: How often do you guys…
Carrie: “color”?
Samantha: Well, I can’t color enough. I would color all day, everyday if I had my way. I’d use every crayon in my box. 
Carrie: We get it, you love to color. 

When asked how often she and Big colors, Carrie replied: But I will tell you this. When Big colors, he rarely stays inside the lines.

So, naturally we made translated this scene into a DIY project. An ordinary white mug was transformed into a DIY black and white heart mug with a colorful, marbled handle, and filled with bright markers!

The message here is either a PG-13/R rated version about sex and coloring outside the lines in bed. If this is your goal, this DIY black and white heart mug is a funny gift to give girlfriends about “coloring” with their man, in a #howoftendoyoucolor kind of way.

sex-and-the-city-black-white-heart-mug-diy-marbled-cup-gift

sex-and-the-city-how-often-do-you-color-black-white-heart-mug

The G rated message of this DIY black and white heart mug can be more inspirational – in a black and white world, be the person who adds color. Be bold. Be yourself. Color the world with bright colors, happiness and kindness. Color the world pretty.

diy-black-white-heart-vinyl-marbled-mug-markers-color-outside-the-lines

Even if you’re not a Sex and the City fan, coloring is all the rage for kids and adults these days, so this would make for a great Valentine’s Day gift, birthday gift, or overall fun gift for a friend. Combine it with a pretty notebook, and write your message inside the notebook. #coloroutsidethelines #howoftendoyoucolor #sexandthecityforever #takethetimetocolor #colortheworldpretty #nevertoooldtocolor

Materials:

Directions:

Design a small heart with the Silhouette editing software. Print the mini hearts on the vinyl, following instructions provided by Silhouette.

Cut the hearts individually while they are still on the Silhouette vinyl backing. Use a small strip of Frog’s Tape on top of each heart to remove it from the vinyl backing. Place it on the mug. Use a credit card or straight-edge to smooth it out.

diy-white-black-heart-mug

Remove the tape. The heart should stay in place on the mug.

black-white-heart-mug-diy-vinyl

IMG_3991

Continue to add all the hearts in a scattered or organized manner on the mug.

black-white-heart-diy-mug-gift

Tape off the handle of the mug with Frog Tape.

white-black-heart-mug-diy-project-vinyl

Pour really warm water into your disposable container. Drop 4 drops of each nail color inside the water. Swirl the colors around quickly {really quickly} with a toothpick. Insert the handle of the mug inside the water till its fully covered and then lift it out. Let the handle dry. Once dry, remove the Frog Tape. If the nail polish gets on the mug, remove it immediately with nail polish remover.

marbled-diy-mug-black-white-hearts-markers

Fill the mug with markers.

diy-black-white-heart-mug-markers-marbled-nail-polish

DIY Tea Organizer Gift

diy-tea-organizer-yogi-coffee-mug-gift-colorful-tabs

We love tea. It’s a recent can’t-live-without routine these days. We also can’t get enough of the Target Dollar bins – seriously, we can’t get out of that section in under 30 minutes. Those 4 mini aisles bring us joy, and fabulous finds. We combined a recent Target find with tea, and we’re obsessed!

Everyone needs a tea organizer like this for the office, for the classroom and for the home. It’s pretty, efficient and simple. We organized our tea by moods and needs because there is a tea bag for just about everything. Our teachers are the lucky recipients of this one, but we have a feeling this will be a go-to DIY gift.

Materials:

Directions:

Gather your favorite tea bags. We used some of our favorites from Yogi.

-teacher-gift-diy-tea-bags-organizer-wood-box-black-coffee-mug-health

Design the tabs/labels in Silhouette Design Store. We chose to organize with the words Energy, Healthy, ZZZ’s and Namaste. We layered the file folders so there was color behind the letters. Make sure the tabs fit inside your organizer. Cut {let the printer do the cutting} and glue.

-teacher-gift-diy-tea-bags-organizer-wood-box-black-coffee-mug-namaste-zzz-health

-teacher-gift-diy-tea-bags-organizer-wood-box-black-coffee-mug

Design and cut the coffee mug with Silhouette. We did not have the vinyl transfer paper, so we used Frog’s Tape, and it worked like a charm.

silhouette-black-coffee-mug-heart-diy-tea-gift

white-box-black-vinyl-green-tape-coffee-mug-diy-gift

Here’s the white box before…

white-box-black-coffee-mug-heart-tea-diy-gift

and after.

white-box-black-coffee-mug-heart-tea-diy-gift

Place the tabs/file folders and tea bags inside the wood box.

-teacher-gift-diy-tea-bags-organizer-wood-box-black-coffee-mug

white-wood-box-diy-gift-tea-teacher-energy

Print the free You’re a Wonderful Tea-cher label, and hang from a piece of twine and tape from the inside of the wood box.

-teacher-gift-diy-tea-bags-organizer-wood-box-black-coffee-mug

namaste-tea-wood-box-diy-gift-blue-paper-teacher