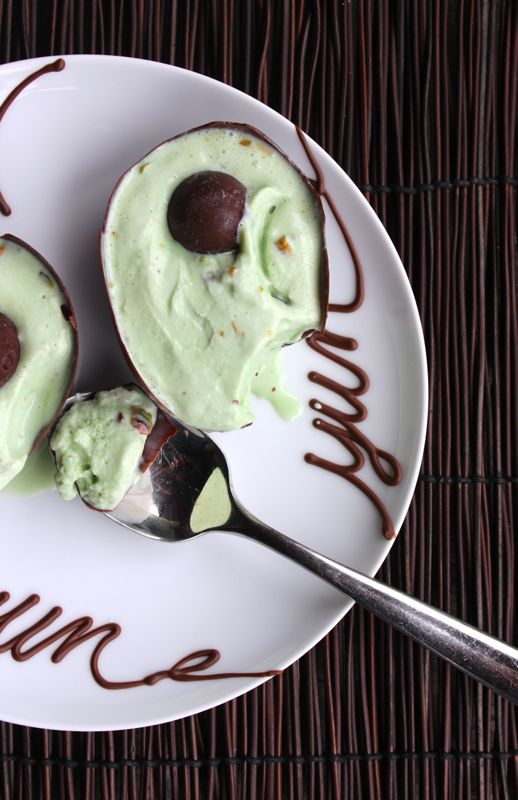
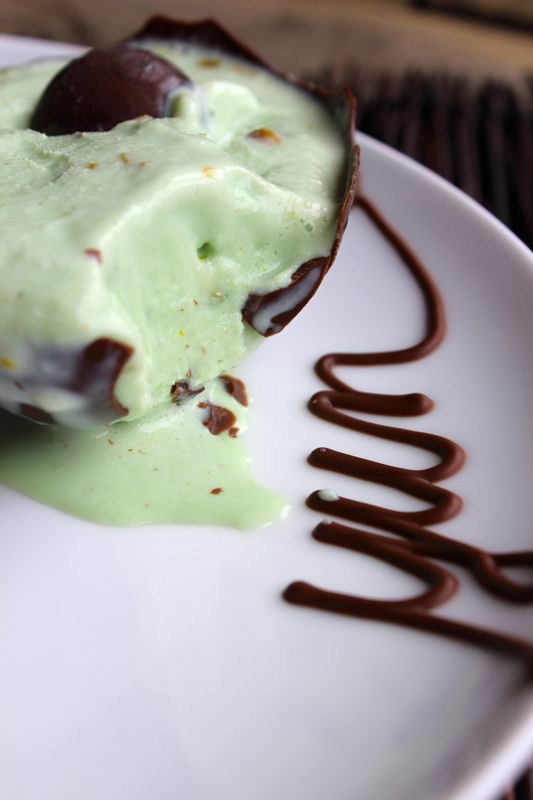
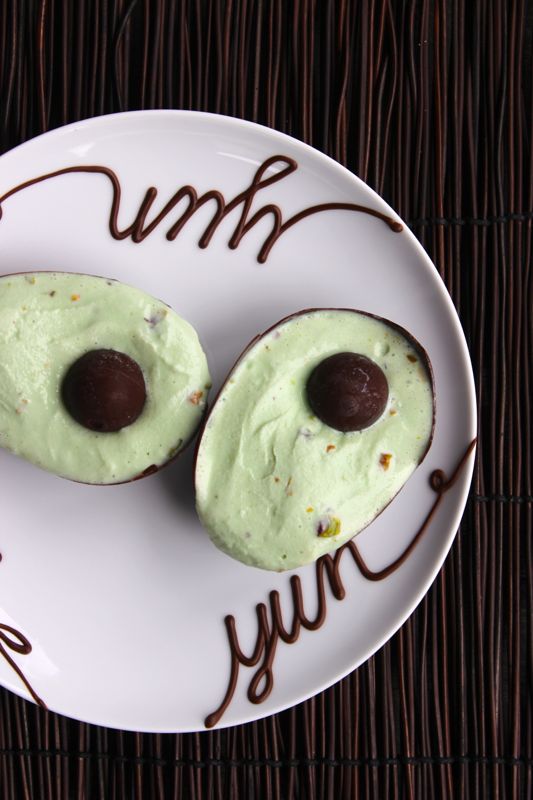
Avocado + ice cream.
It’s not an everyday pairing. At first thought, it sounds creamy, slightly odd and interesting.
Well, after experimenting a bit in the kitchen, we can tell you that the combination of an avocado + ice cream dessert is delicious.
We wish we could take total credit for this idea. However, if there are any Triple D {Diners, Drive-Ins and Dives} fans out there like Jessica’s hubby, you may have seen an episode where a Mexican restaurant made an exact replica of an avocado for dessert; except instead of an avocado, it was homemade avocado ice cream in a chocolate shell, and a homemade caramel and chocolate ball inside. Yum!
We would have attempted actual avocado ice cream, but we went with something easier to make {just buy and scoop}, and sweeter {not as healthy}. Plus, the gelato had the word Sicilian in it, and being of Sicilian heritage, it was a no-brainer.
At your next party, surprise guests with an avocado dessert…or at least Avocado shaped ice cream for dessert. It will be a hit!
You’ll Need:
- Finely chopped dark chocolate. We used Ghiradelli Dark Melting Wafers
- Lindt Extra Dark Lindor Chocolate Truffles
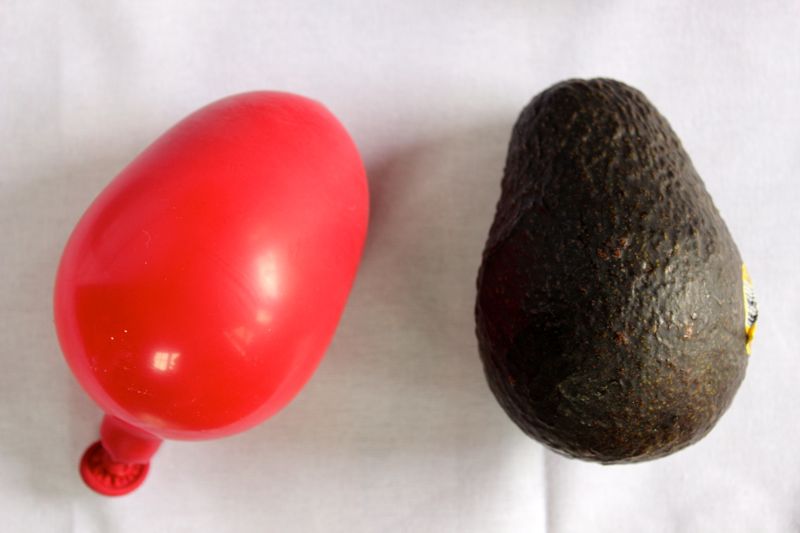
- Balloons
- Talenti Gelato, Sicilian Pistachio
- Wax Paper
Directions:
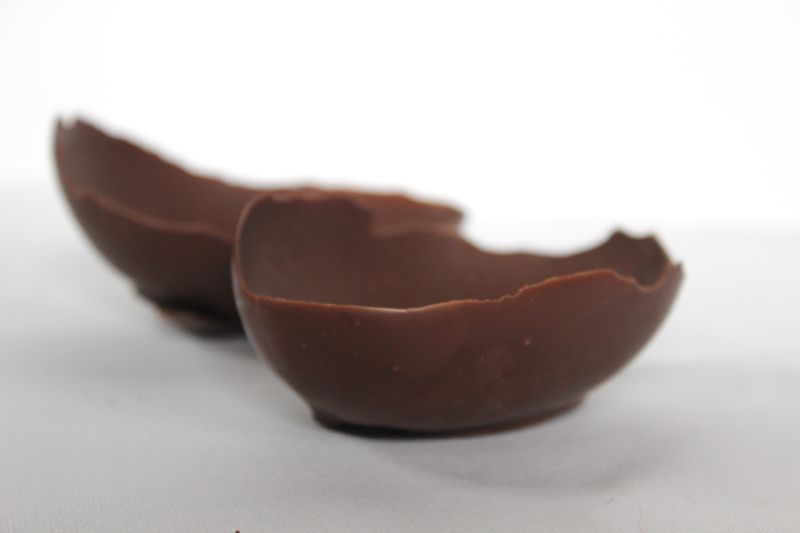
Make the Chocolate Avocado Shell
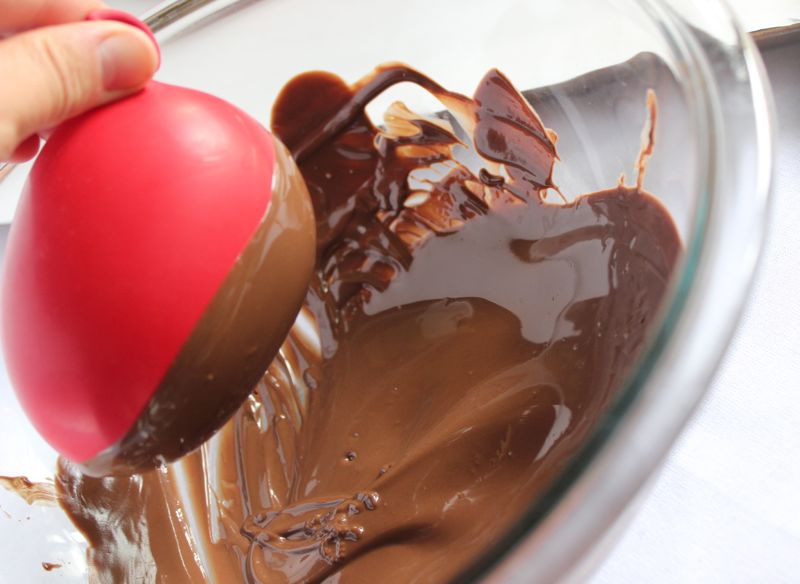
- Step 1: Melt the chocolate wafers. We melted it via microwave in 30-second intervals until it was melted. Stir until smooth.
- Step 2: Blow up a balloon about the size of an avocado.
- Step 3: Prepare a baking sheet with wax paper or parchment paper.
- Step 4: Make sure the chocolate is slightly cool.
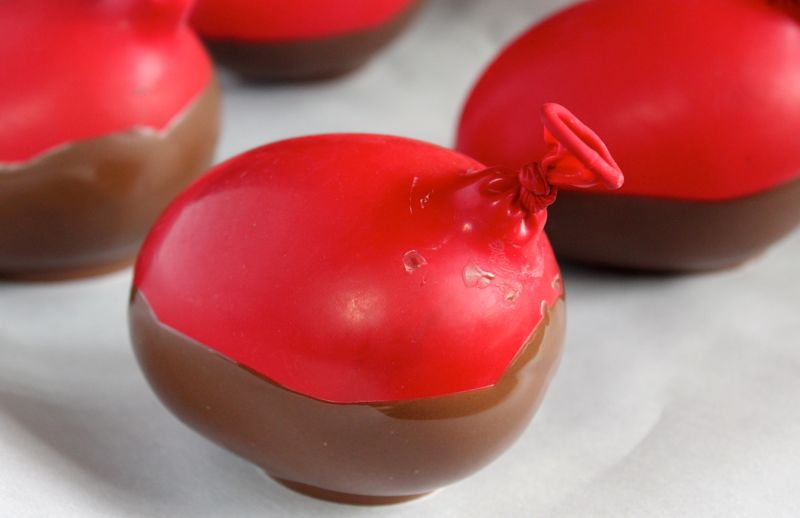
- Step 5: Gently dip the balloon in the chocolate, coating the bottom half of the balloon.
- Step 6: Place on the baking sheet. Repeat for as many bowls as you want to make. Place the baking sheet in the refrigerator for about 10 minutes.
- Step 7: To release the air from the balloon, pinch the balloon and use a tack or knife to puncture a small hole.
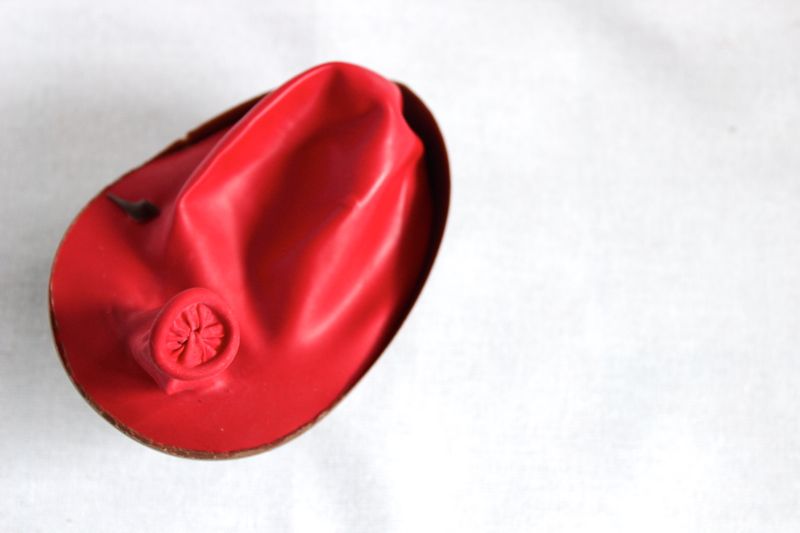
- Step 8: Release the air gradually. If the air is released too fast, the bowl will be more likely to break.
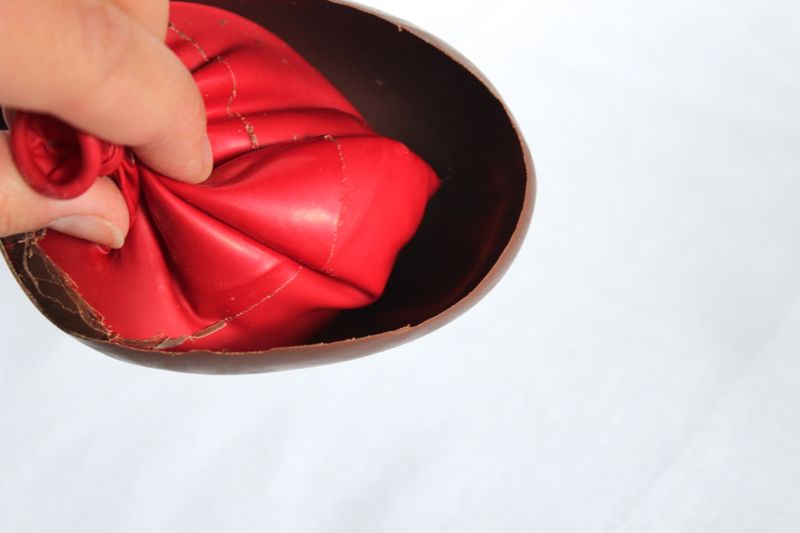
- Step 9: Carefully peel the deflated balloons from the bowl, trying not to press down or squeezing the bowl.
Add Ice Cream to the Shell
- Step 1: Remove the ice cream from the freezer, and let it thaw slightly so it’s easier to mold without breaking the shell.
- Step 2: Gently add spoonful’s of ice cream into the chocolate ‘avocado shell’ until it’s full.
- Step 3: Press a Lindt chocolate truffle into the ice cream so it looks just like the nut inside an avocado.
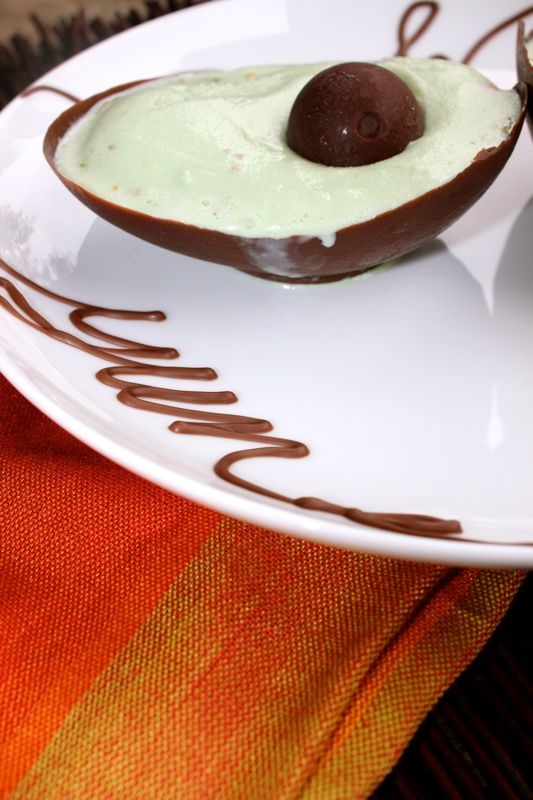
- Step 4: Place the sweet DIY ice cream avocados into the freezer until you are ready to serve.