Personalized Book Giveaway and DIY Kite Easter Eggs

kite-easter-eggs-marker-stripes-bows-diy-

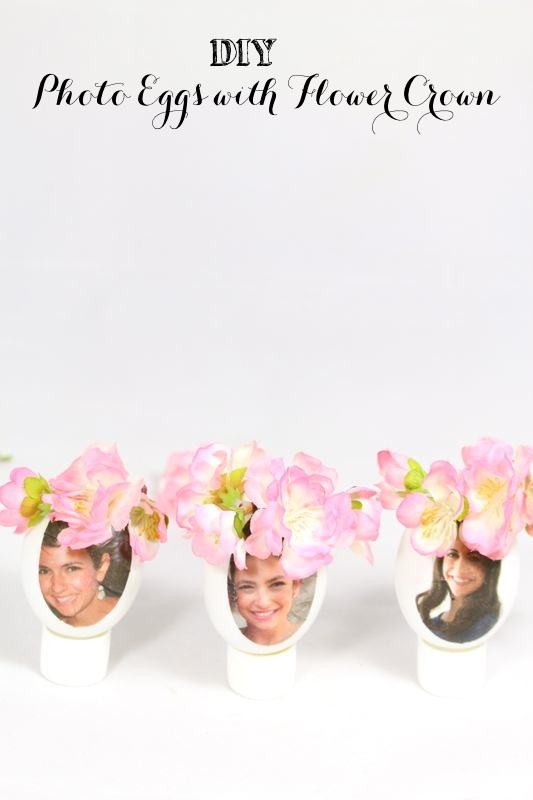
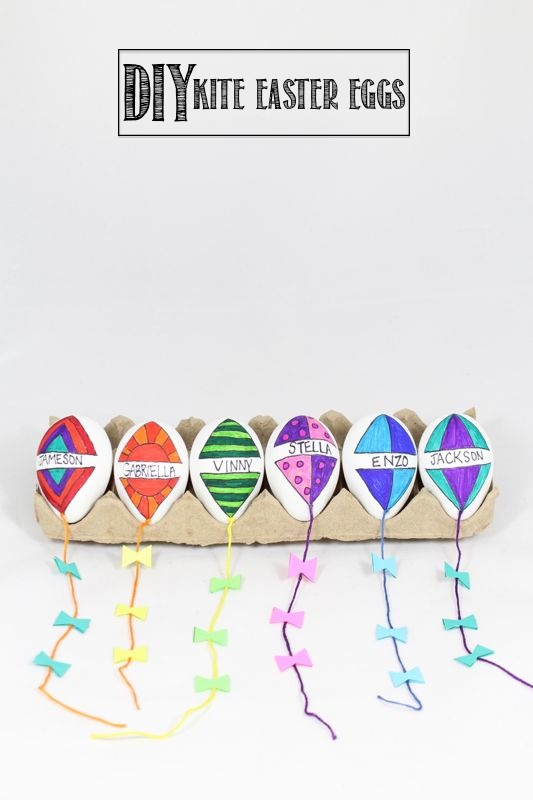
We are flying high with today’s post. Literally, we are as high as a kite in the sky! We love our newest DIY Kite Easter Eggs, and they were inspired by an I See Me! book, My Little Book of Blessings. We have always loved I See Me! products, and they remain one of our favorite newborn gifts. Recently we opened up the blessings book and found the graphics to be magical, and the words to be meaningful. A book that teaches children the golden rule, the importance of friendship and how to lend a helping hand is a book we want on our bookshelves. Plus, every page is customized with a child’s name, and a special note and photo on the front and back pages.

kite-book-i-see-me-books

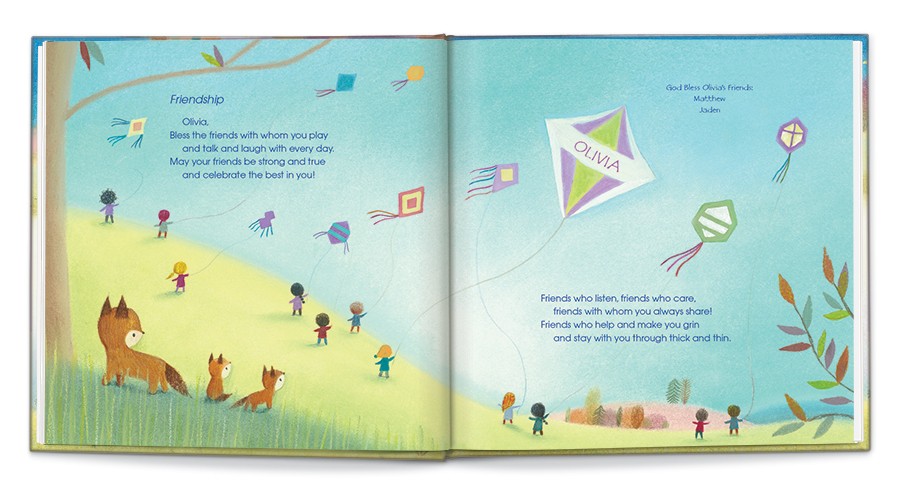
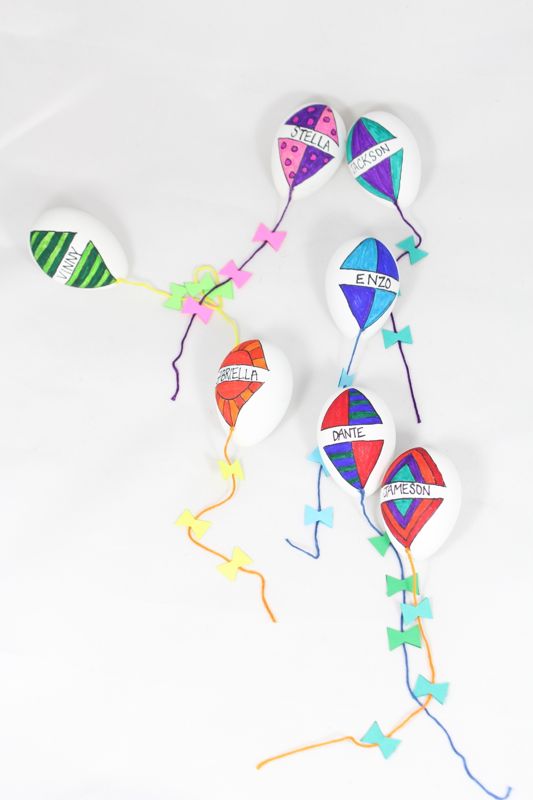
The page about friendship has kite illustrations, and thus our DIY easter eggs were born. Please keep reading for a tutorial on the eggs, as well as a giveaway for a I See Me! book of your choice, just in time for Easter. The books are amazing, and the gift of reading is priceless.

diy-kite-easter-eggs-marker-coloring-bow-diy

Materials:

Directions:

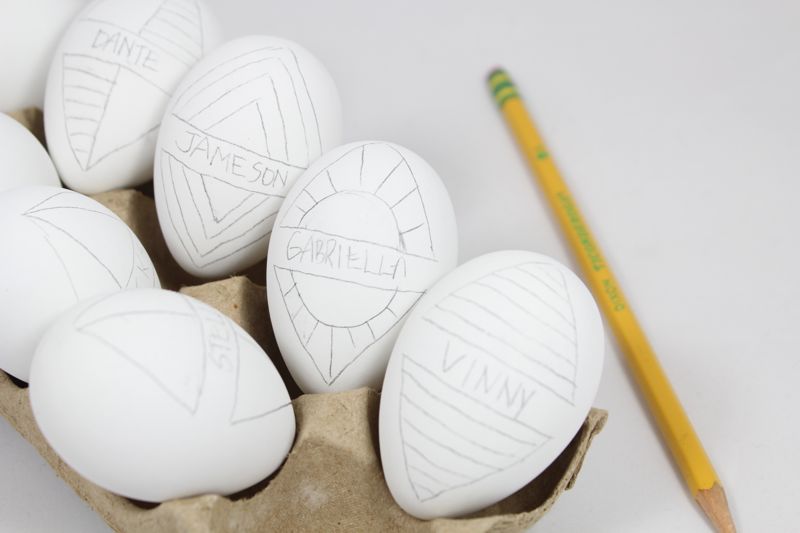
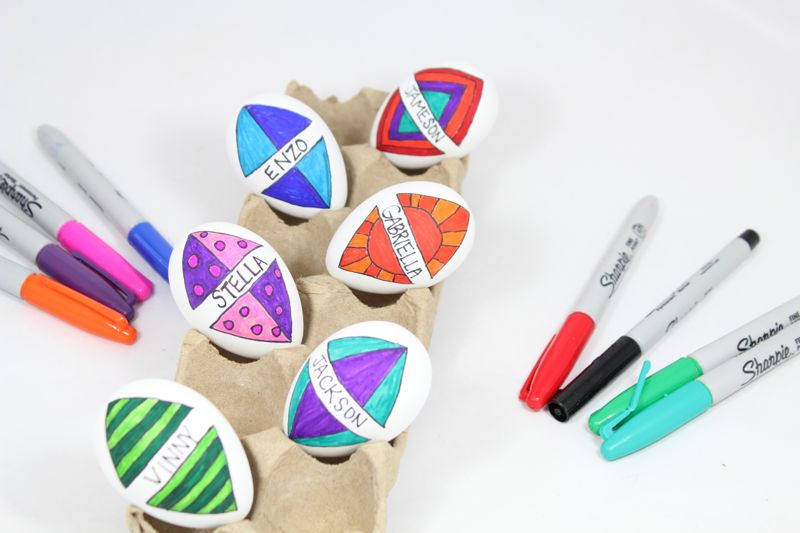
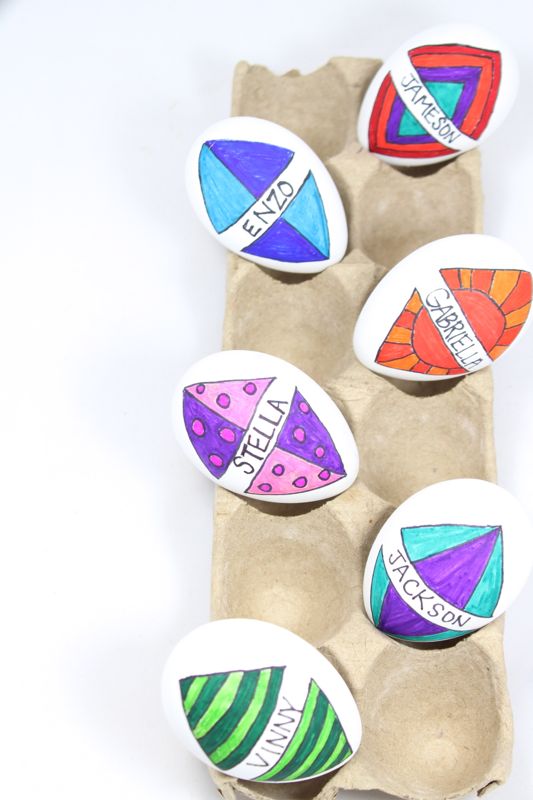
Draw the kite designs with a pencil. If you mess up, you can erase it. We used free-hand to draw our designs.

pencil-egg-drawings-kite-easter

Outline the egg with a thin black Sharpie marker. Once the design is outlined, erase any pencil marks that remain on the egg.

vinny-diy-easter-eggs-black-lines

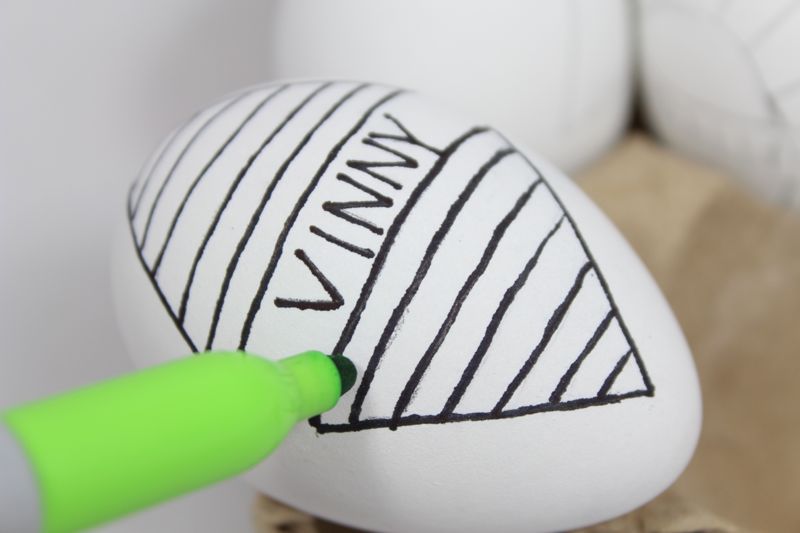
Begin to color inside the lines with Sharpie colorful markers. Continue until all kites are brightly colored.

diy-kites-easter-eggs-coloring-markers

diy-kites-easter-eggs-coloring-markers

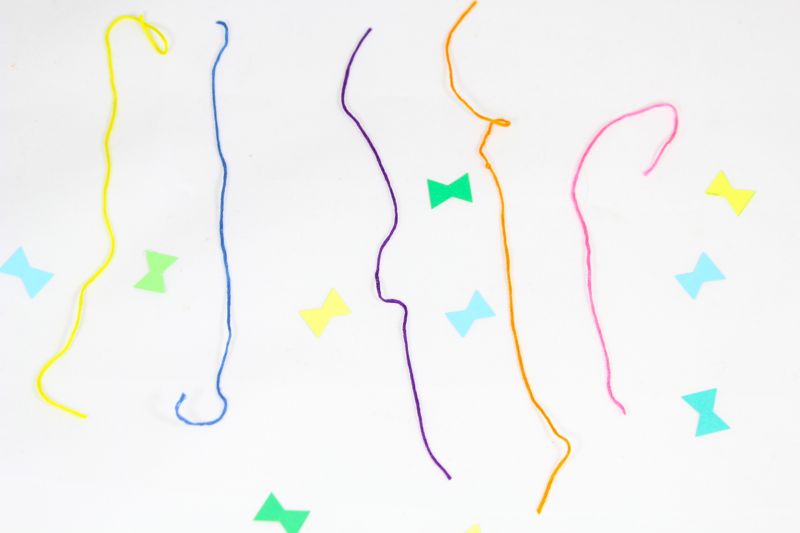
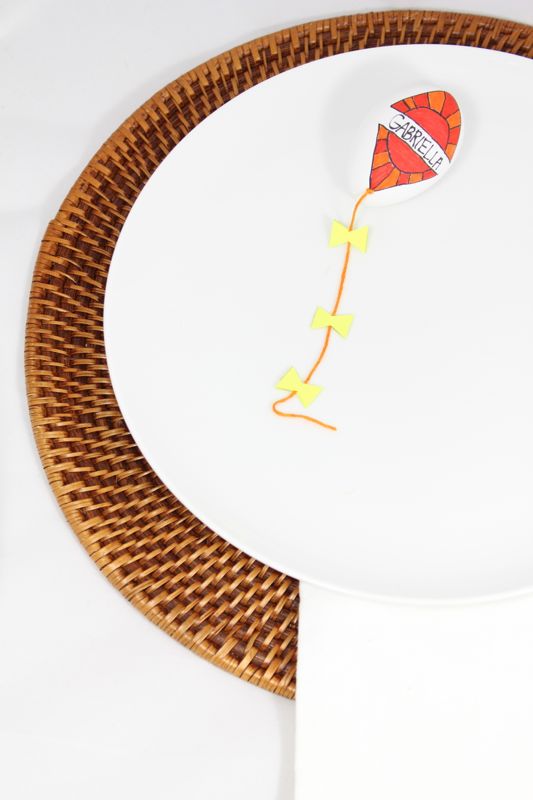
To begin to make the kite tails, cut strands of embroidery string and cut mini bows from the card stock. You can find a template for mini bows online.

bow-string

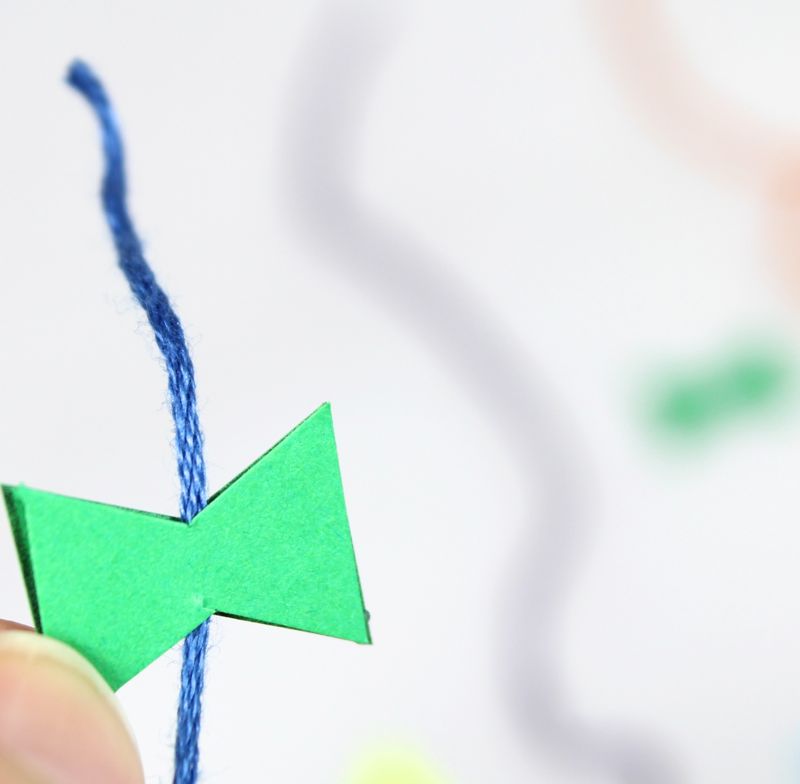
Add glue to one side of the bow, and quickly place the string in the middle, and then cover with another bow.

glue-bow-string

string-bow

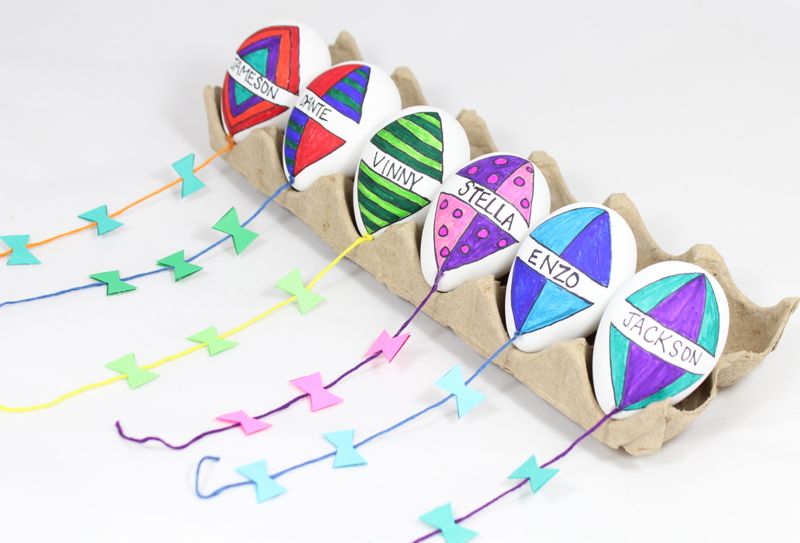
Once all the bows are in place, dab a tiny amount of glue to the bottom of the kite, and press the end of the string down on the glue.

diy-kite-easter-eggs-rainbow-markers

You’re done!

diy-kite-easter-eggs-rainbow-markers

easter-egg-kite-place-setting

Now, it’s giveaway time. Entry info below. Please make sure to leave your Instagram account name, because we will check the winner’s account. Good luck! The giveaway ends March 10, 2016.

a Rafflecopter giveaway

We received a product from I See Me! in conjunction with this post, but we would love I See Me! even if we didn’t. Thanks for supporting the companies that support our blog.

DIY Photo Easter Eggs with Flower Crown

diy-photo-eggs-flower-crown-ladies-brunch-placecard

We have some egg-tastic Easter eggs coming your way. First up, photo eggs with flower crowns.

If we could wake up every day and wear a flower crown, we would. Ok, Jenna probably wouldn’t unless it was made of black and white anemone’s. But, seriously, how pretty would we feel if we were crowned with such beauty on a daily basis? We would feel like a beautiful princess.

One day, just to be spontaneous and special, we are going to go through our daily, wonderful mom routine {cooking, cleaning, tantrums, laundry, poopy diapers and playdates} with a DIY flower crown on our heads. Who says we can’t walk around in our yoga clothes and feel like a princess for the day?

Since wearing a floral crown everyday is not always feasible, we found an adorable plan b – DIY photo easter eggs with flower crowns. Now we can crown our heads with pretty flowers, and put it on display. This egg project is an easy and fun project to do with kids {or friends}, and it’s a lovely easter egg display. Plus it also makes for beautiful place cards on easter. Everyone just needs to look for their beautiful face at the brunch table. For the men, add a bow tie or newsboy hat!

diy-photo-eggs-flower-crown-ladies-brunch-placecard

Materials:

  • wood or paper mache eggs
  • Mod Podge
  • card stock
  • White tissue paper
  • Frog tape
  • Paintbrush
  • Photos
  • Scissors
  • Fake flowers
  • Floral wire
  • Hot glue gun and hot glue

Directions:

Find photos of your family and friends. Crop and edit them in Microsoft Word. No Photoshop necessary for this. Just crop them into an oval shape, and make sure they fit the size of your eggs.

Tape a piece of tissue paper onto the card stock and print. Then, cut out the photos.

photos-tissue-paper

Paint a small amount of Mod Podge {about the size of the photo} onto the egg. Gently press the photo down on the egg and smooth out as many wrinkles as you can. We don’t need more wrinkles than we already have, right?

After about 5 minutes, paint a small amount of Mod Podge over the photo and surrounding area. Do not swipe the paint brush too many times over the photo, or the ink will smear. Let the egg dry.

To craft the DIY floral crown, cut the small stems from your branch and put together with floral wire wrapped around each stem, and shape into a circle. Make sure the size/shape fits over the top of your egg.

diy-flower-crown-pink-flowers

Dab a tiny dot of glue to the back of the egg, and press the back of the crown down on the glue{so the flowers are in front}. This will keep the crown in place.

flower crown-for-easter-eggs

Display on egg holders, plates or in baskets. FYI – this is the only time you will see a pink flower crown on Jenna, so let’s take it all in.

woman-pink-flower-crown-diy-photo-eggs

diy-photo-eggs-flower-crown-ladies-brunch-placecard

photo-egg-flower-crowns-pink-flowers-easter

Poke the Rainbow Activity for Kids on St. Patrick’s Day

rainbow-st-pattys-day-pot-of-gold-clouds-kids

St. Patrick’s Day is a favorite among adults to raise a glass with Guinness or Jameson in hand. For kids, it’s all about the leprechaun, a colorful rainbow, wearing green and the gold. We made an easy, fun and non-candy Poke-the-Rainbow activity for kids on St. Patrick’s Day.

The rules of the game are simple. Each child takes a turn to pick one cup to poke through. Once the leprechaun is found, everyone can reach for the gold. The best part…everyone walks away with a treat. Who will be the first to poke the cup with the leprechaun?

Important side note: this game could be really fun and adult-friendly with each cup filled with a mini shot of Irish liquor. Cheers!

Materials:

  • plastic cups {white}
  • napkins in every color of the rainbow
  • pot and gold coins
  • white tissue paper
  • mini leprechaun or photo of leprechaun
  • non-candy gifts such as bead necklaces, buttons, bracelets
  • rubber bands
  • foam core board, white
  • hot glue gun and glue
  • stickers, shamrock cut-outs

Directions:

Randomly place the non-candy items in the cups. Pick one special cups for the leprechaun.

st-pattys-day-beads-cups-treats

Cover each cup with a napkin, and wrap a rubber band around the top.

rainbow-red-orange-yellow-green-blue-purple-napkins

Once all the cups have colors, arrange in a rainbow-like pattern on a foam core board, and glue all of them in place. Glue the bottom of the cups so the top of the cup is facing outward.

rainbow-red-orange-yellow-green-blue-purple-cups-napkins-clouds-poms

Make white tissue paper clouds, and glue them on the end{s} of the rainbow.

rainbow-st-pattys-day-pot-of-gold-clouds-kids

Write, stencil, glue or stick letters on the foam board for simple directions.

rainbow-st-pattys-day-pot-of-gold-clouds-kids-leprechaun

Set up in the classroom {this will be a hit if you’re in charge of this year’s classroom party} , or at your St. Patrick’s Day celebration, and make sure the pot of gold is under the rainbow.

pot-of-gold-st-pattys-day

rainbow-st-pattys-day-pot-of-gold-clouds-kids

rainbow-st-pattys-day-pot-of-gold-clouds-kids

rainbow-st-pattys-day-pot-of-gold-clouds-kids

rainbow-st-pattys-day-pot-of-gold-clouds-kids

DIY Watercolor Animal Cards

IMG_3981

Valentine’s Day is one of the top holidays when the puns just can’t help themselves! Some are cute, some are cheesy, some are just plain genius – all work because we become big piles of love mush {or love stinks grinches}, so on Valentine’s Day we eat them up {most of the time}.

An easy and pretty way to decorate a card for someone you love is with watercolors – you don’t need to have an ounce of artistry for this one – just add color to the paper. We hopped on the train of puns with these! Embrace your creative side, brainstorm the puns, get the kids messy in paint and send a little extra love in the mail this year.

diy-watercolor-valentines-day-cards-kids-animals-moose-elephant-giraffe

Materials:

  • Watercolor paper
  • Watercolor paints
  • Paintbrushes
  • Water
  • Blank fold-over notecards. If you don’t have any, cut card stock and fold them.
  • Elmer’s glue
  • Sharpie marker, thin tip

Directions:

Trace and cut out animal shapes on watercolor paper. You can find images online, trace and cut. We used our Silhouette electronic cutting machine to cut the animals for us. If you like to create, the machines are worth the investment. We love ours.

Paint the animals with watercolor paints. Let them dry.

Apply glue to the back of the animals, and stick them to the cards.

diy-watercolor-valentines-day-cards-kids-animals-moose-elephant-giraffe

Write your words with a thin black Sharpie marker.

diy-watercolor-valentines-day-cards-kids-animals-moose-elephant-giraffe

DIY Marbled Coasters & DIY Yarn Wall Hanging

bronco-party-blue-orange-super-bowl-50-football-yarn-wall-hanging

We are still dreaming orange and blue from our Super Bowl 50 Broncos party yesterday. If you haven’t seen it, take the time. It’s got it all – fashion, pretty girls {Jodi and Kaitlin from The Every Hostess}, a bar cart with really good Vodka and a special cocktail recipe.

bronco-party-blue-orange-super-bowl-50-football-yarn-wall-hanging

As promised here’s DIY #1 from the shoot yesterday, DIY Bronco Marbled Coasters.

Keep reading for the second tutorial – DIY Yarn Wall Hangings.

DIY-marbled-coasters-blue-orange-nail-polish-bronco-party-for-the-ladies

Materials:

  • 4X4 white tile, The Home Depot
  • Nail polish
  • Disposable Container
  • Warm water
  • Toothpick
  • Disposable Gloves
  • Felt pads

Directions

Fill a throw-away container with really warm water.

Drop 4-8 drops of nail polish into the water. We chose to do one color for each coaster.

Swirl the polish in a swift manner with the toothpick. Quickly, dip the entire coaster into the water with your gloves on. Once the coaster dips under the water, it will ‘collect’ all the polish.

Pull the coaster up out of the water. The nail polish will be swirled on top. Let them air-dry.

Once dry, add felt pads to the bottom.

Add them to your serving tray or bar cart.

oranges-party-serving-tray-broncos-diy-marbled-coasters

Love the pop of color from the coasters. They make for a lovely hostess gift, too.

bronco-party-blue-orange-super-bowl-50-football-marbled-coasters

Finally, here’s tutorial #2 from our Super Bowl party – DIY Yarn Wall Hangings.

bronco-party-blue-orange-super-bowl-50-football-diy-yarn-wall-hanging

Materials:

  • Yarn
  • Wire hangers
  • Scissors

Directions:

Cut long strands of yarn.

Decide on a color pattern, or see where your creativity takes you as you go.

To tie it onto the hanger, fold the yarn in half, and loop it through. No glue needed. Tighten the knot.

Repeat until the hanger is covered.

Lay the hanger on a smooth surface and straighten all the yarn ends. Cut the ends of the yarn at different angles.

bronco-party-blue-orange-super-bowl-50-football-diy-yarn-wall-hanging

We like all the pretty stuff and looking good, but we get really into the game too! Go Broncos!

Cheers!

ladies-bronco-party-blue-orange-super-bowl-50-football-yarn-wall-hanging

ladies-smiling-game-time-orange-cocktail-fun-party-bronco

VENDOR LOVE
Photographer: Meredith Moran | @meredithmoranphoto
Clothing and Jewelry: Denver Street Boutique @denverstreetboutique
Cocktail: 10th Mountain Whiskey & Spirit | @10thmtnwhiskey
Event Stylist: J. Sorelle | @jsorelle3 and The Every Hostess | @theeveryhostess
Models: Jodi, the beautiful brunette of J. Sorelle | @jsorelle3 and Kaitlin, the bombshell blonde of The Every Hostess |  @theeveryhostess
Bar CartWest Elm
DIY coaster and yarn wall hangings: J. Sorelle